Floor Turtle (Turtle Mop) Step-by-Step Tutorial / Free Downloadable Pattern!
Spilled water while cooking? Puddles around the dog bowl? Instead of ruining your good hand towels, reach for a Floor Turtle (also known as a Turtle Mop)!
These adorable, absorbent Turtle Mops are designed specifically for those everyday drips. The best part? You don’t even have to bend over. Just drop the turtle on the floor, place your foot on its back, and slide it across the floor to wipe the mess away.
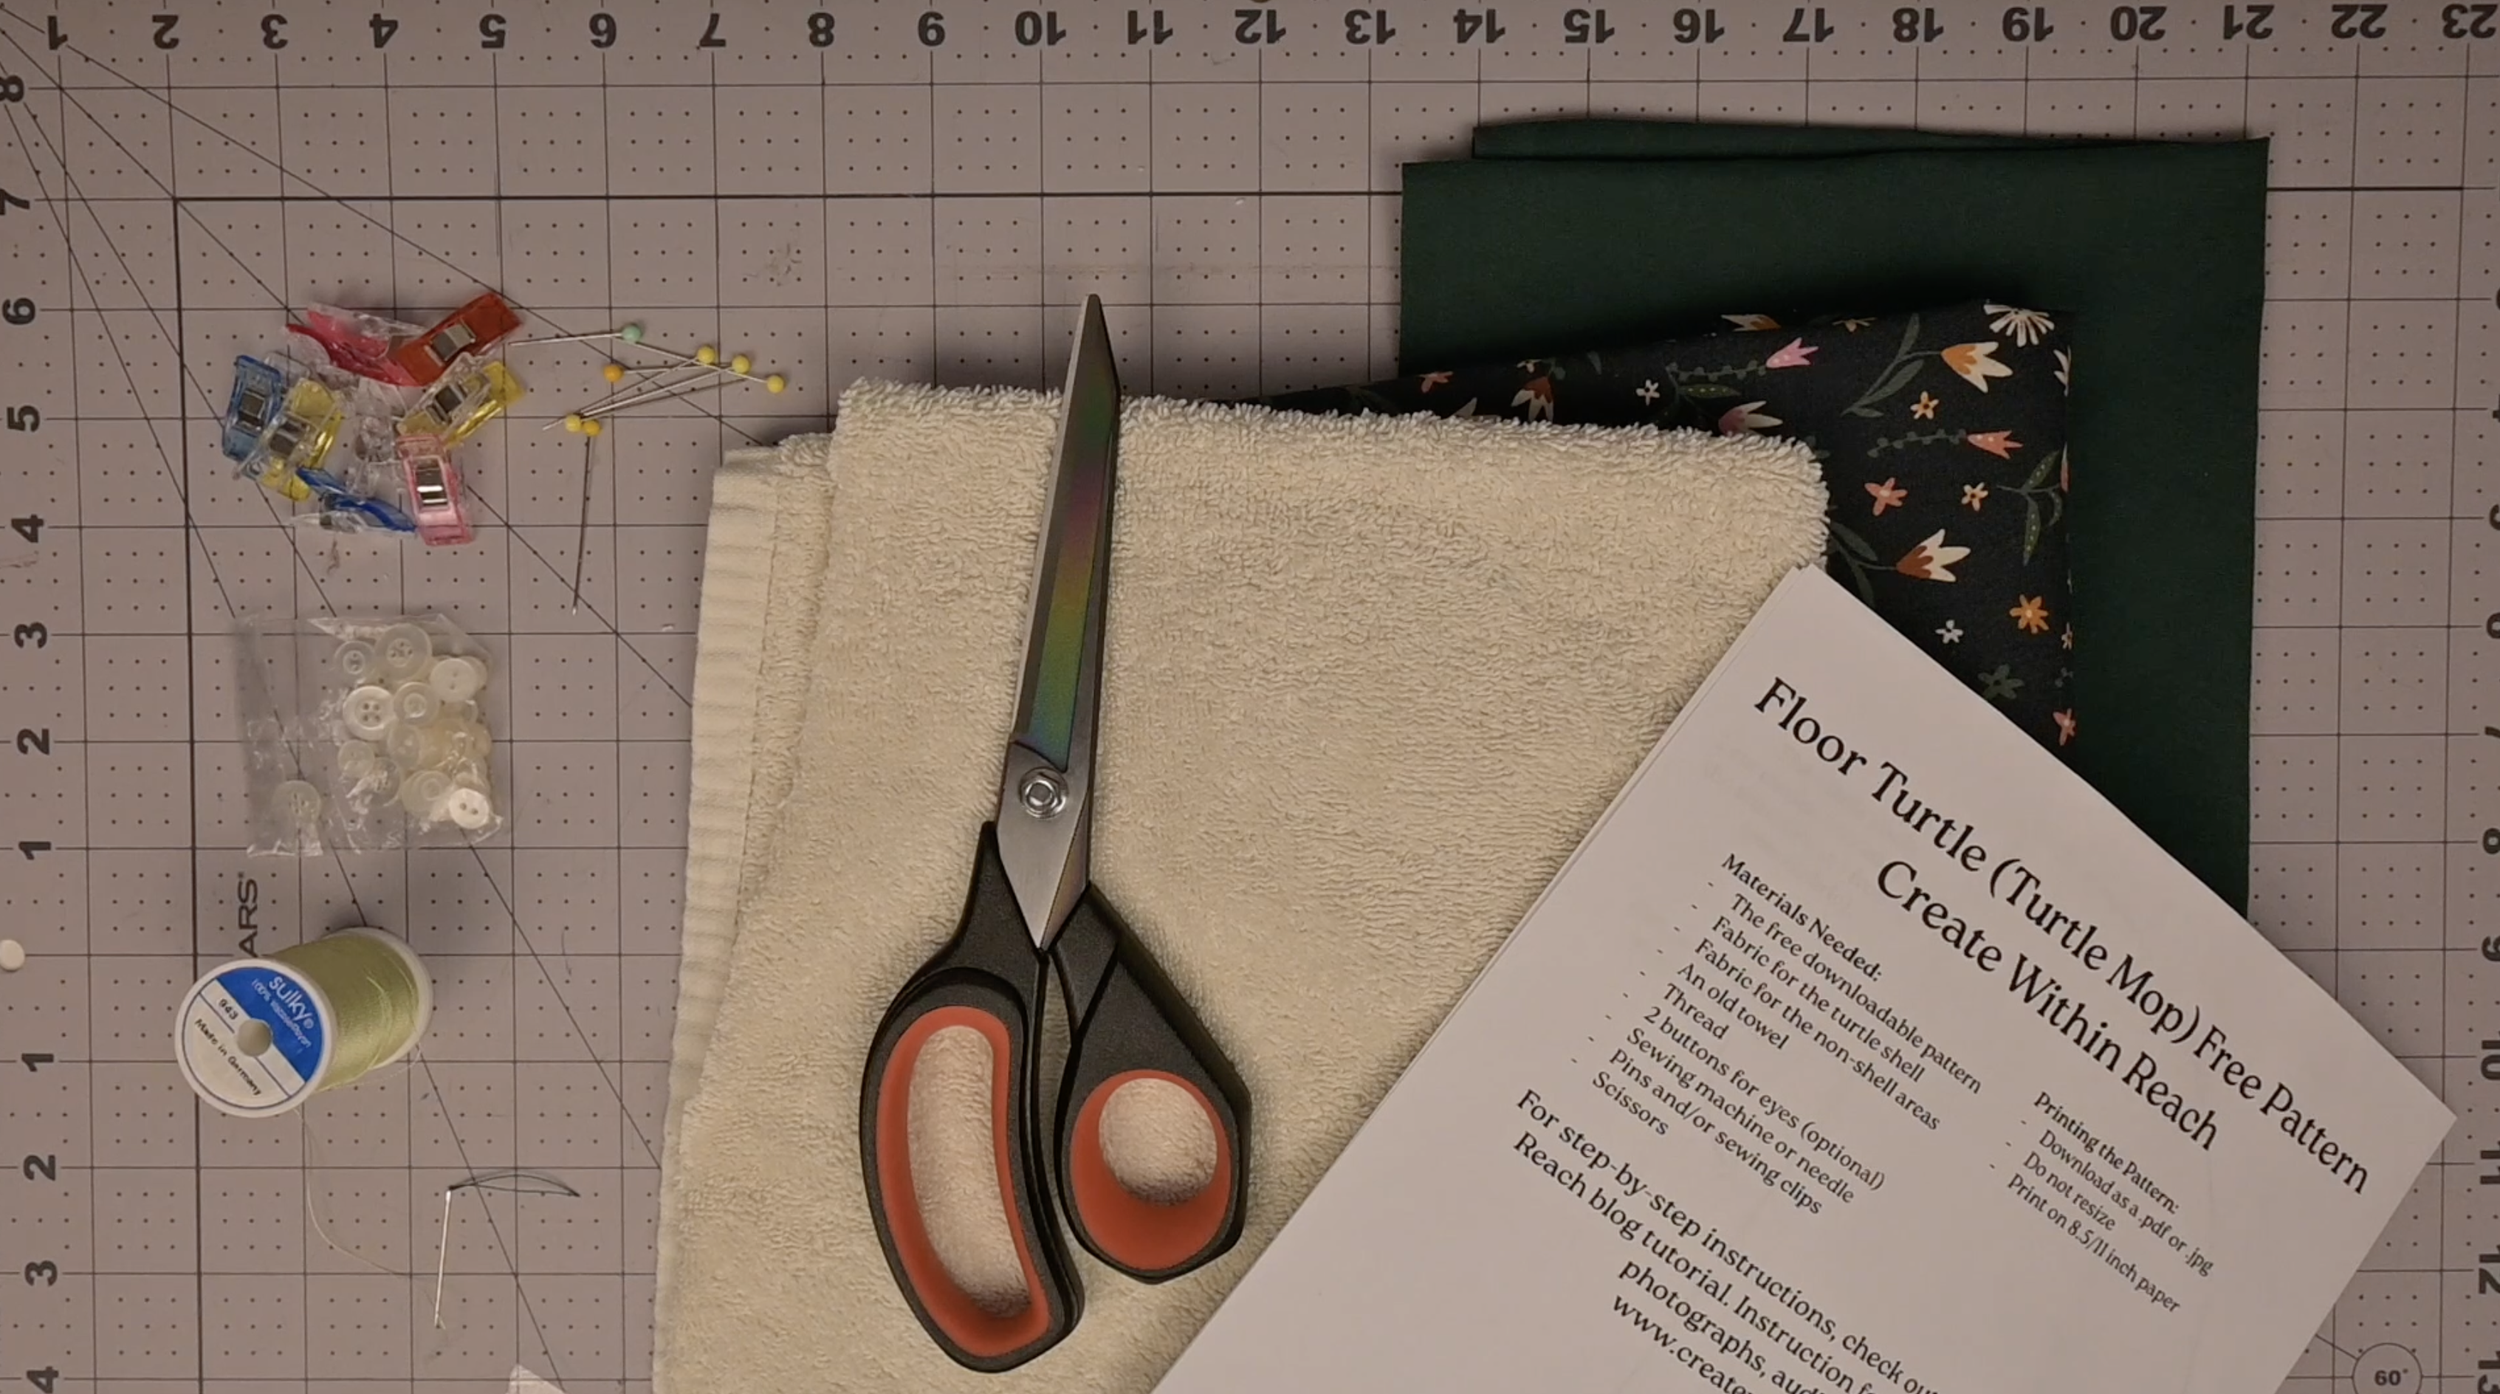
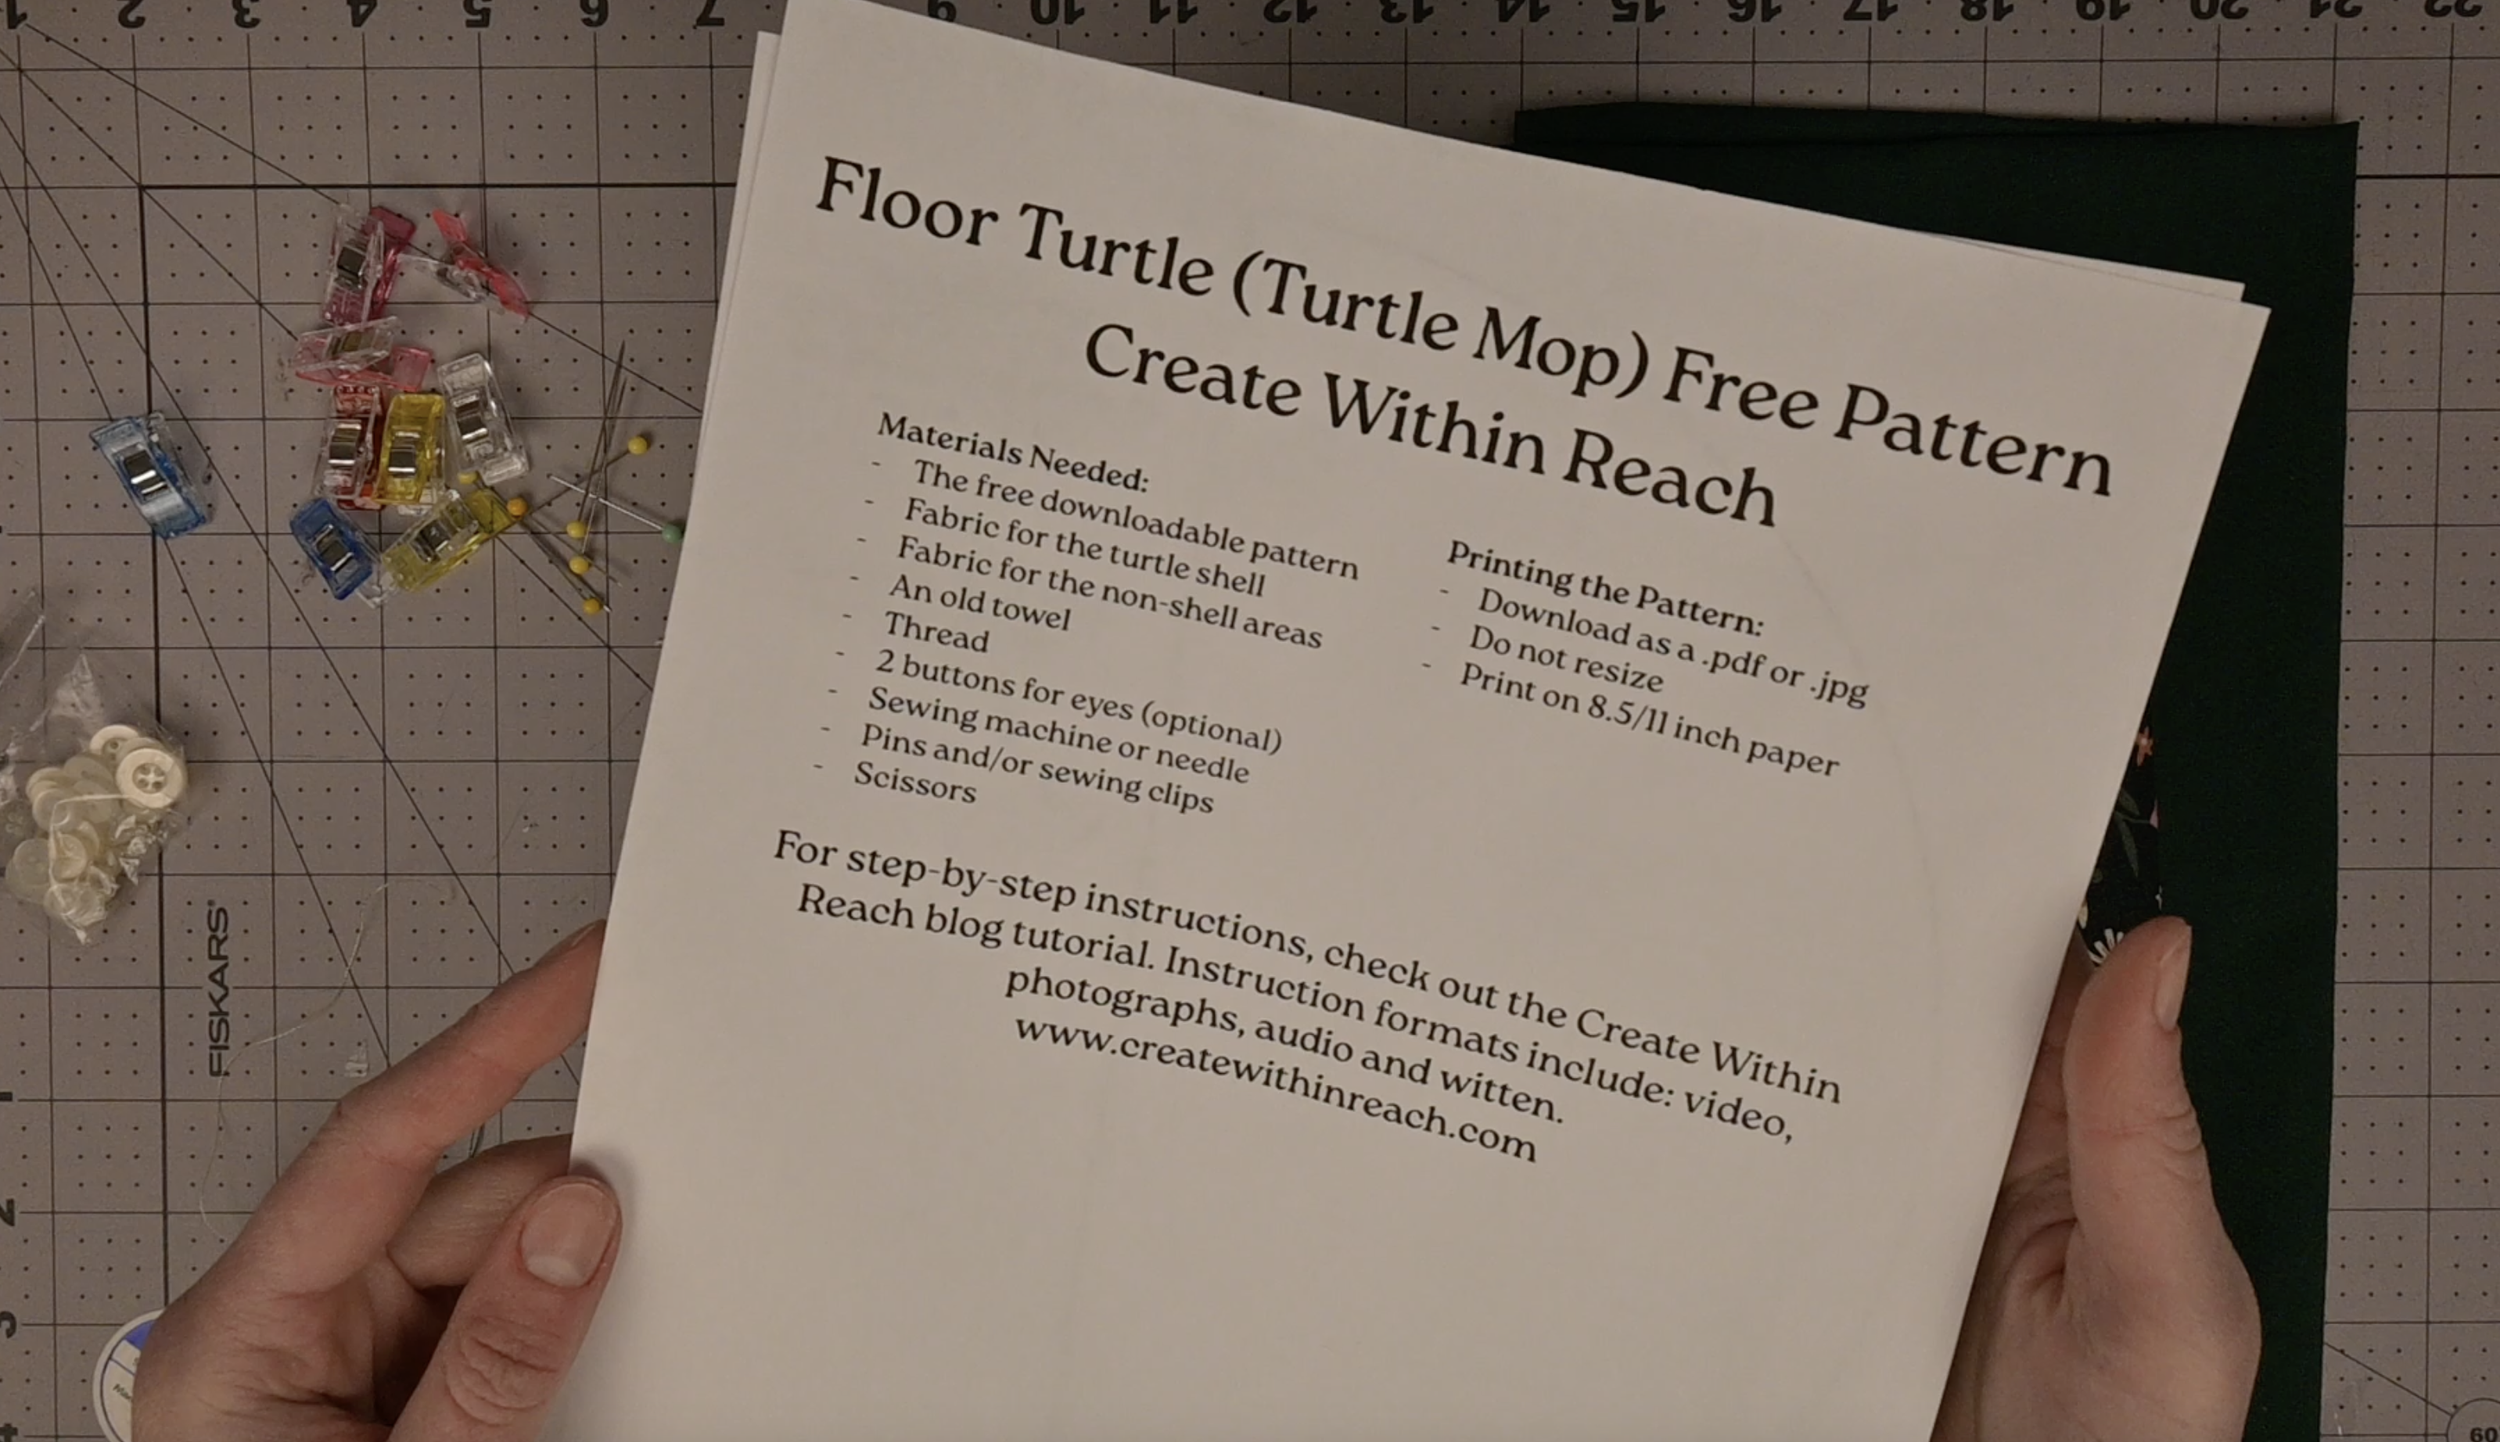
Materials Needed (As an Amazon Associate I earn from qualifying purchases):
The free downloadable pattern
Fabric for the turtle shell
Fabric for the non-shell areas
An old towel
Thread
2 small buttons for eyes (optional)
Sewing machine or needle
Pins and/or sewing clips
Scissors
Iron and ironing board (optional, but highly recommended)
The Downloadable Pattern:
Linked below is the free downloadable file:
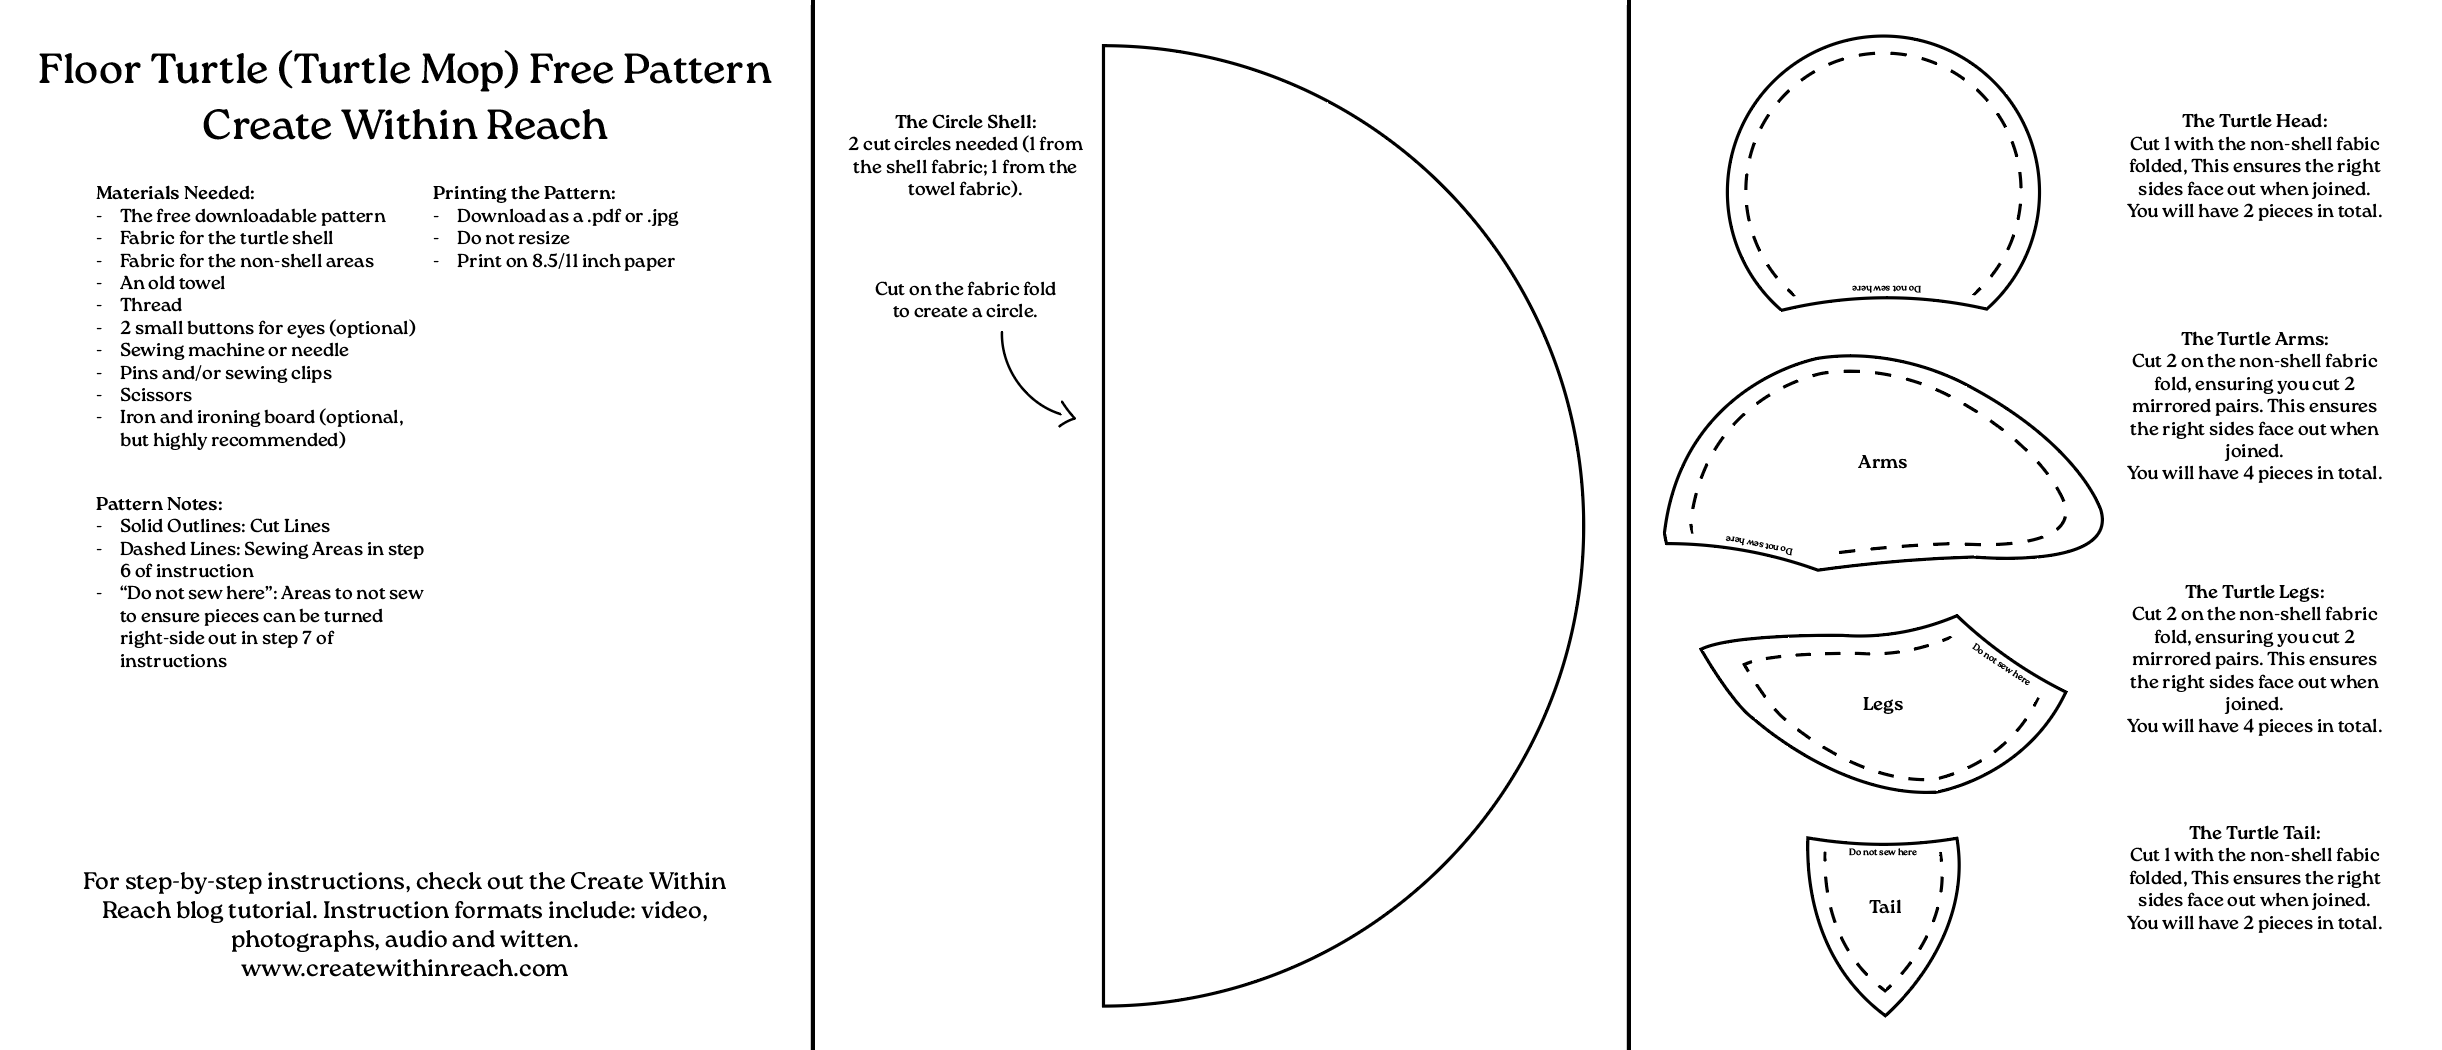
Step 1: Print the Pattern
Download the free pattern as a .pdf or .jpg
Do not resize to ensure the dimensions are correct
Print on 8.5/11 inch paper
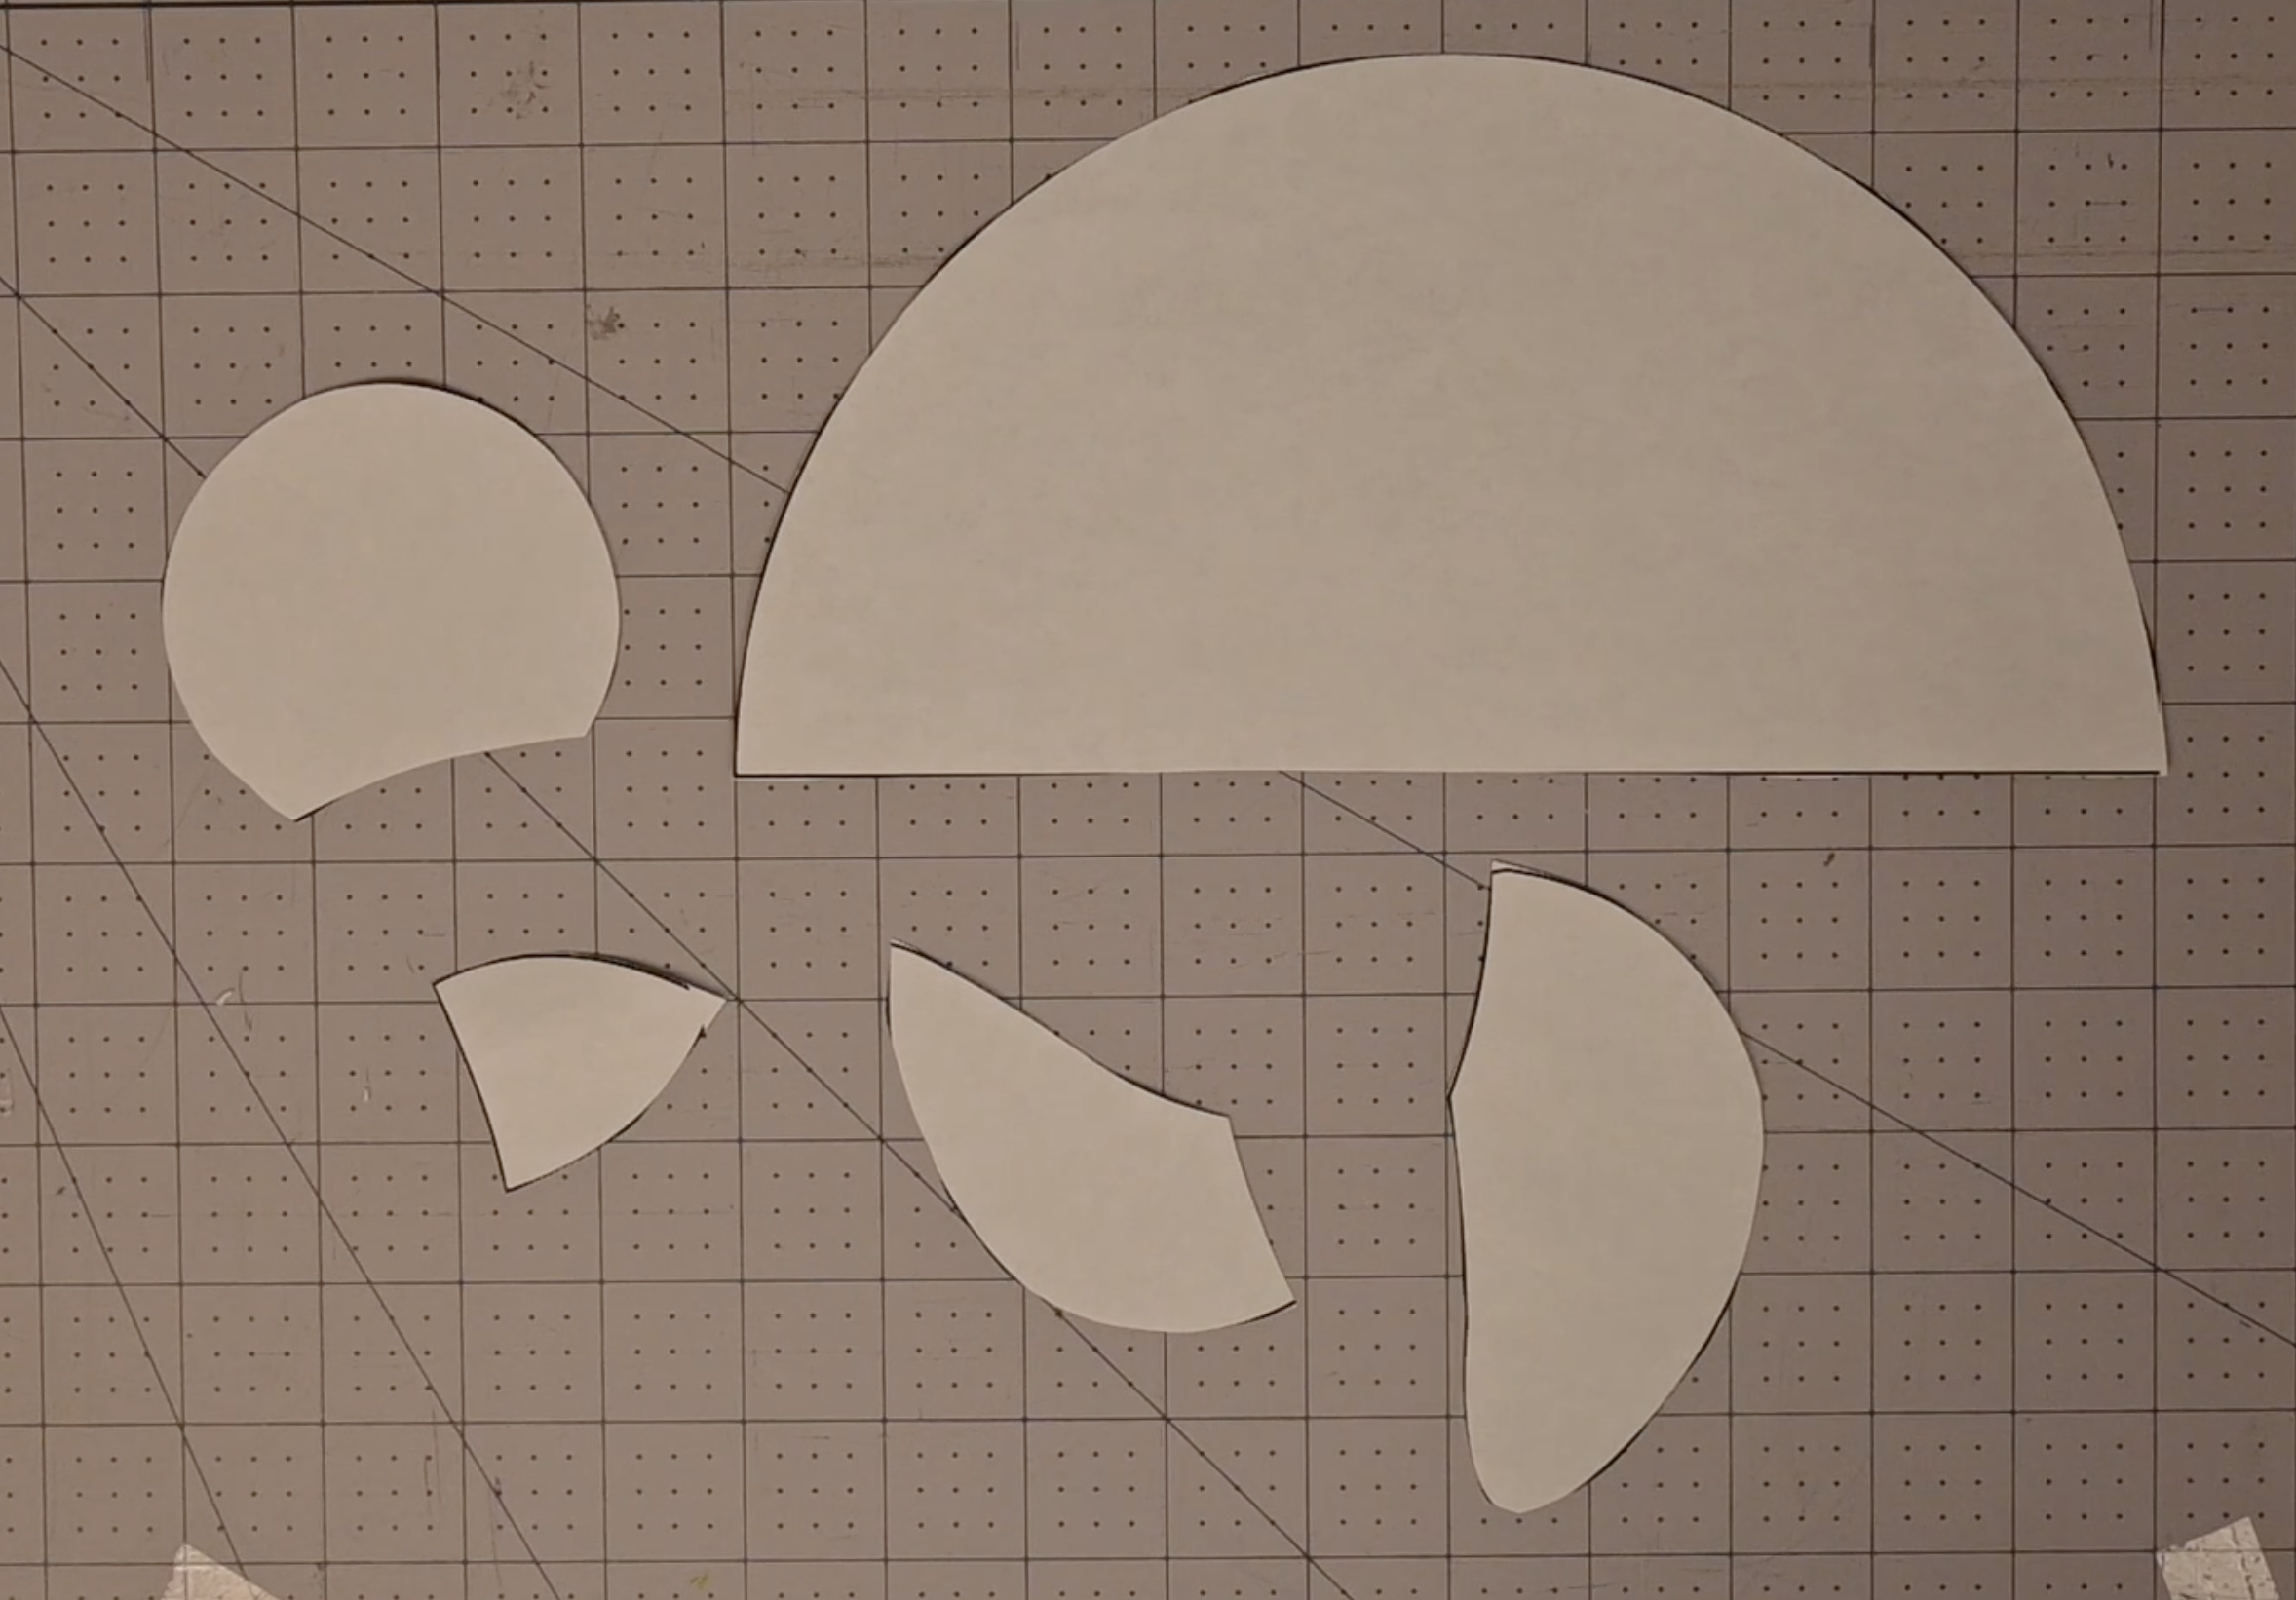
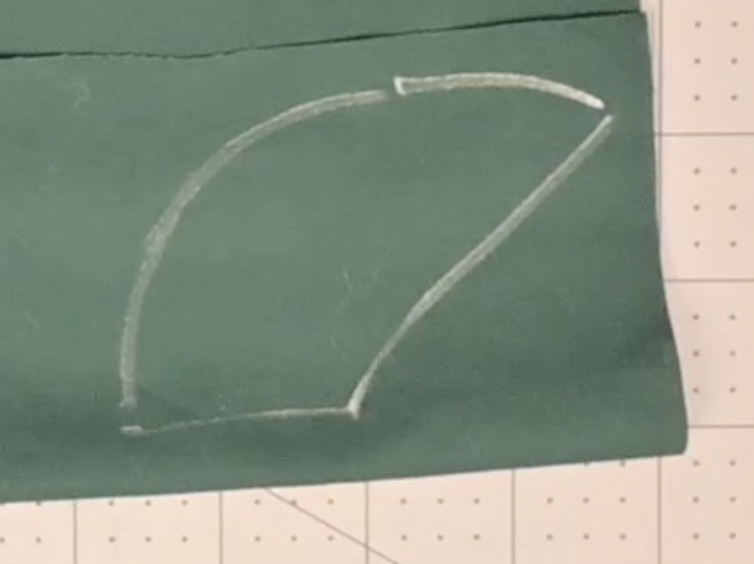
Step 2: Cut Out the Paper Pattern
Step 3: Transfer the Pattern
Trace each pattern section onto the designated fabric. You also may use pins for this step if you desire.
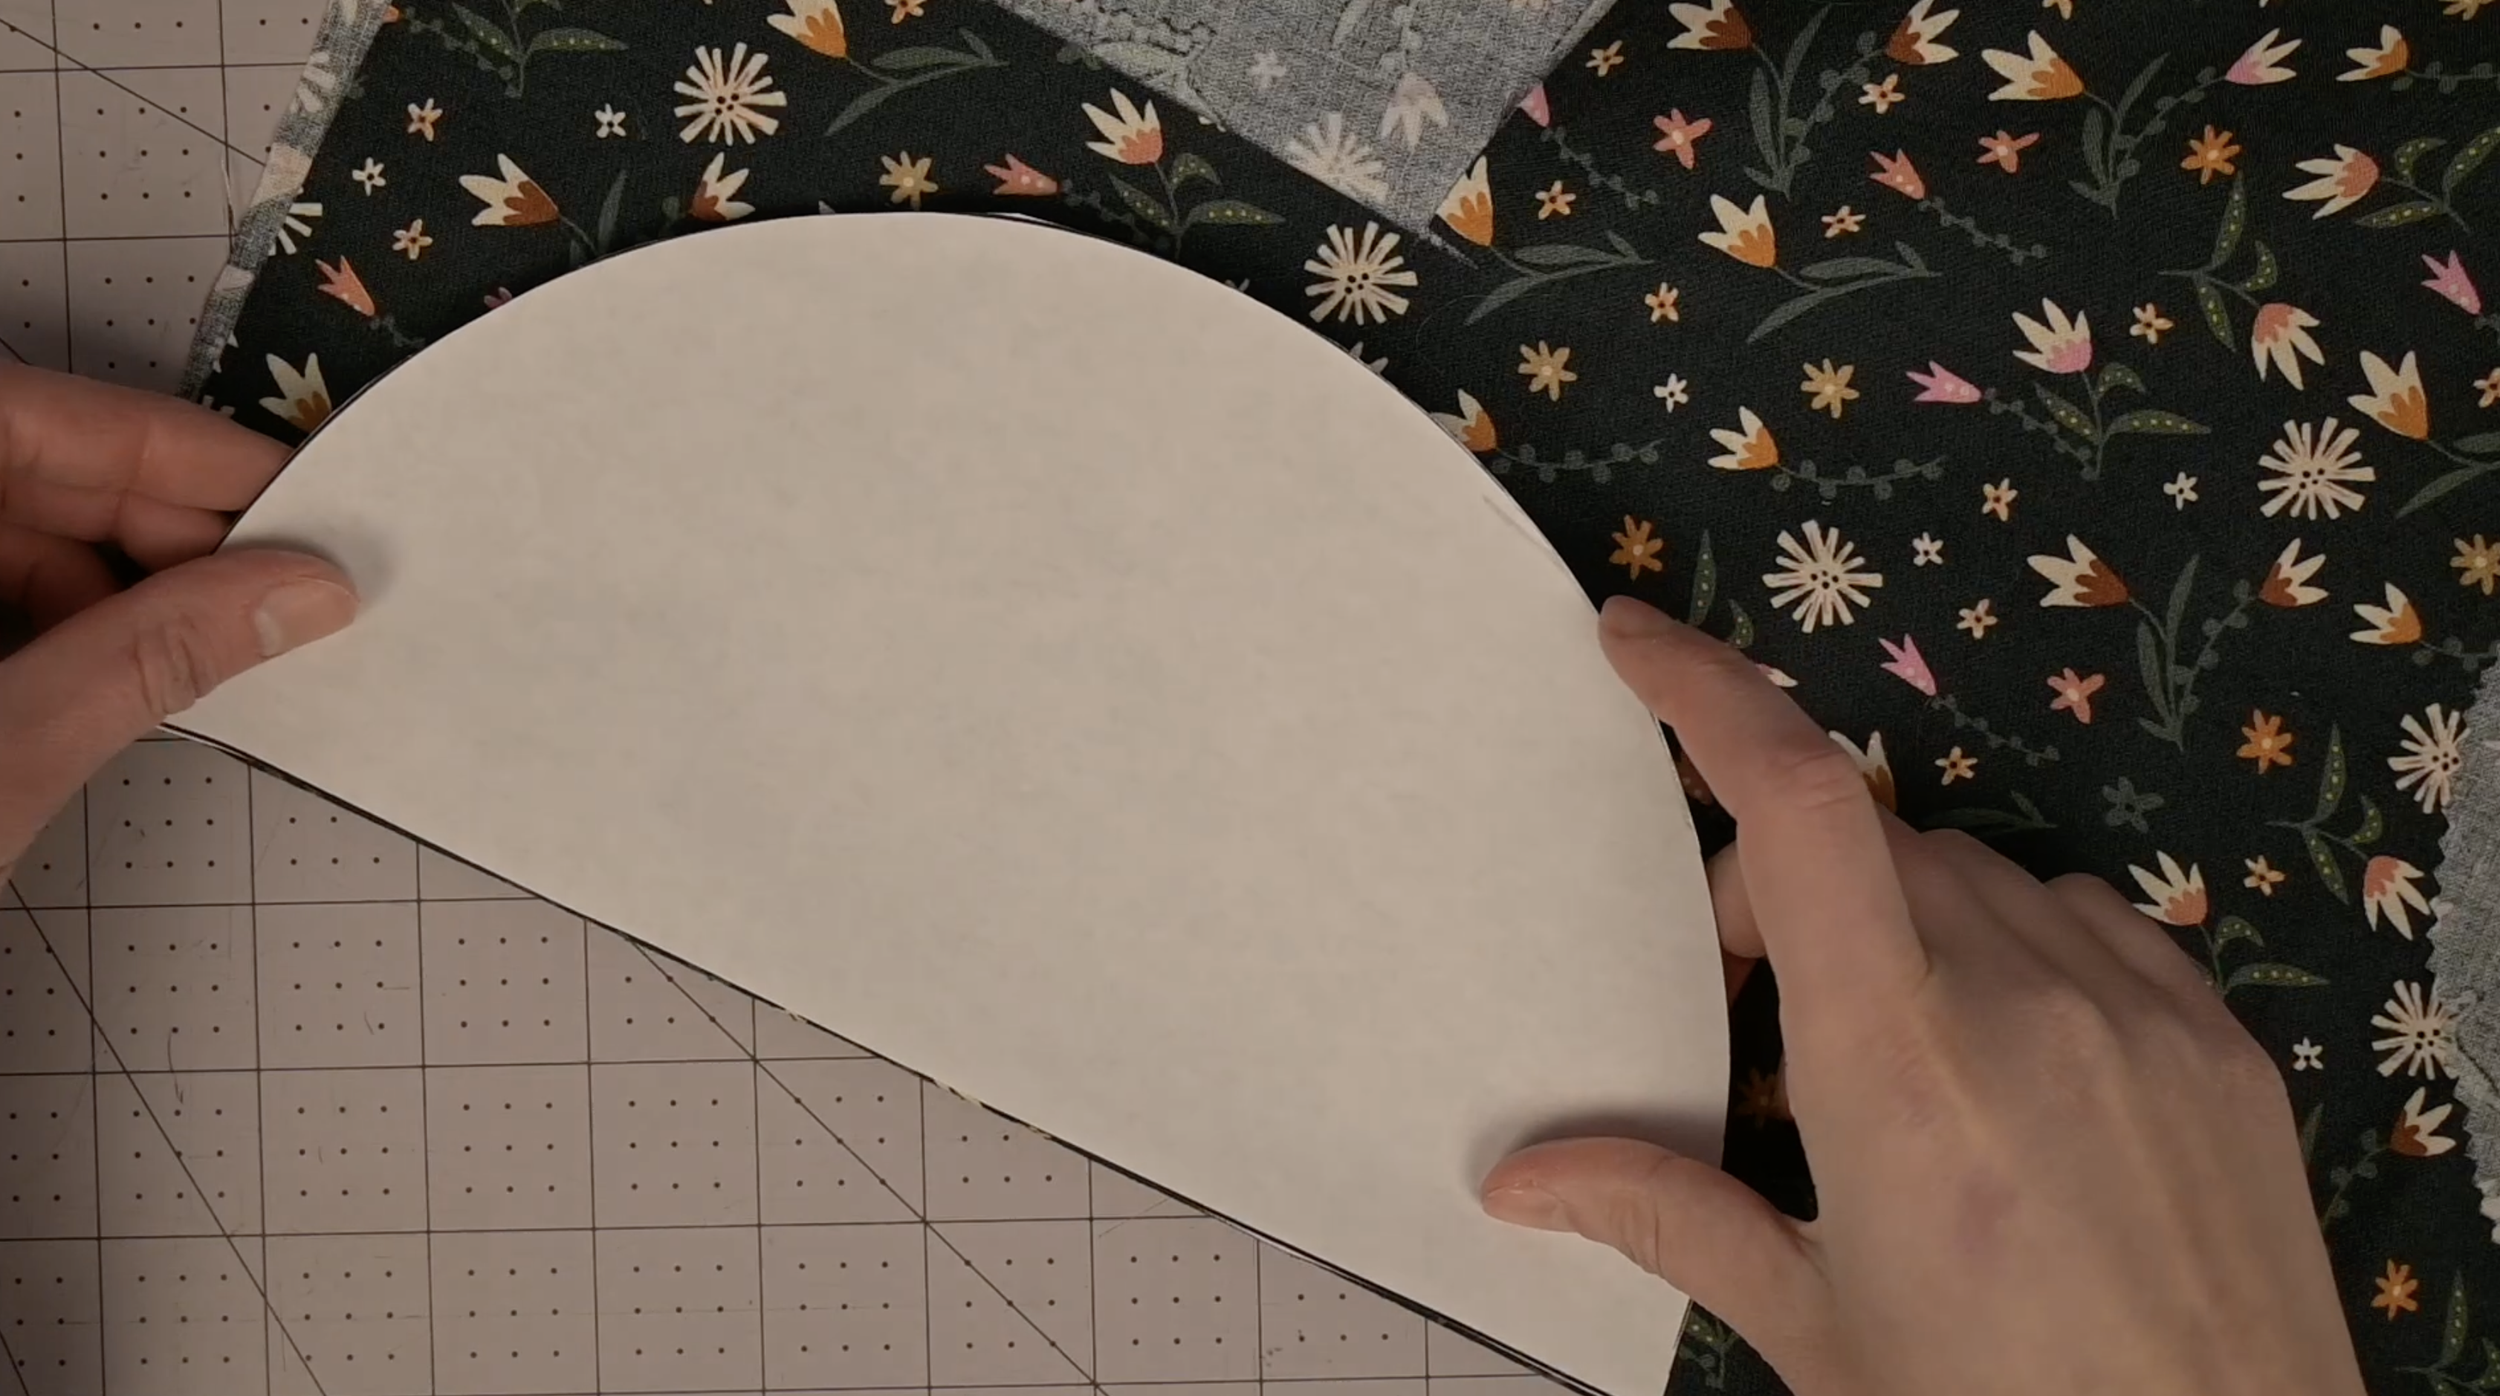
For the Turtle Shell:
Start with the shell fabric. Fold it in half
Place the straight line of the pattern on the fold
Trace the pattern onto the fabric
Repeat these steps on the towel
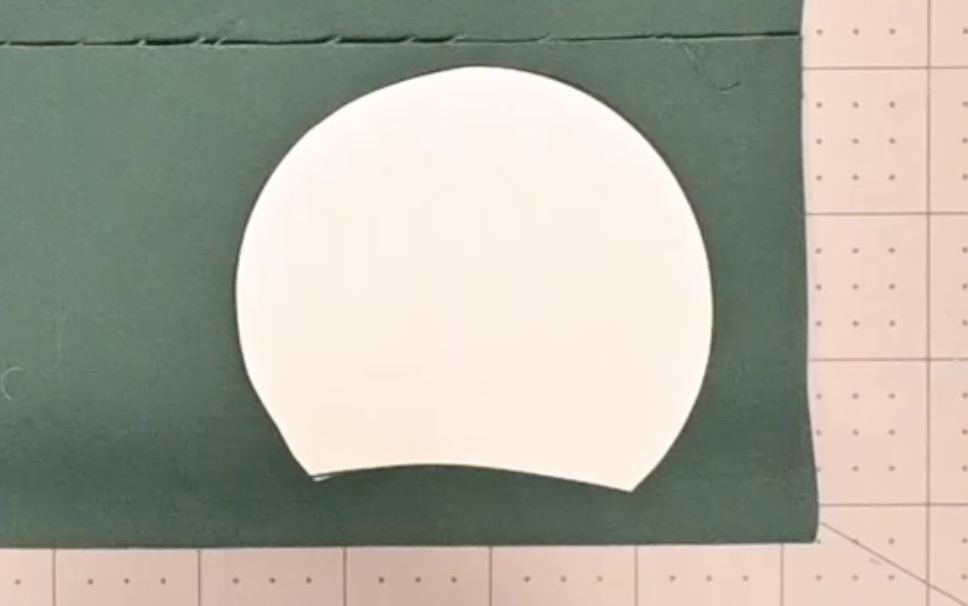
For the Turtle Head:
Start with the non-shell fabric
Fold it in half (This ensures the right sides face out when joined)
Trace the pattern onto the fabric
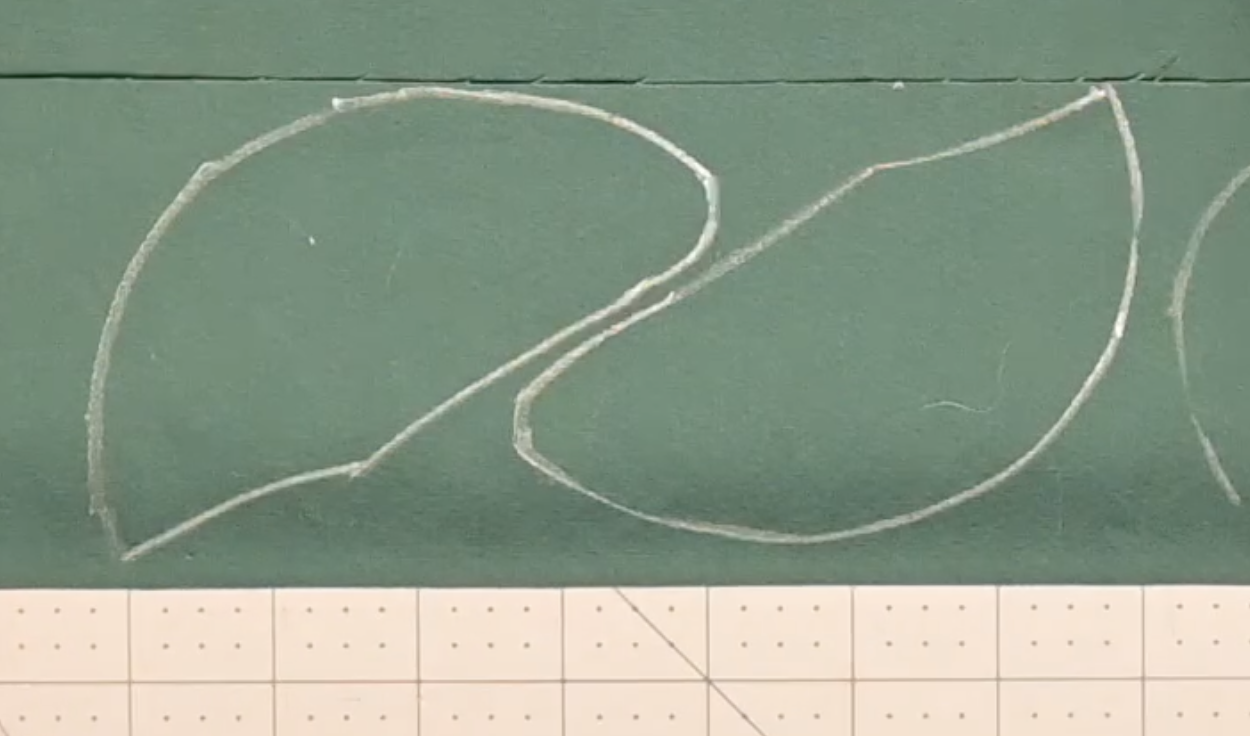
For the Turtle Arms:
Start with the non-shell fabric
Fold it in half (This ensures the right sides face out when joined)
Trace the pattern onto the fabric twice
For the Turtle Legs:
Start with the non-shell fabric
Fold it in half (This ensures the right sides face out when joined)
Trace the pattern onto the fabric twice
For the Turtle Tail:
Start with the non-shell fabric
Fold it in half (This ensures the right sides face out when joined)
Trace the pattern onto the fabric
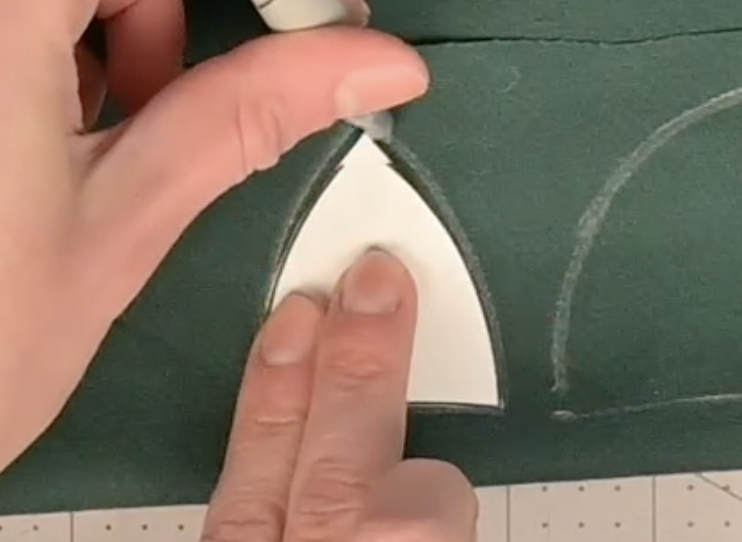
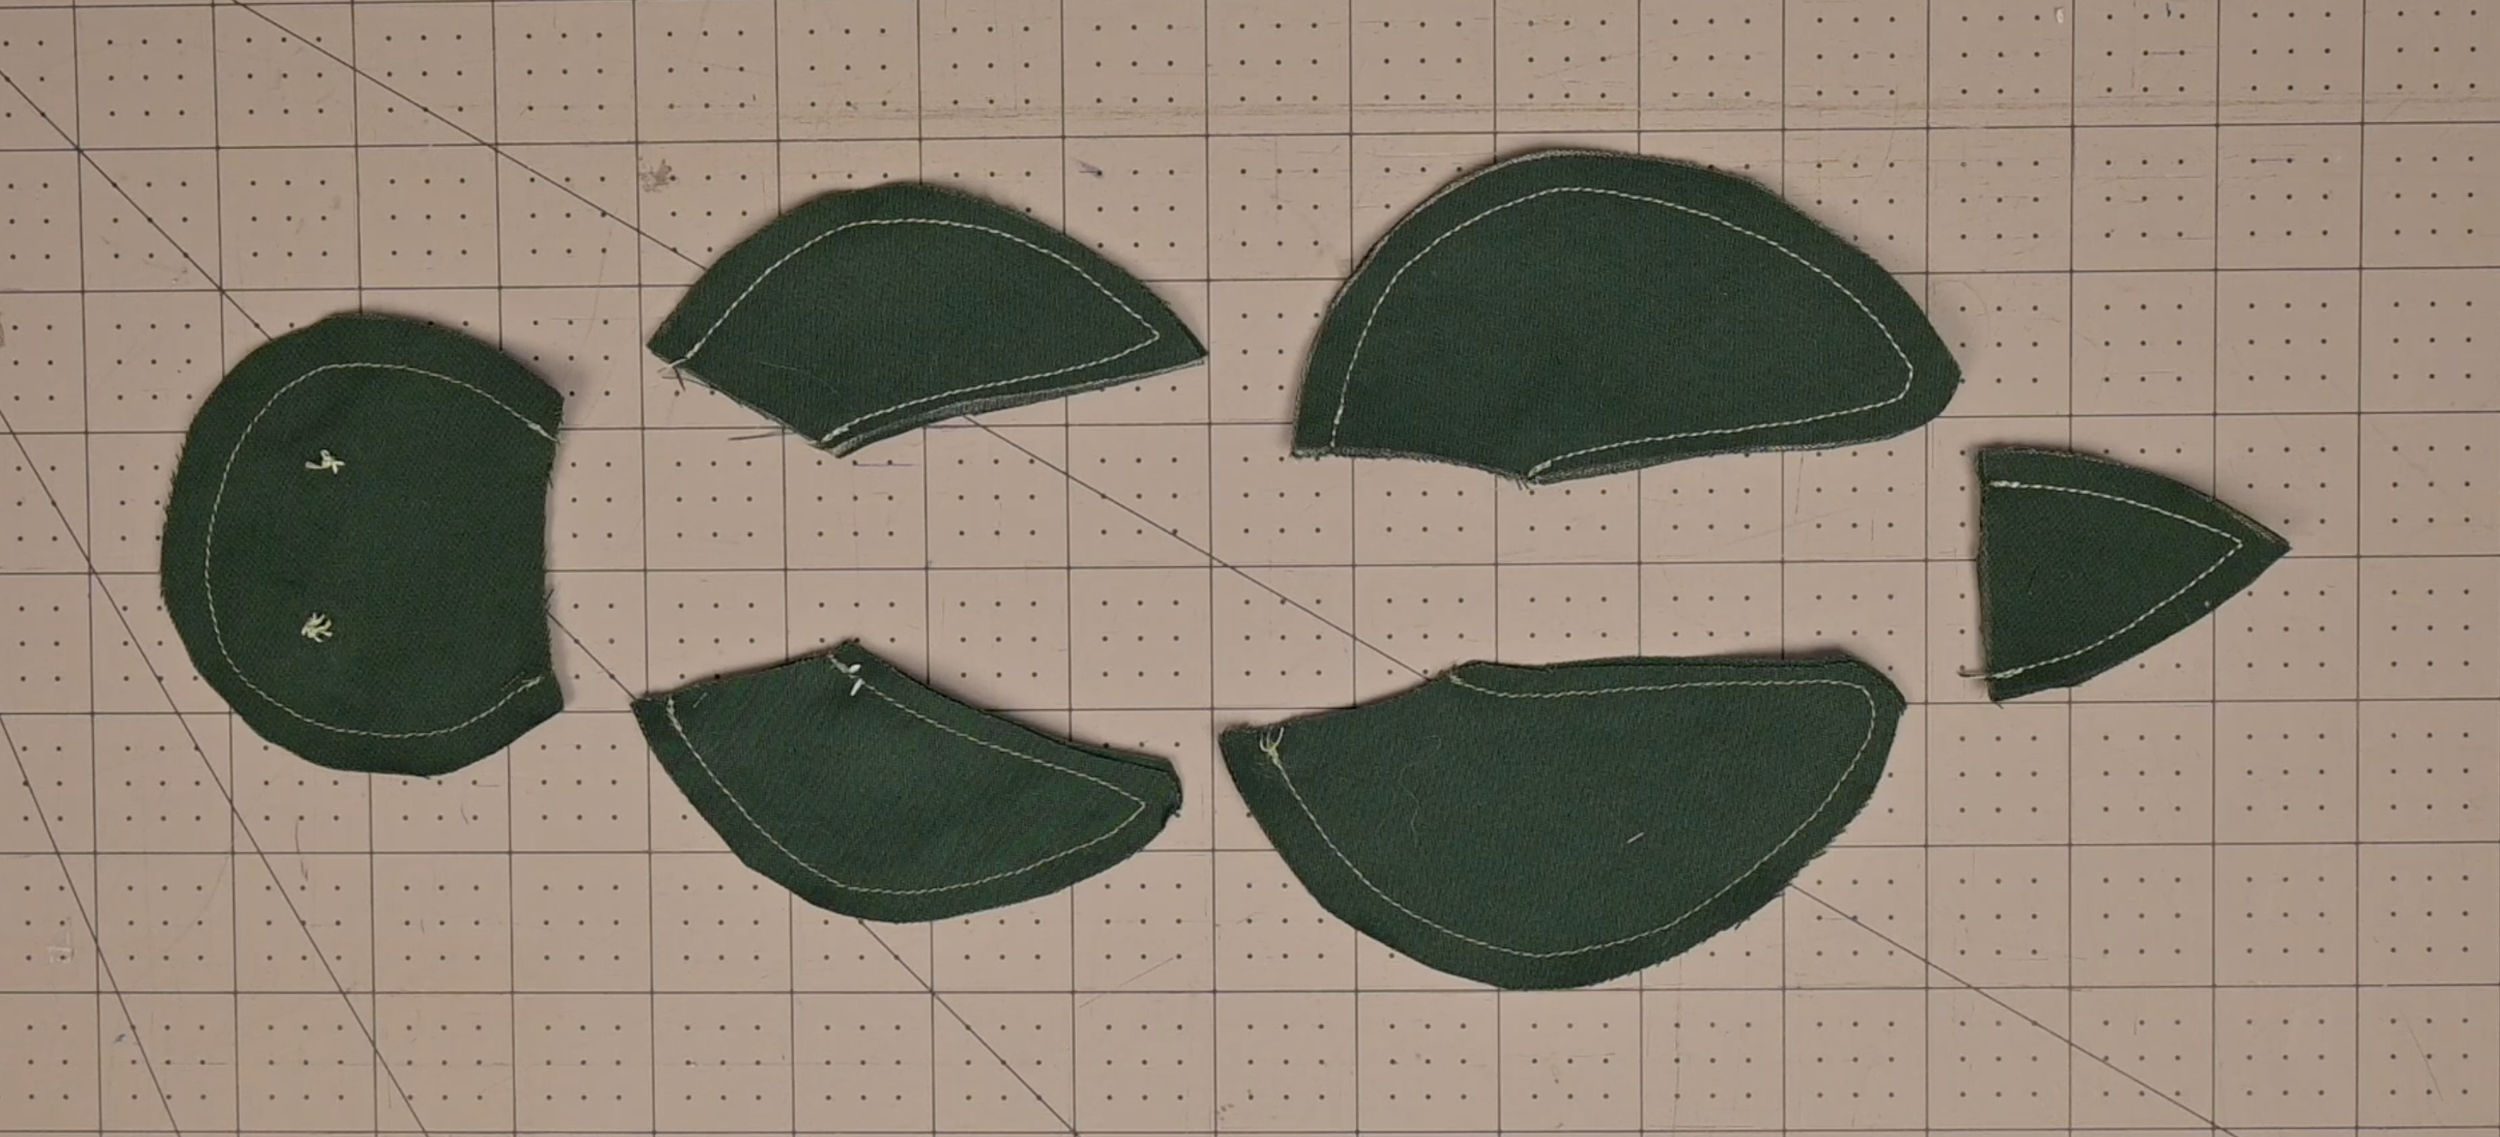
Step 4: Cut Out the Traced Areas
You will have:
2 cut circles (1 from the shell fabric; 1 from the towel fabric)
2 turtle head pieces
4 turtle arm pieces
4 turtle leg pieces
2 turtle tail pieces
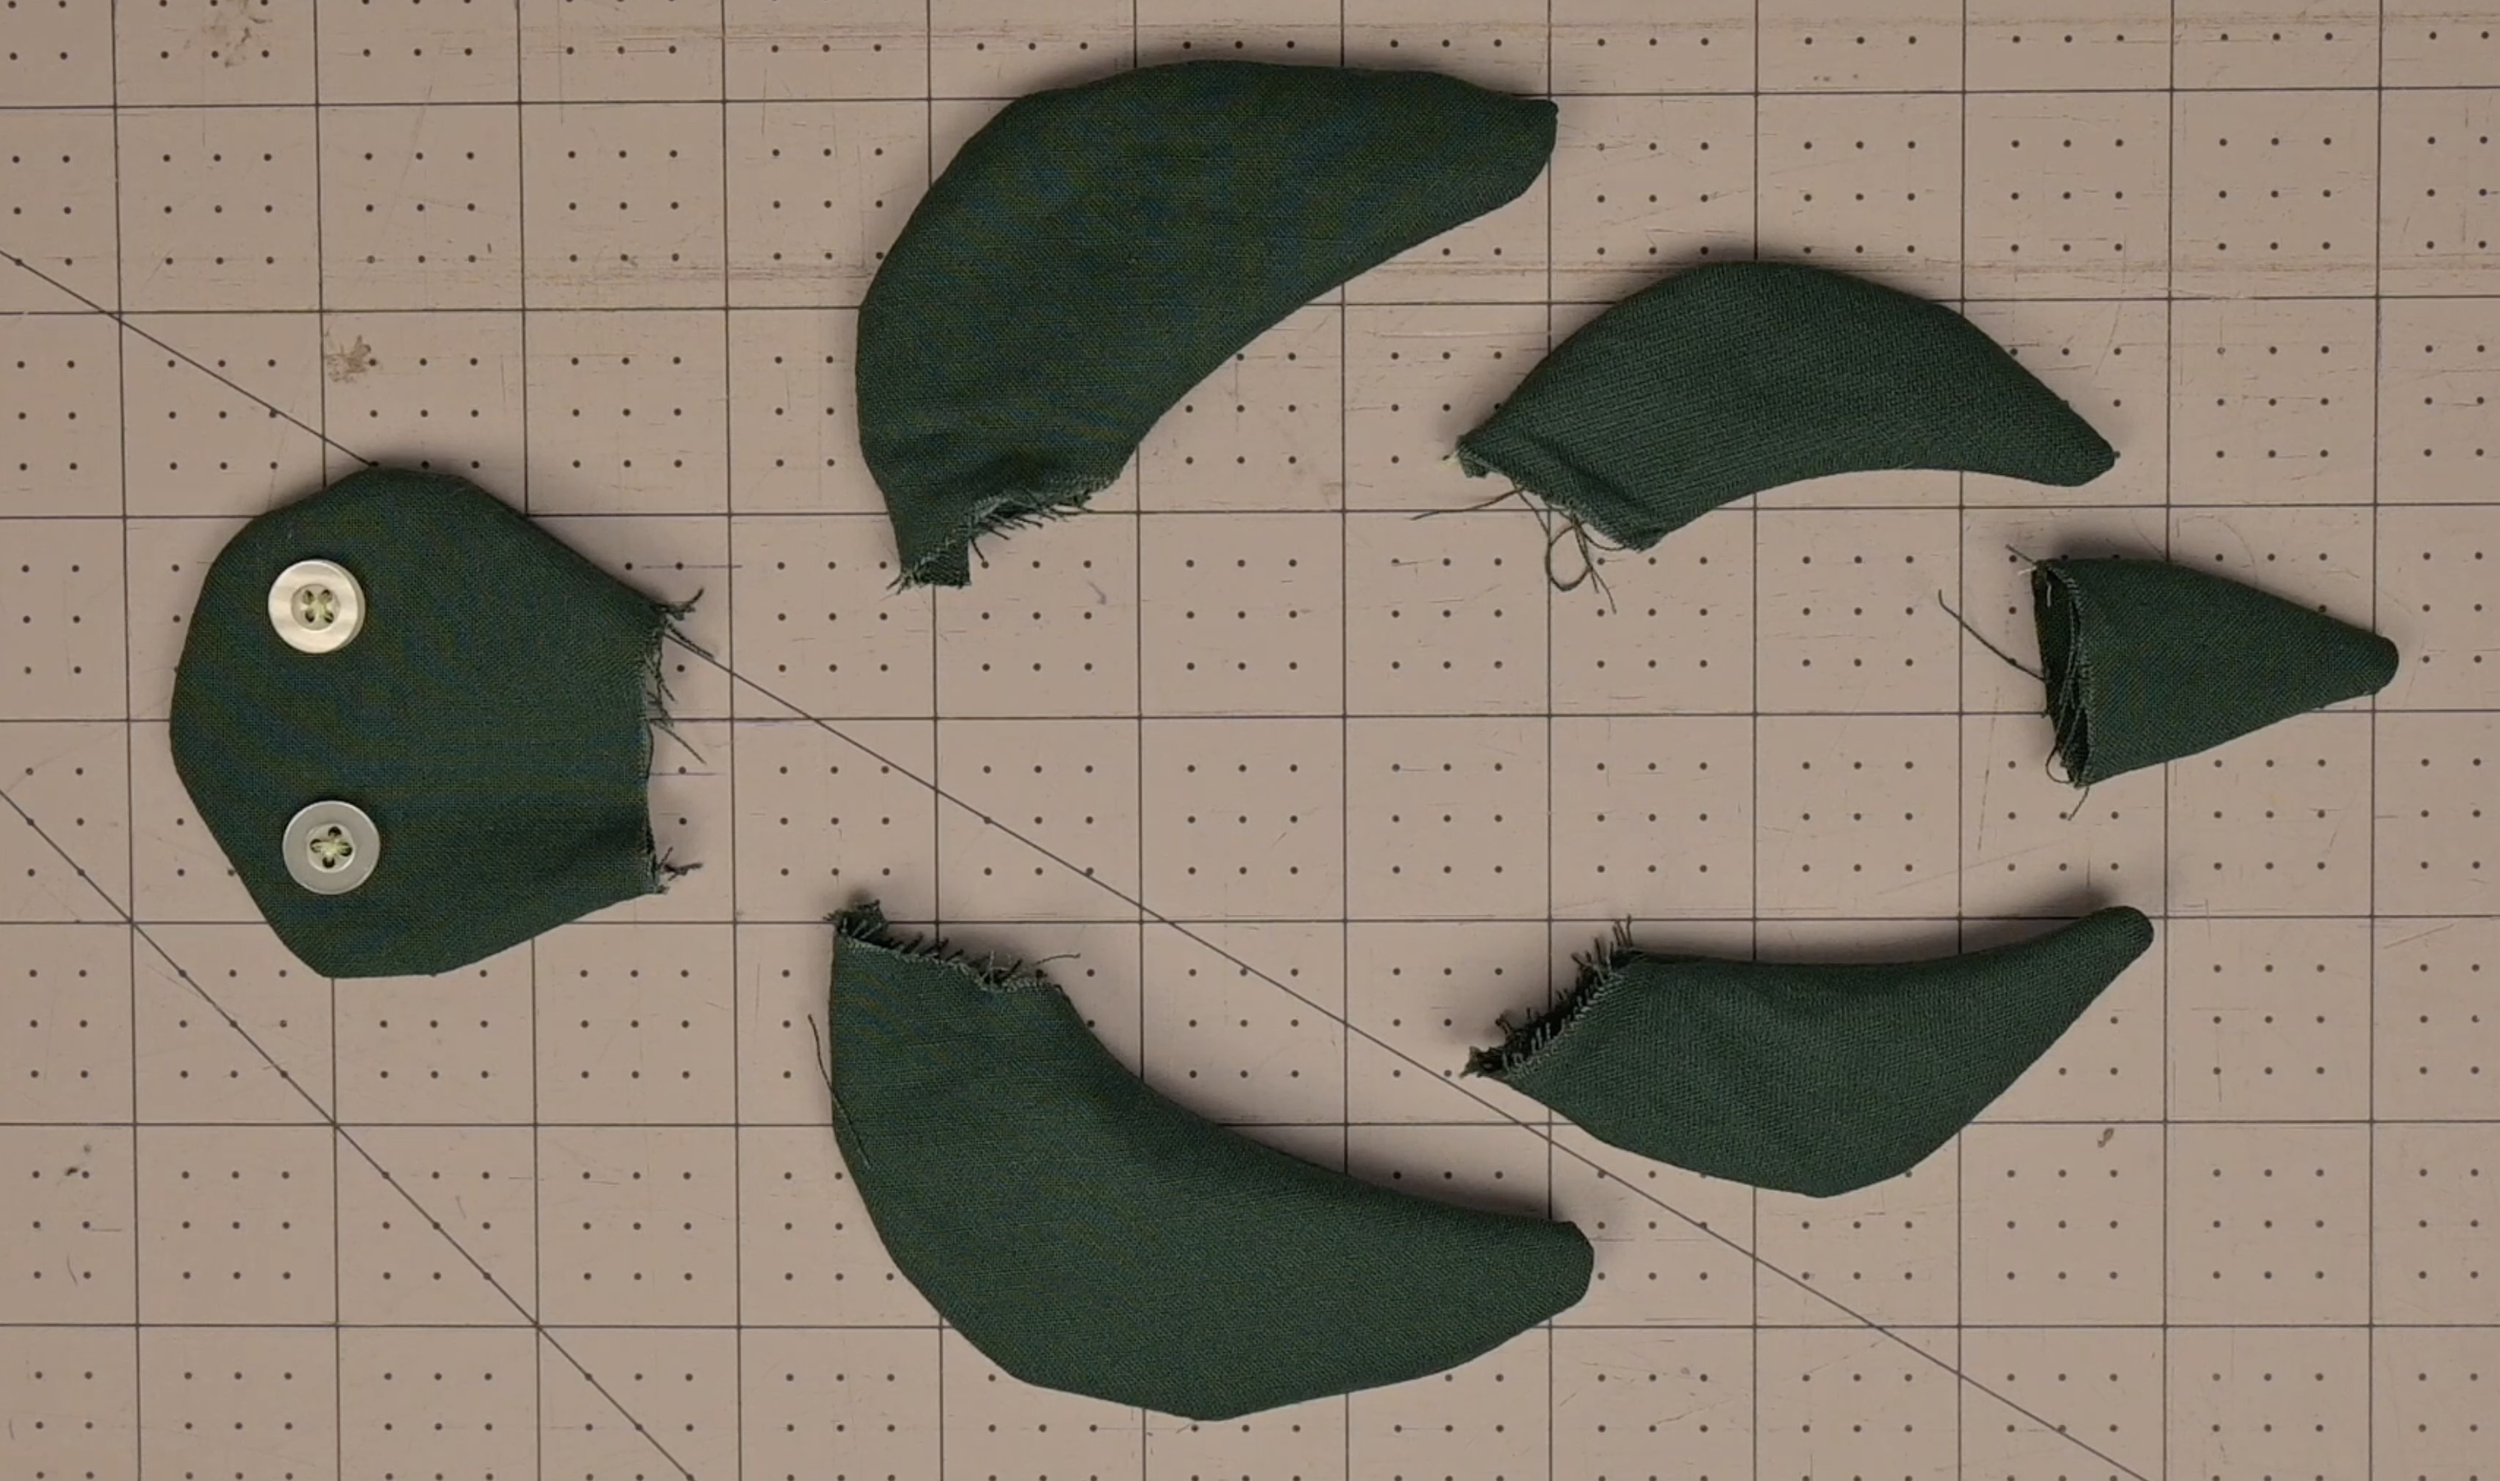
Step 5: Adding the Button Eyes
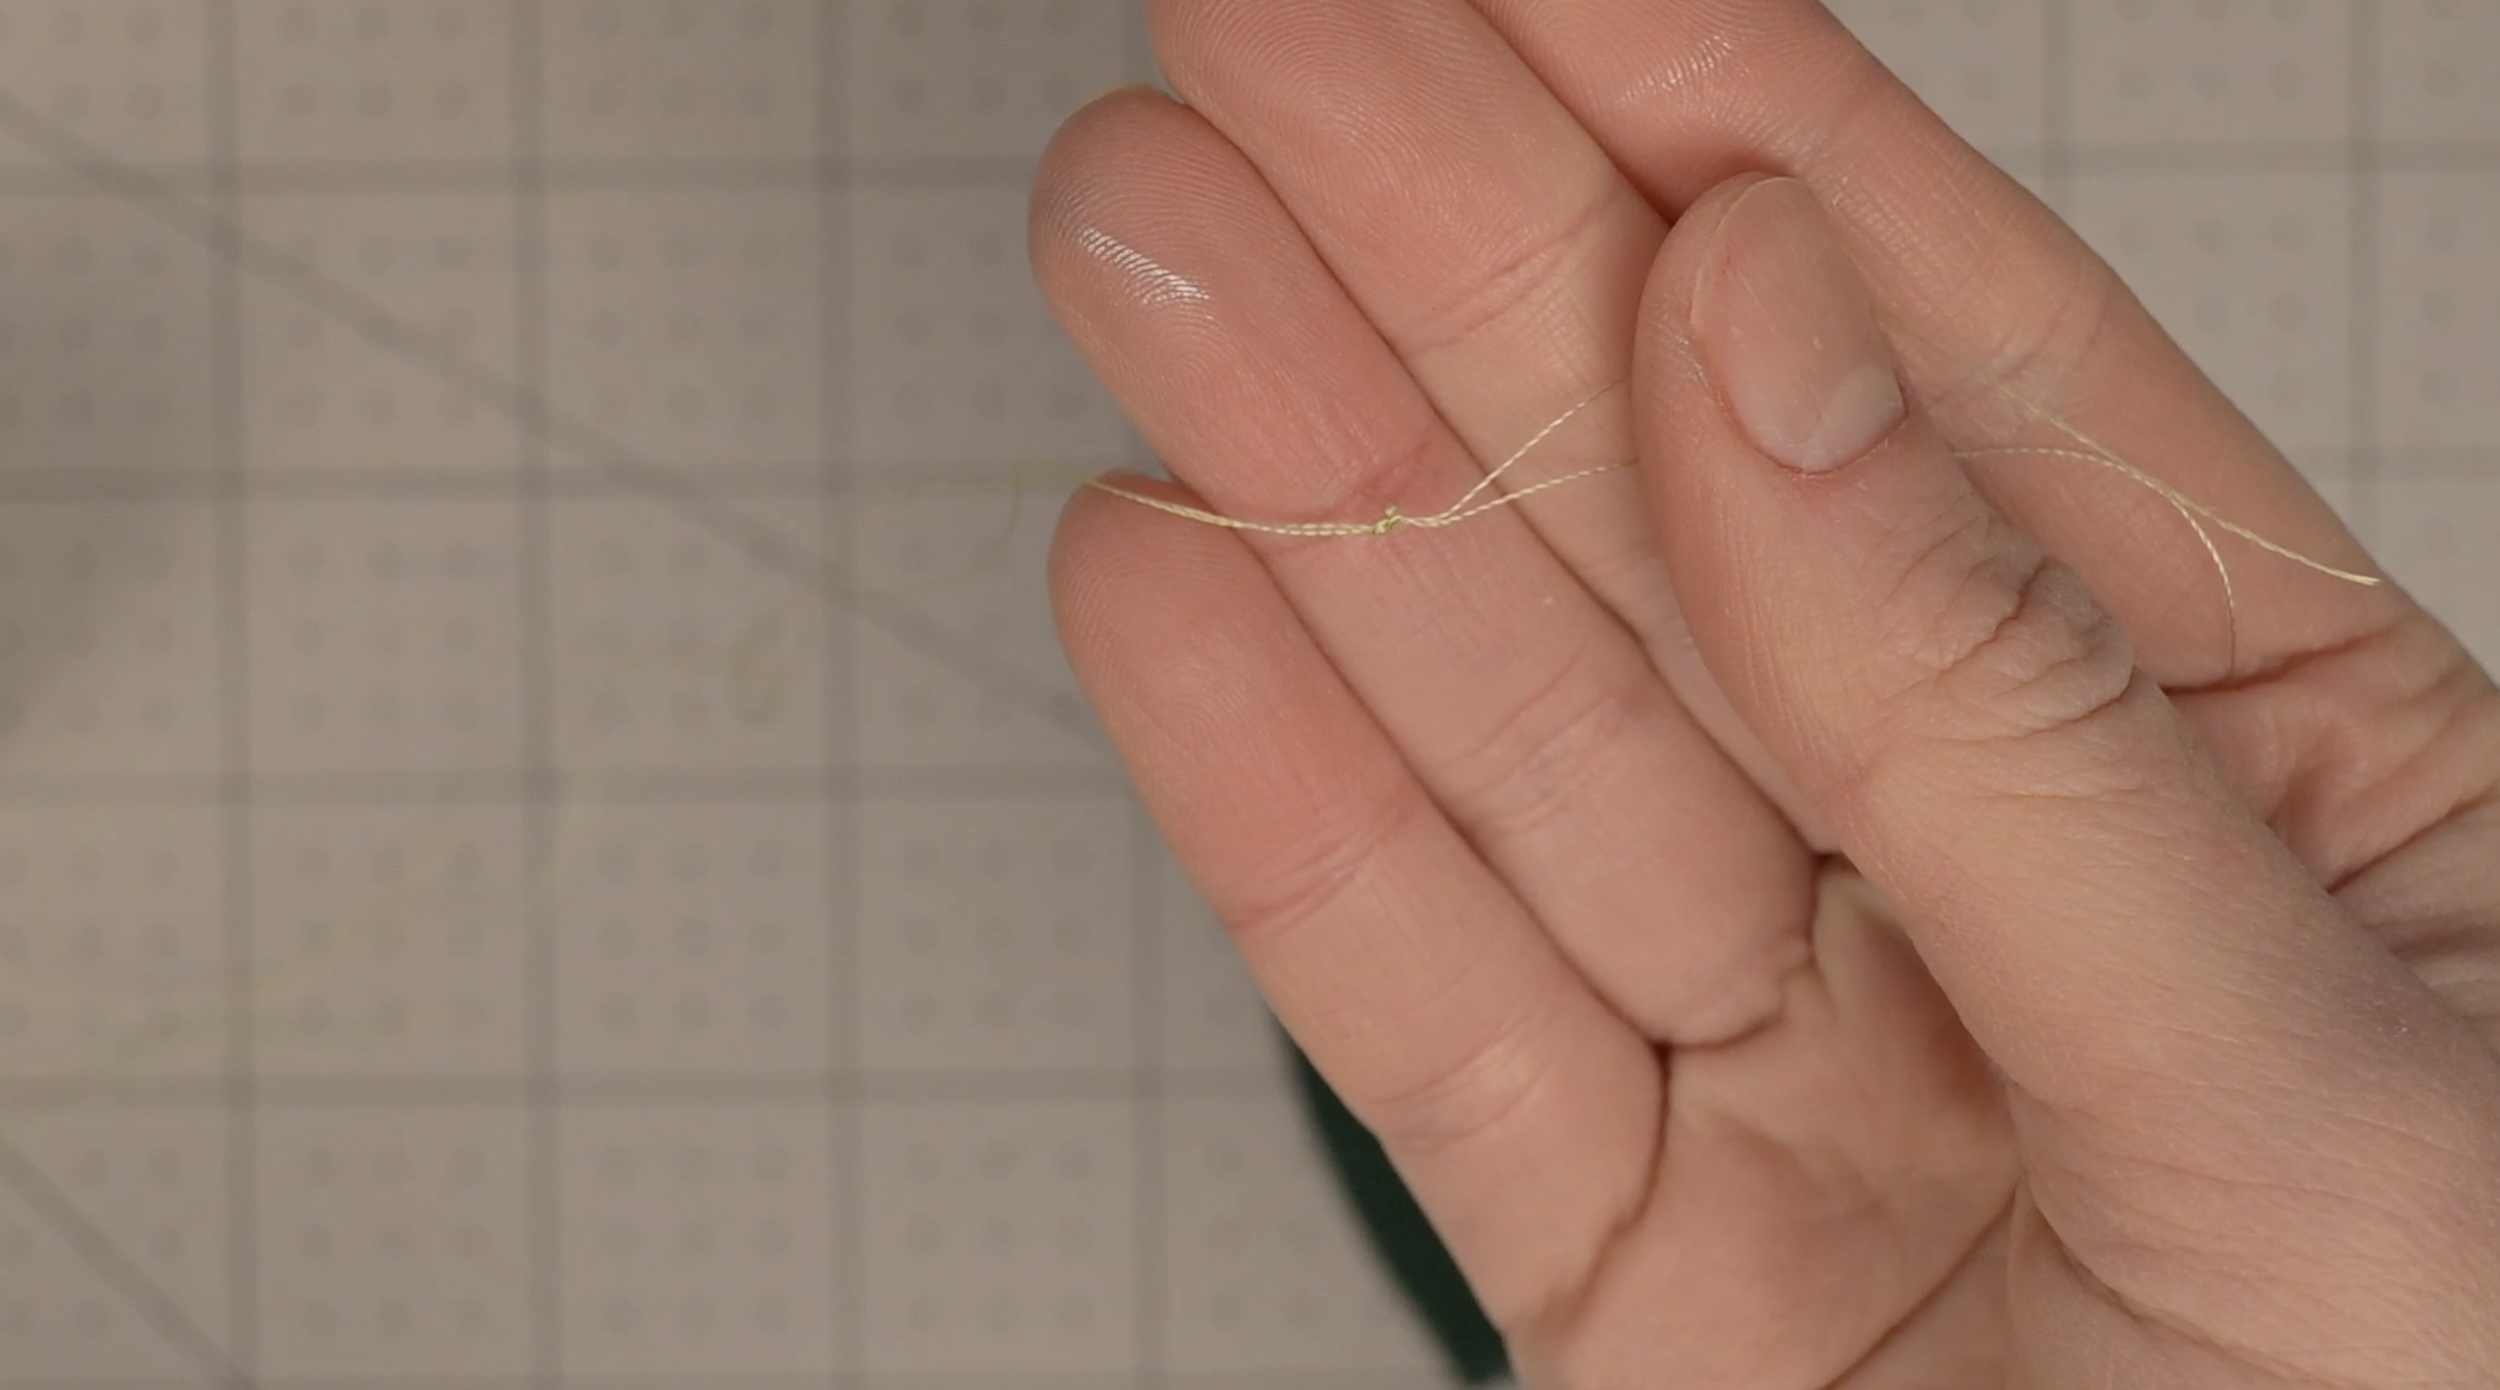
Cut about 24 inches of thread. Fold it in half, thread the needle, and tie the two ends together in a single knot.
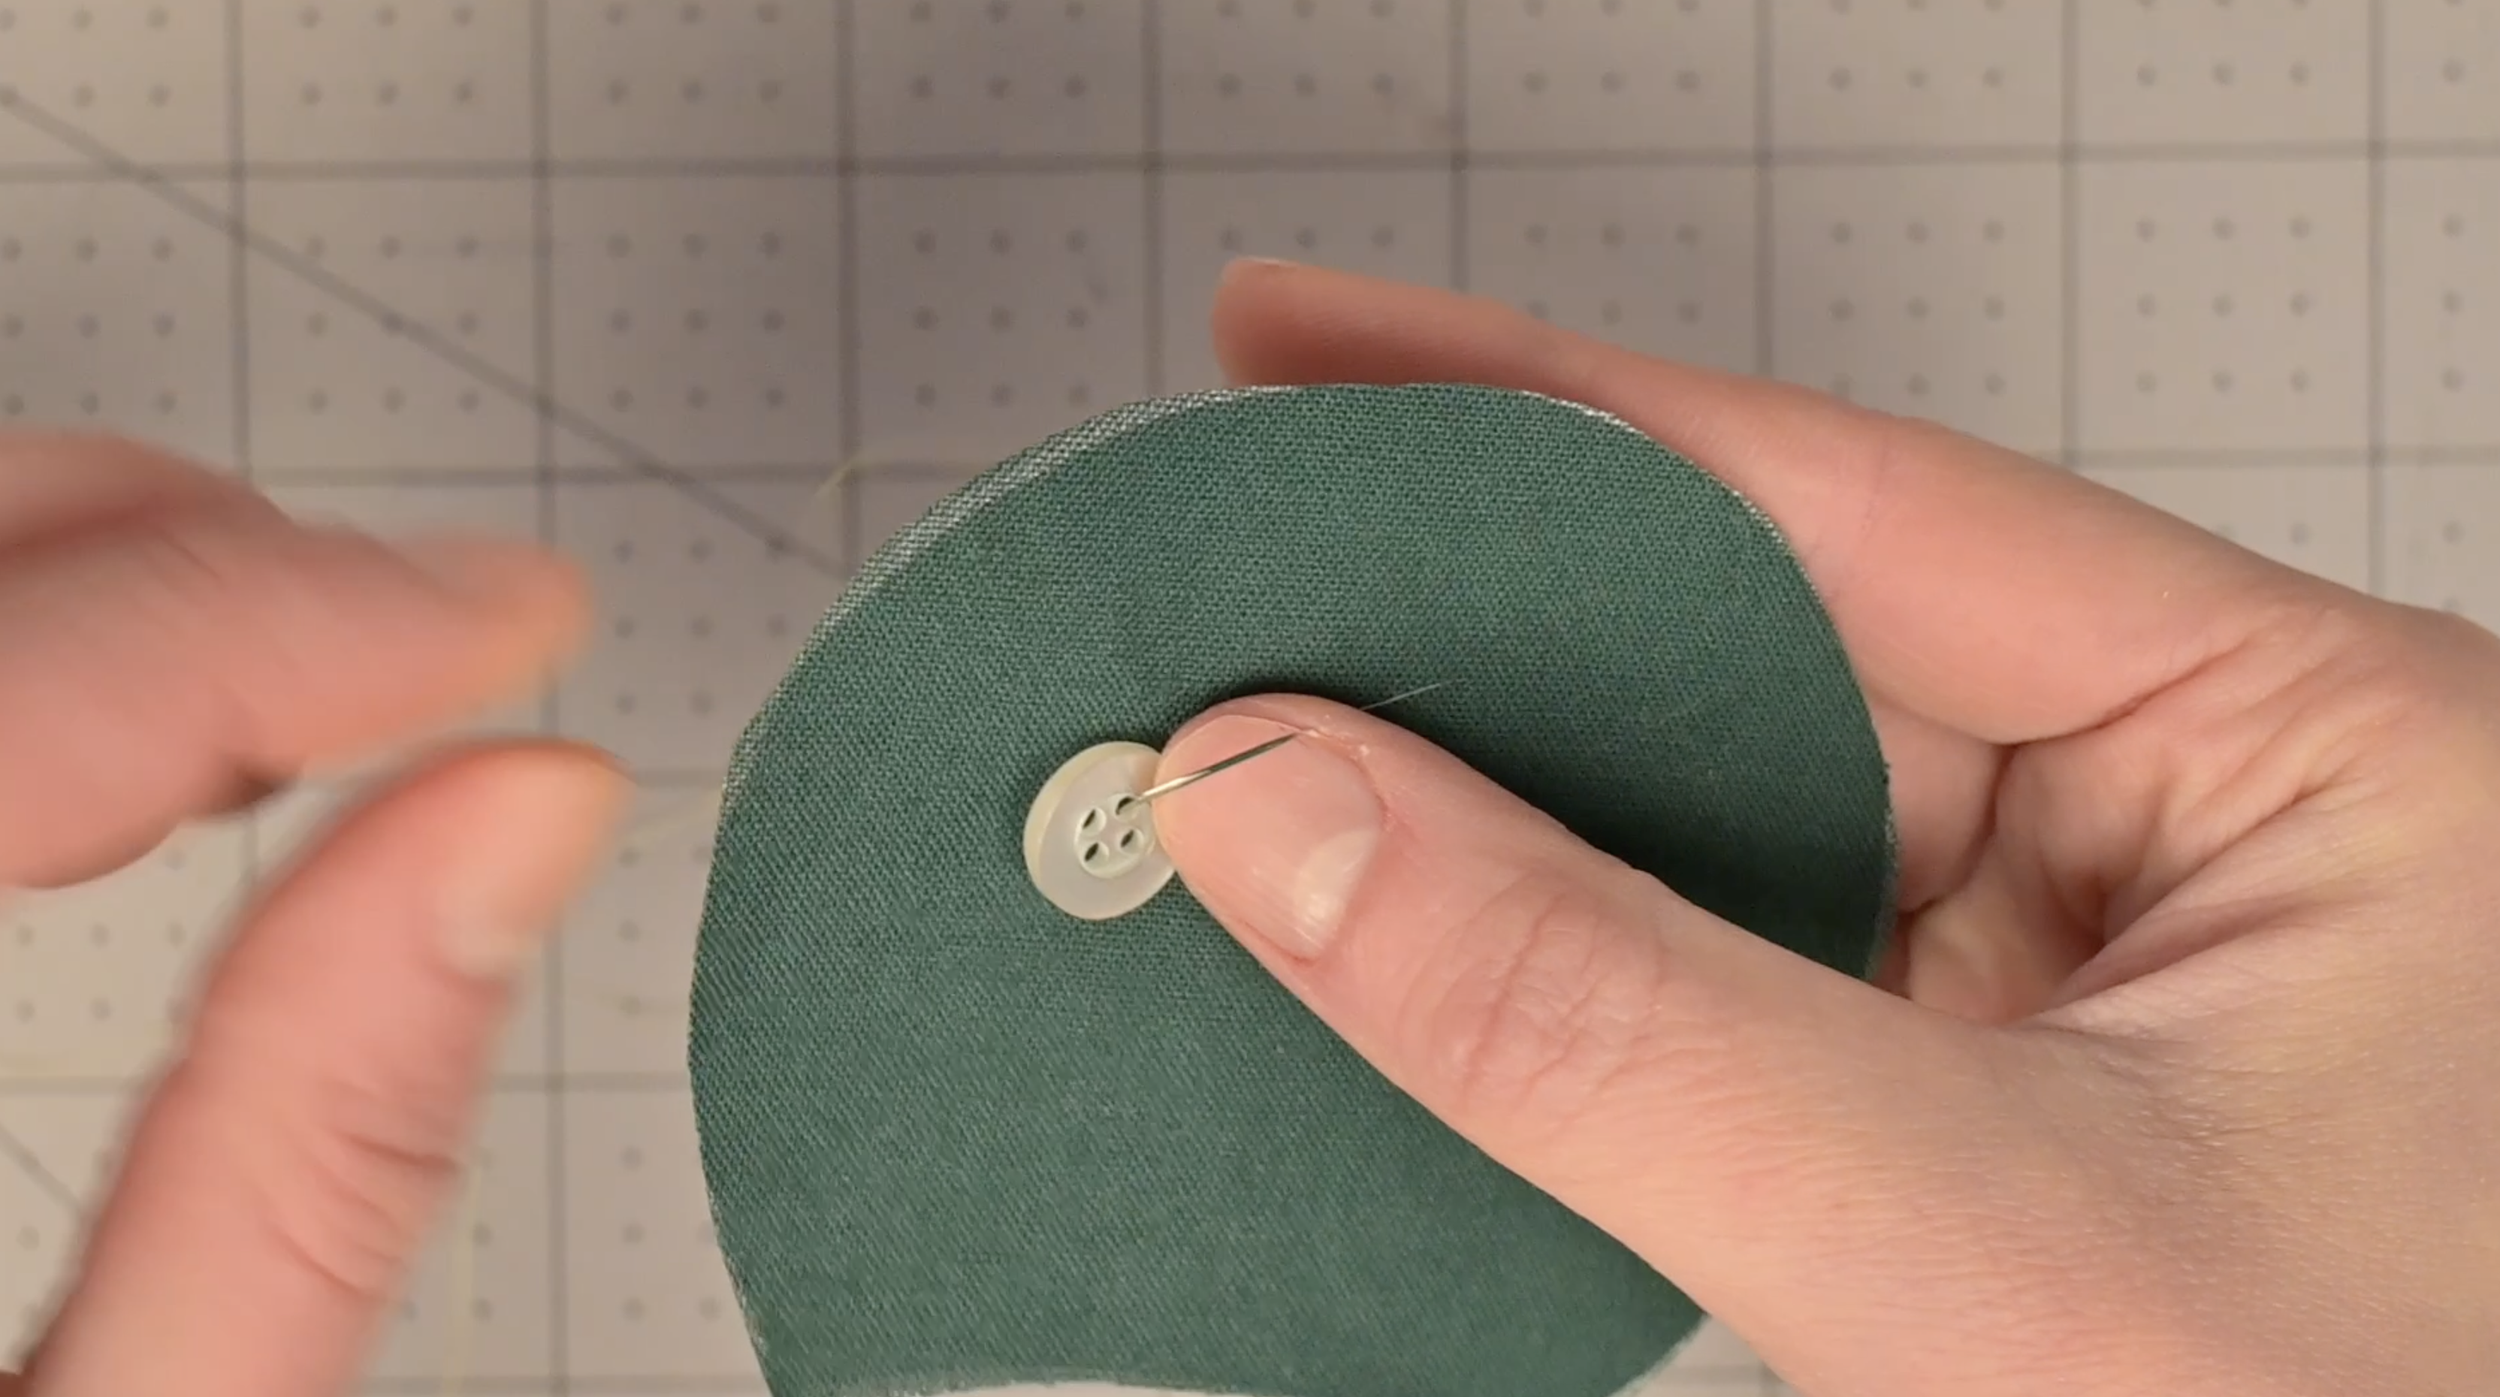
Take 1 piece of the turtle head pattern. Push the needle through the fabric from the back to the front exactly where you want the button. Pull until the knot hits the fabric.
Slide the button onto the needle through one of the holes. Push the needle back down through the opposite hole and through the fabric.
Repeat the up-and-down motion through the holes 6-8 times. If it’s a 4-hole button, sew in an "X" pattern.
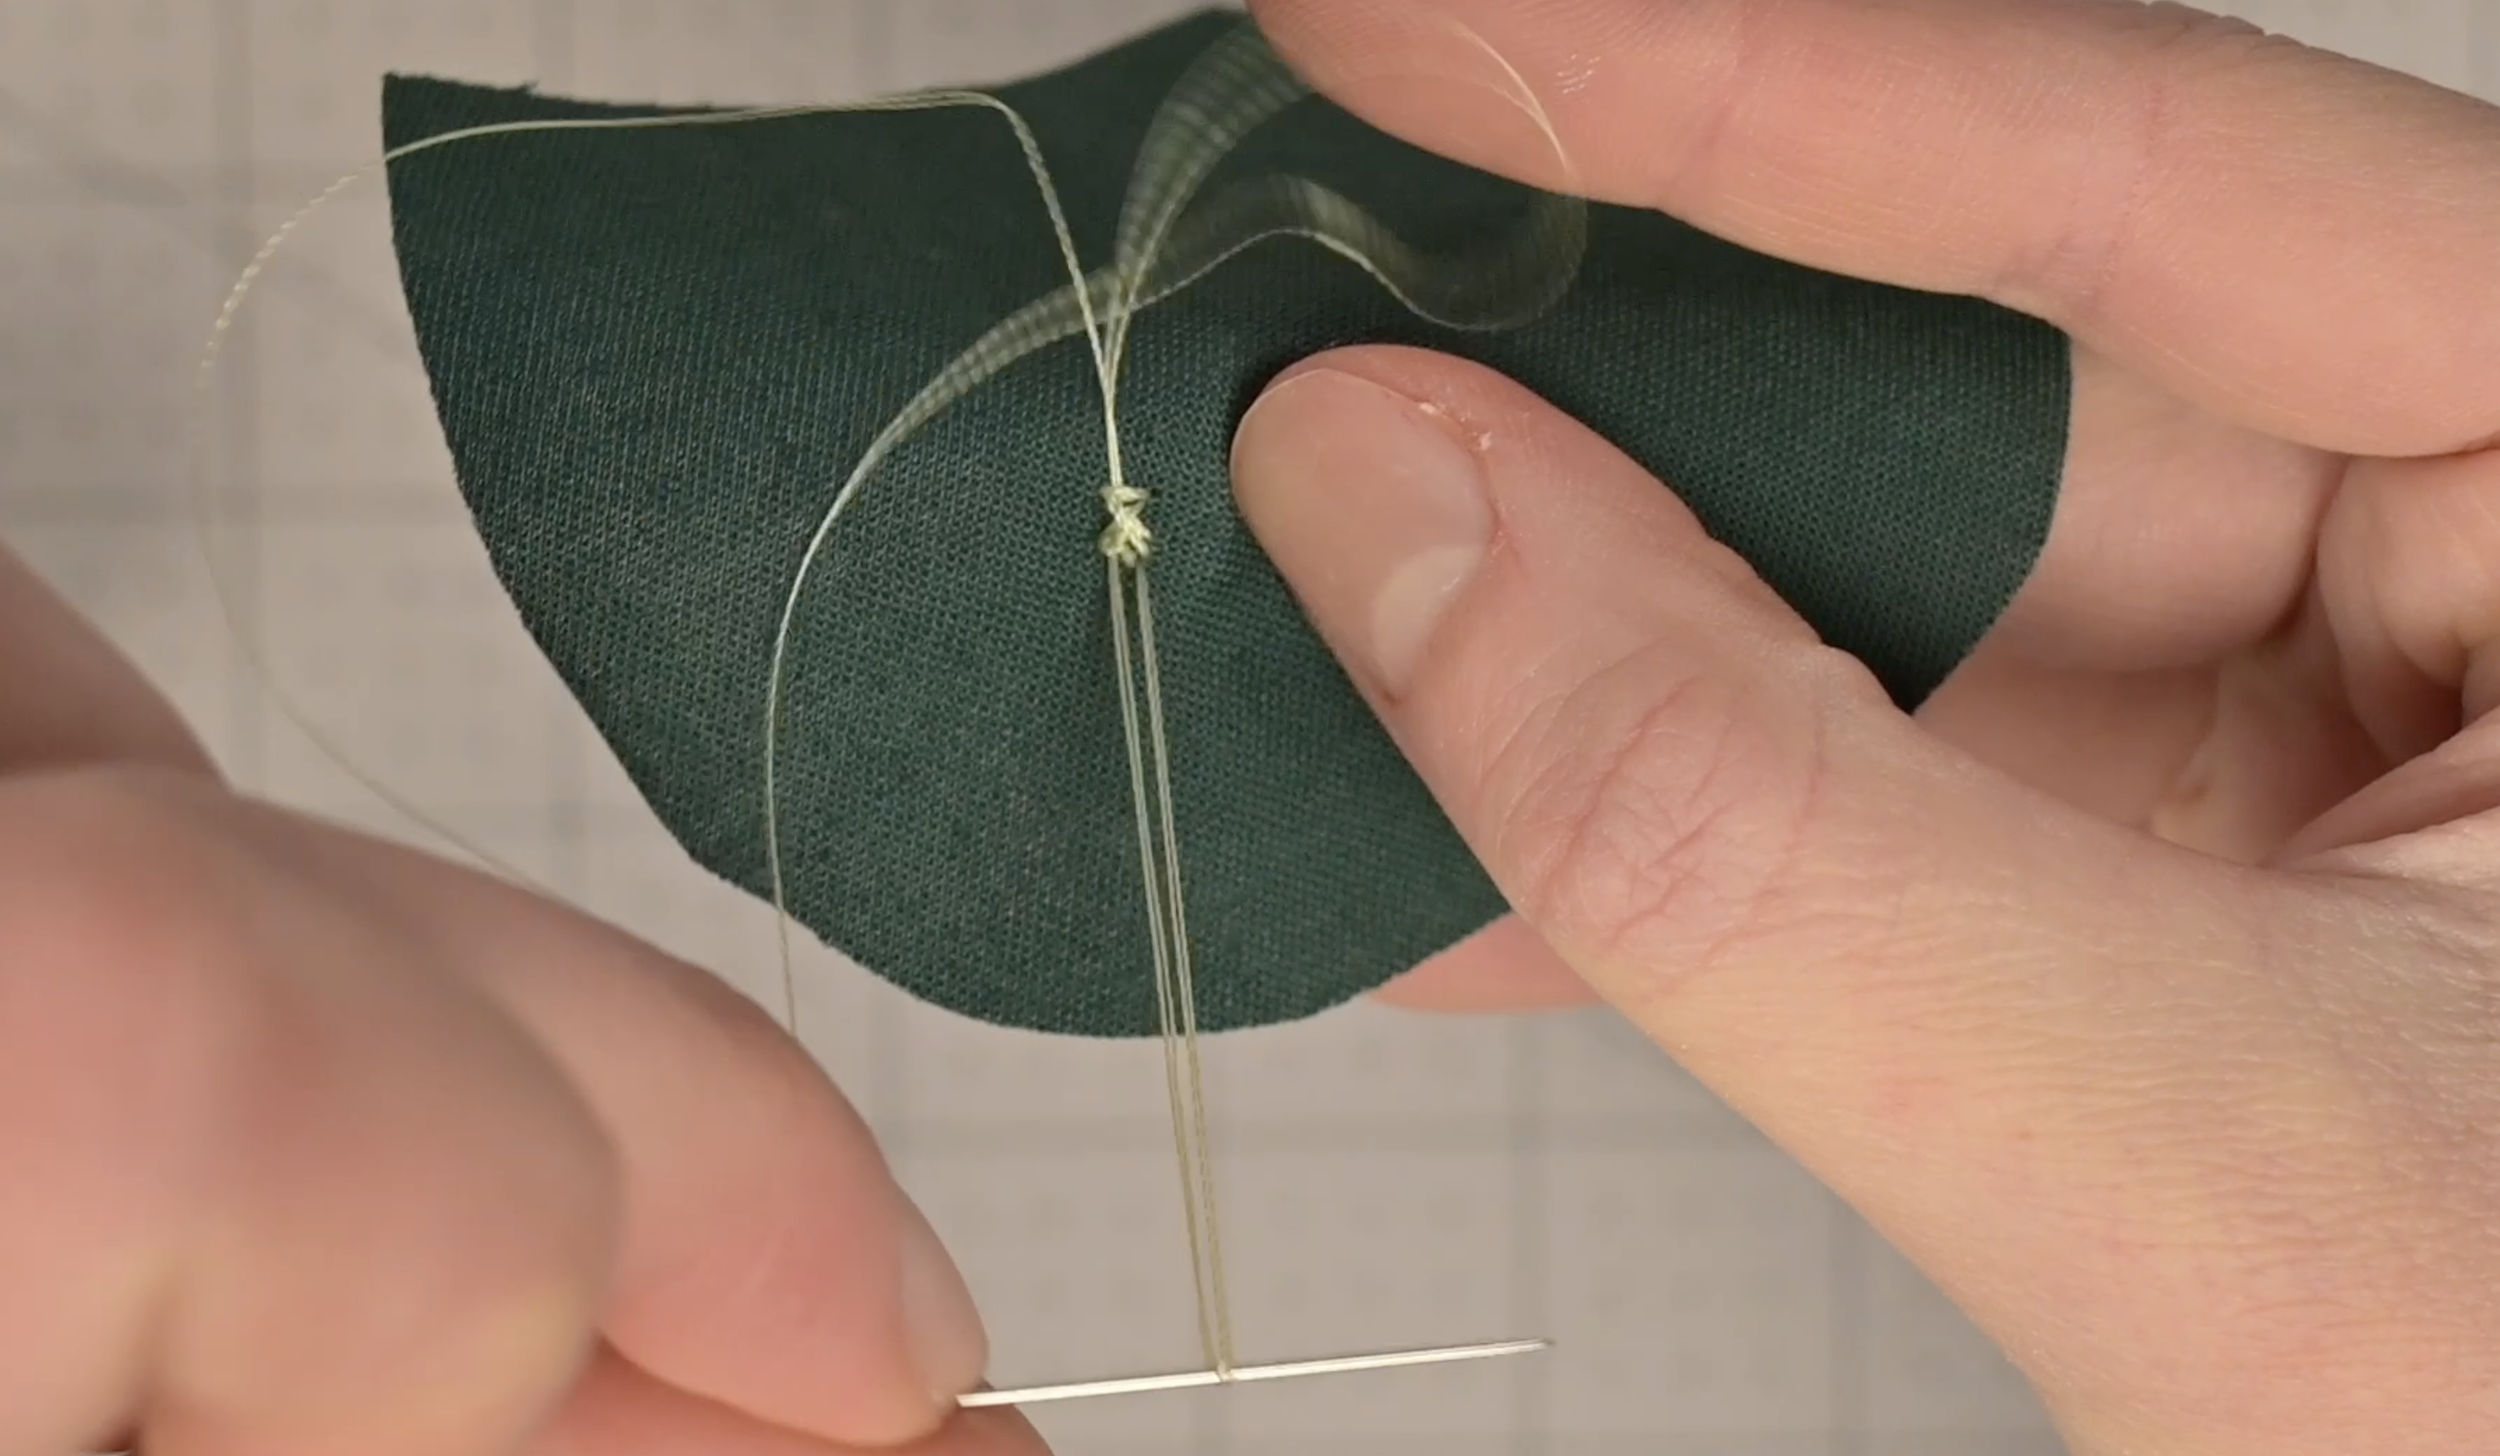
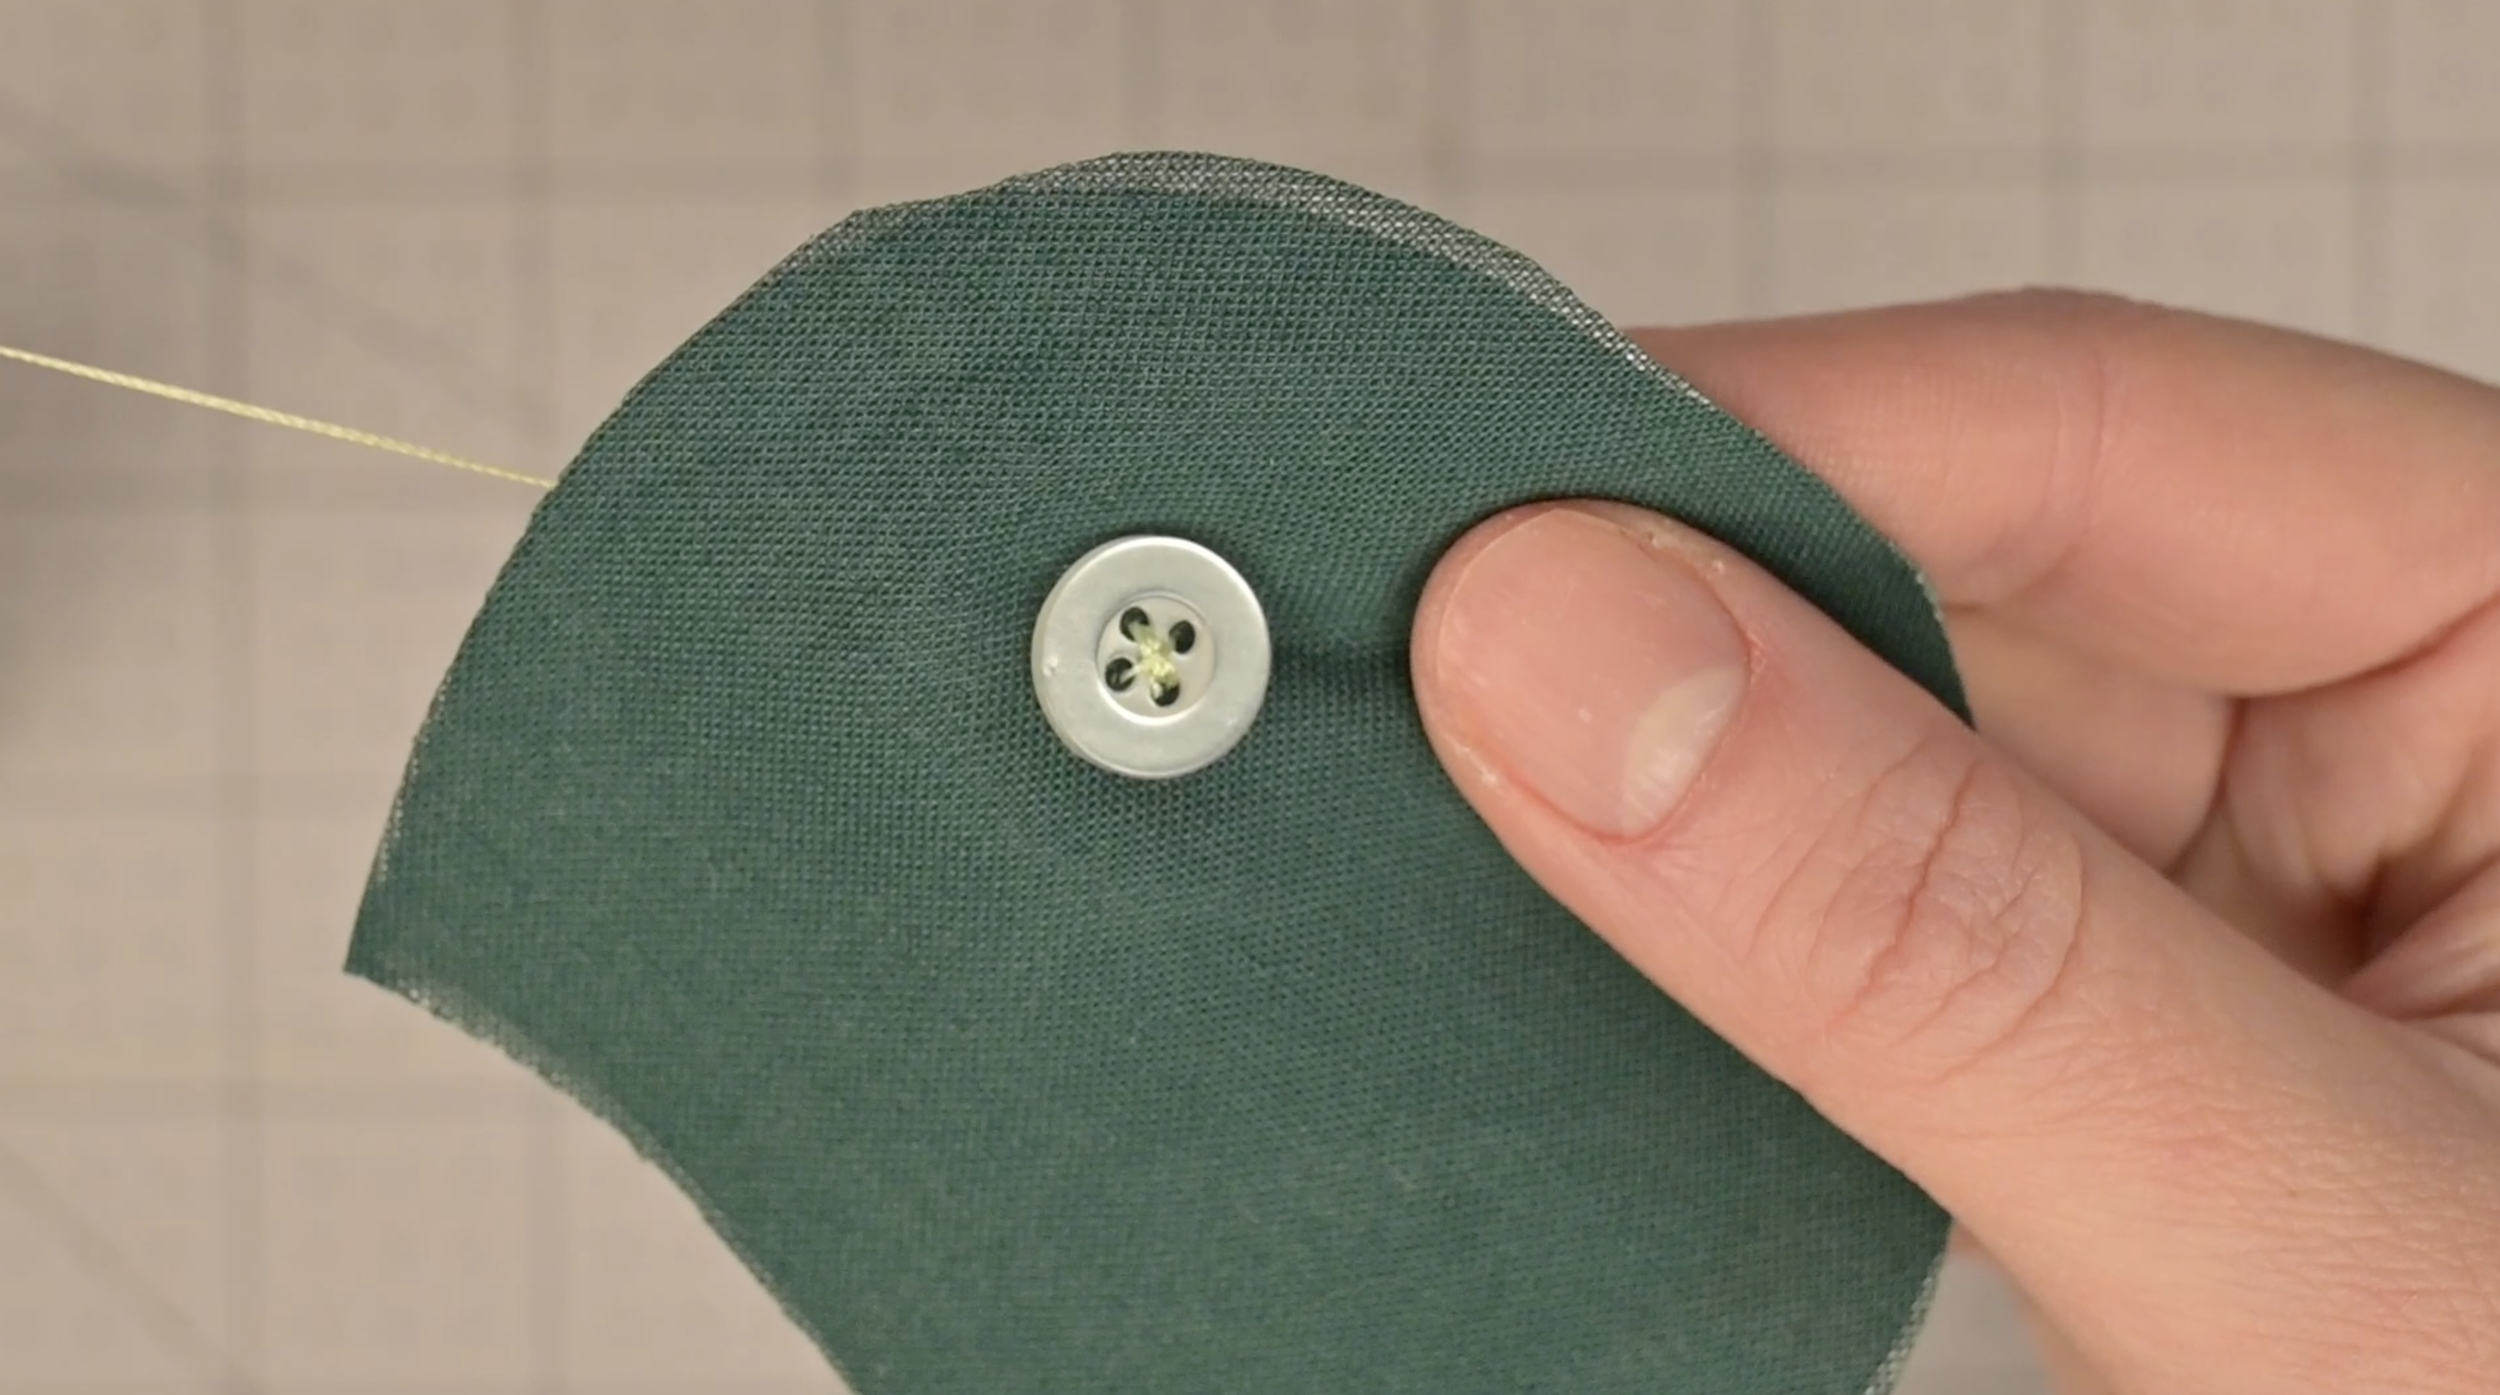
Push the needle back to the underside of the fabric. Take the needle and pull it through the stitches on the back of the button. Pull it until a tiny loop forms. Pass your needle through that loop. Pull tight to create a knot. Repeat once more or until the knot feels secure.
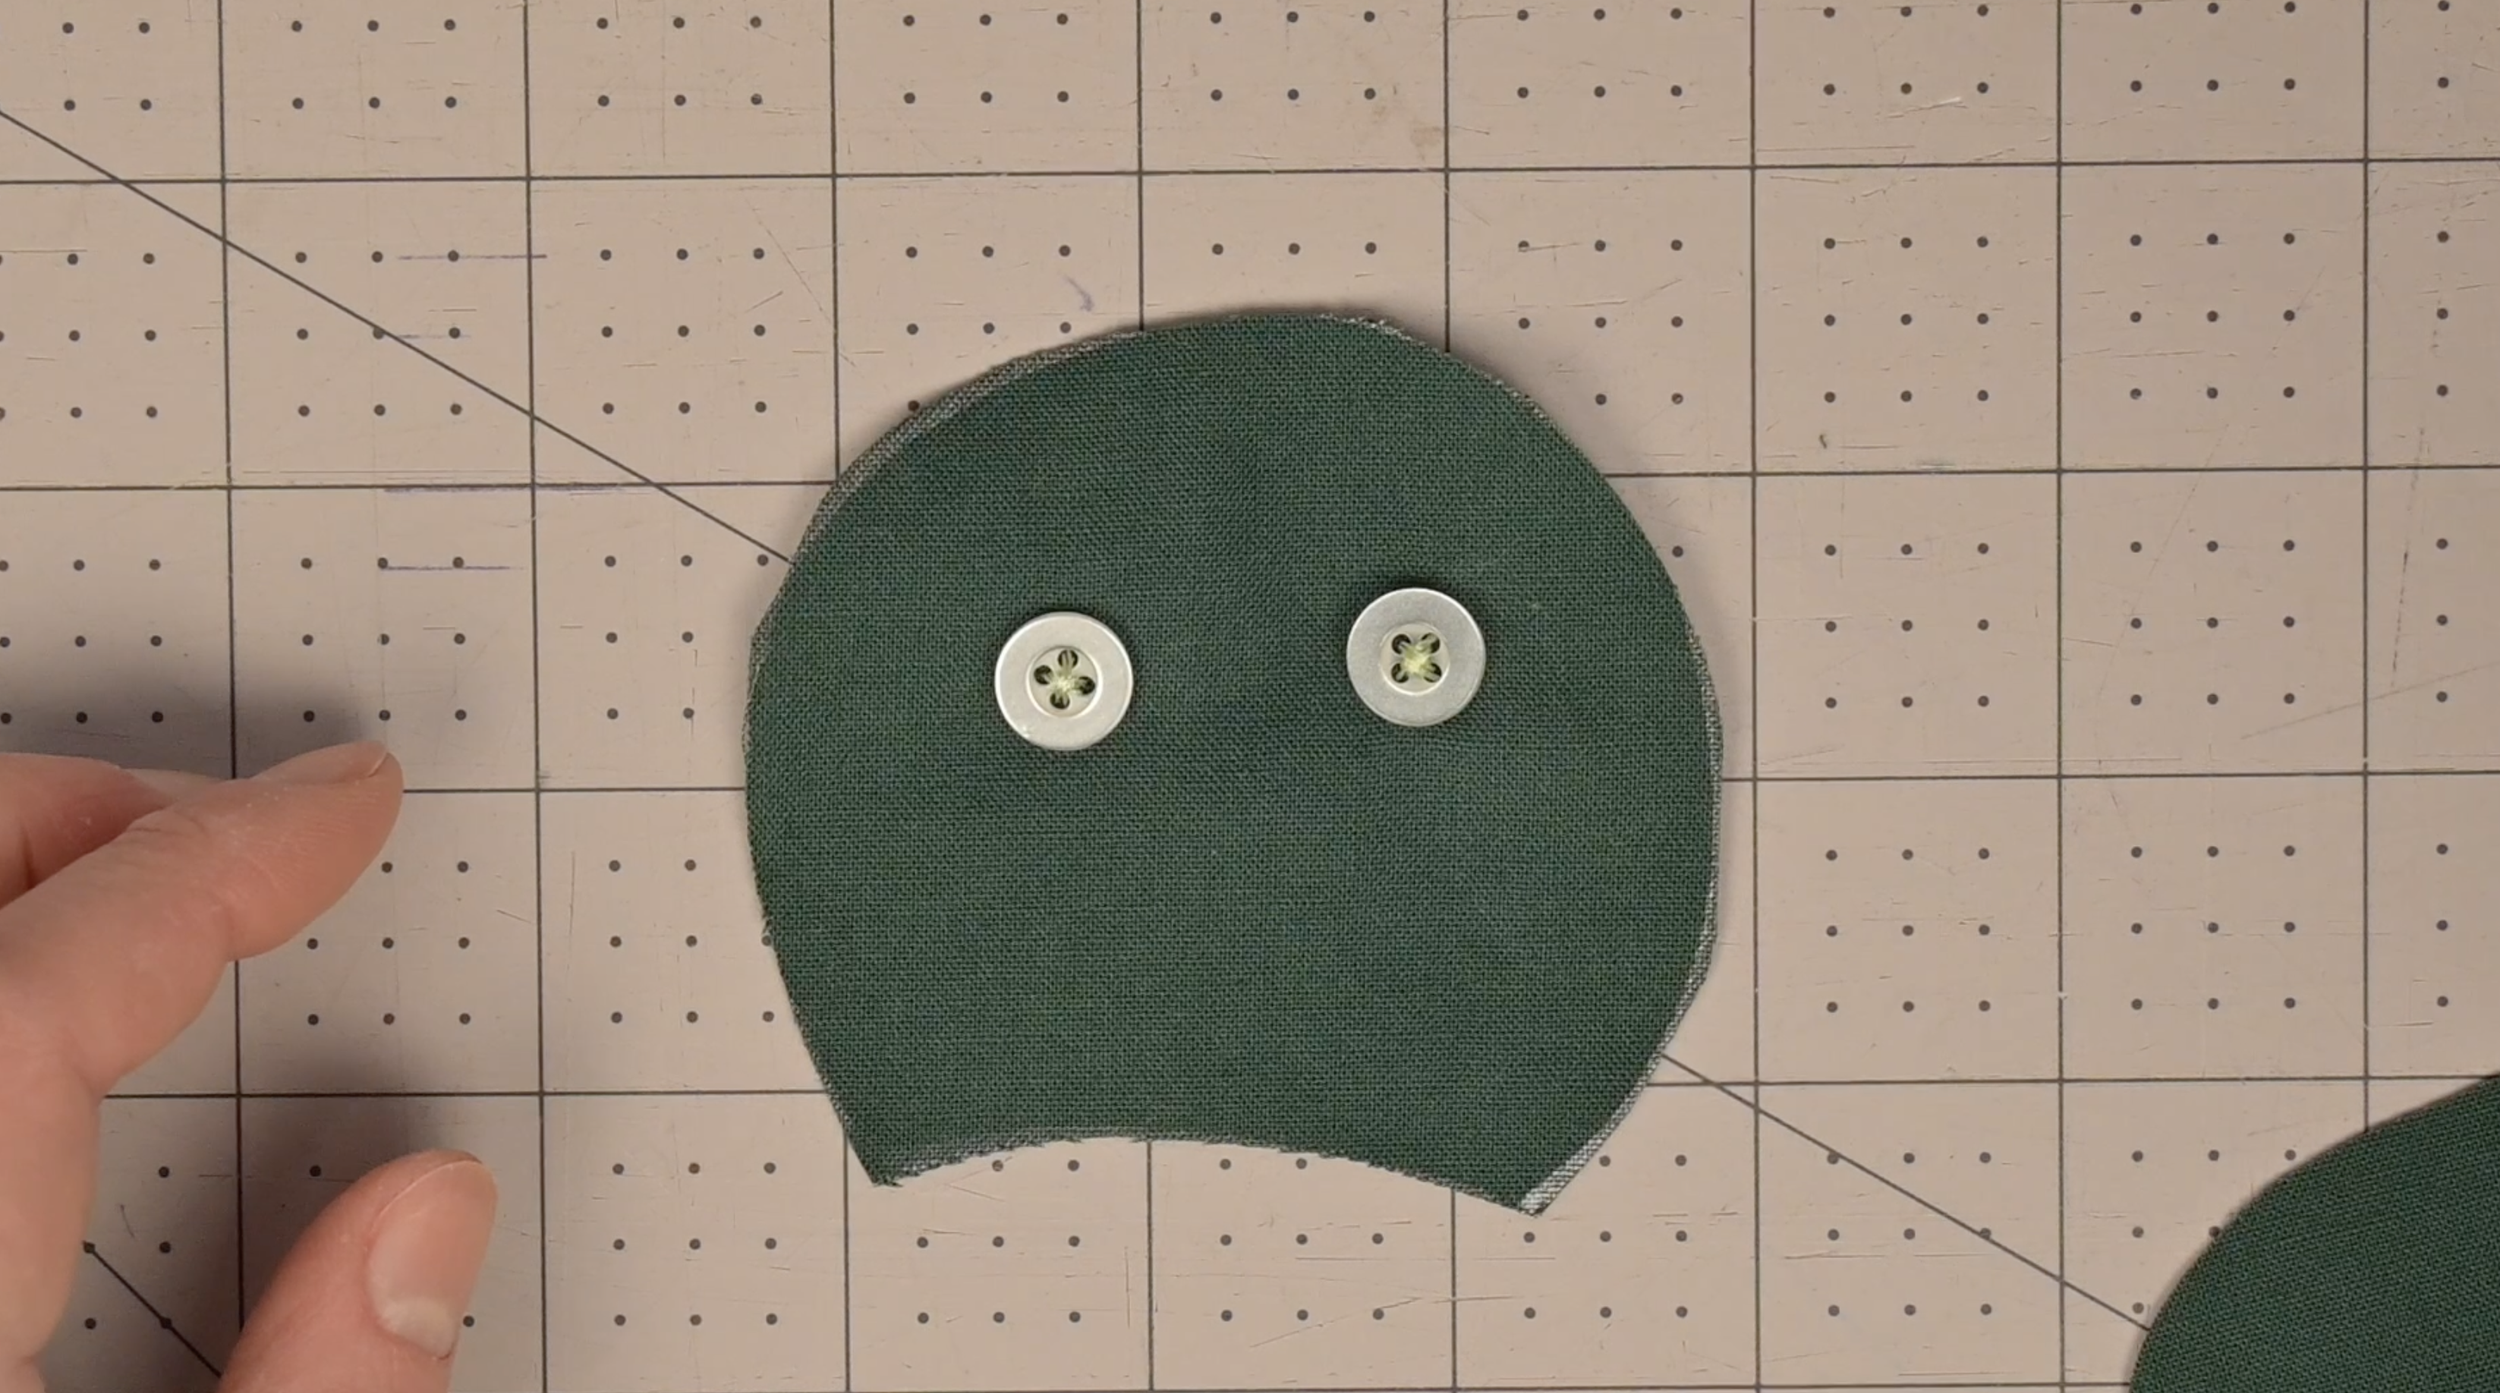
Repeat with the second button.
Step 6: Sewing the Non-Shell Areas Together
For each non-shell area, make sure the wrong side of the fabric is facing out. Sew the pieces together leaving room to turn inside out. Sew where the dashed lines are shown on the pattern (around 3/8 inch to 1/4 inch seam allowance). This ensures the pieces can be turned right-side out properly in the next step.
Back stitch at the start and end of each piece to create a secure thread.
Step 7: Flip Non-Shell Areas Right-Side Out
Cut slits into the seam allowance or use pinking shears to trim off the extra fabric. Through the un-sewed areas, flip each piece right-side out.
Through the un-sewed areas, flip each piece right-side out.
It can be helpful to use the back of a pencil or paintbrush to poke out the tricky areas.
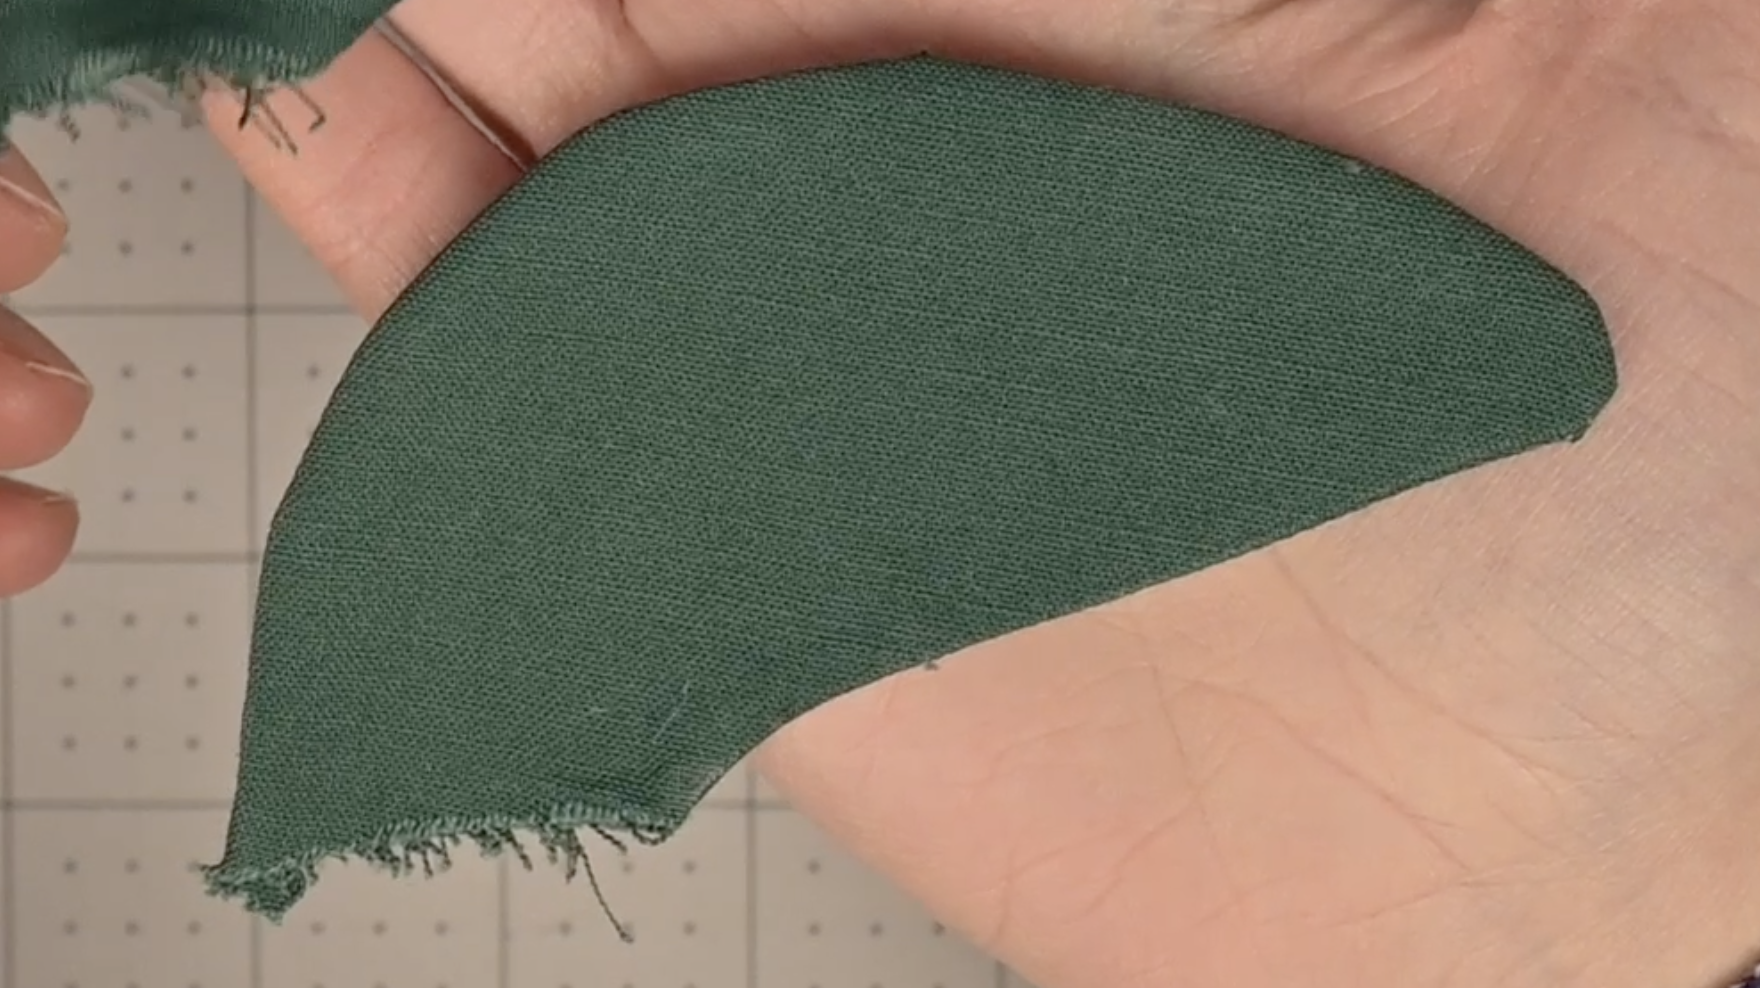
Step 8: Iron Non-Shell Areas Flat
Iron each non-shell piece flat.
If you are a sewist who tends to skip ironing because you think it will not affect the finished result and/or you want to save time, this is your project reminder that you will thank your future self for taking a few minutes to iron each piece.
Step 9: Add Detail Outline (Optional)
Sew an outline around 3/8 inch to 1/4 inch from the outer edge.
This step is optional and is based on personal preference.

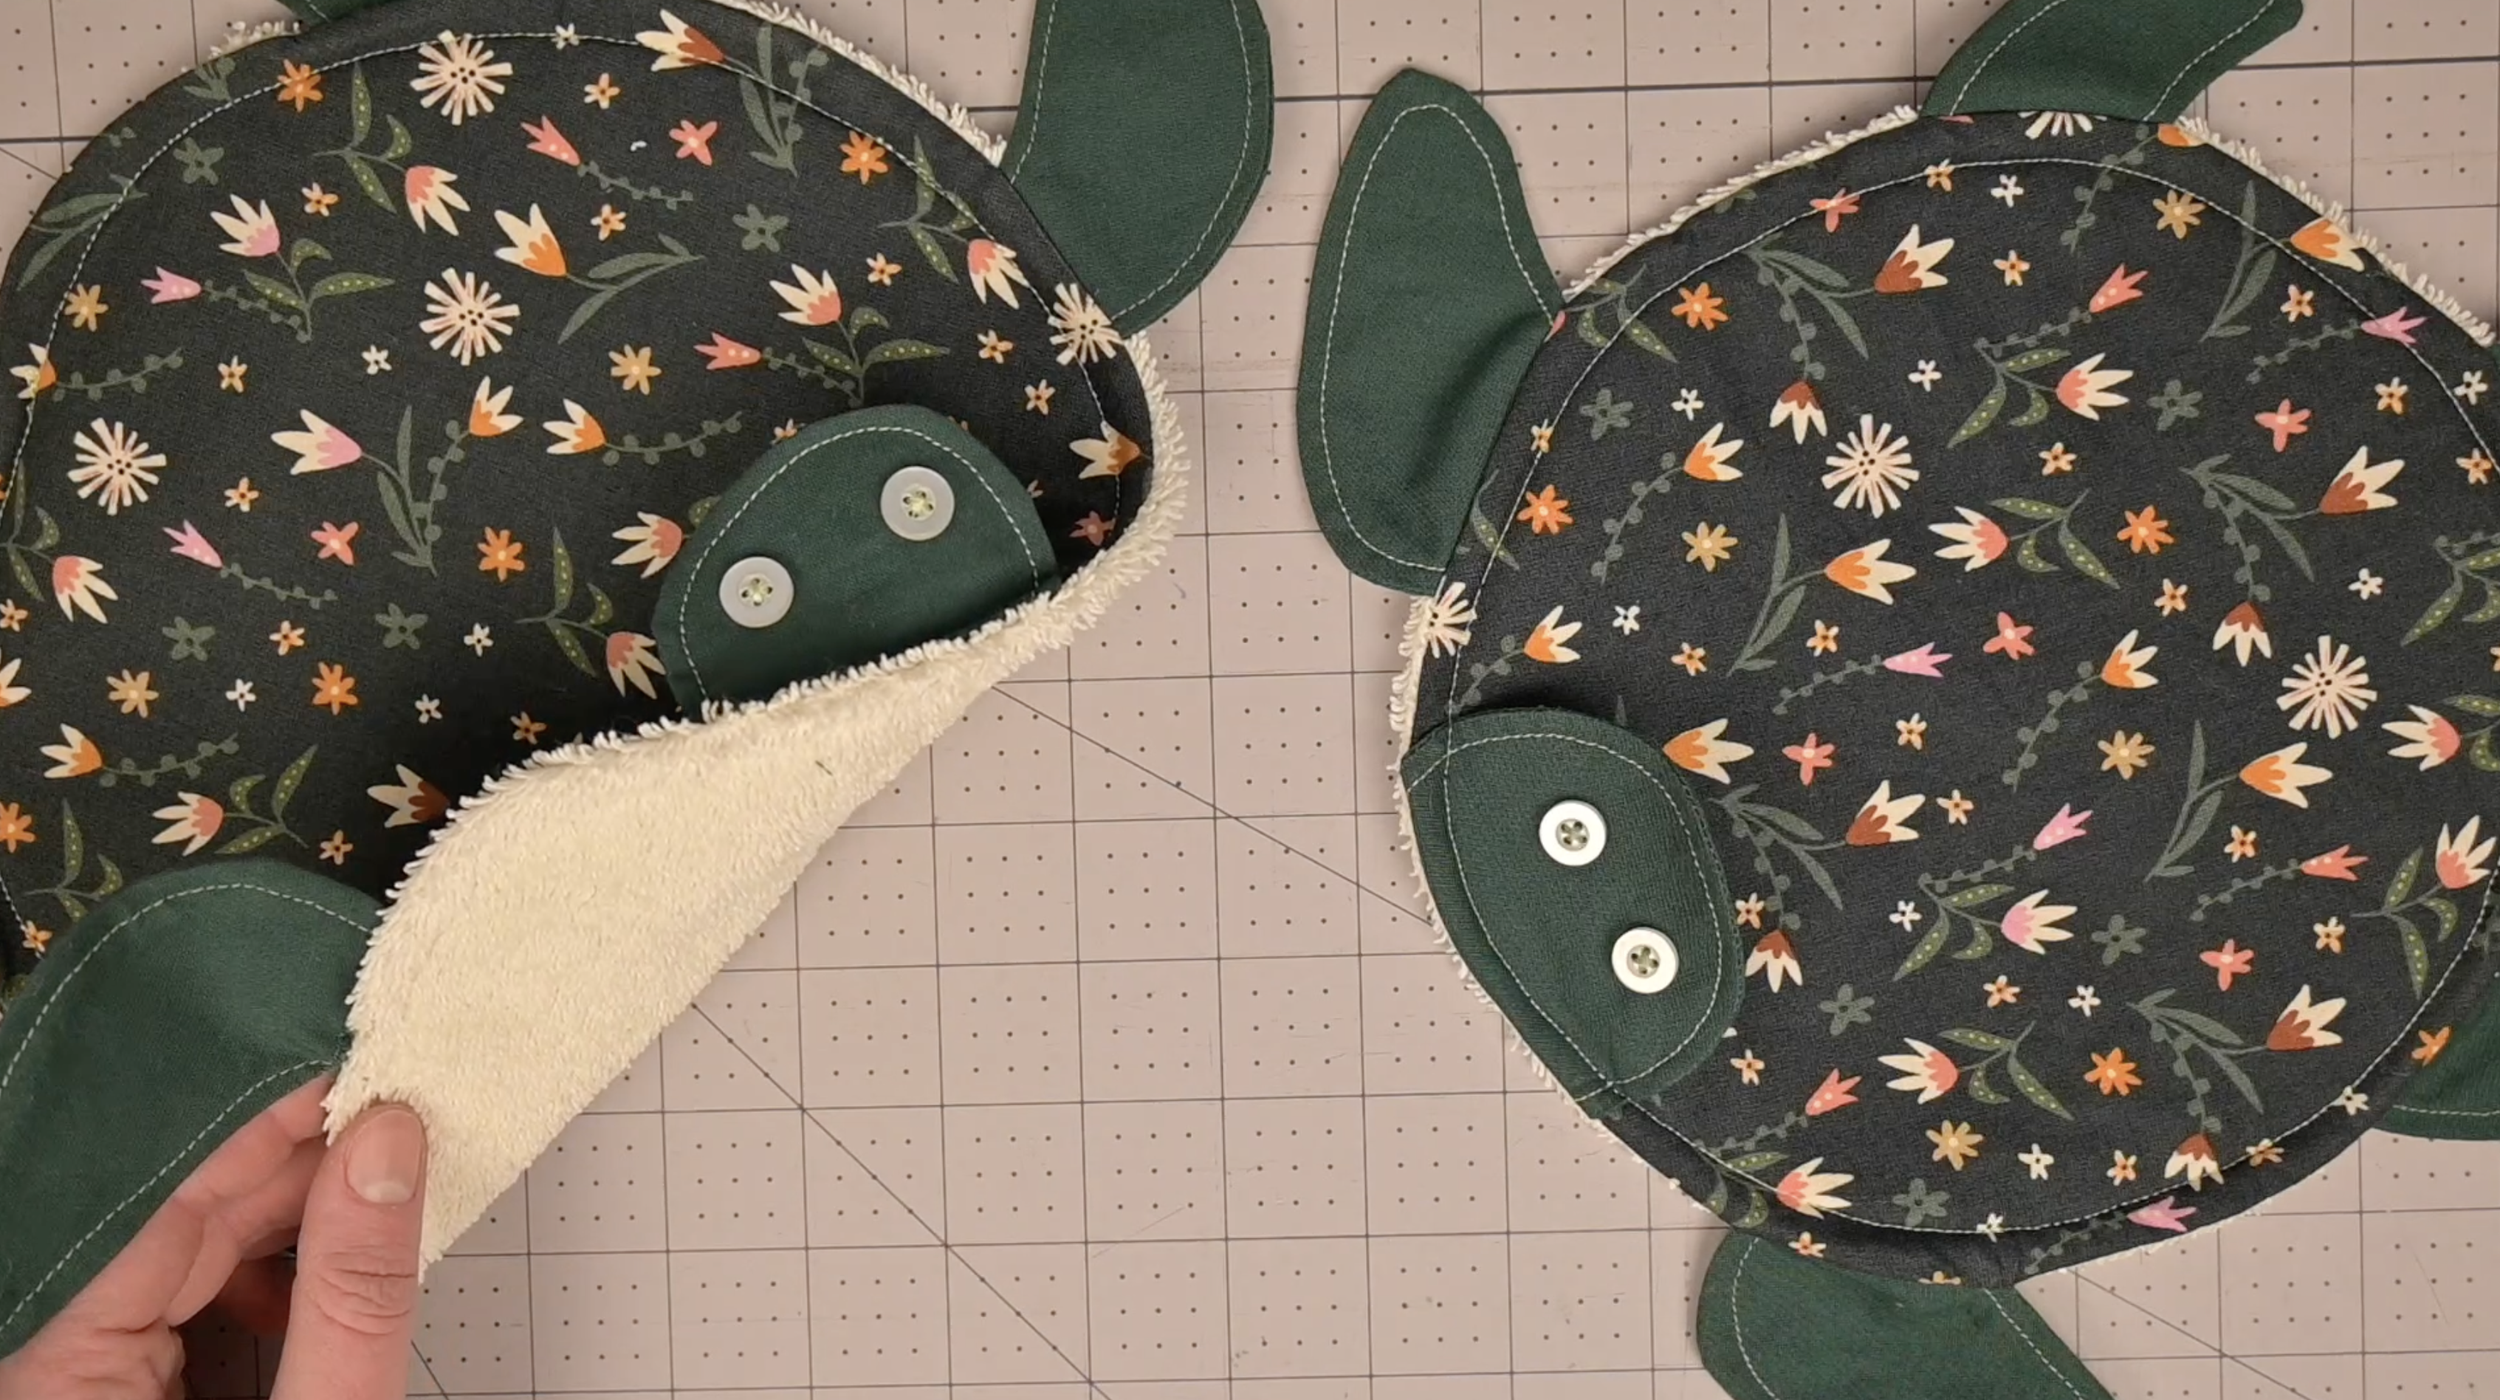
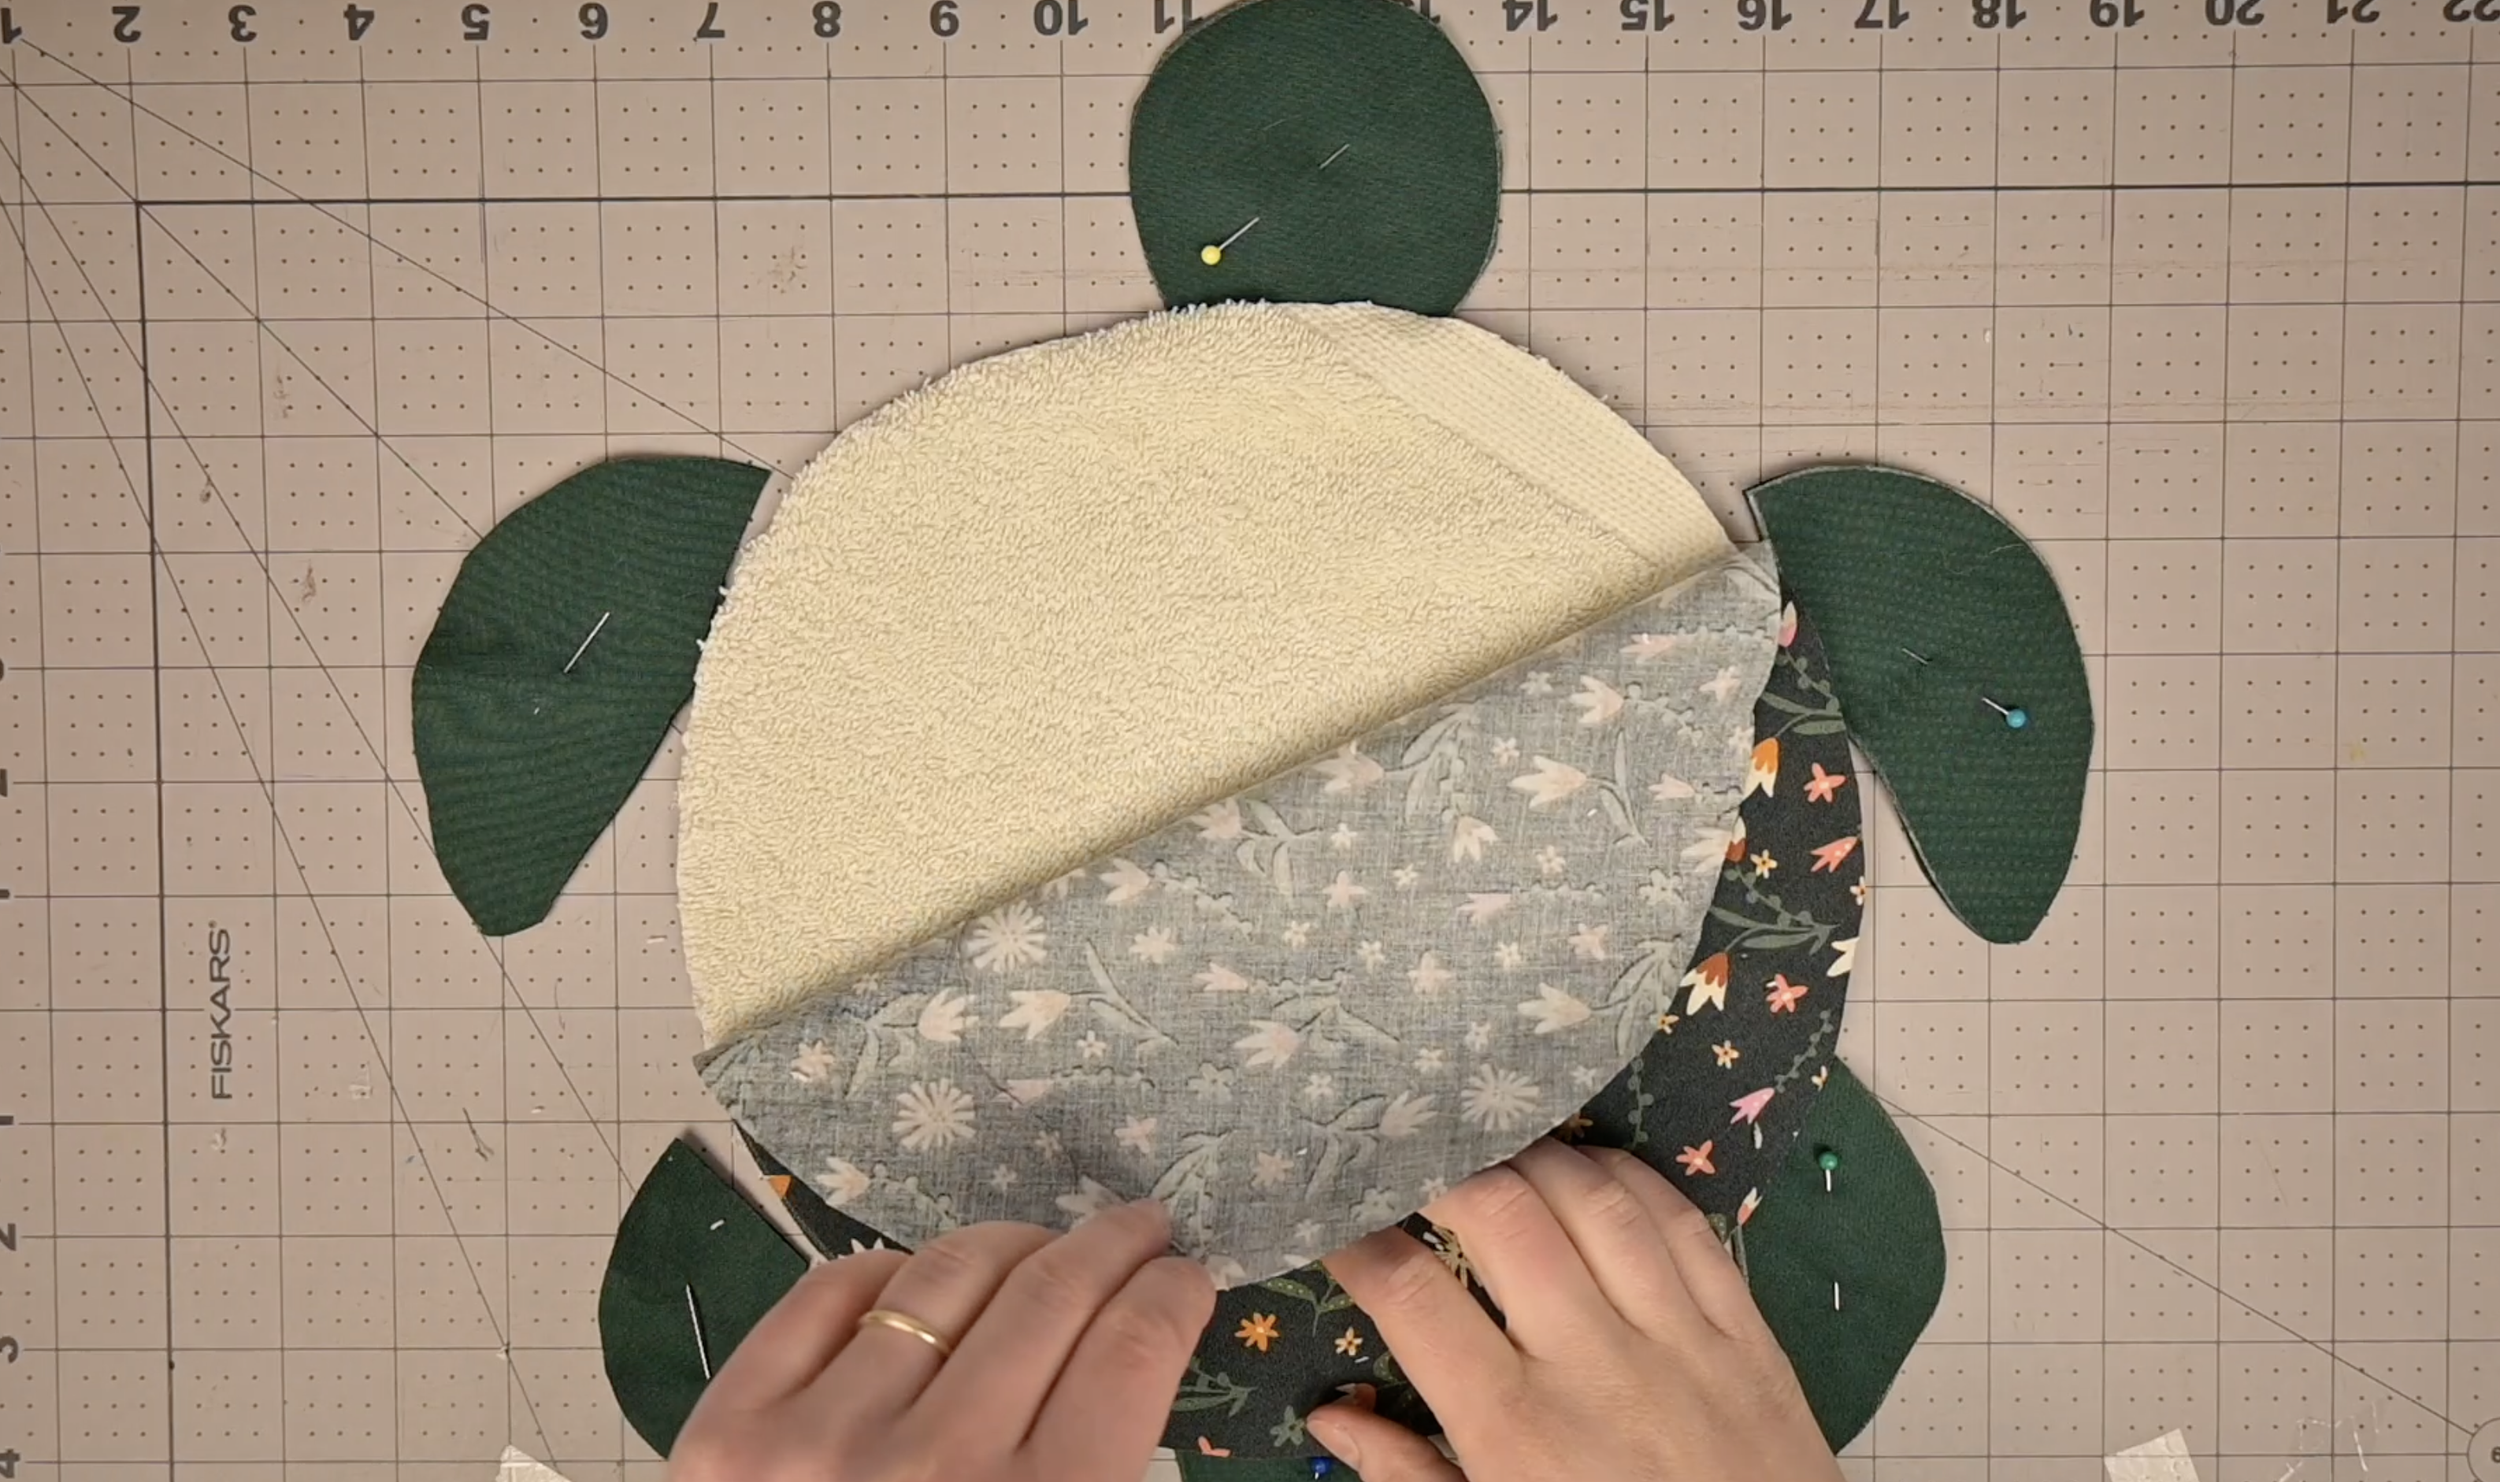
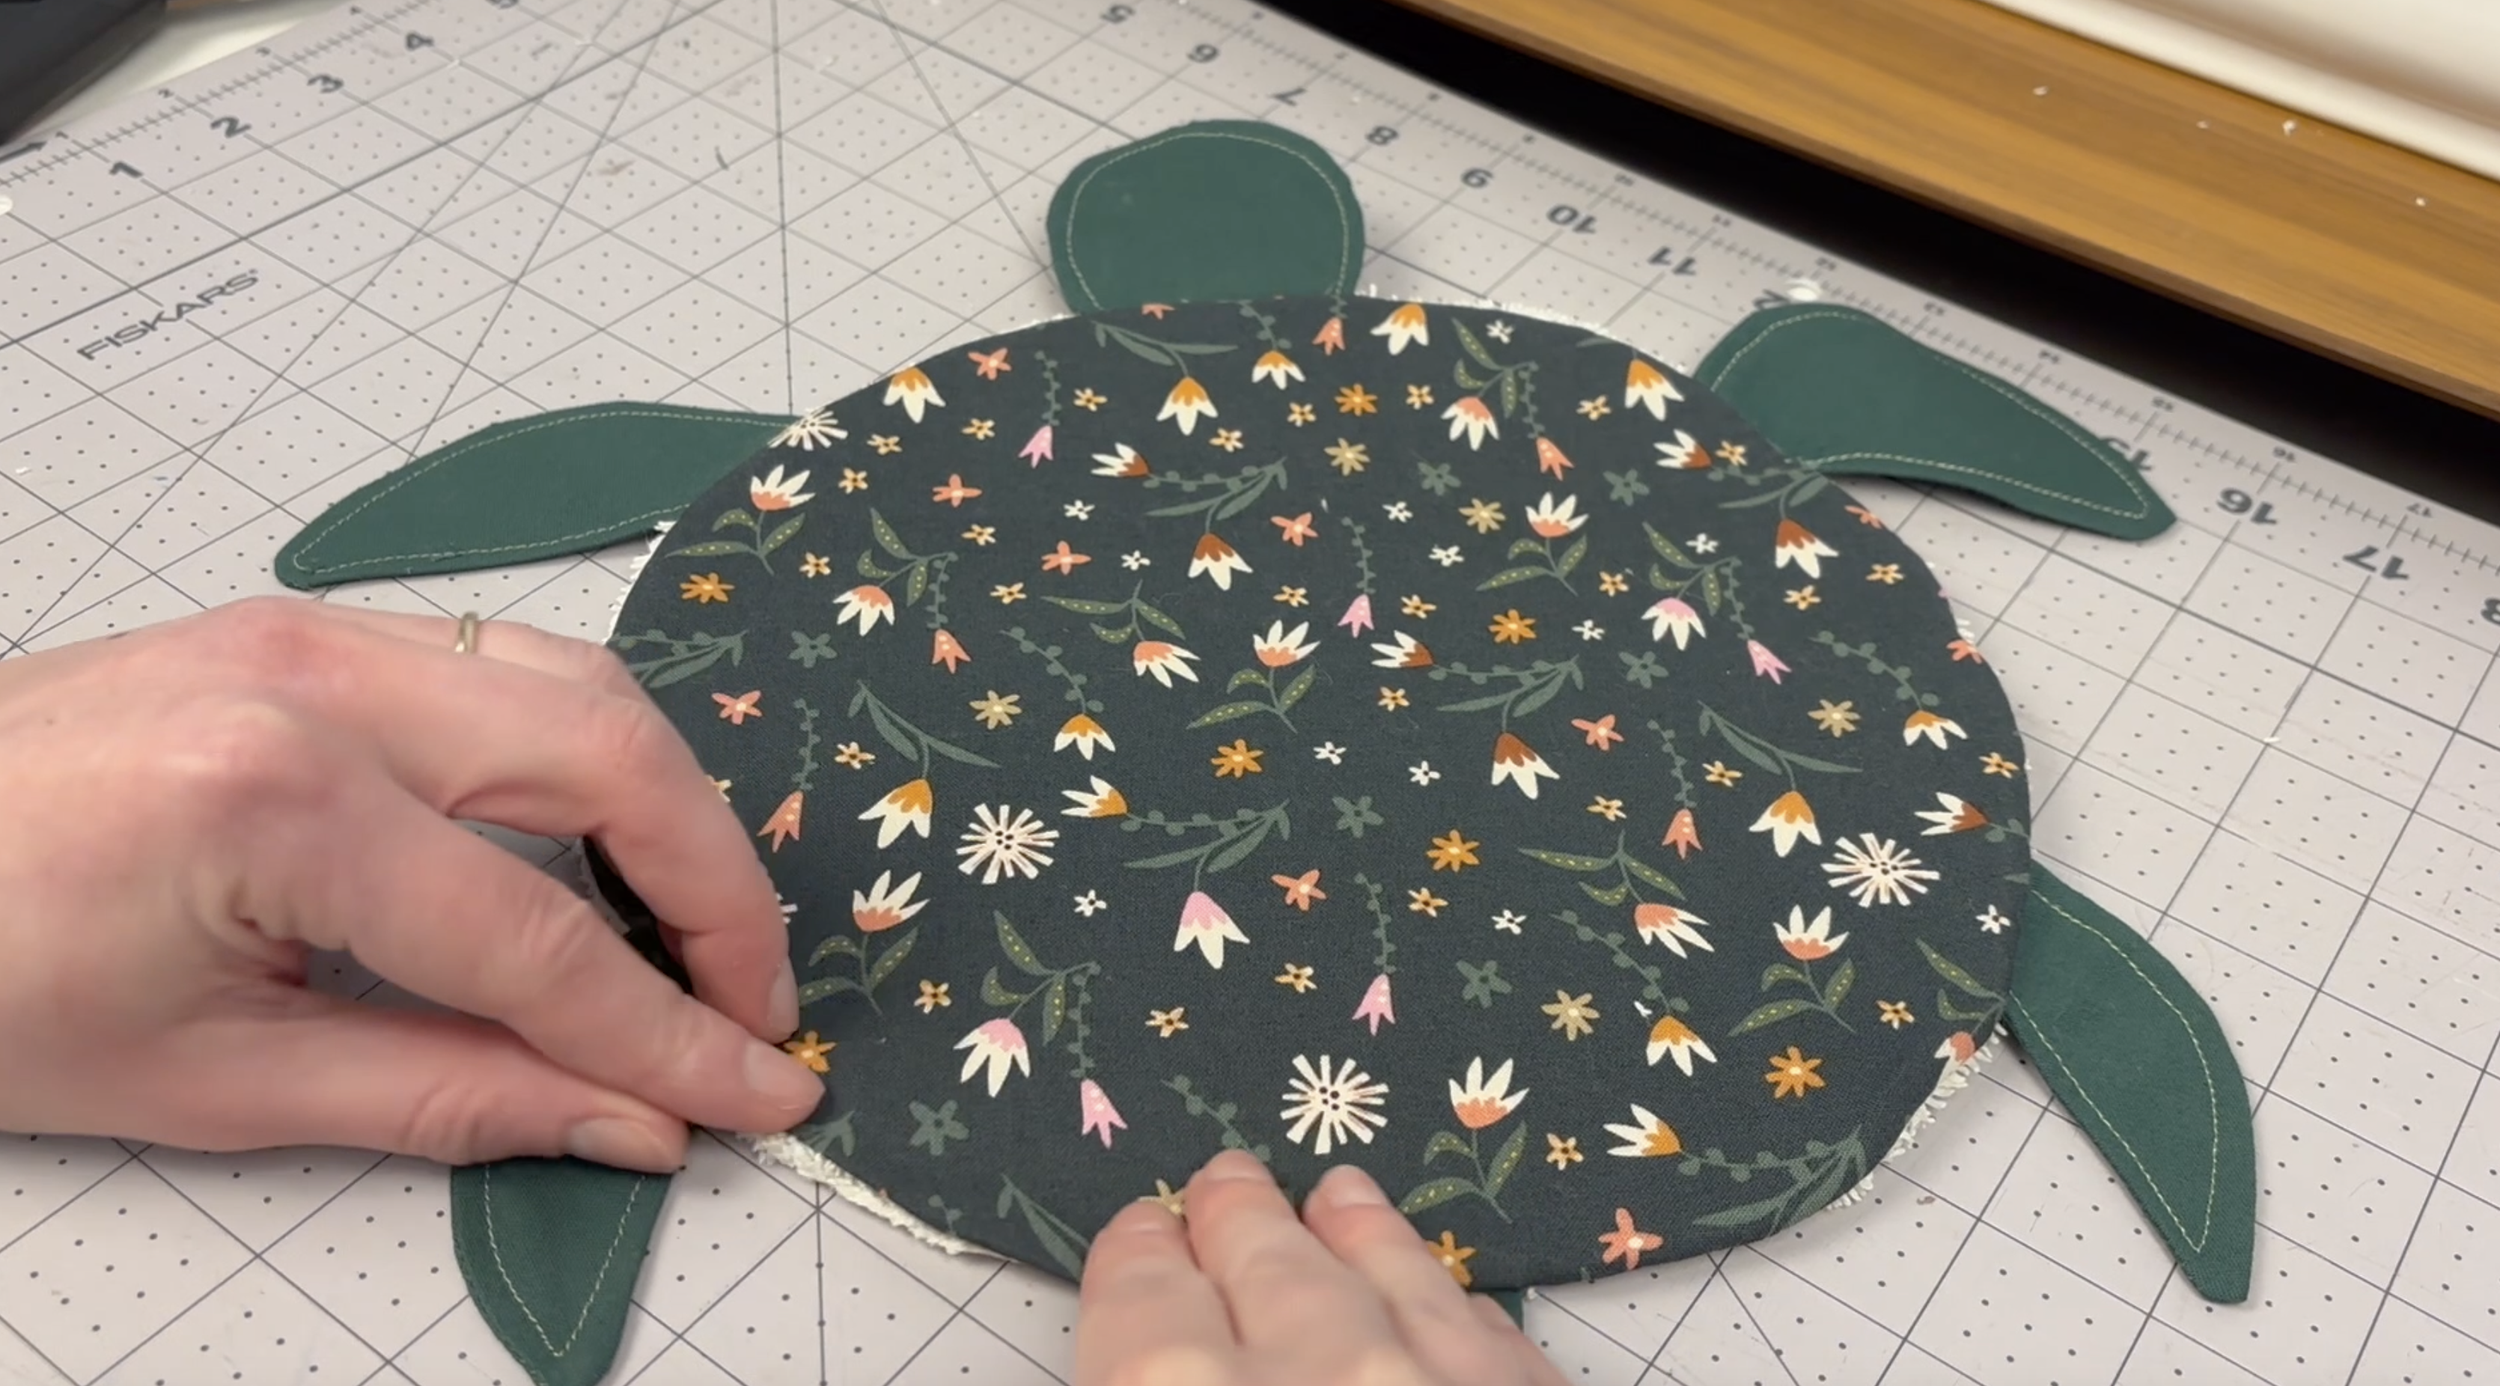
Step 10: Secure Non-Shell Areas to Shell
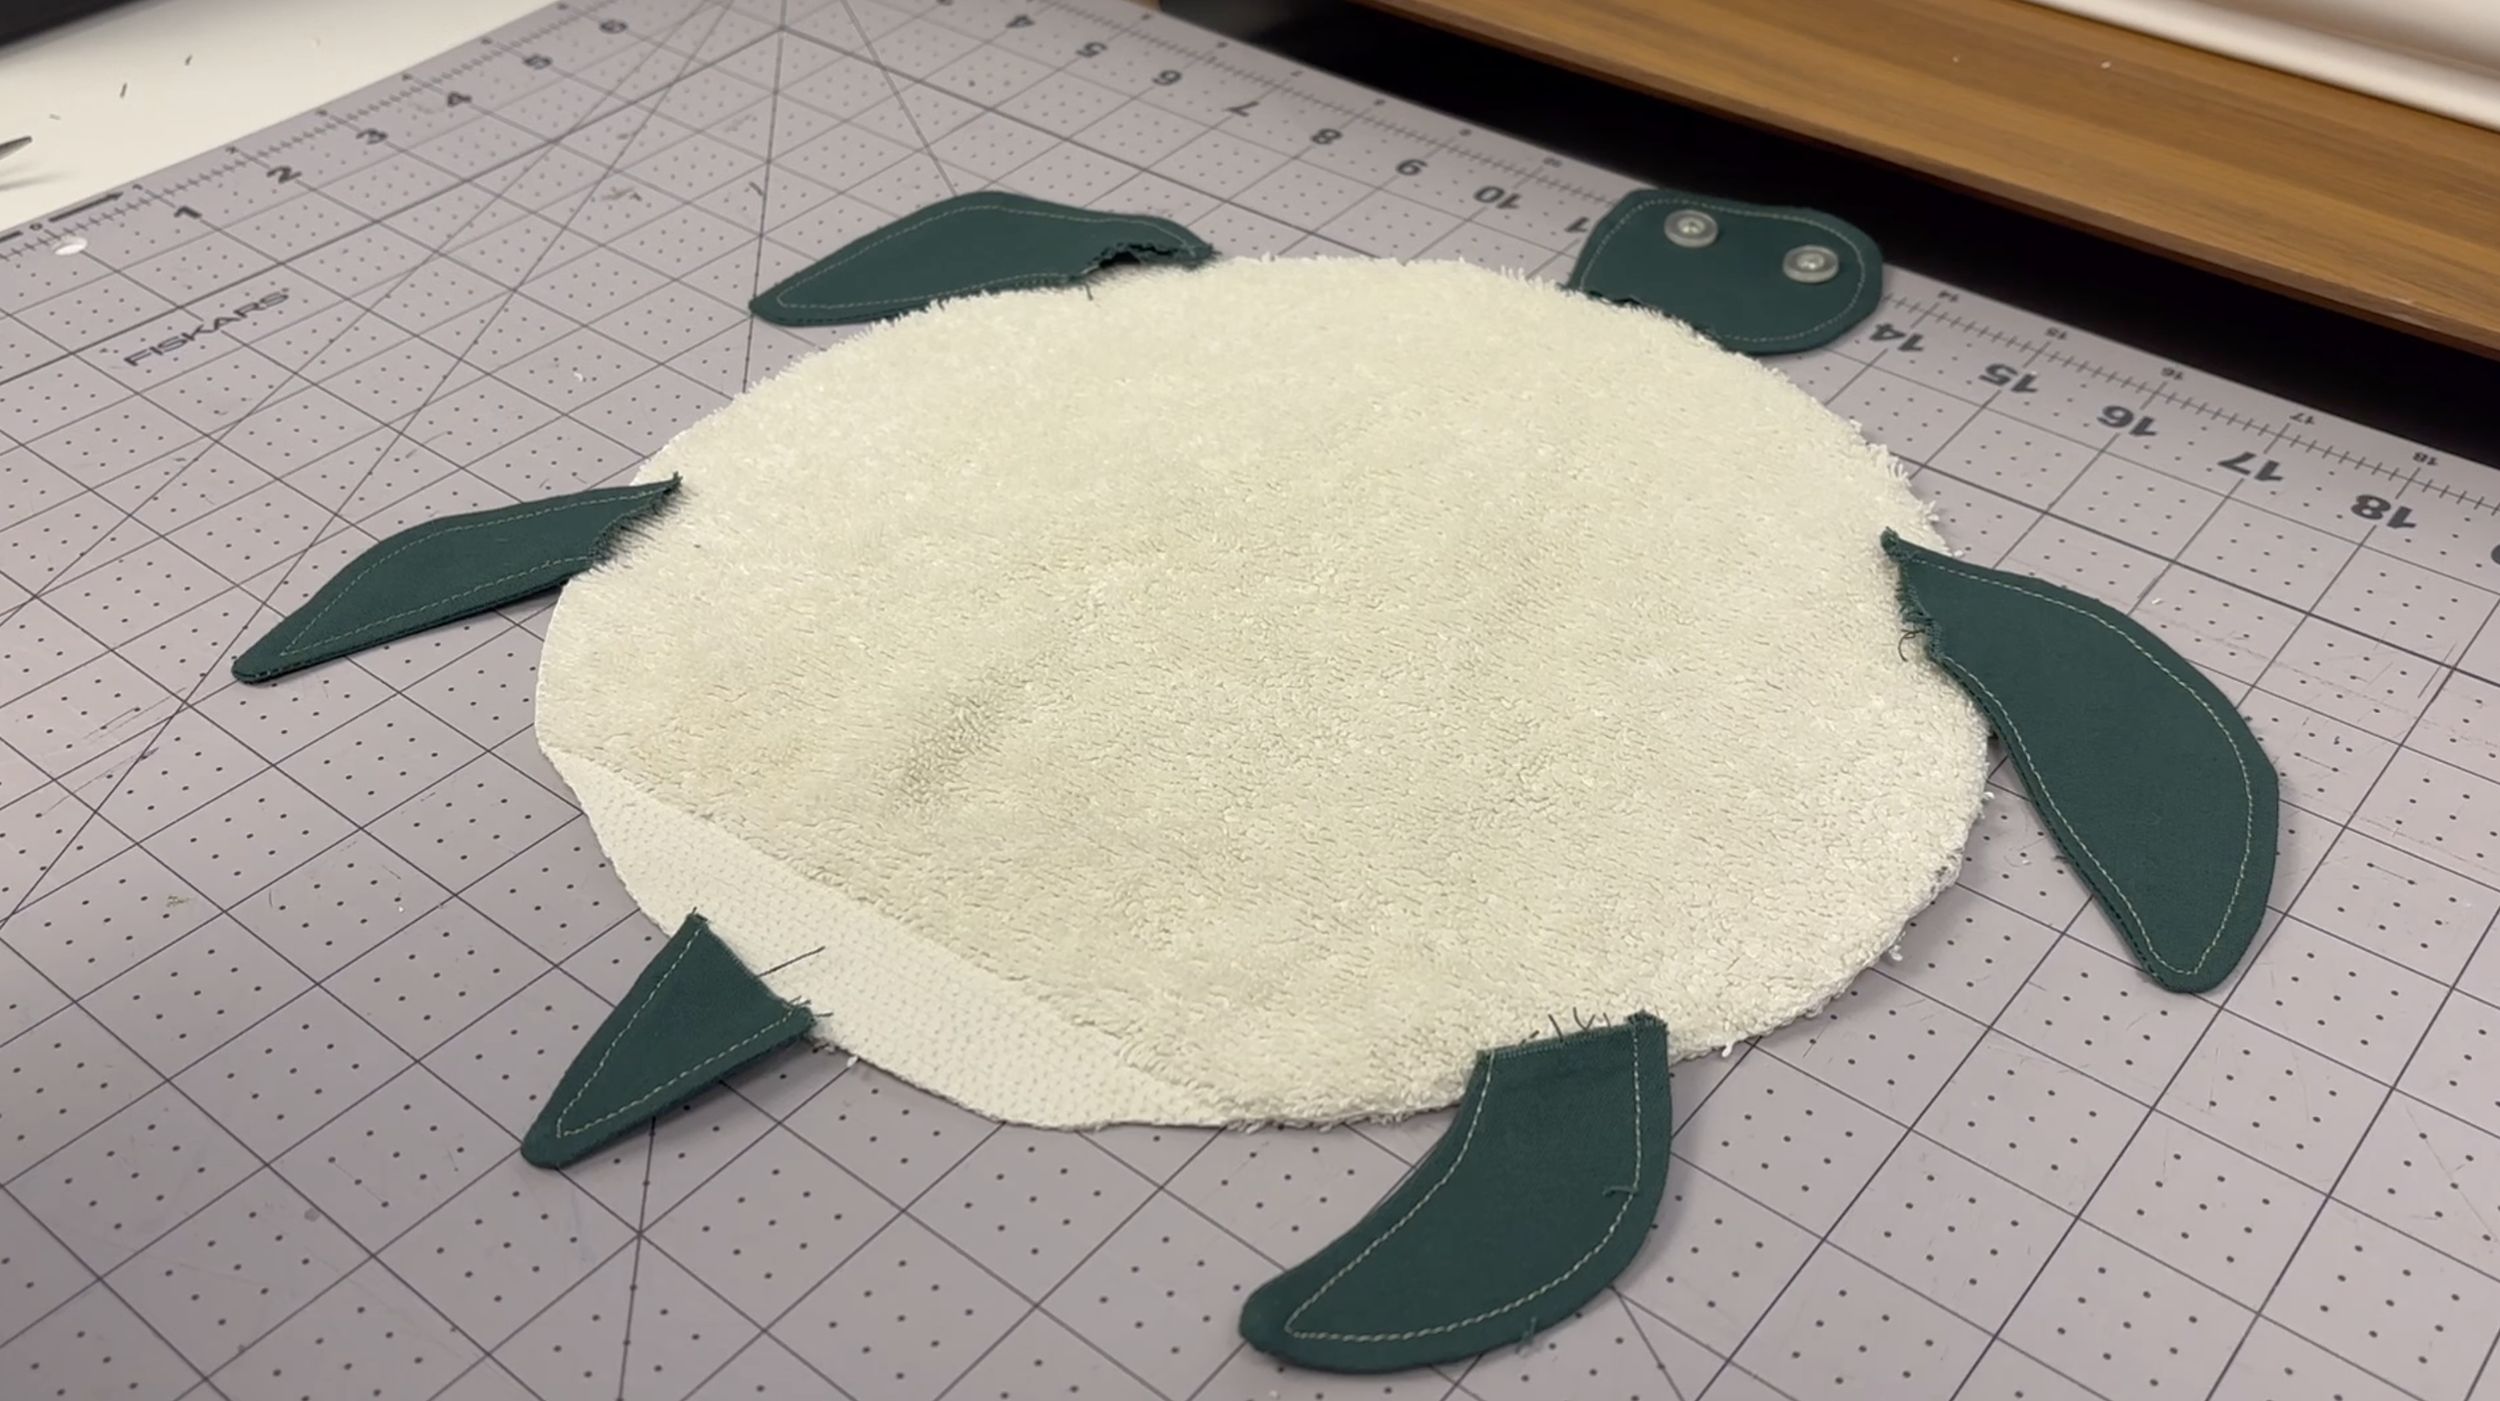
Place the right side of the towel circle in front of you. Place each non-shell piece in their proper spot on the shell.
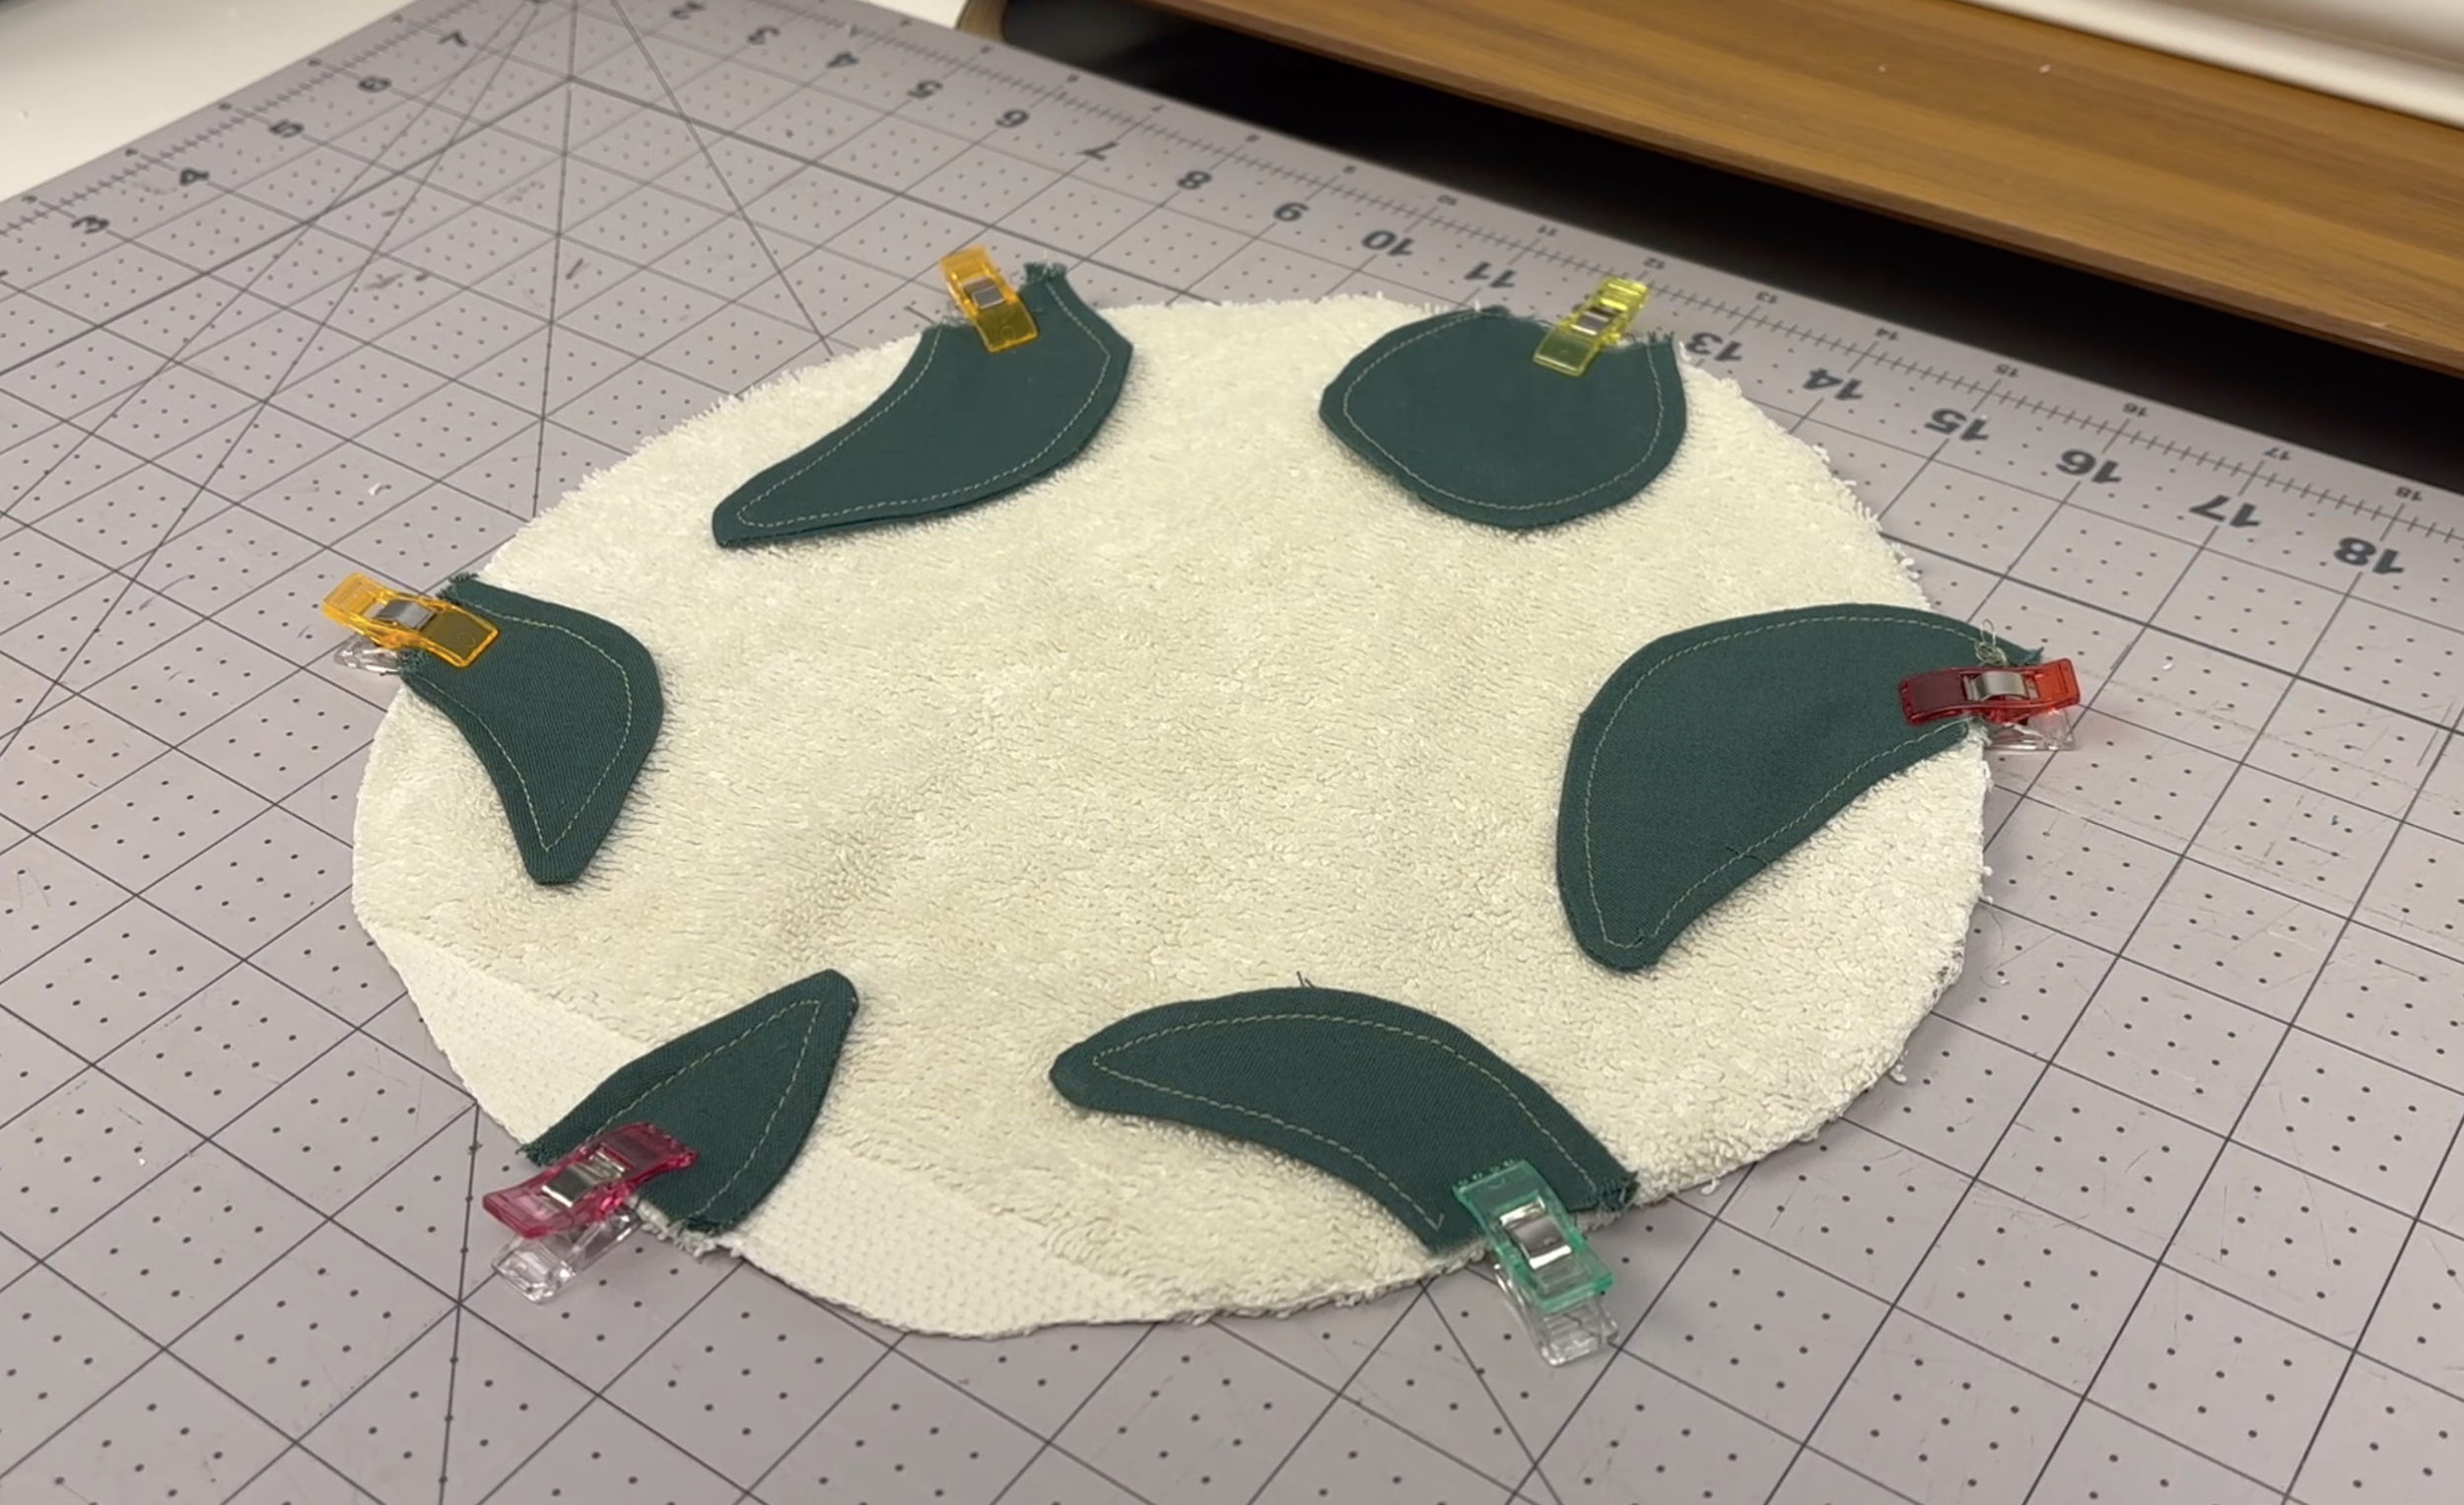
Reflect each non-shell piece into the inner area of the towel circle.
Place the shell fabric circle onto the towel circle with the right side of the fabric facing down.
Use clips and/or pins to secure the circles together and the non-shell areas in place.
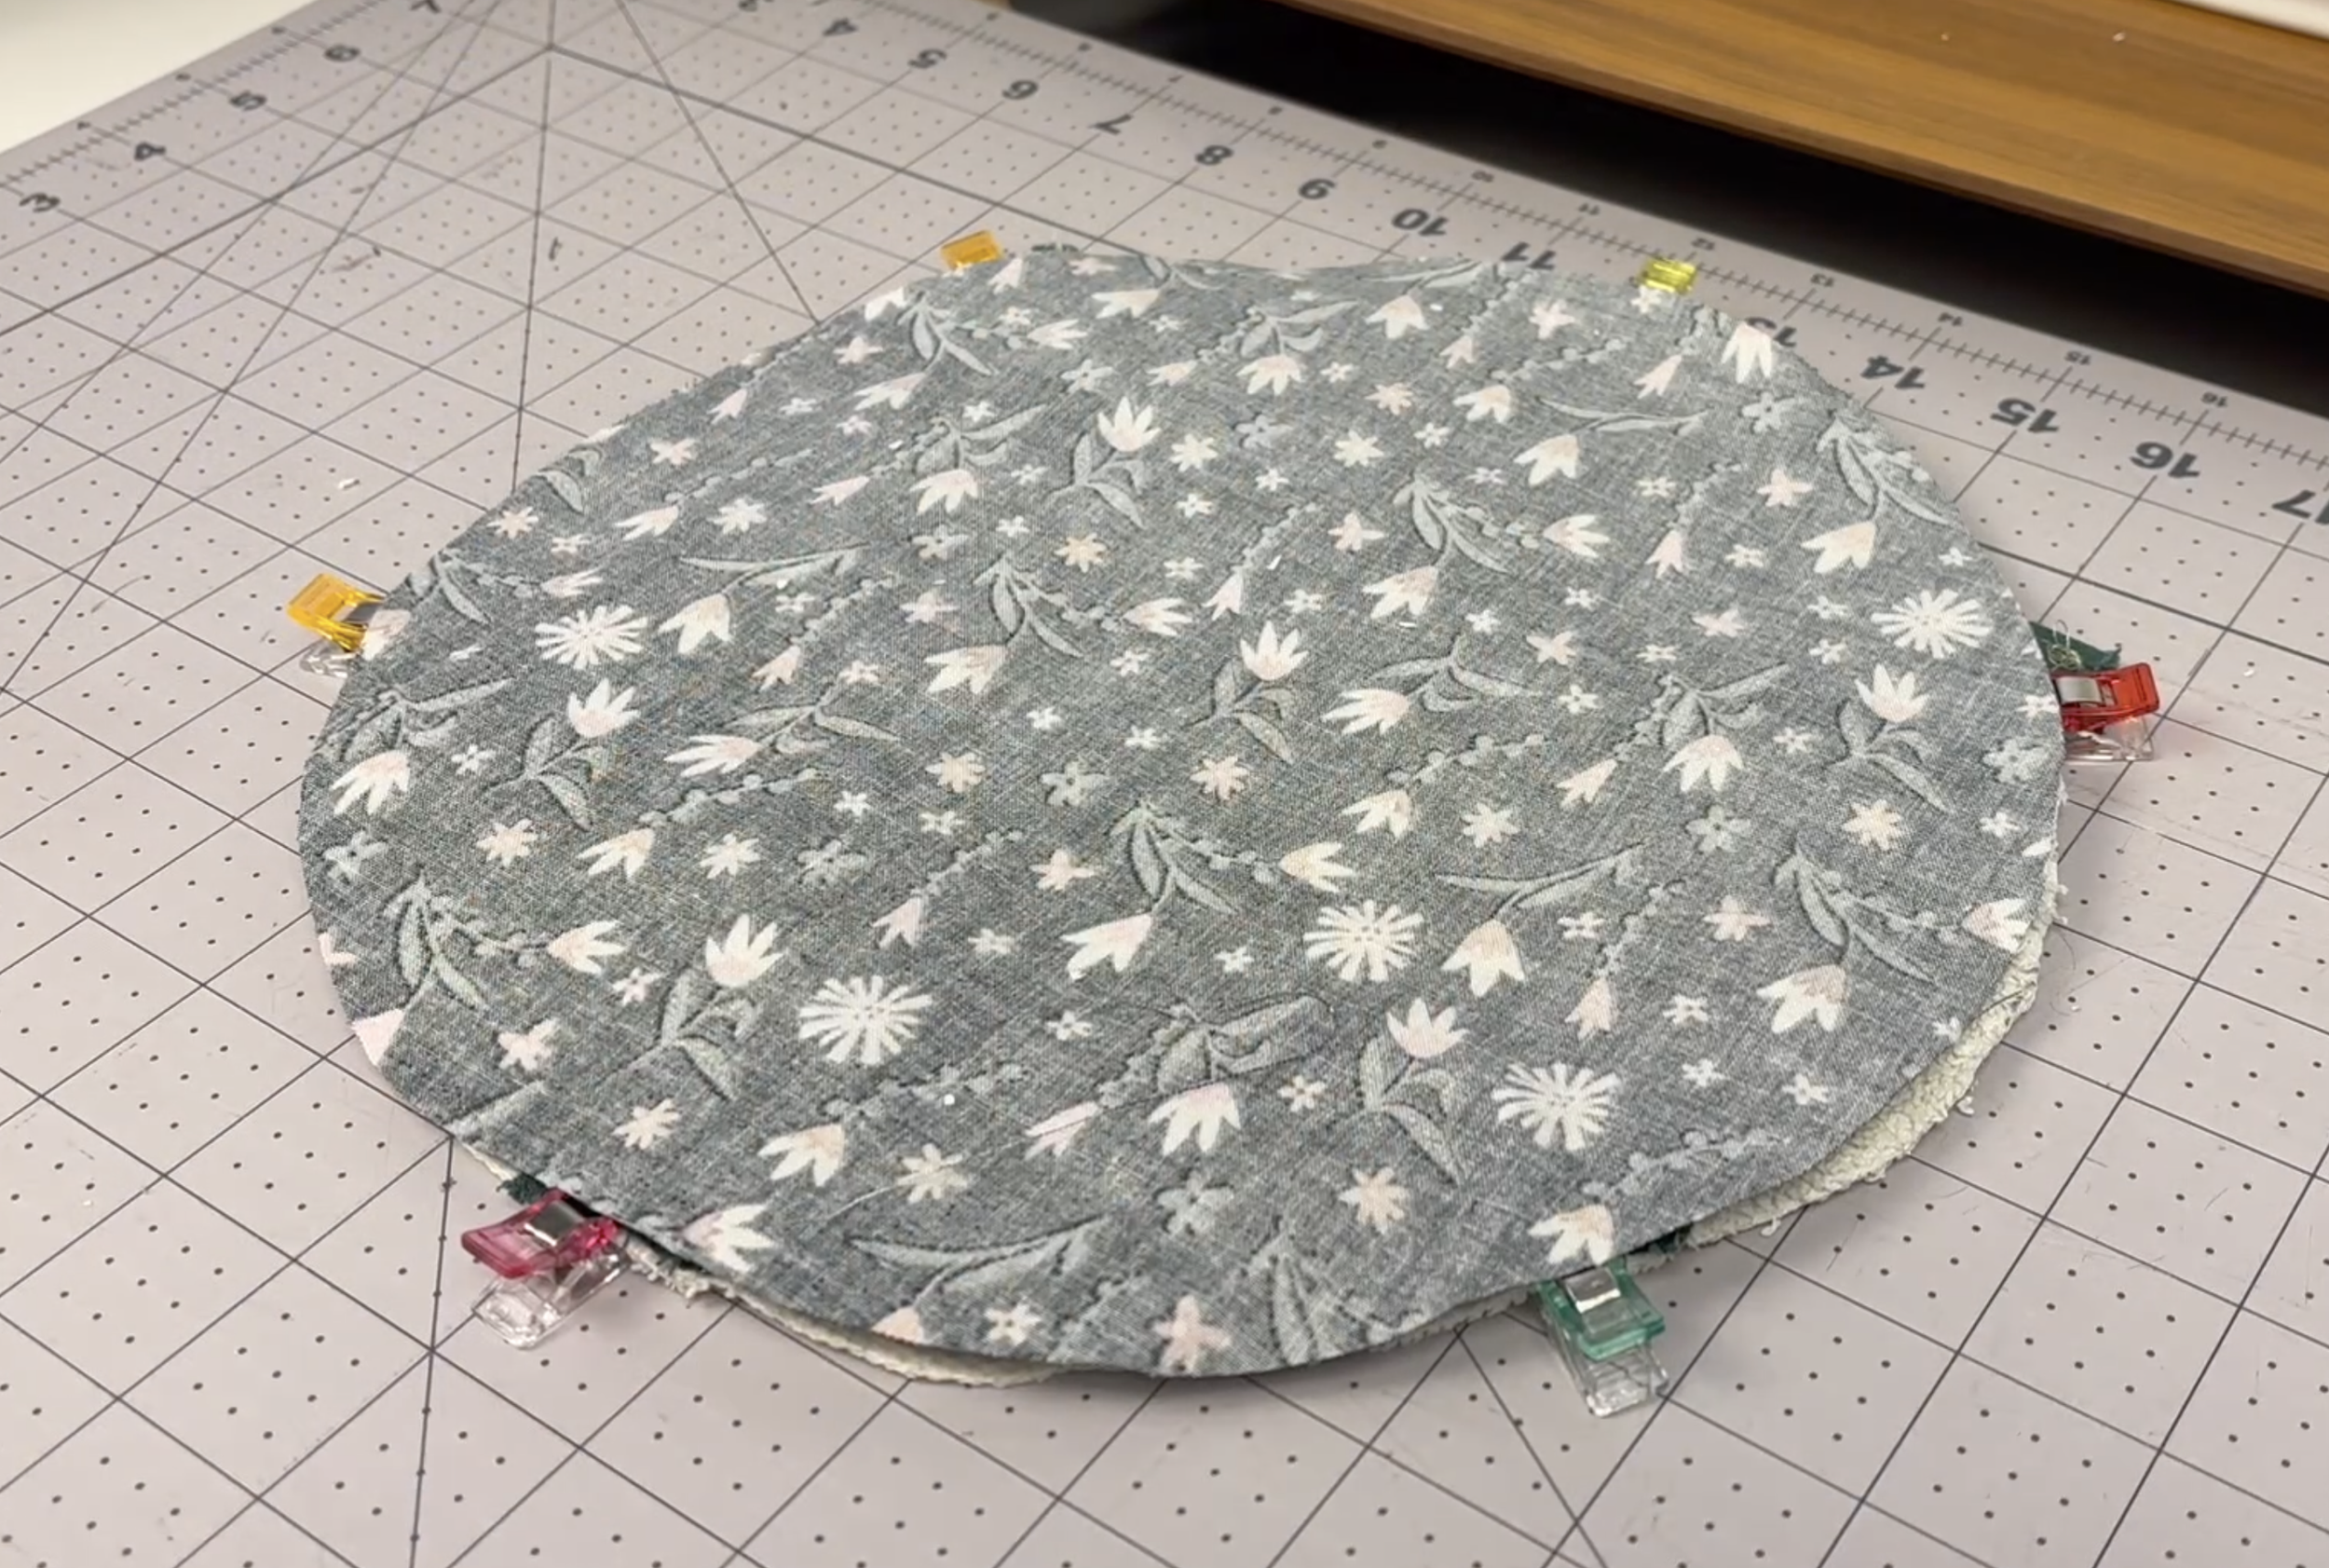
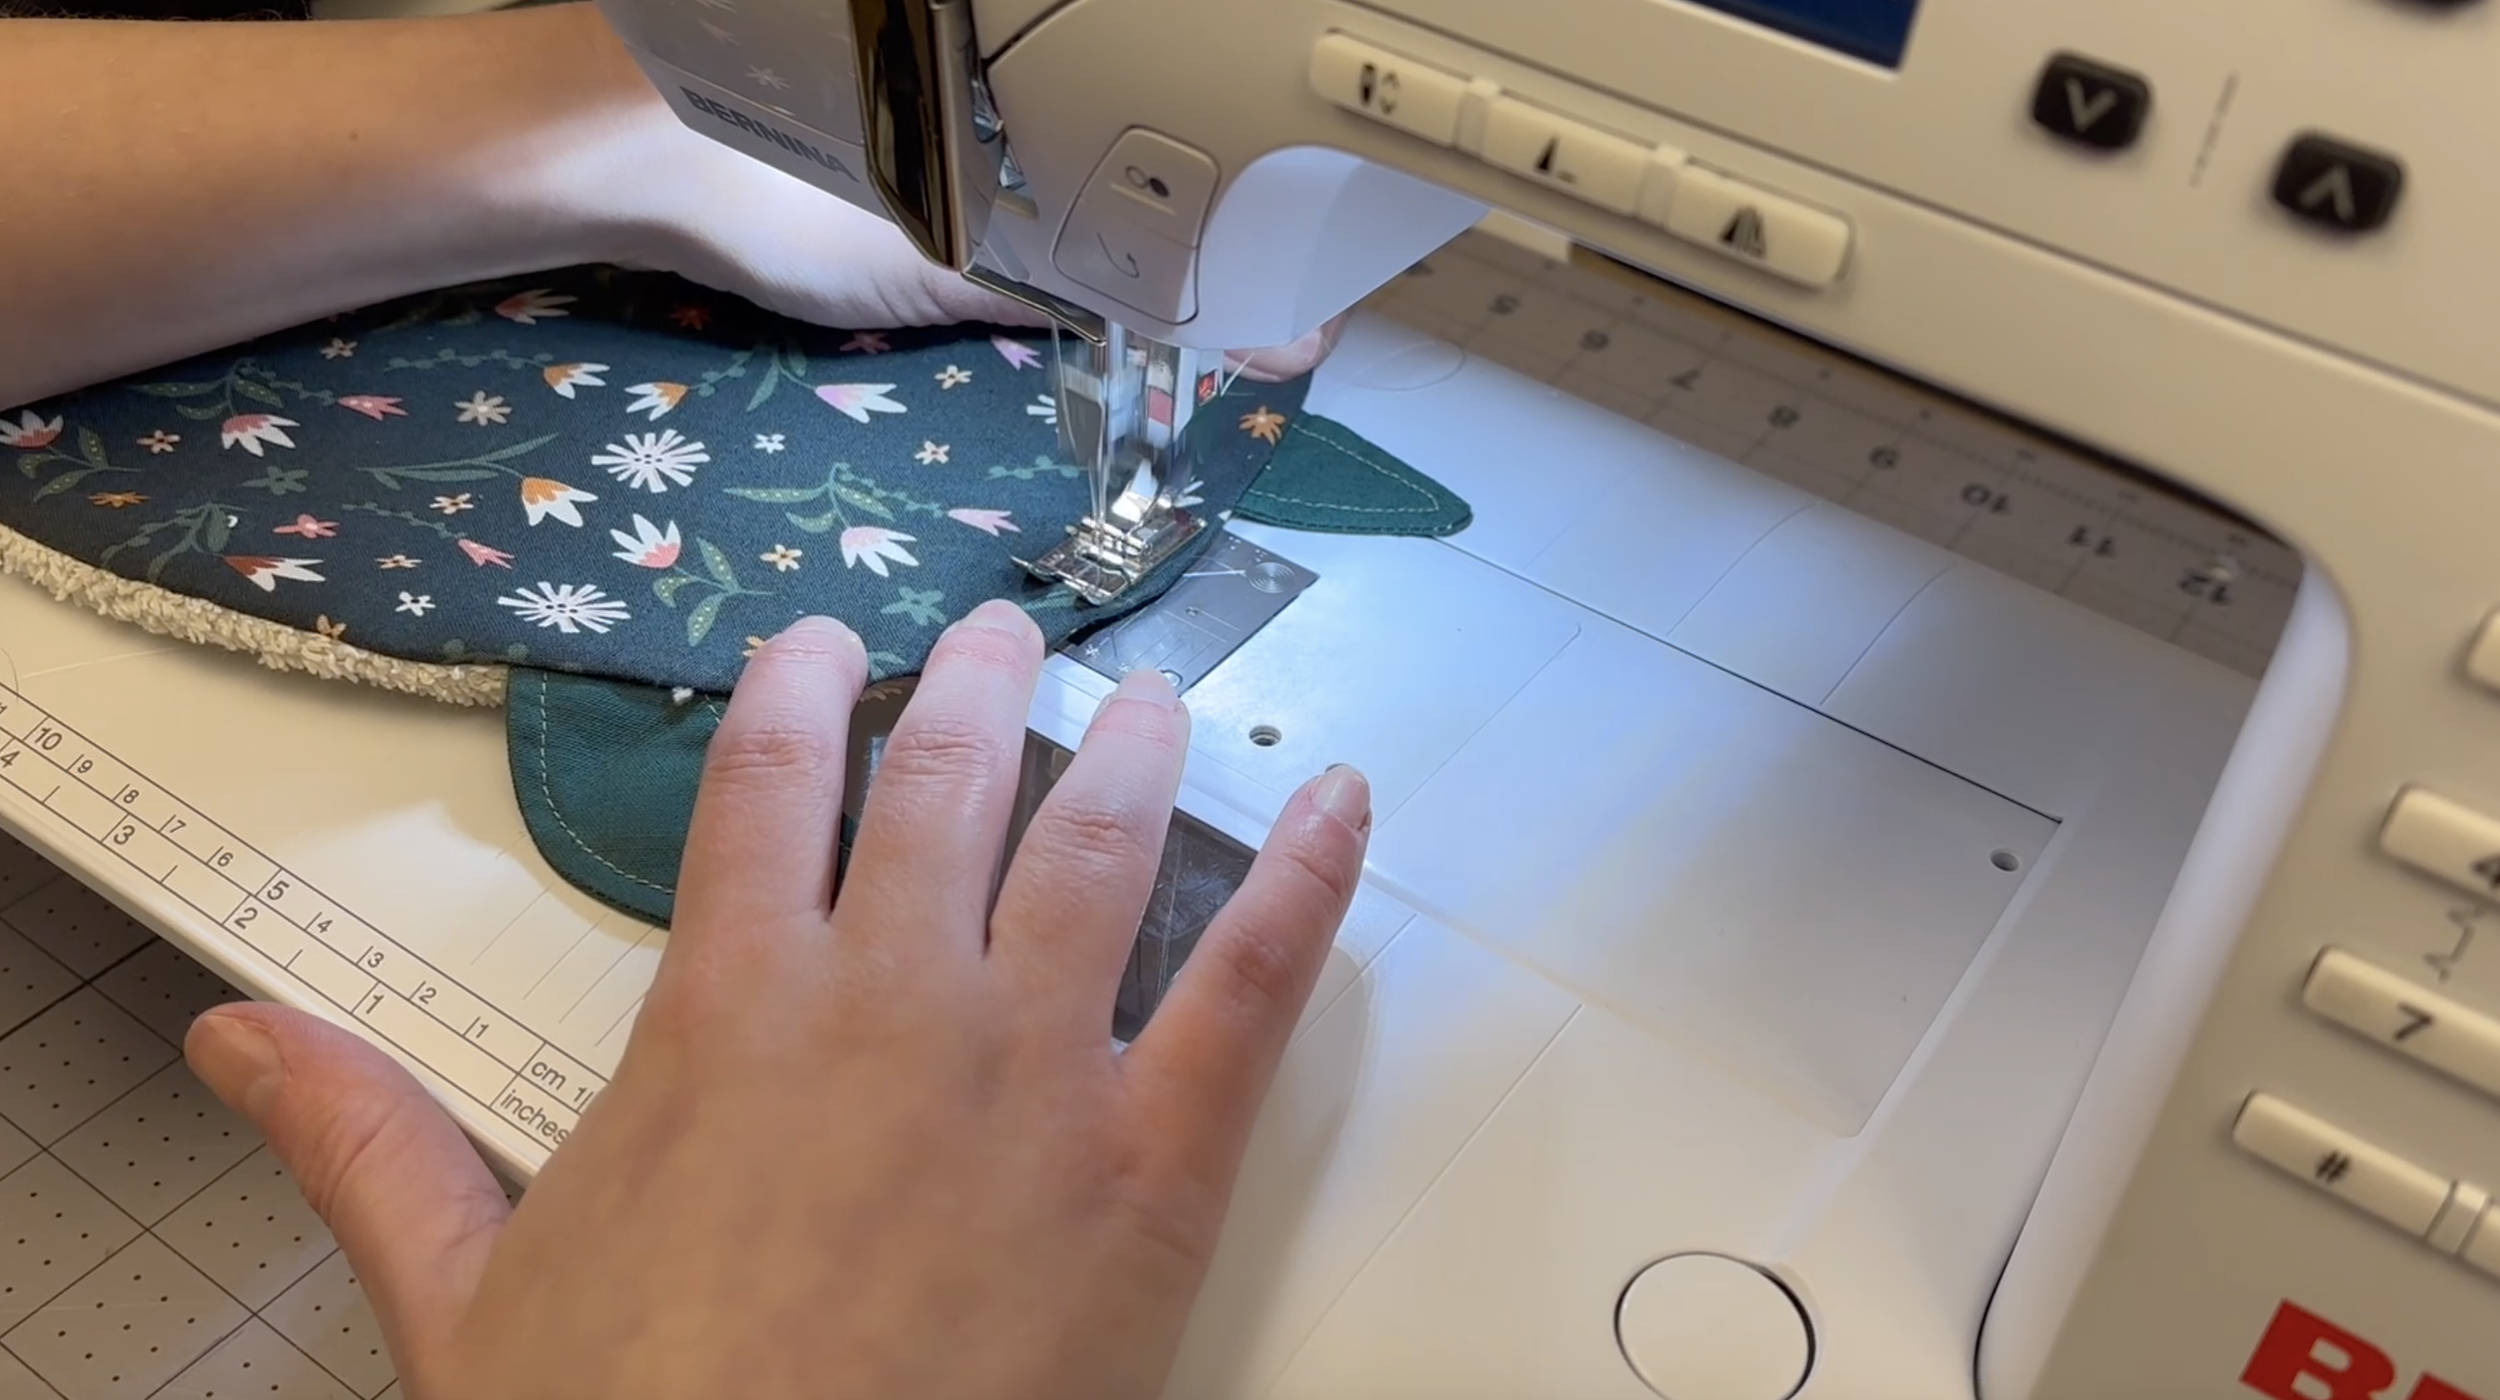
Step 11: Sew Around the Shell
Sew an outline around the circle 3/8 inch to 1/4 inch from the outer edge.
Leave a 2 inch opening.
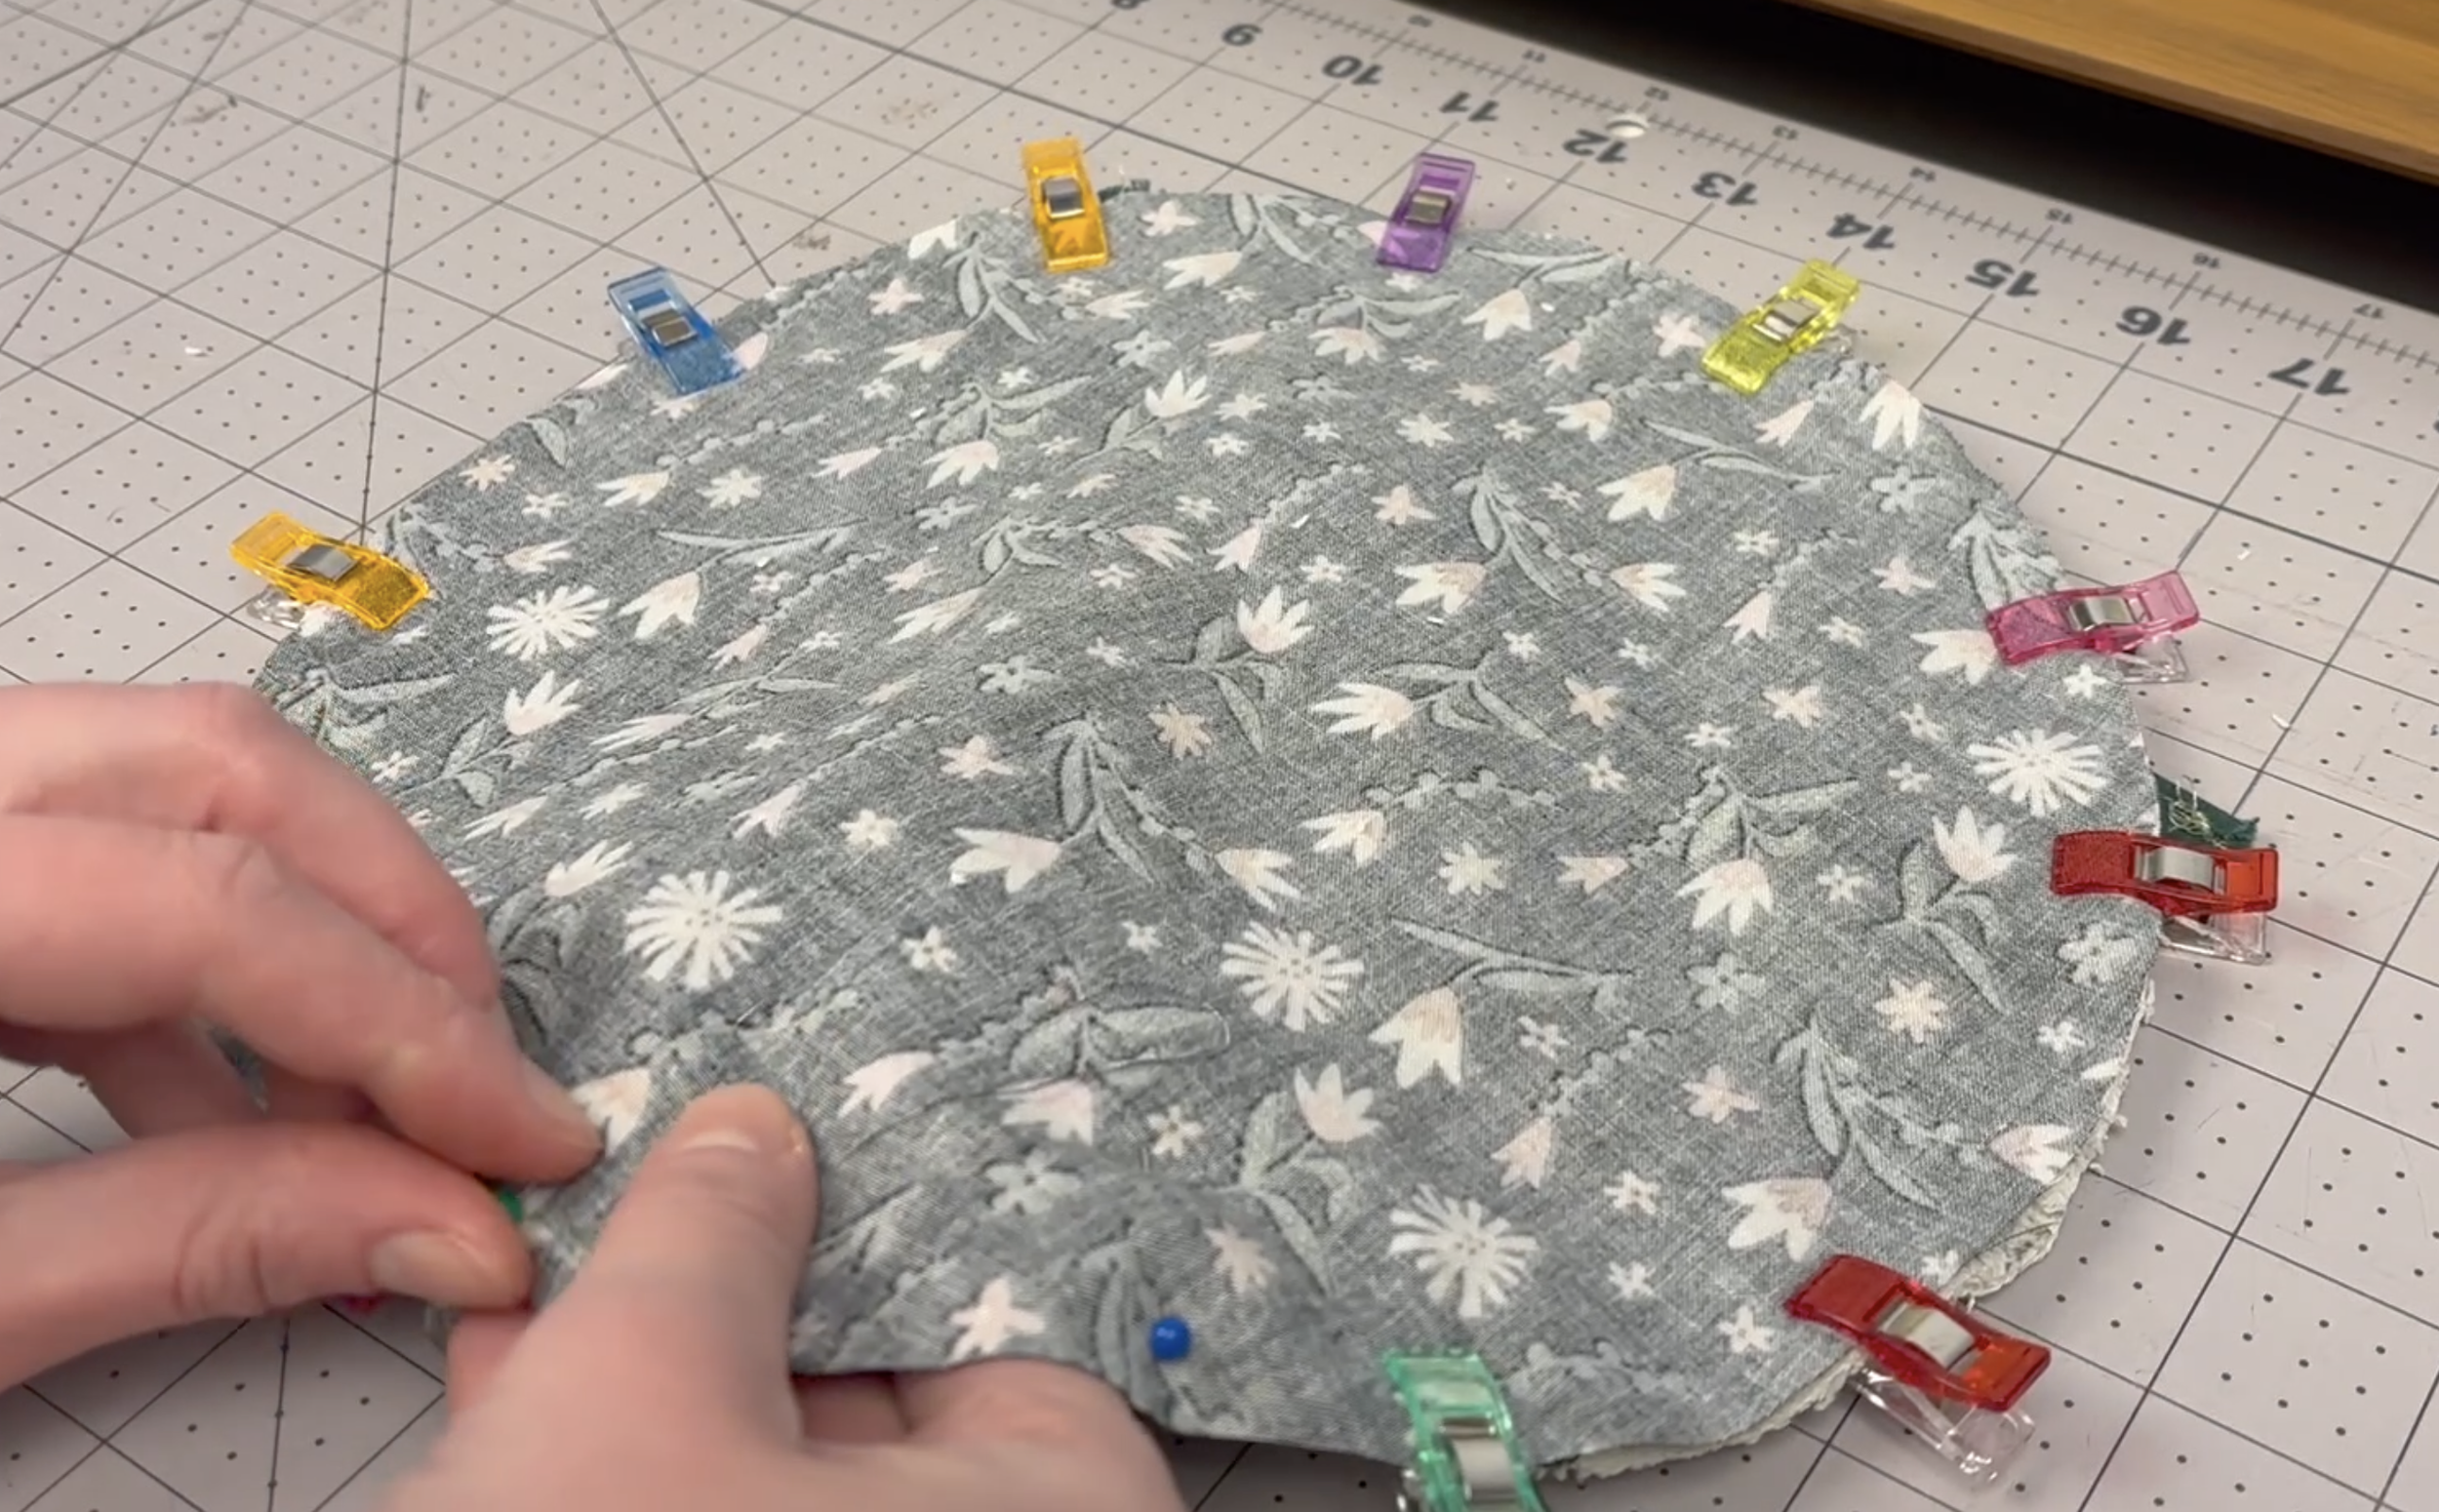
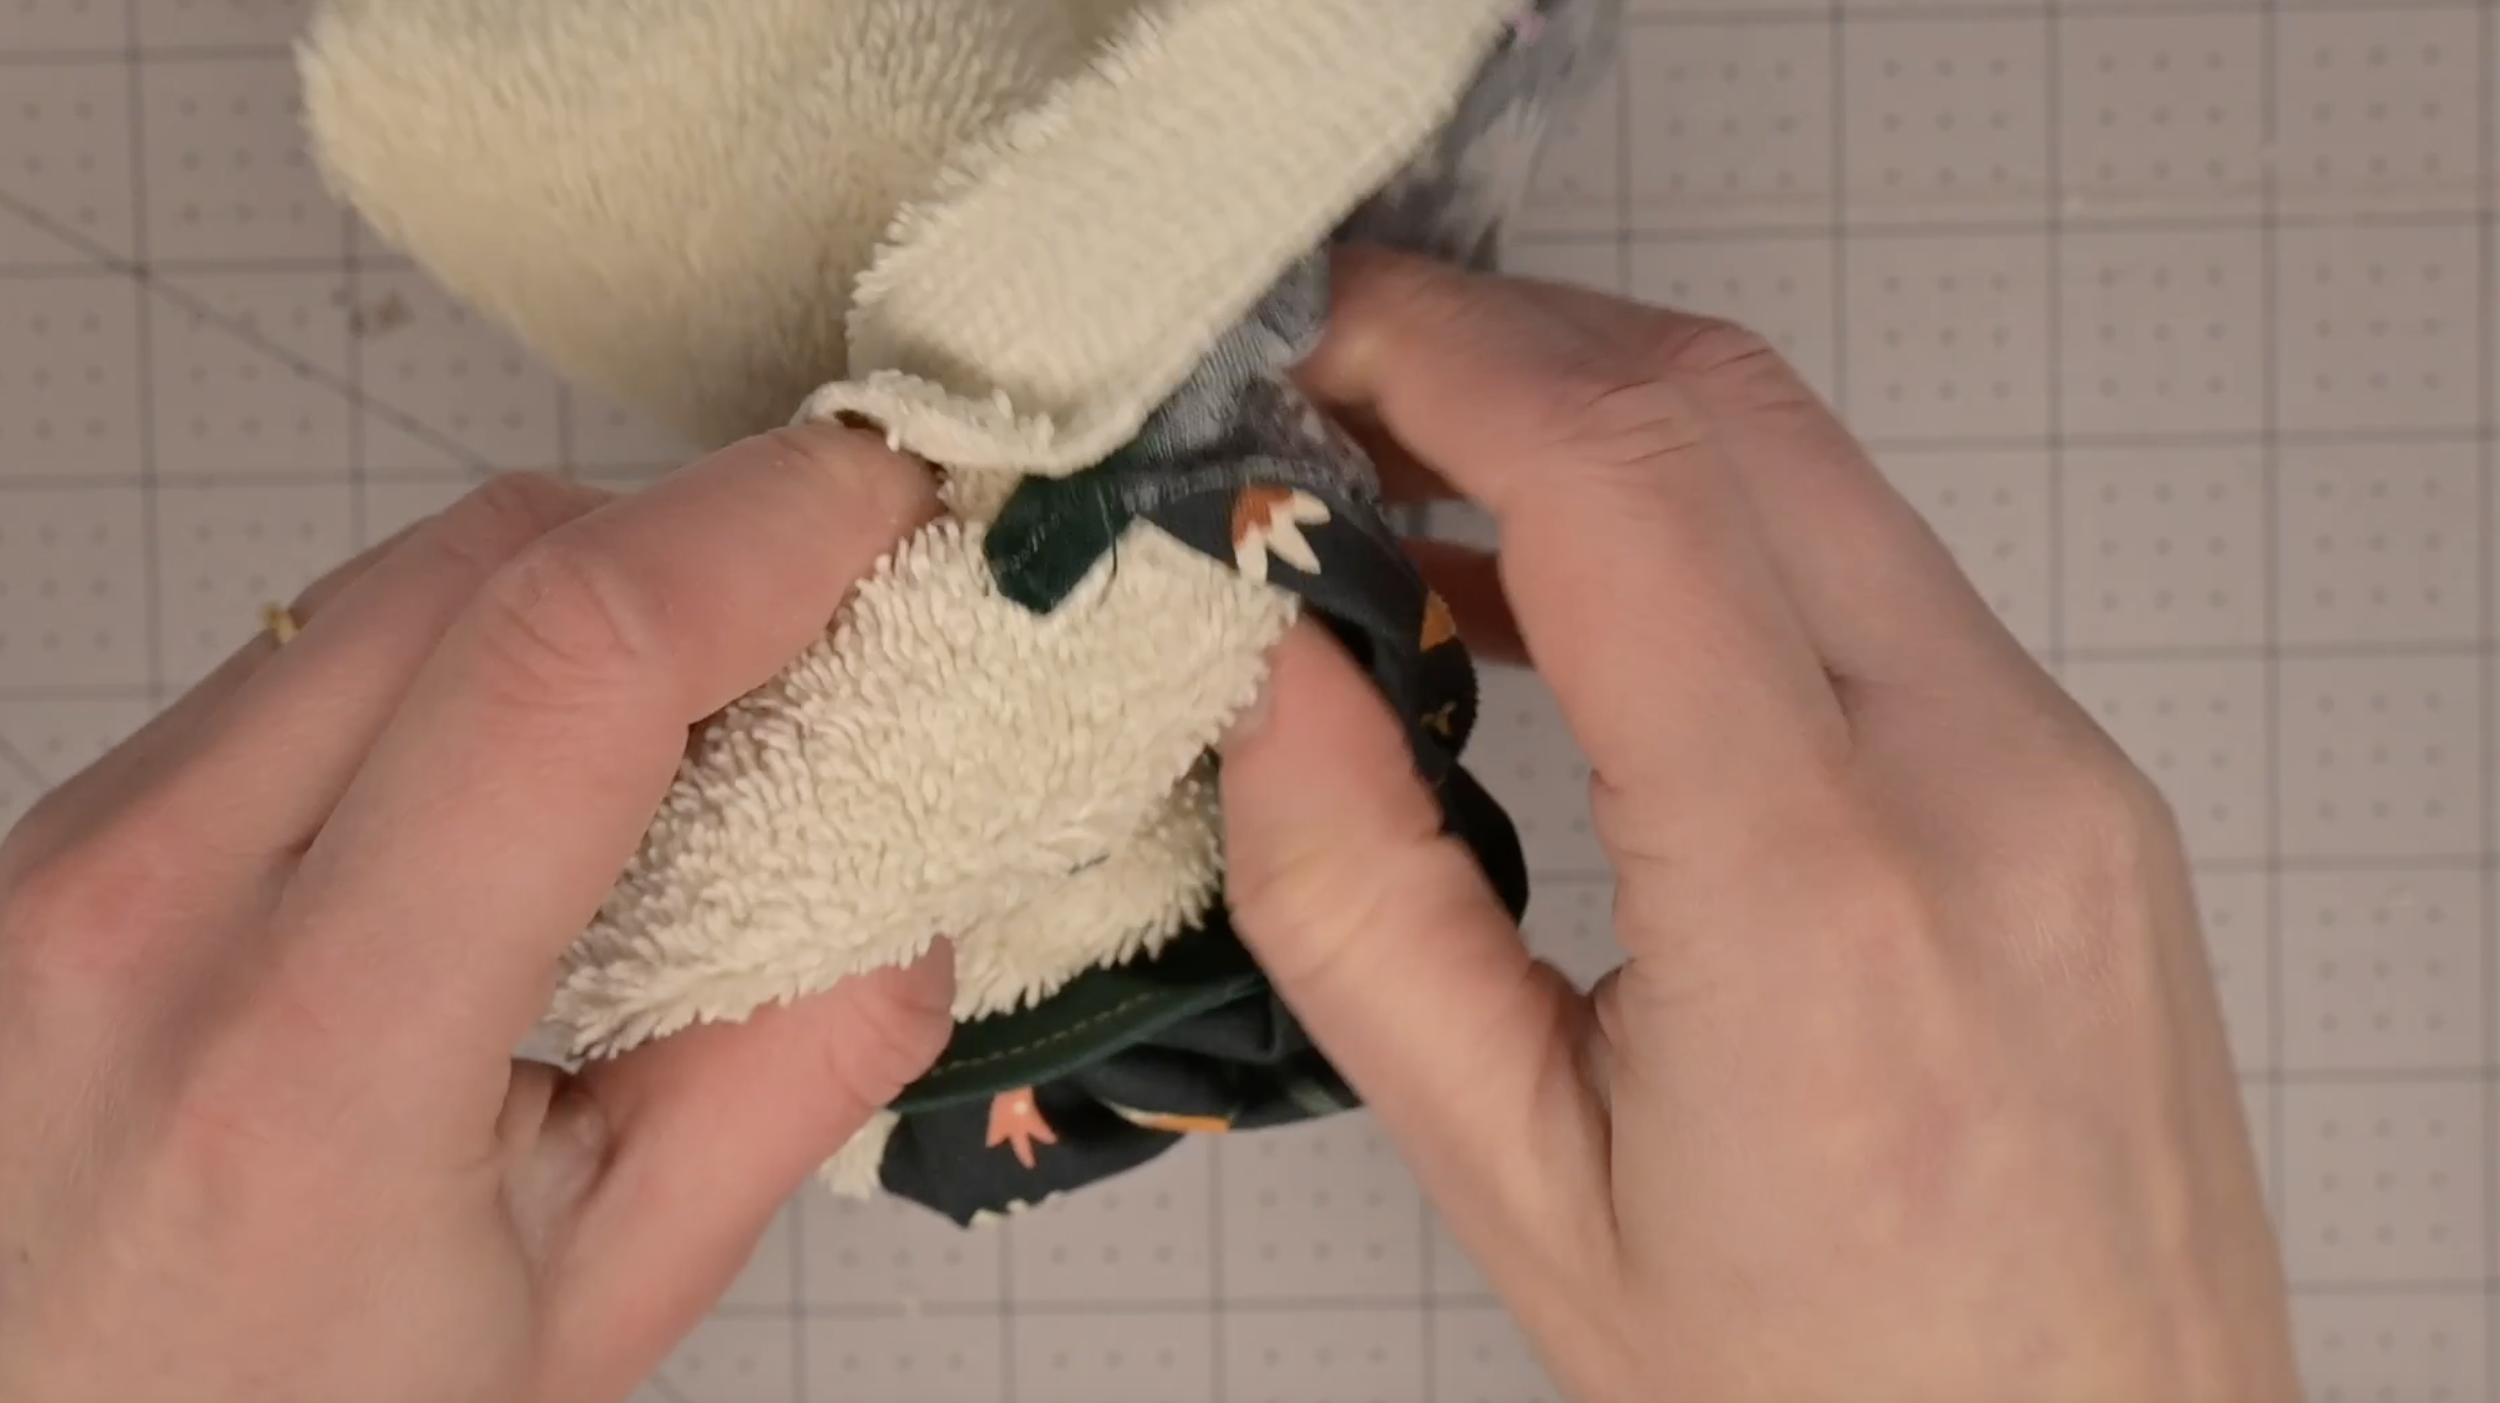
Step 12: Flip Shell Right-Side Out
Flip the shell right-side out through the 2 inch opening.
Step 13: Iron Turtle Flat
Fold the 2 inch fabric opening into the shell. Iron the opening area to close the shell. Use a clip or pin to secure shut.
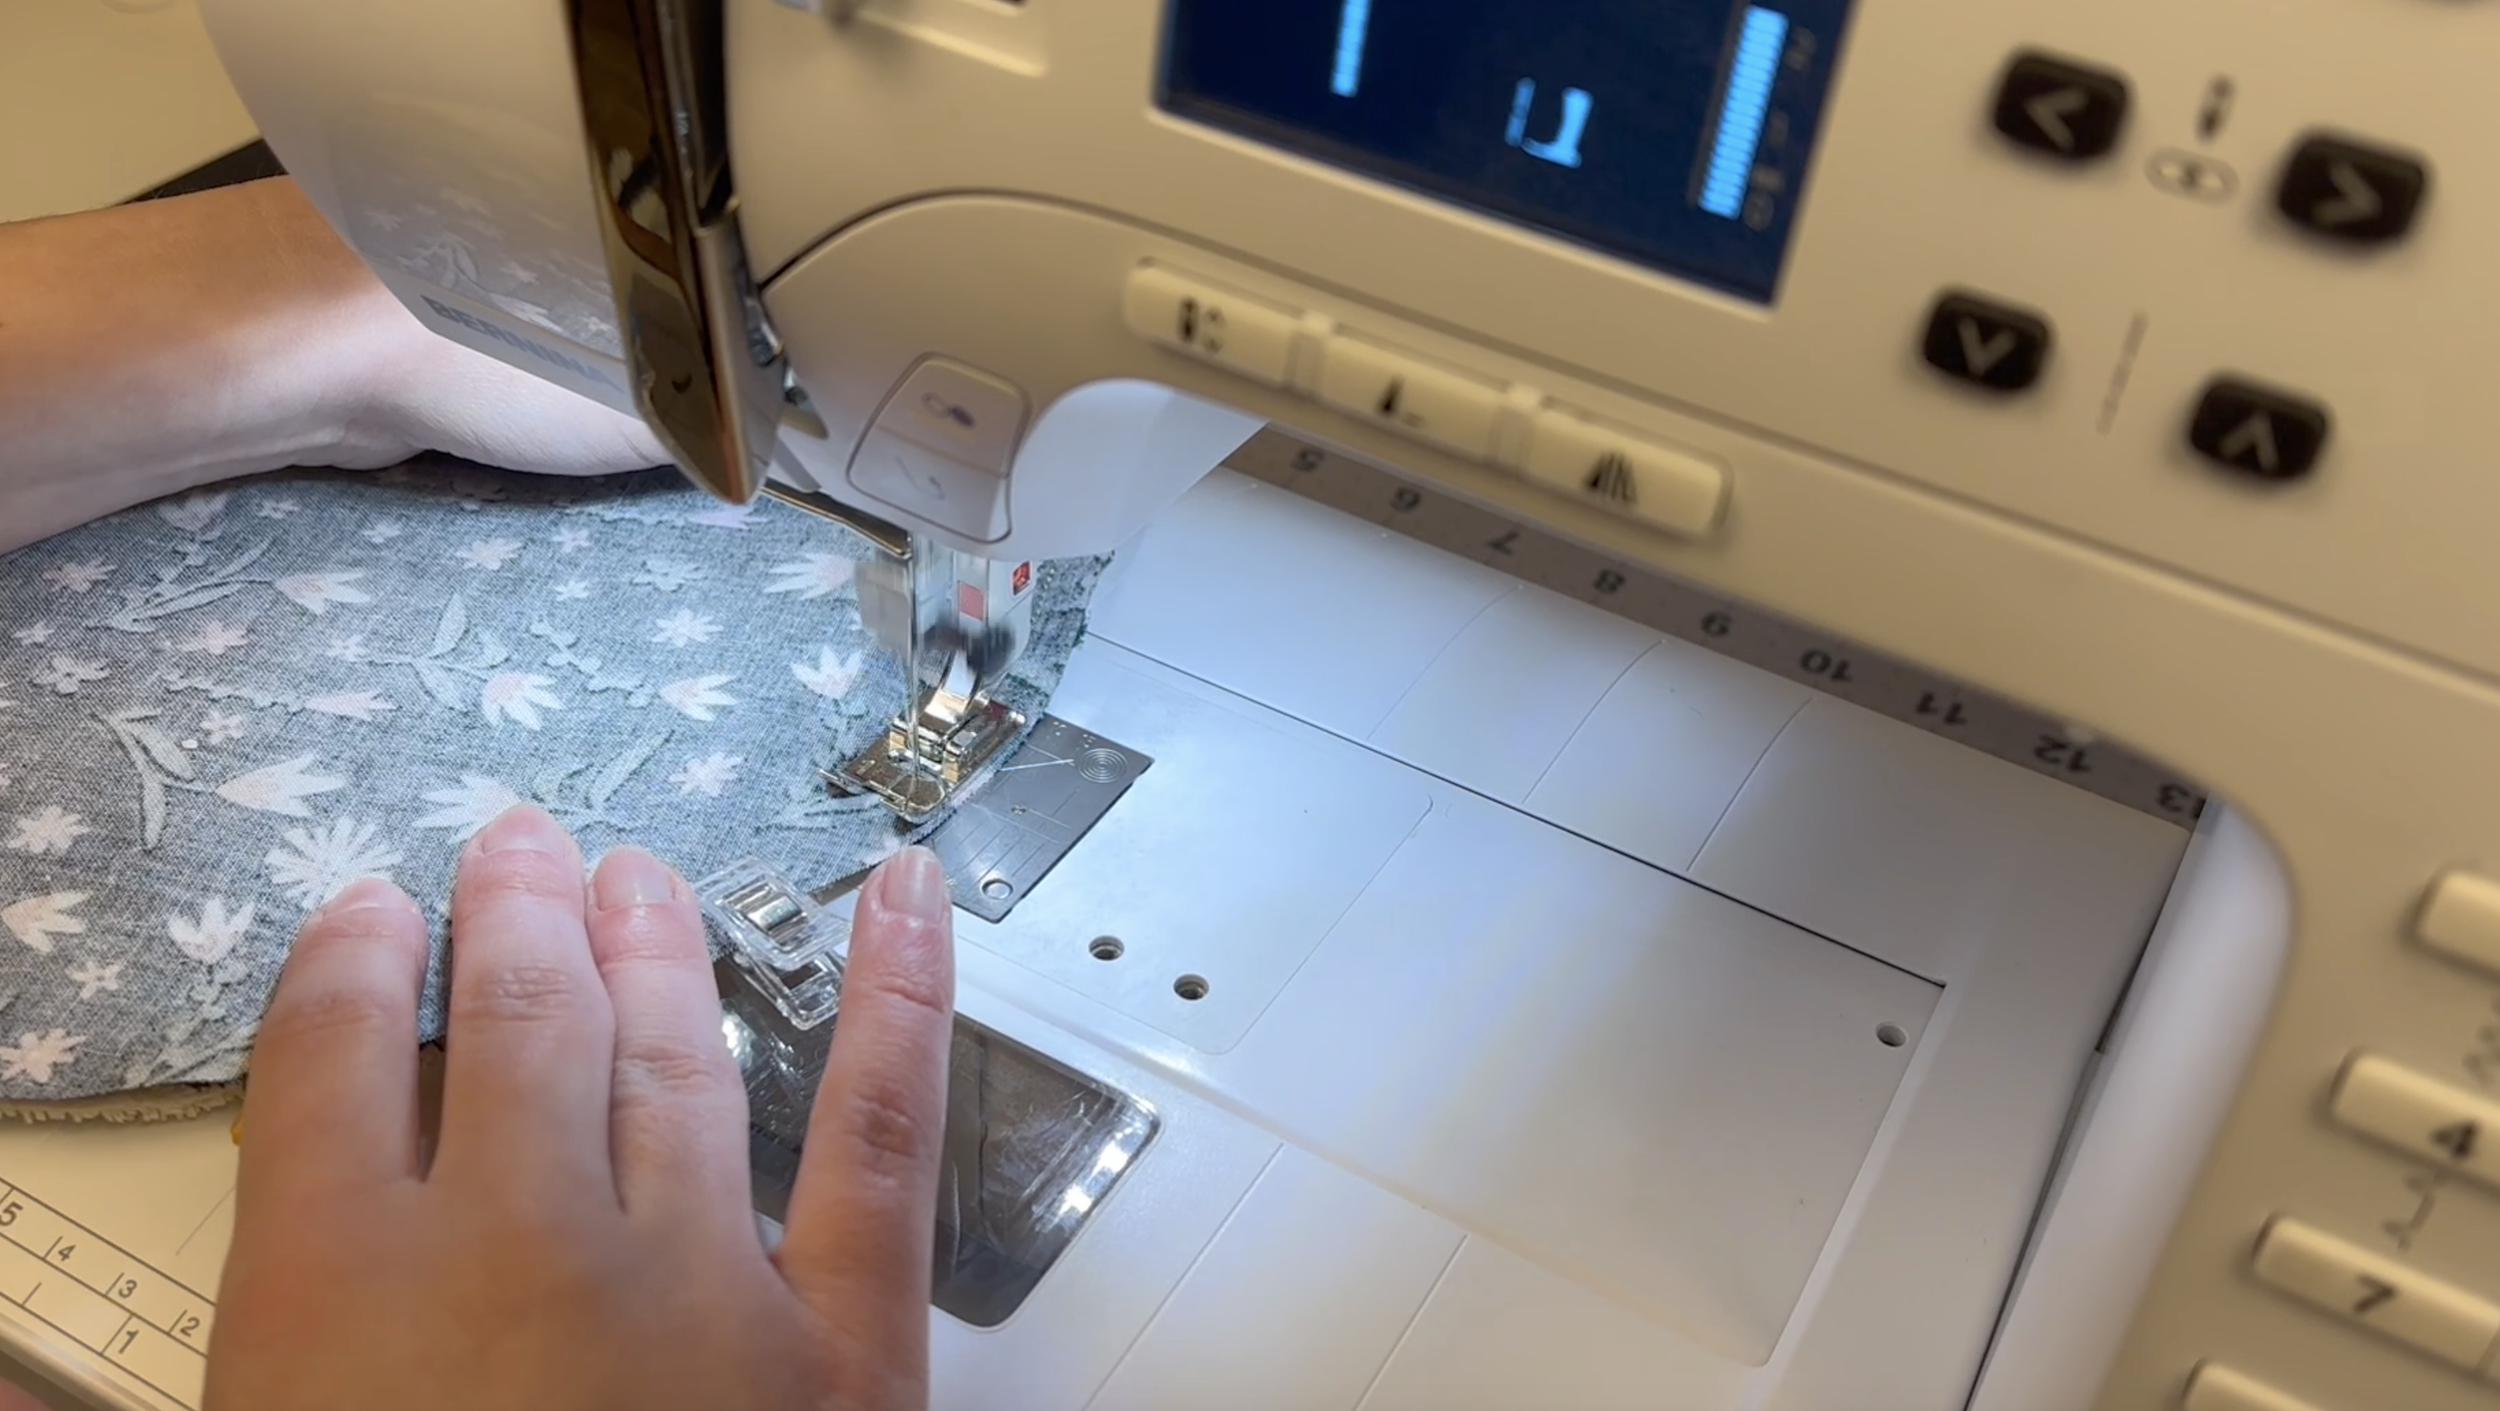
Step 14: Close the Shell
Sew an outline around the circle 3/8 inch to 1/4 inch from the outer edge.
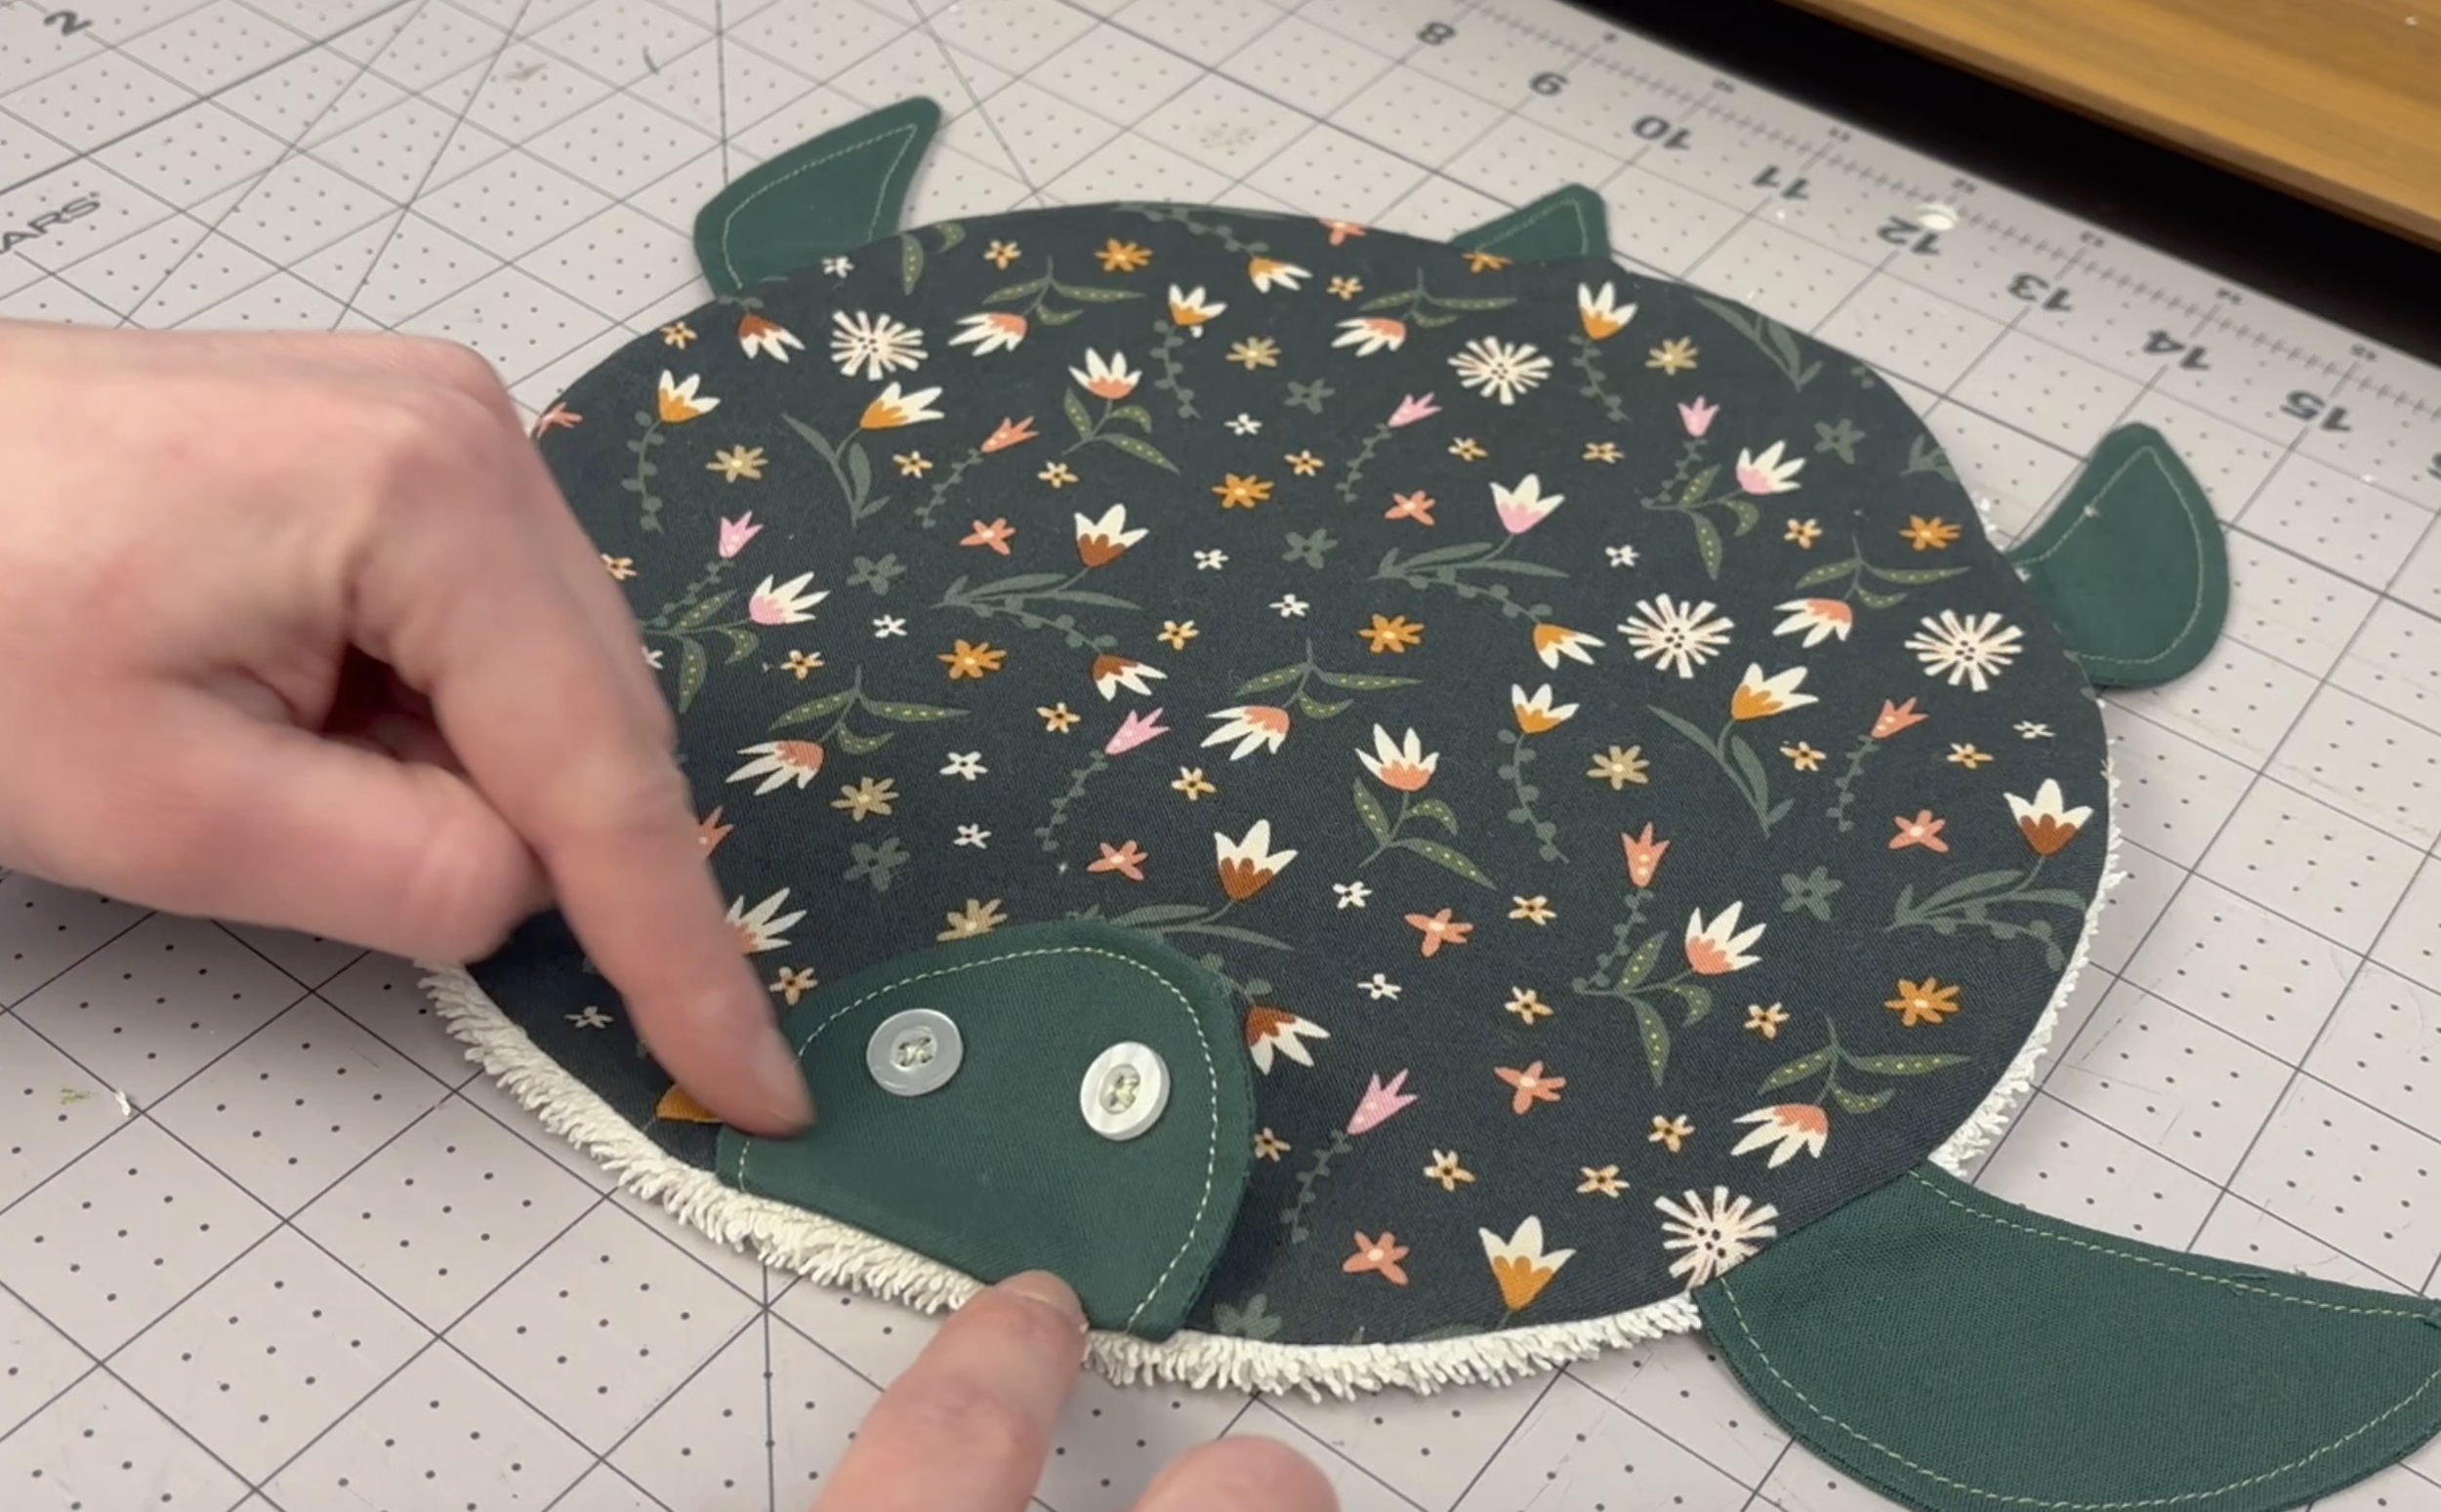
If you would like the turtle head to not be flat, fold the turtle inward before sewing the circle outline.
In order to do this, when securing the head, have the button eyes facing towards the bottom in step 10.