
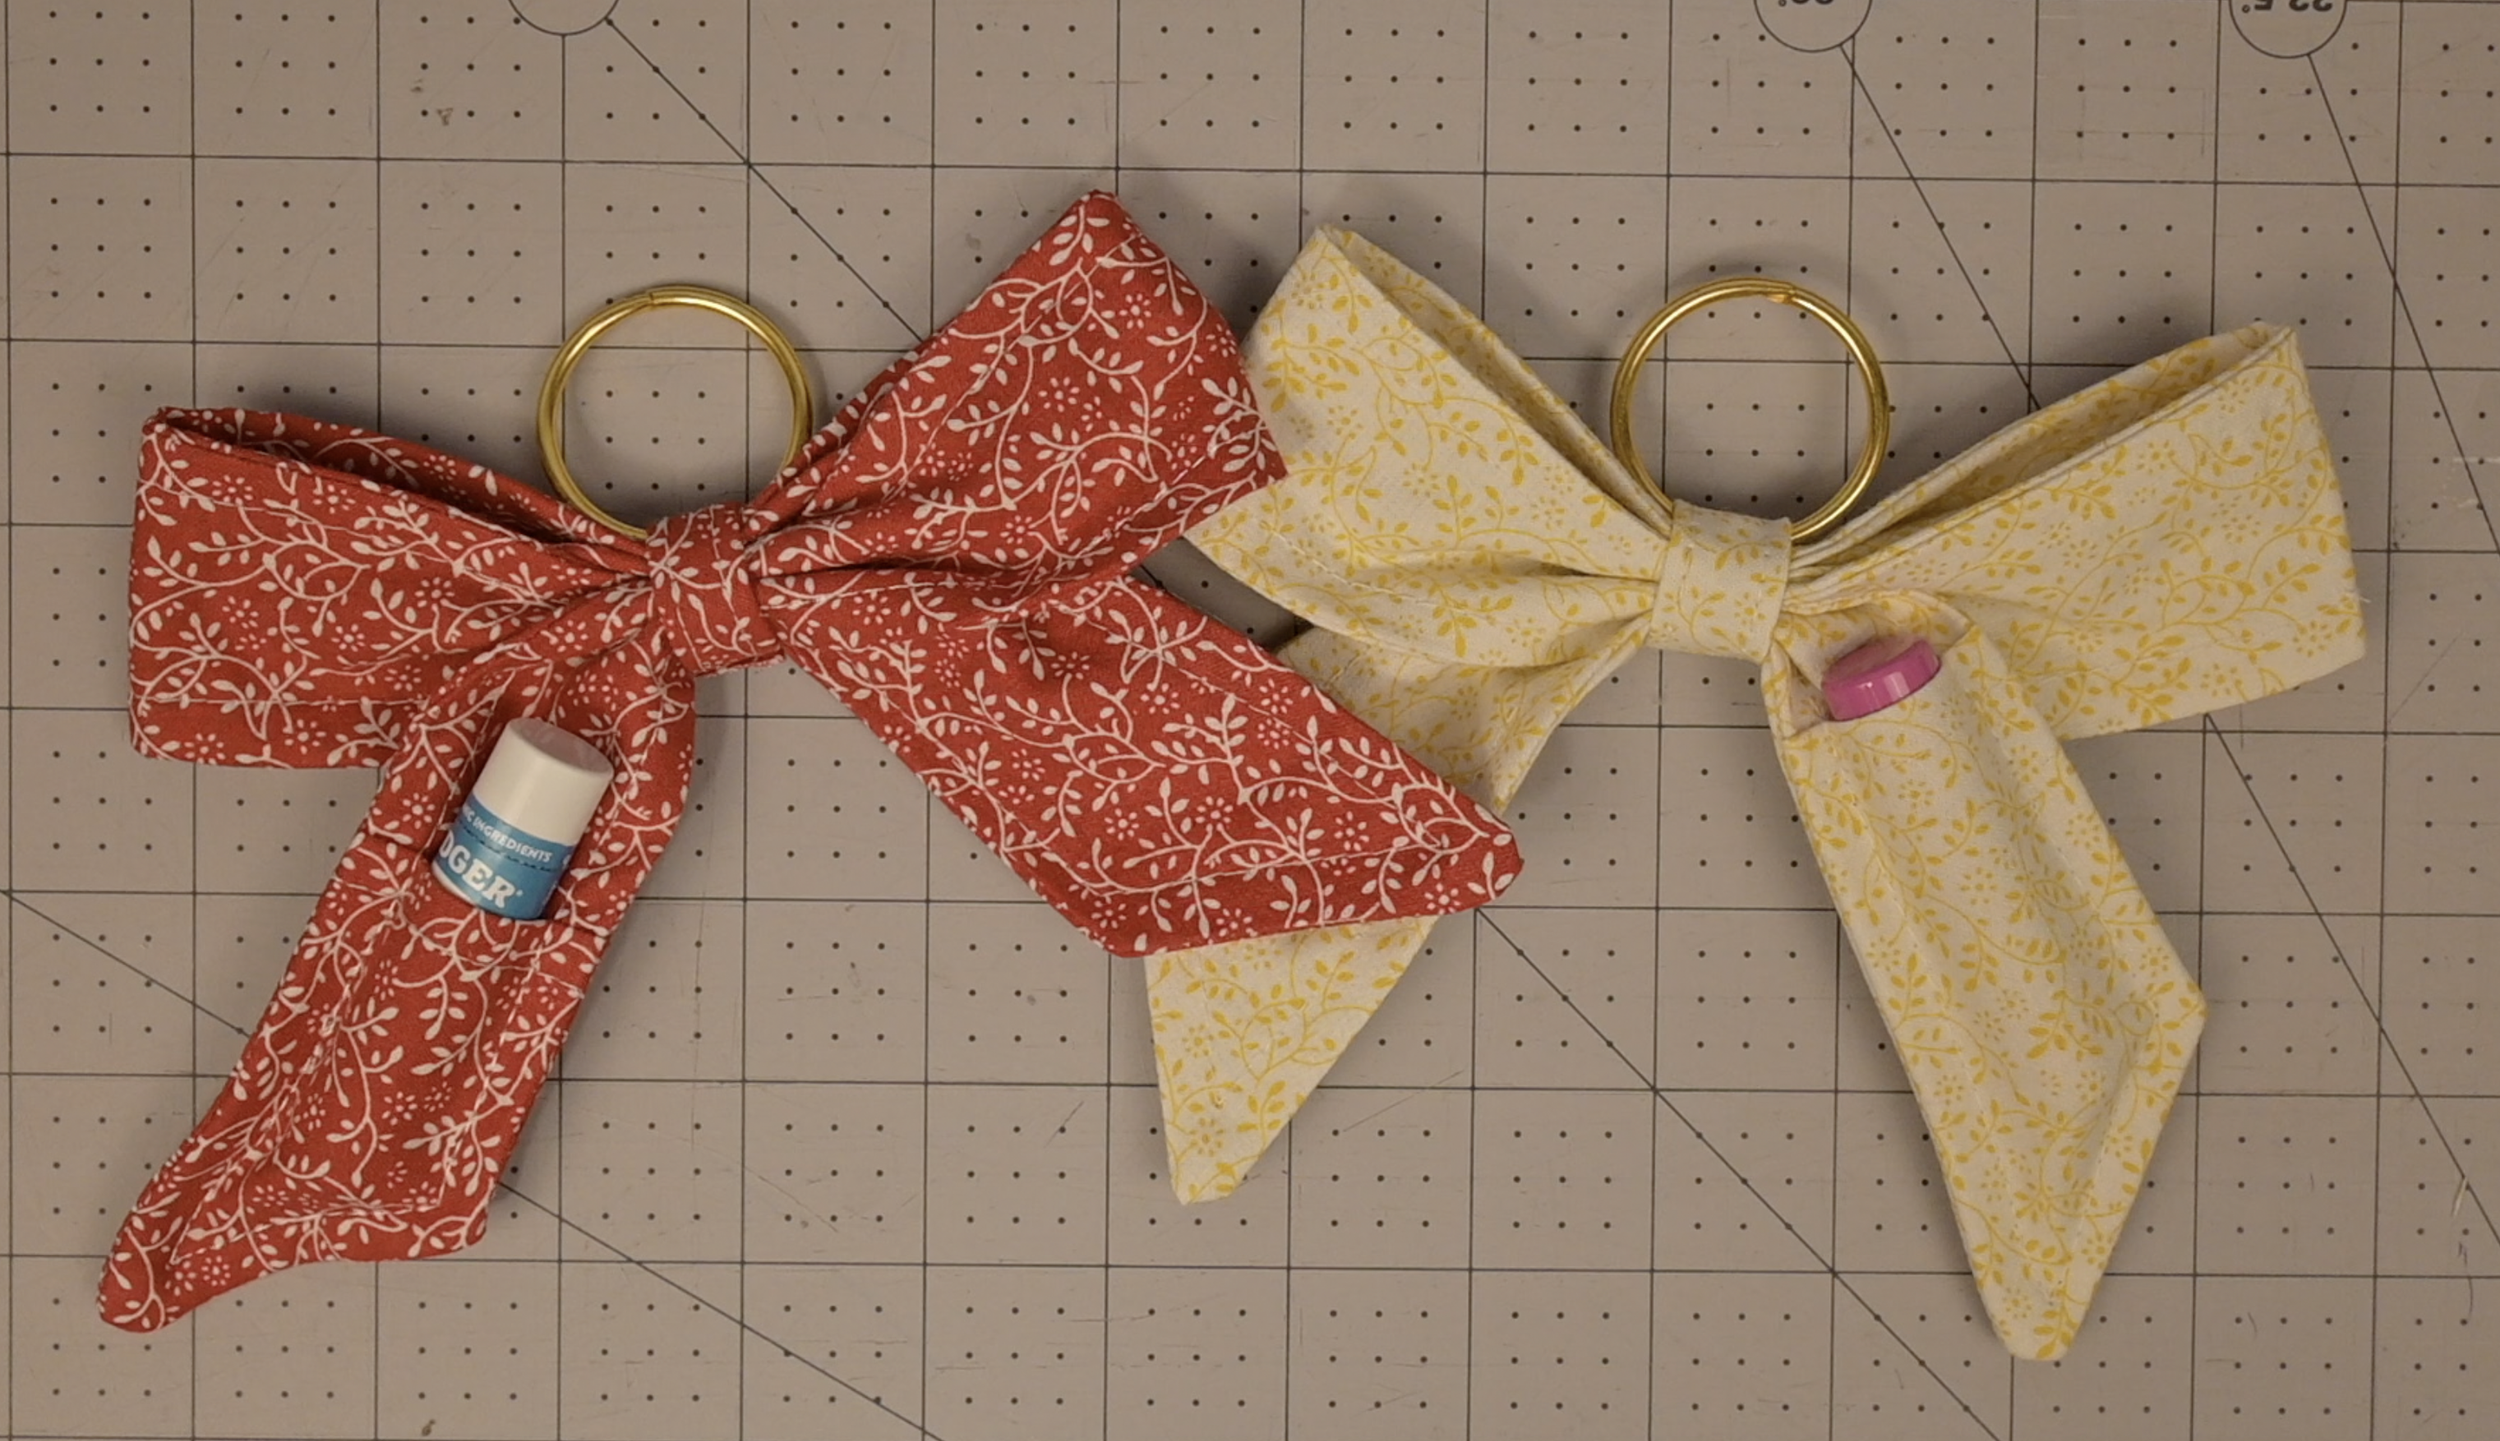
Fabric Bow Lip Balm/Chapstick Holder Keychain
Let’s make a Fabric Bow Lip Balm/Chapstick Holder! This cute and practical accessory is the perfect way to use up fabric scraps. It clips right onto your bag so you never lose your chapstick again!
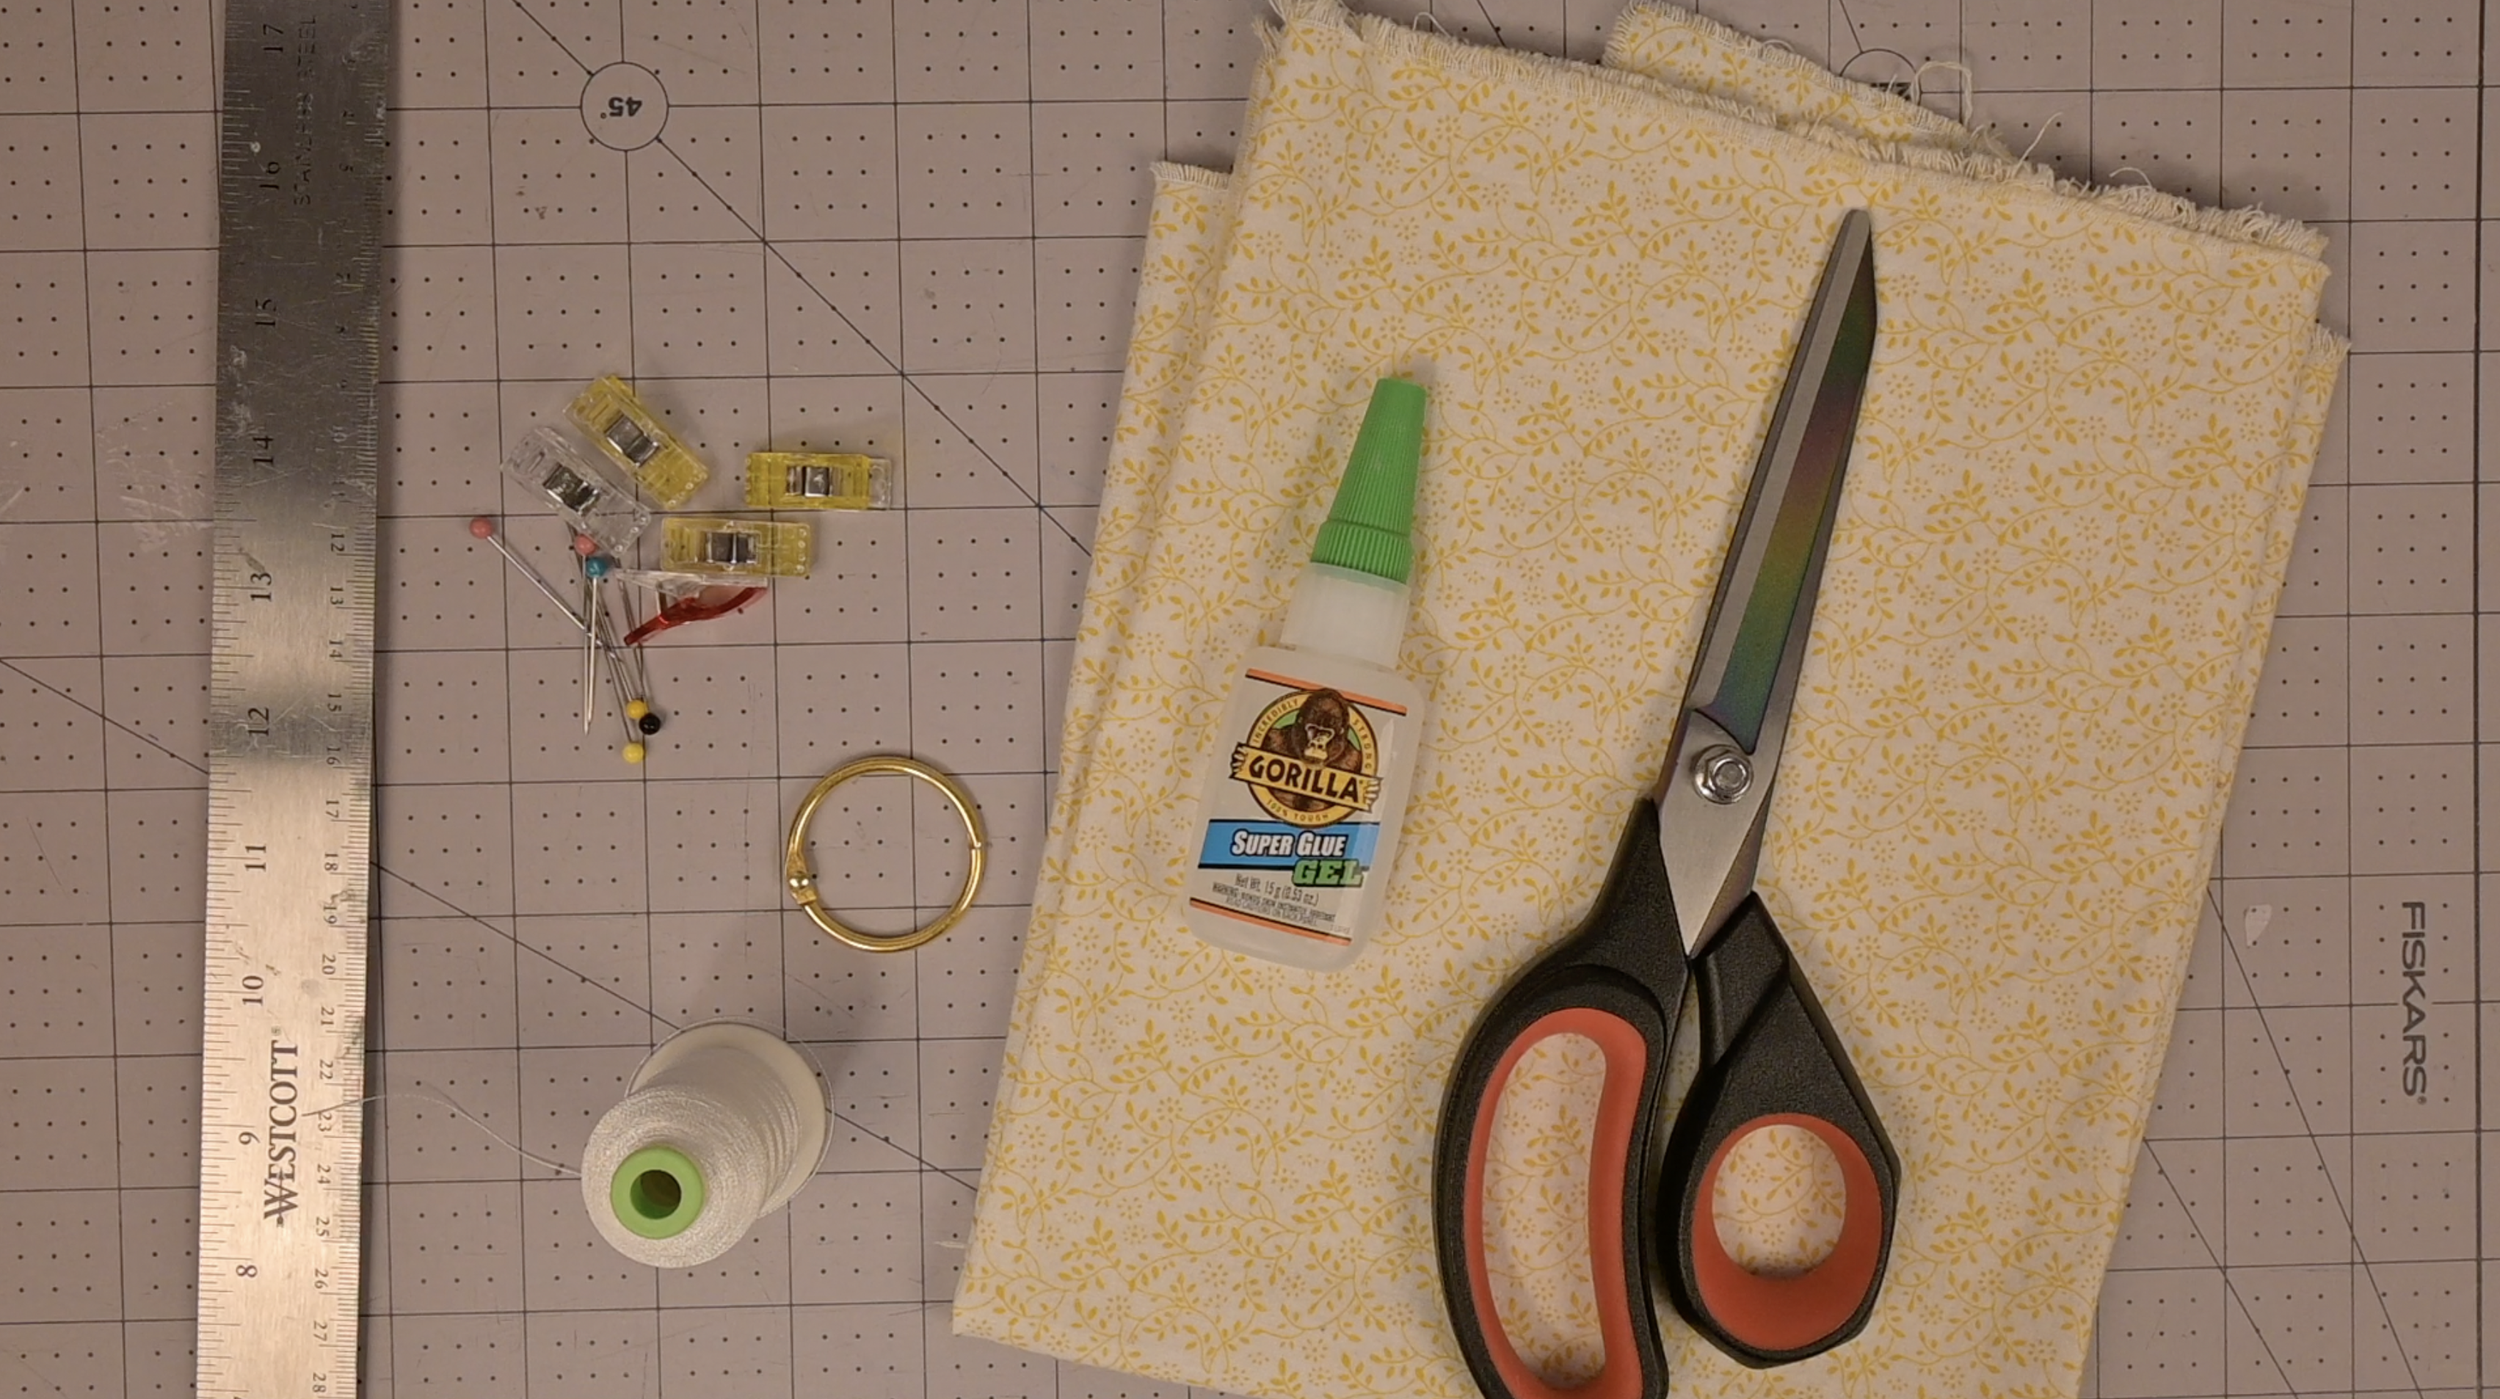
Materials Needed (As an Amazon Associate I earn from qualifying purchases):
Step 1: Cut the Fabric
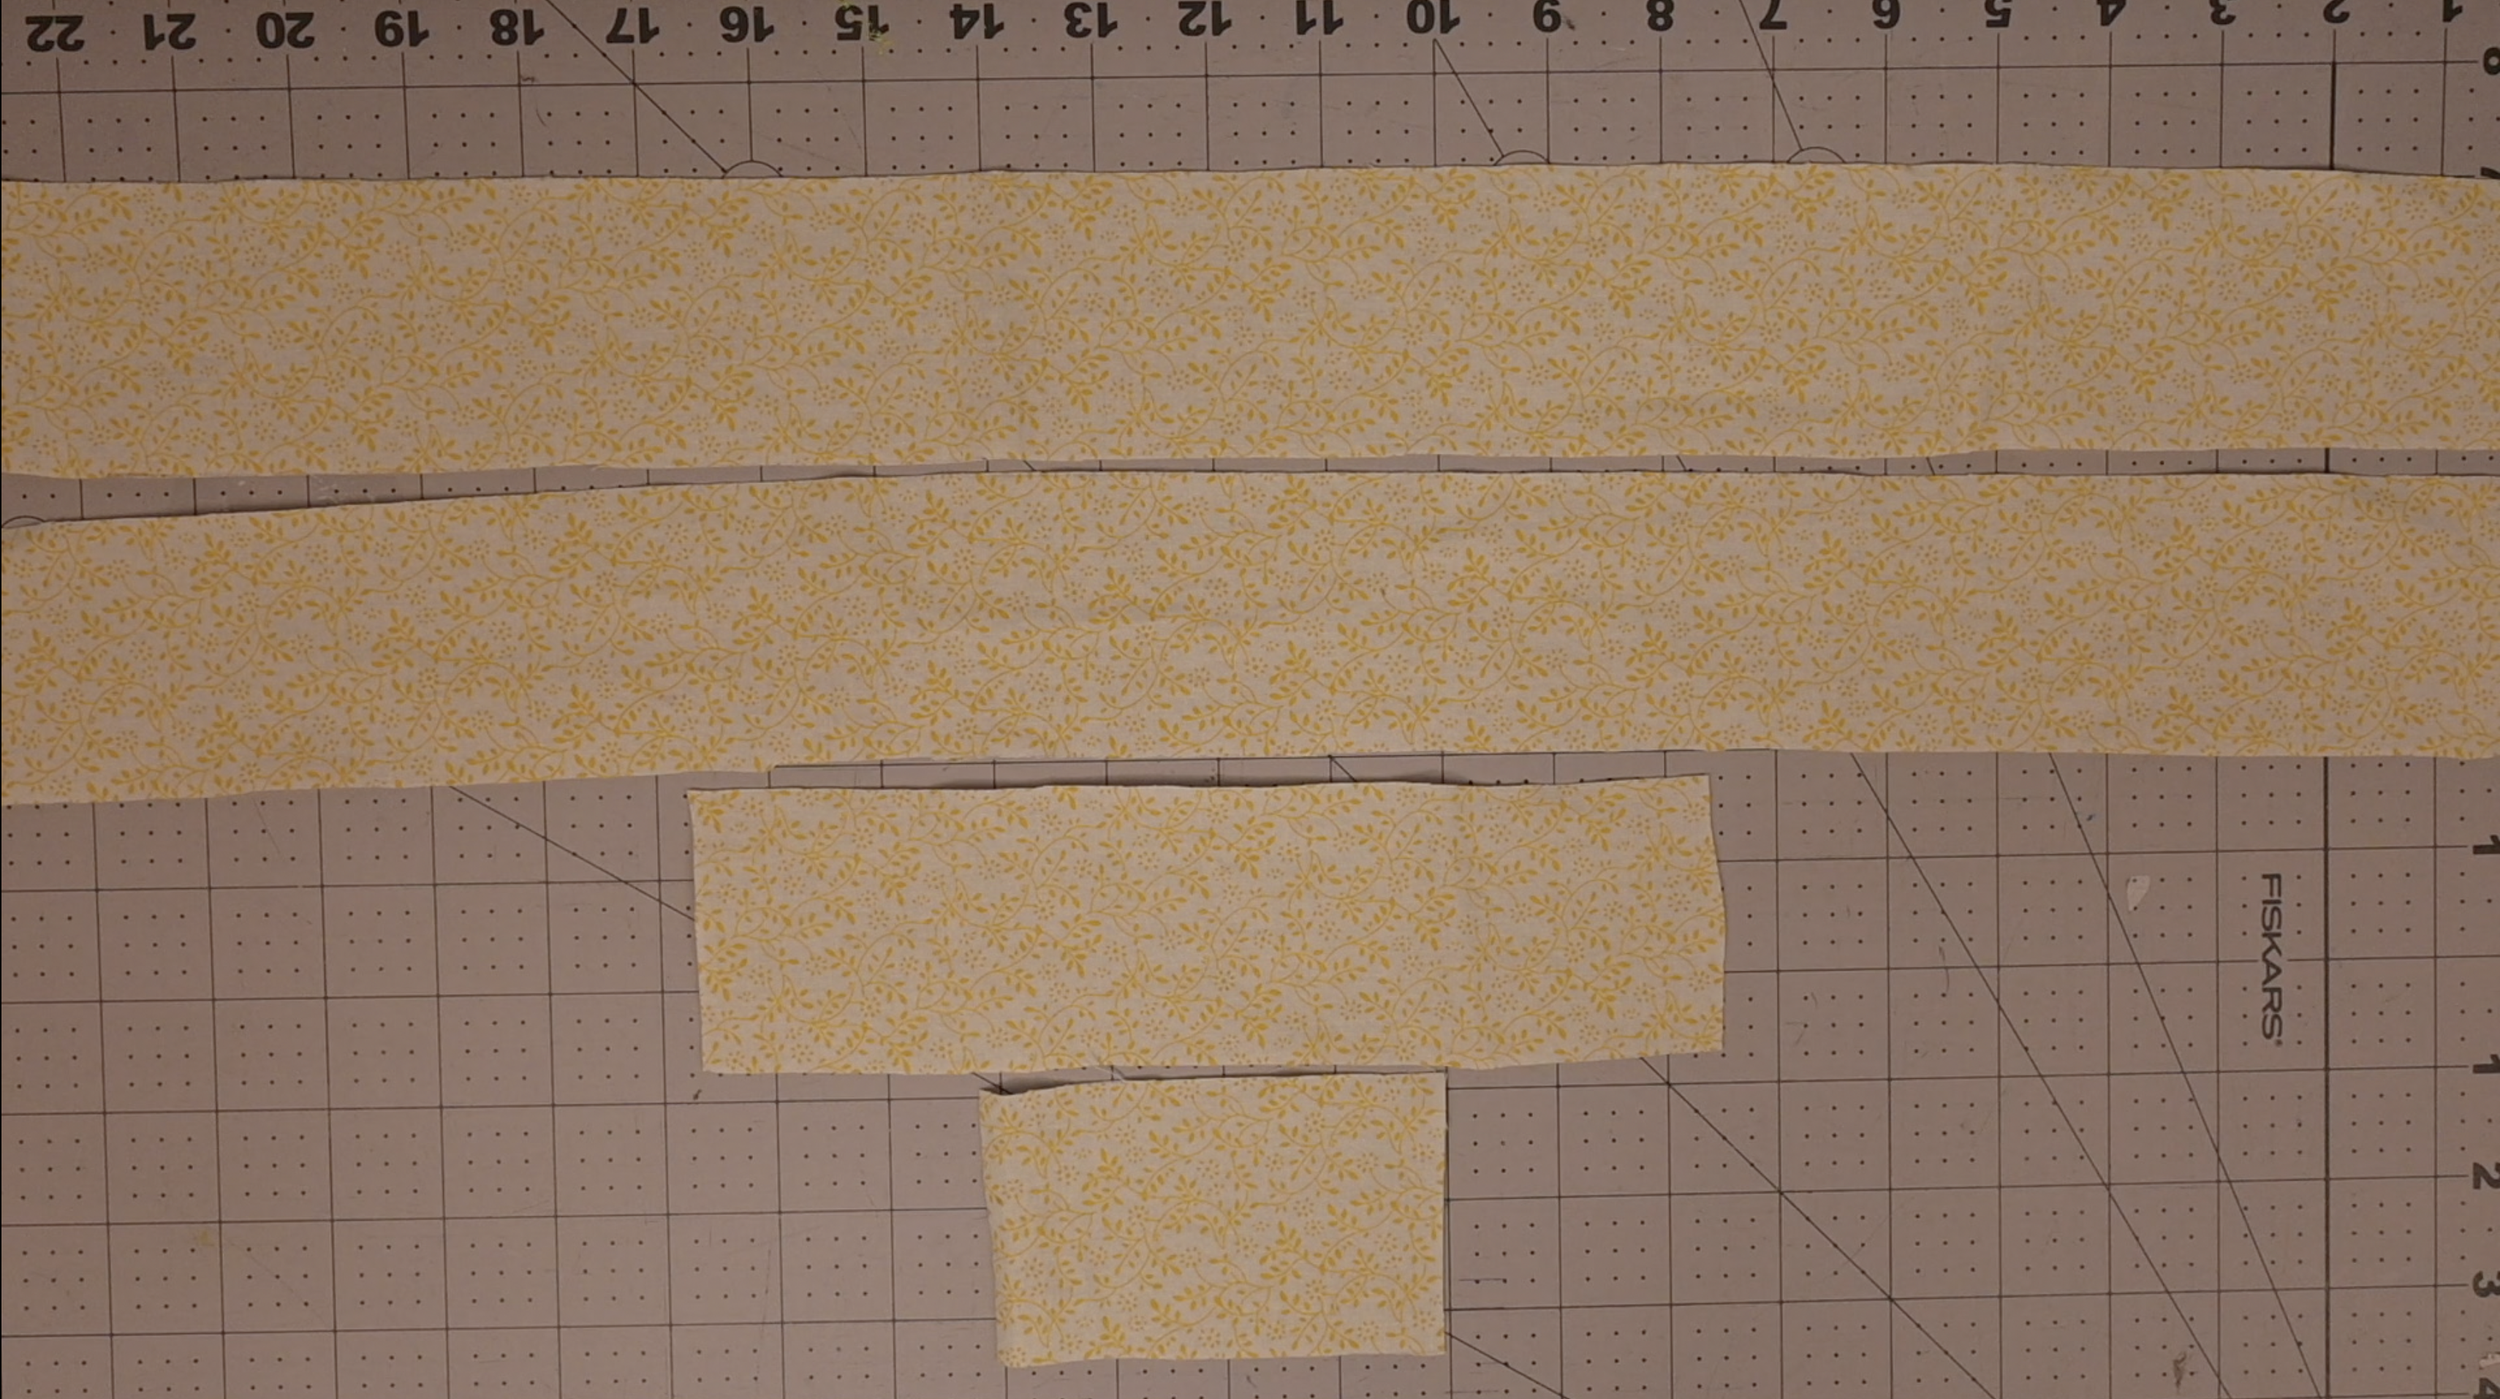
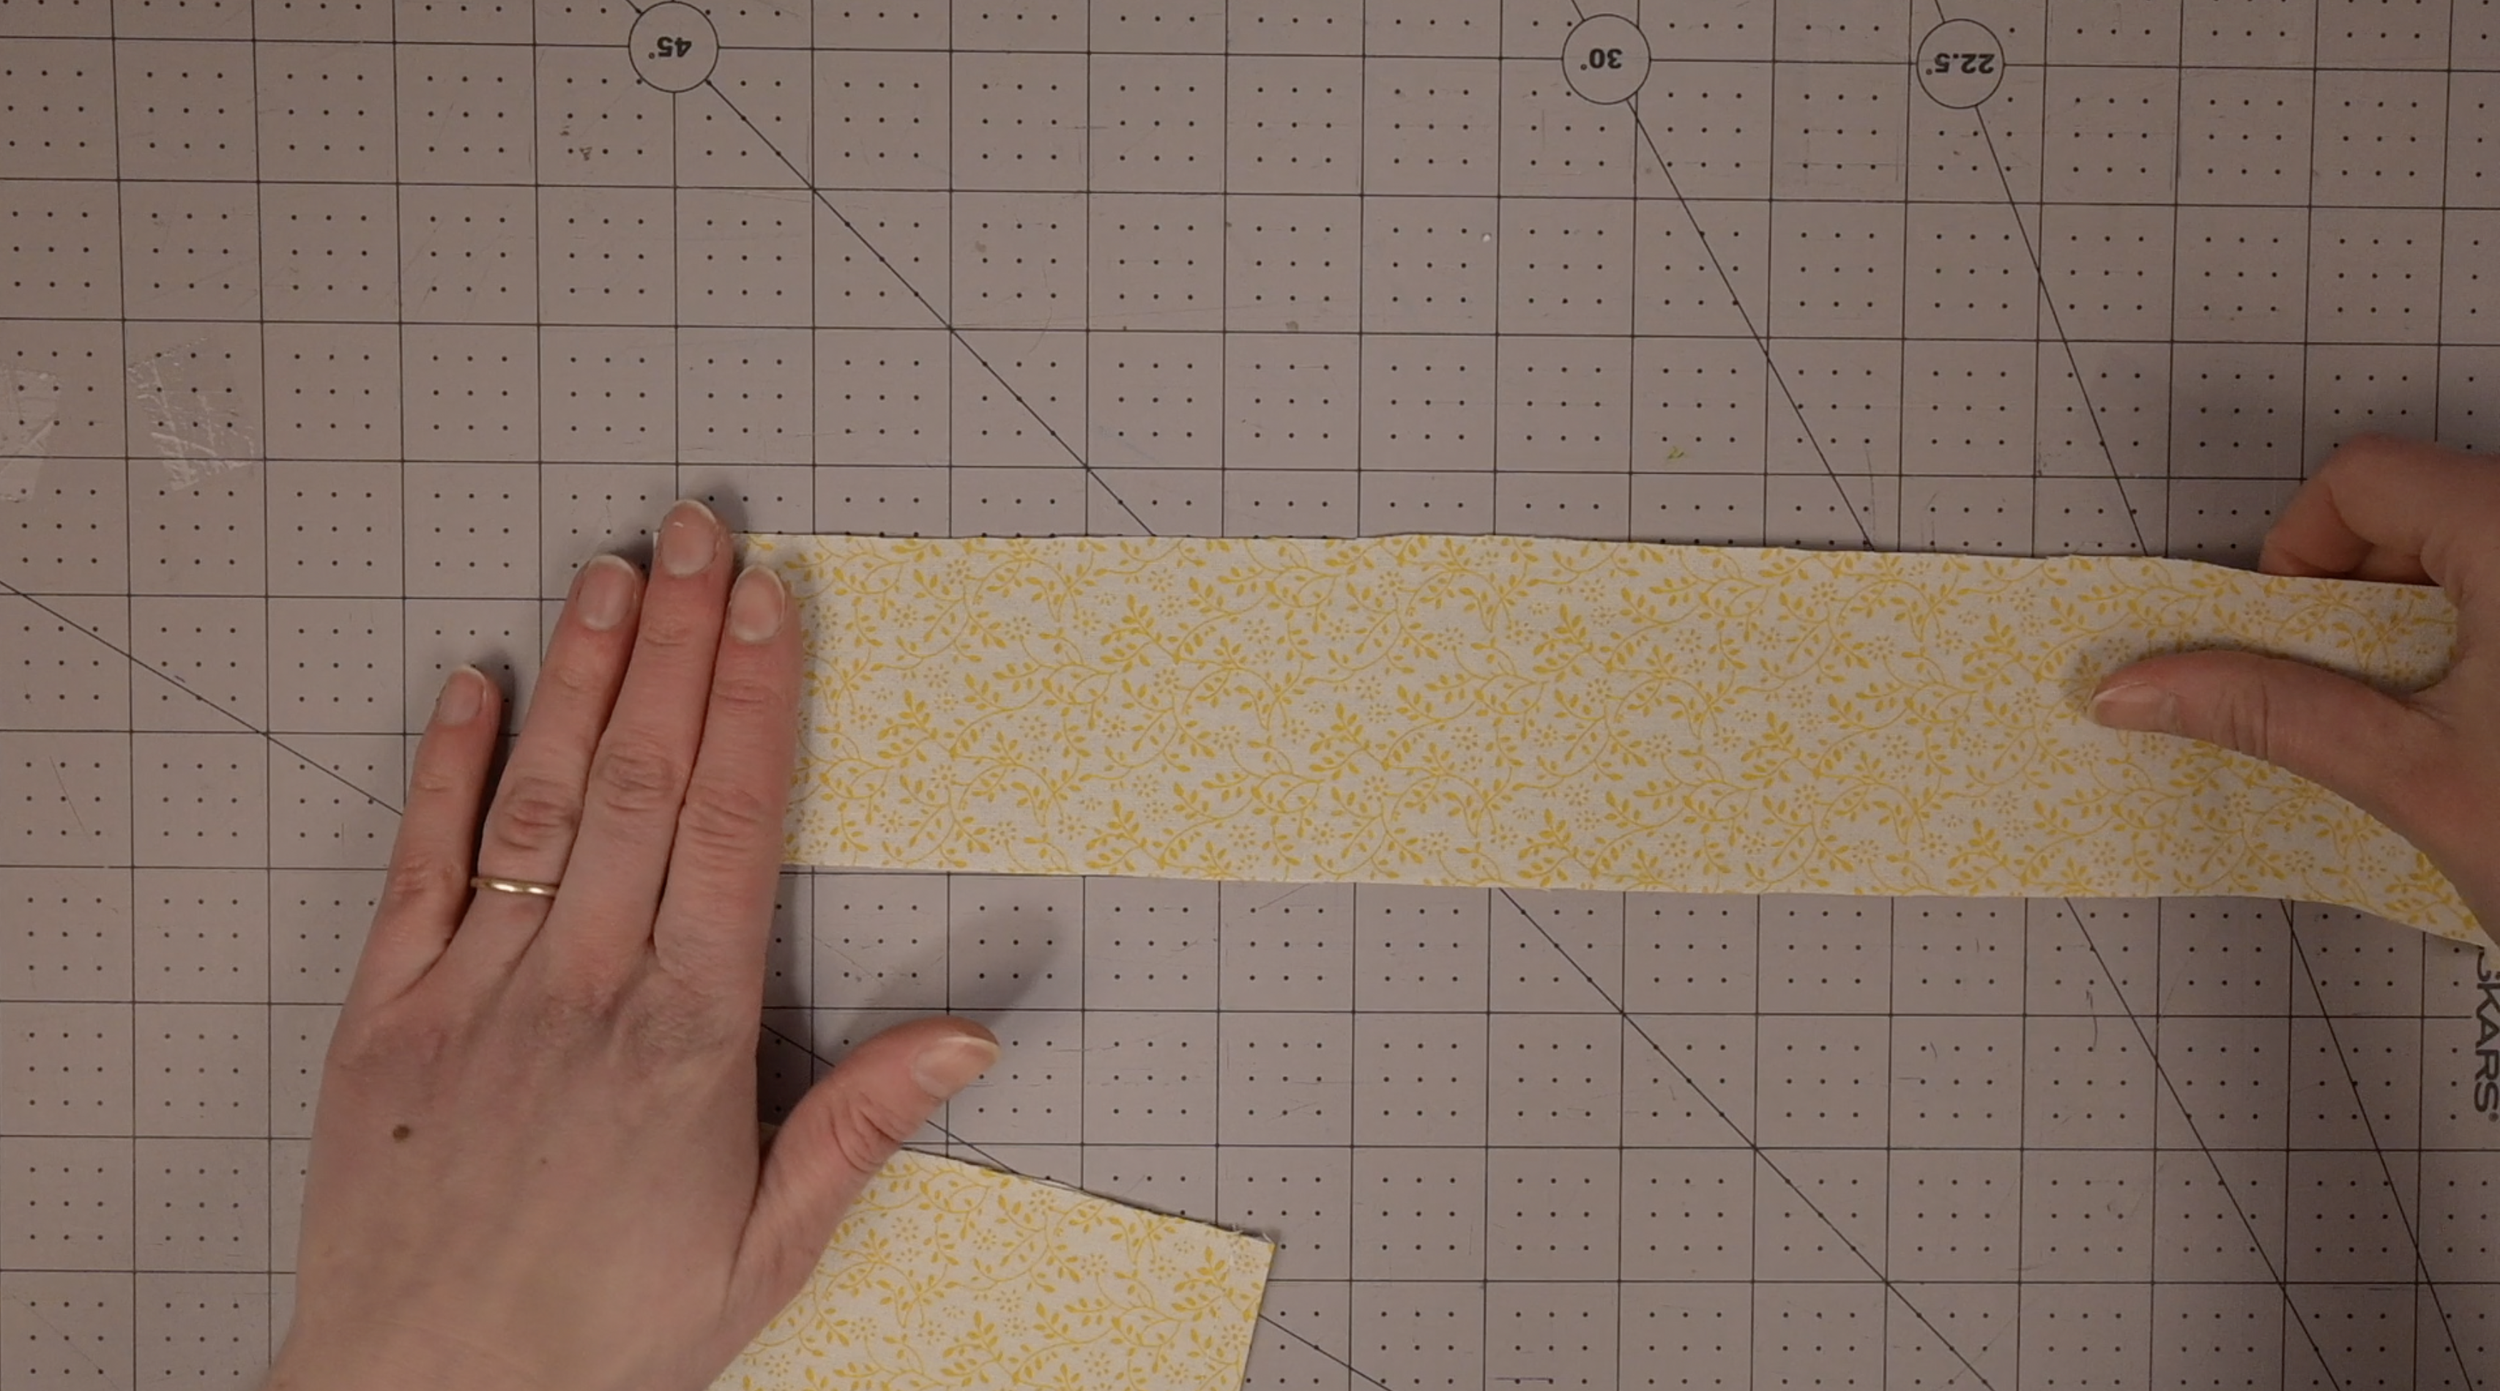
Cut out the following dimensions from your fabric:
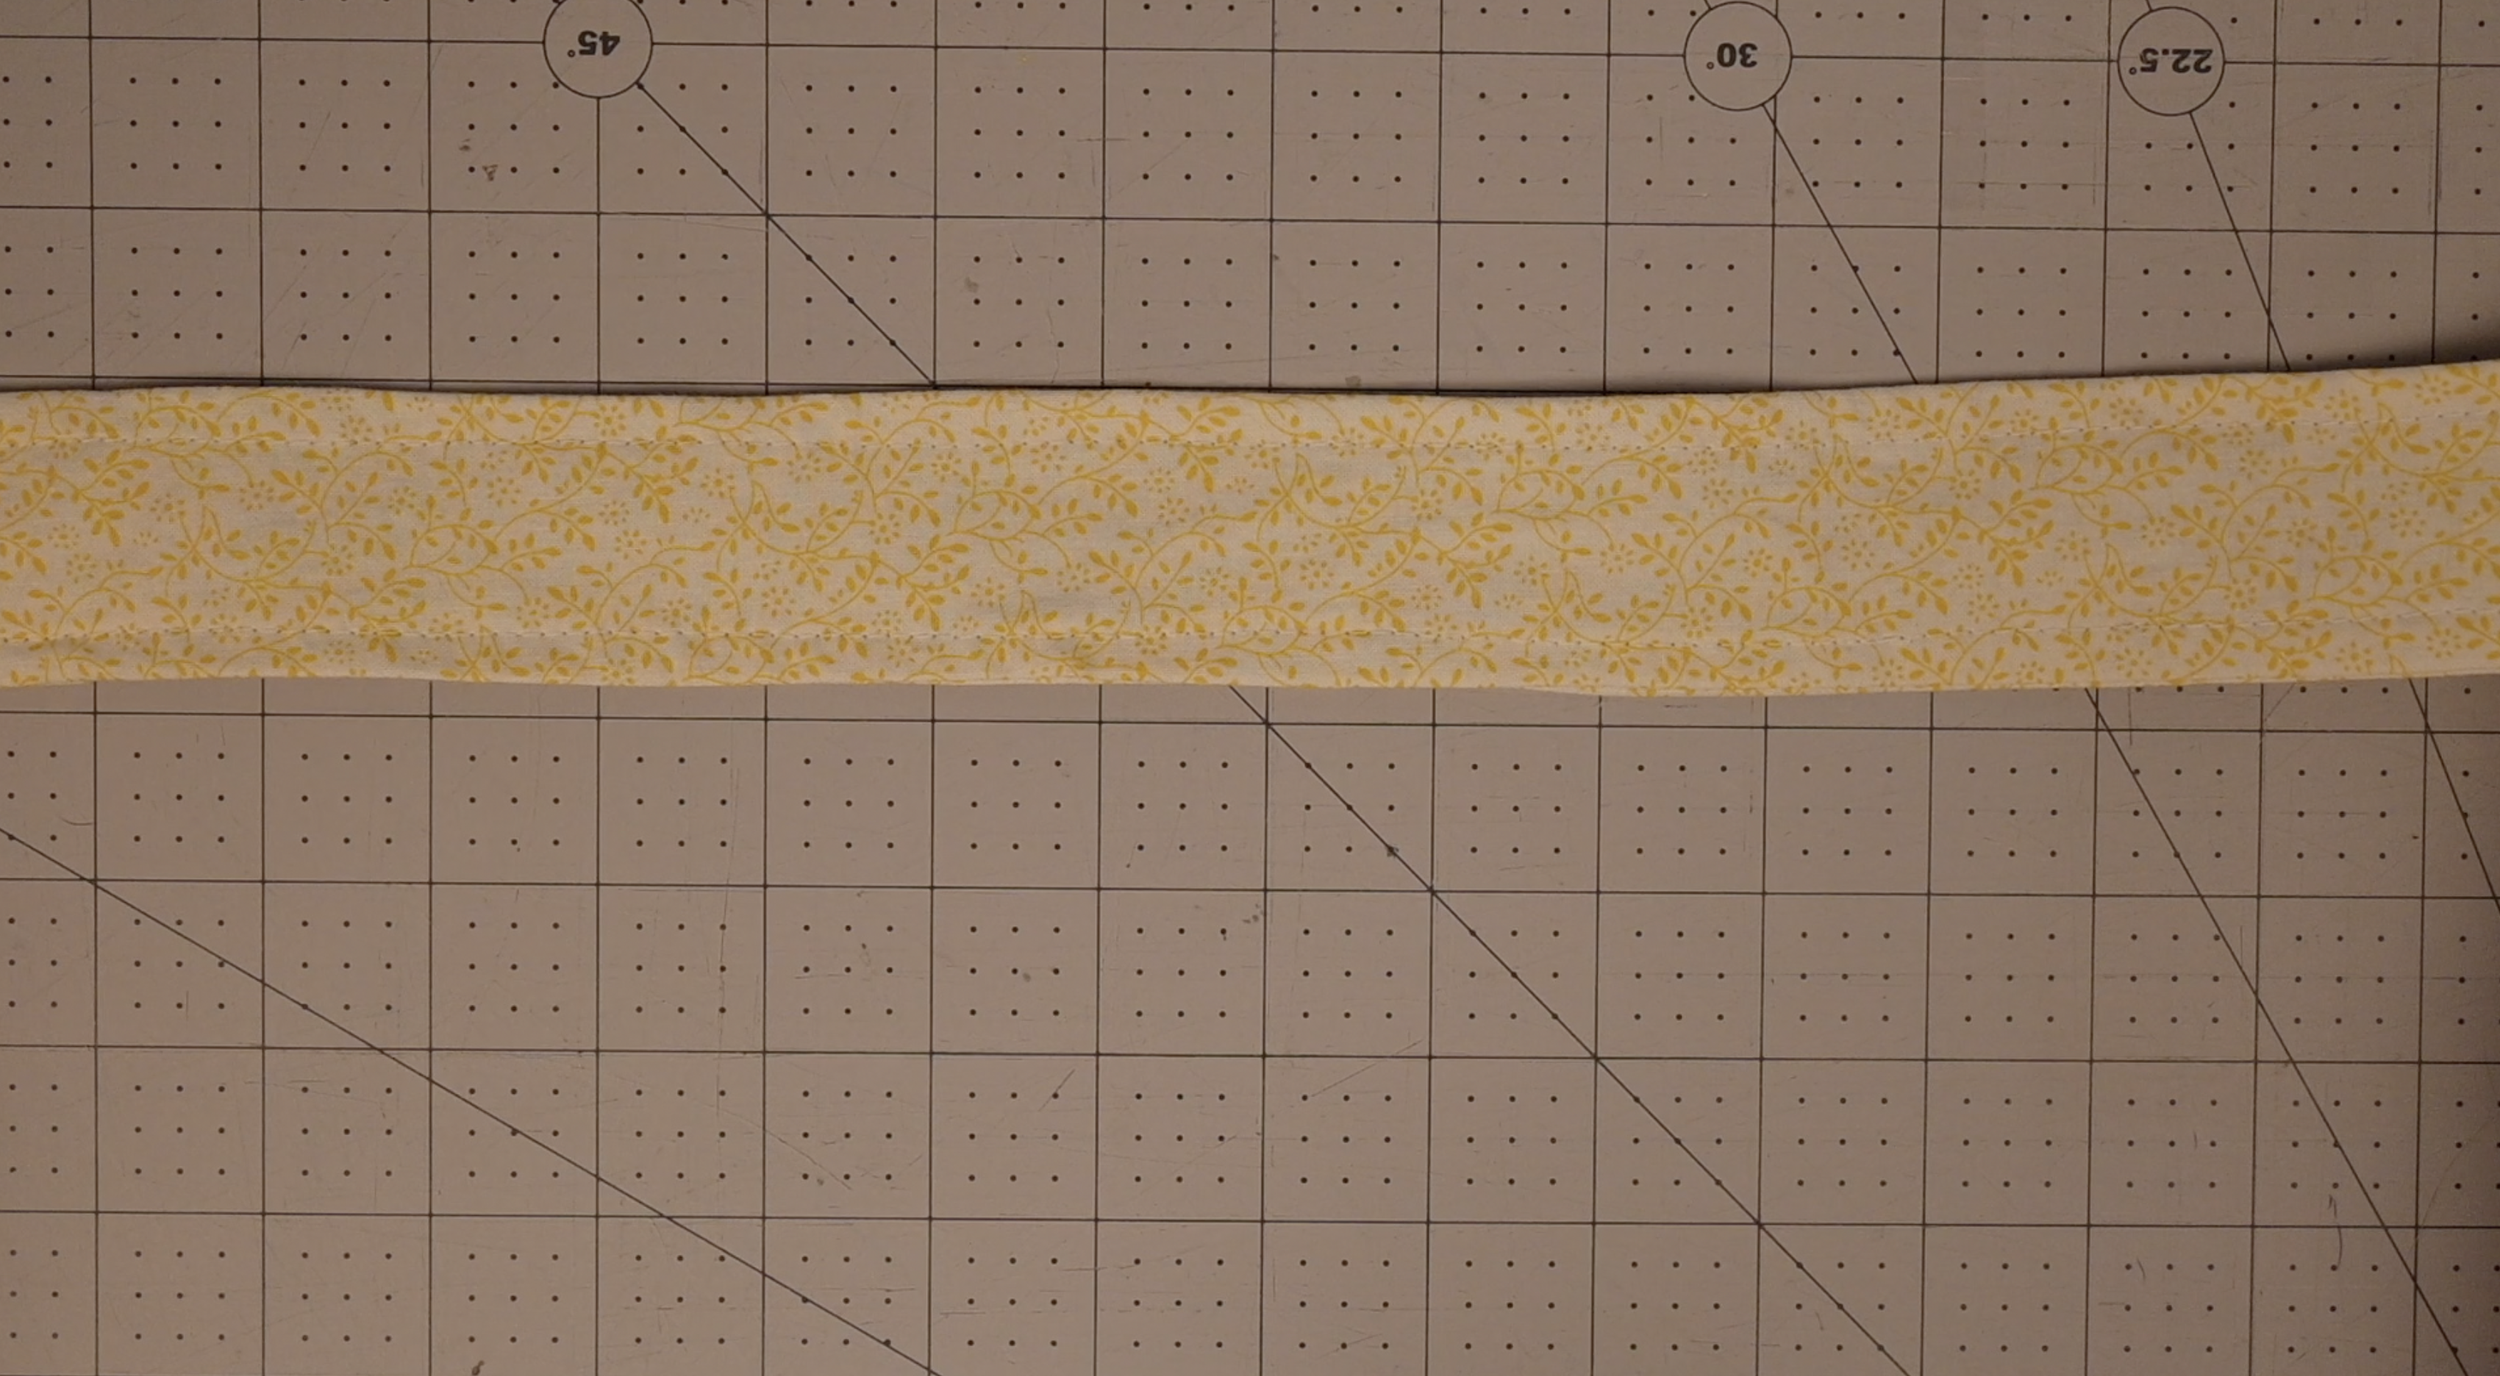
Bow Base: Cut 2 pieces (24" x 2.5")
Pocket: Cut 1 piece (9" x 2.5")
Bow Center: Cut 1 piece (4" x 2")
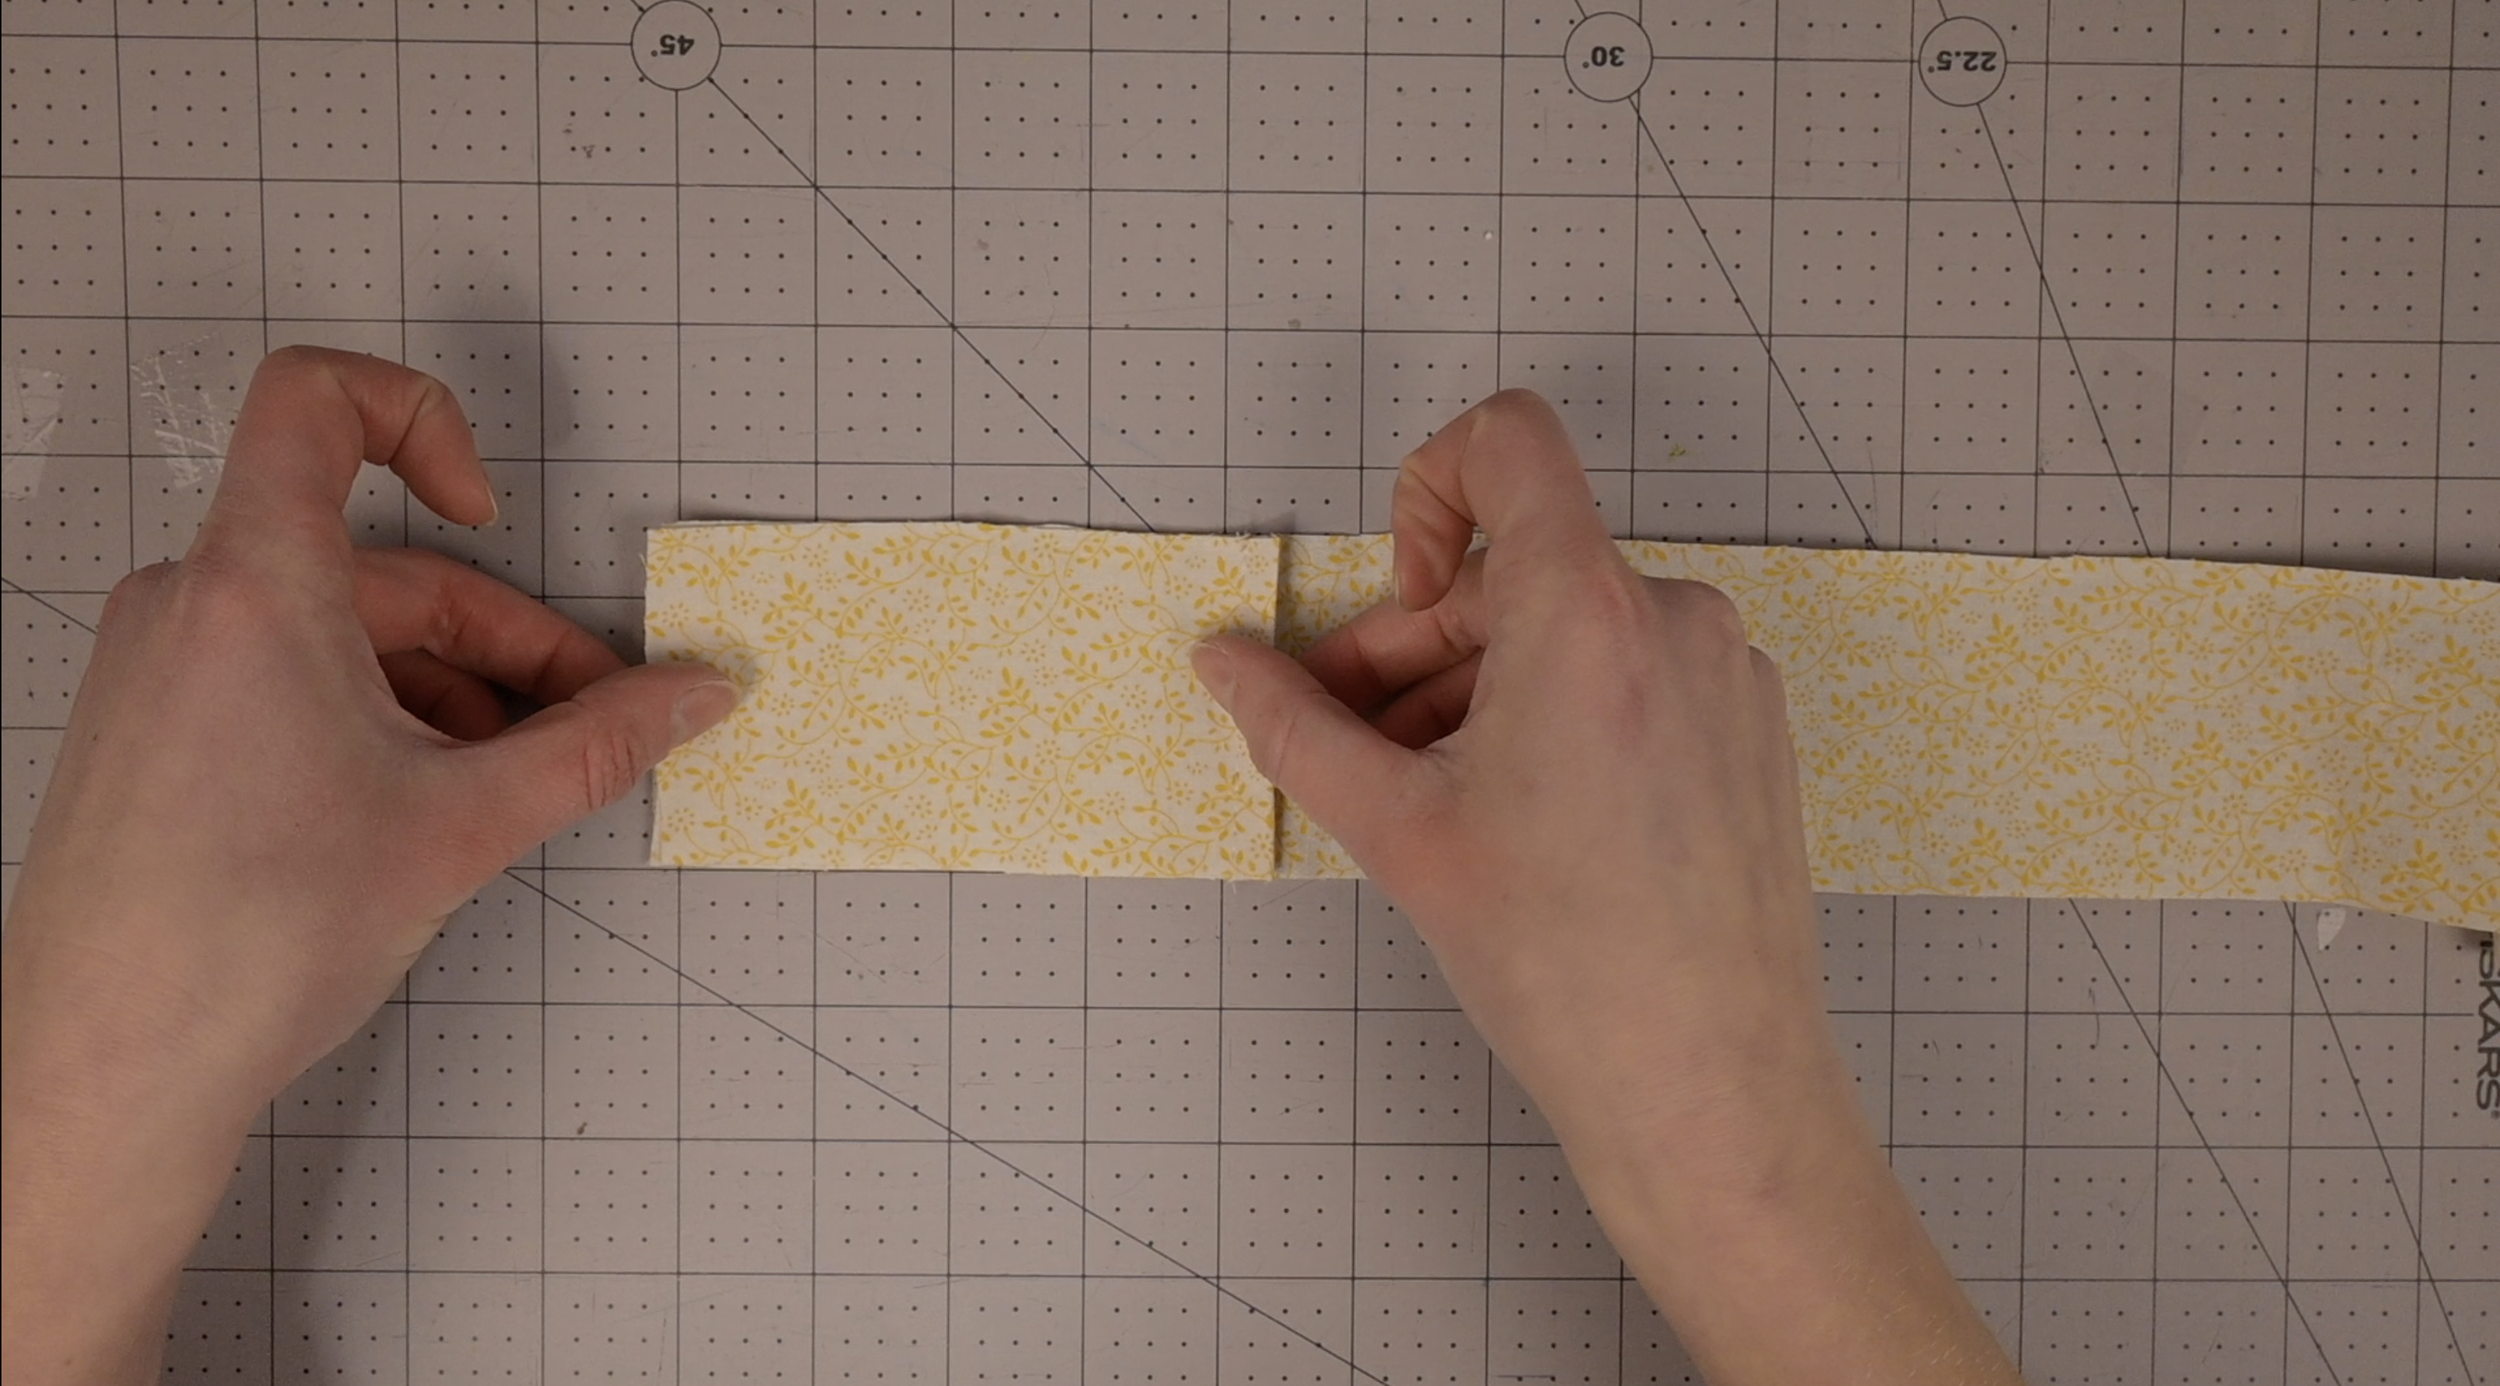
Step 2: The Pocket

Fold the 9" x 2.5" pocket piece in half (width-wise). You should now have a folded rectangle measuring 4.5" x 2.5".
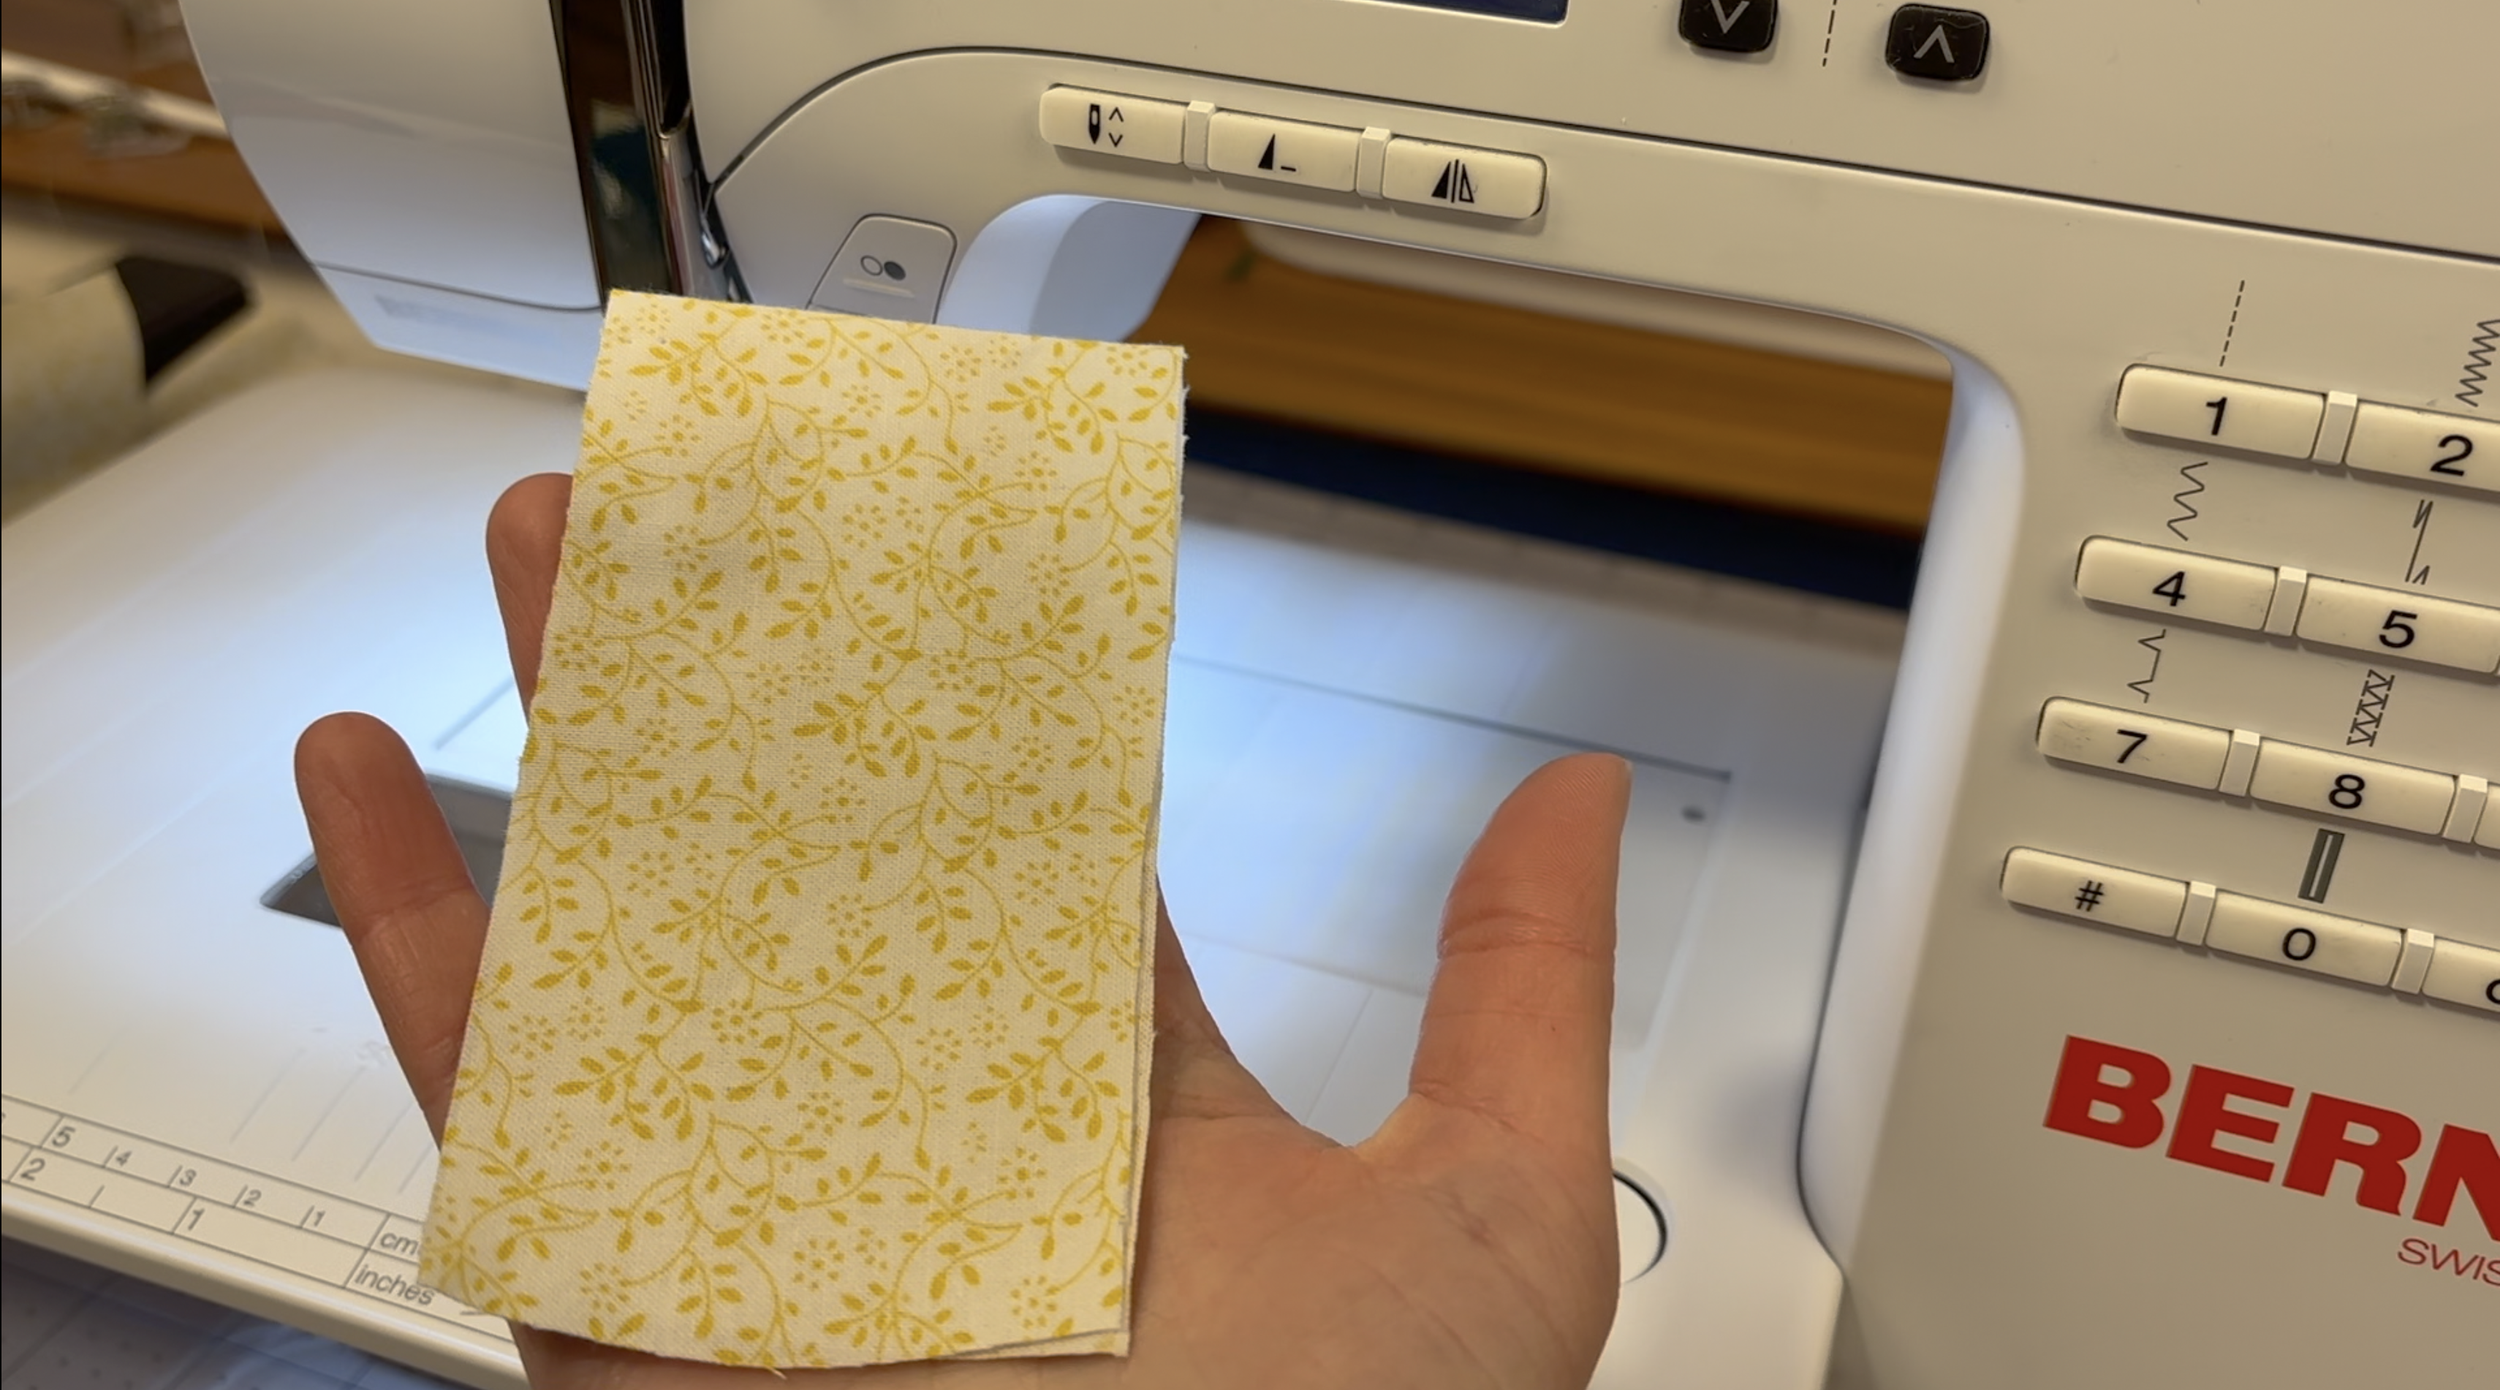
Iron the fold flat.
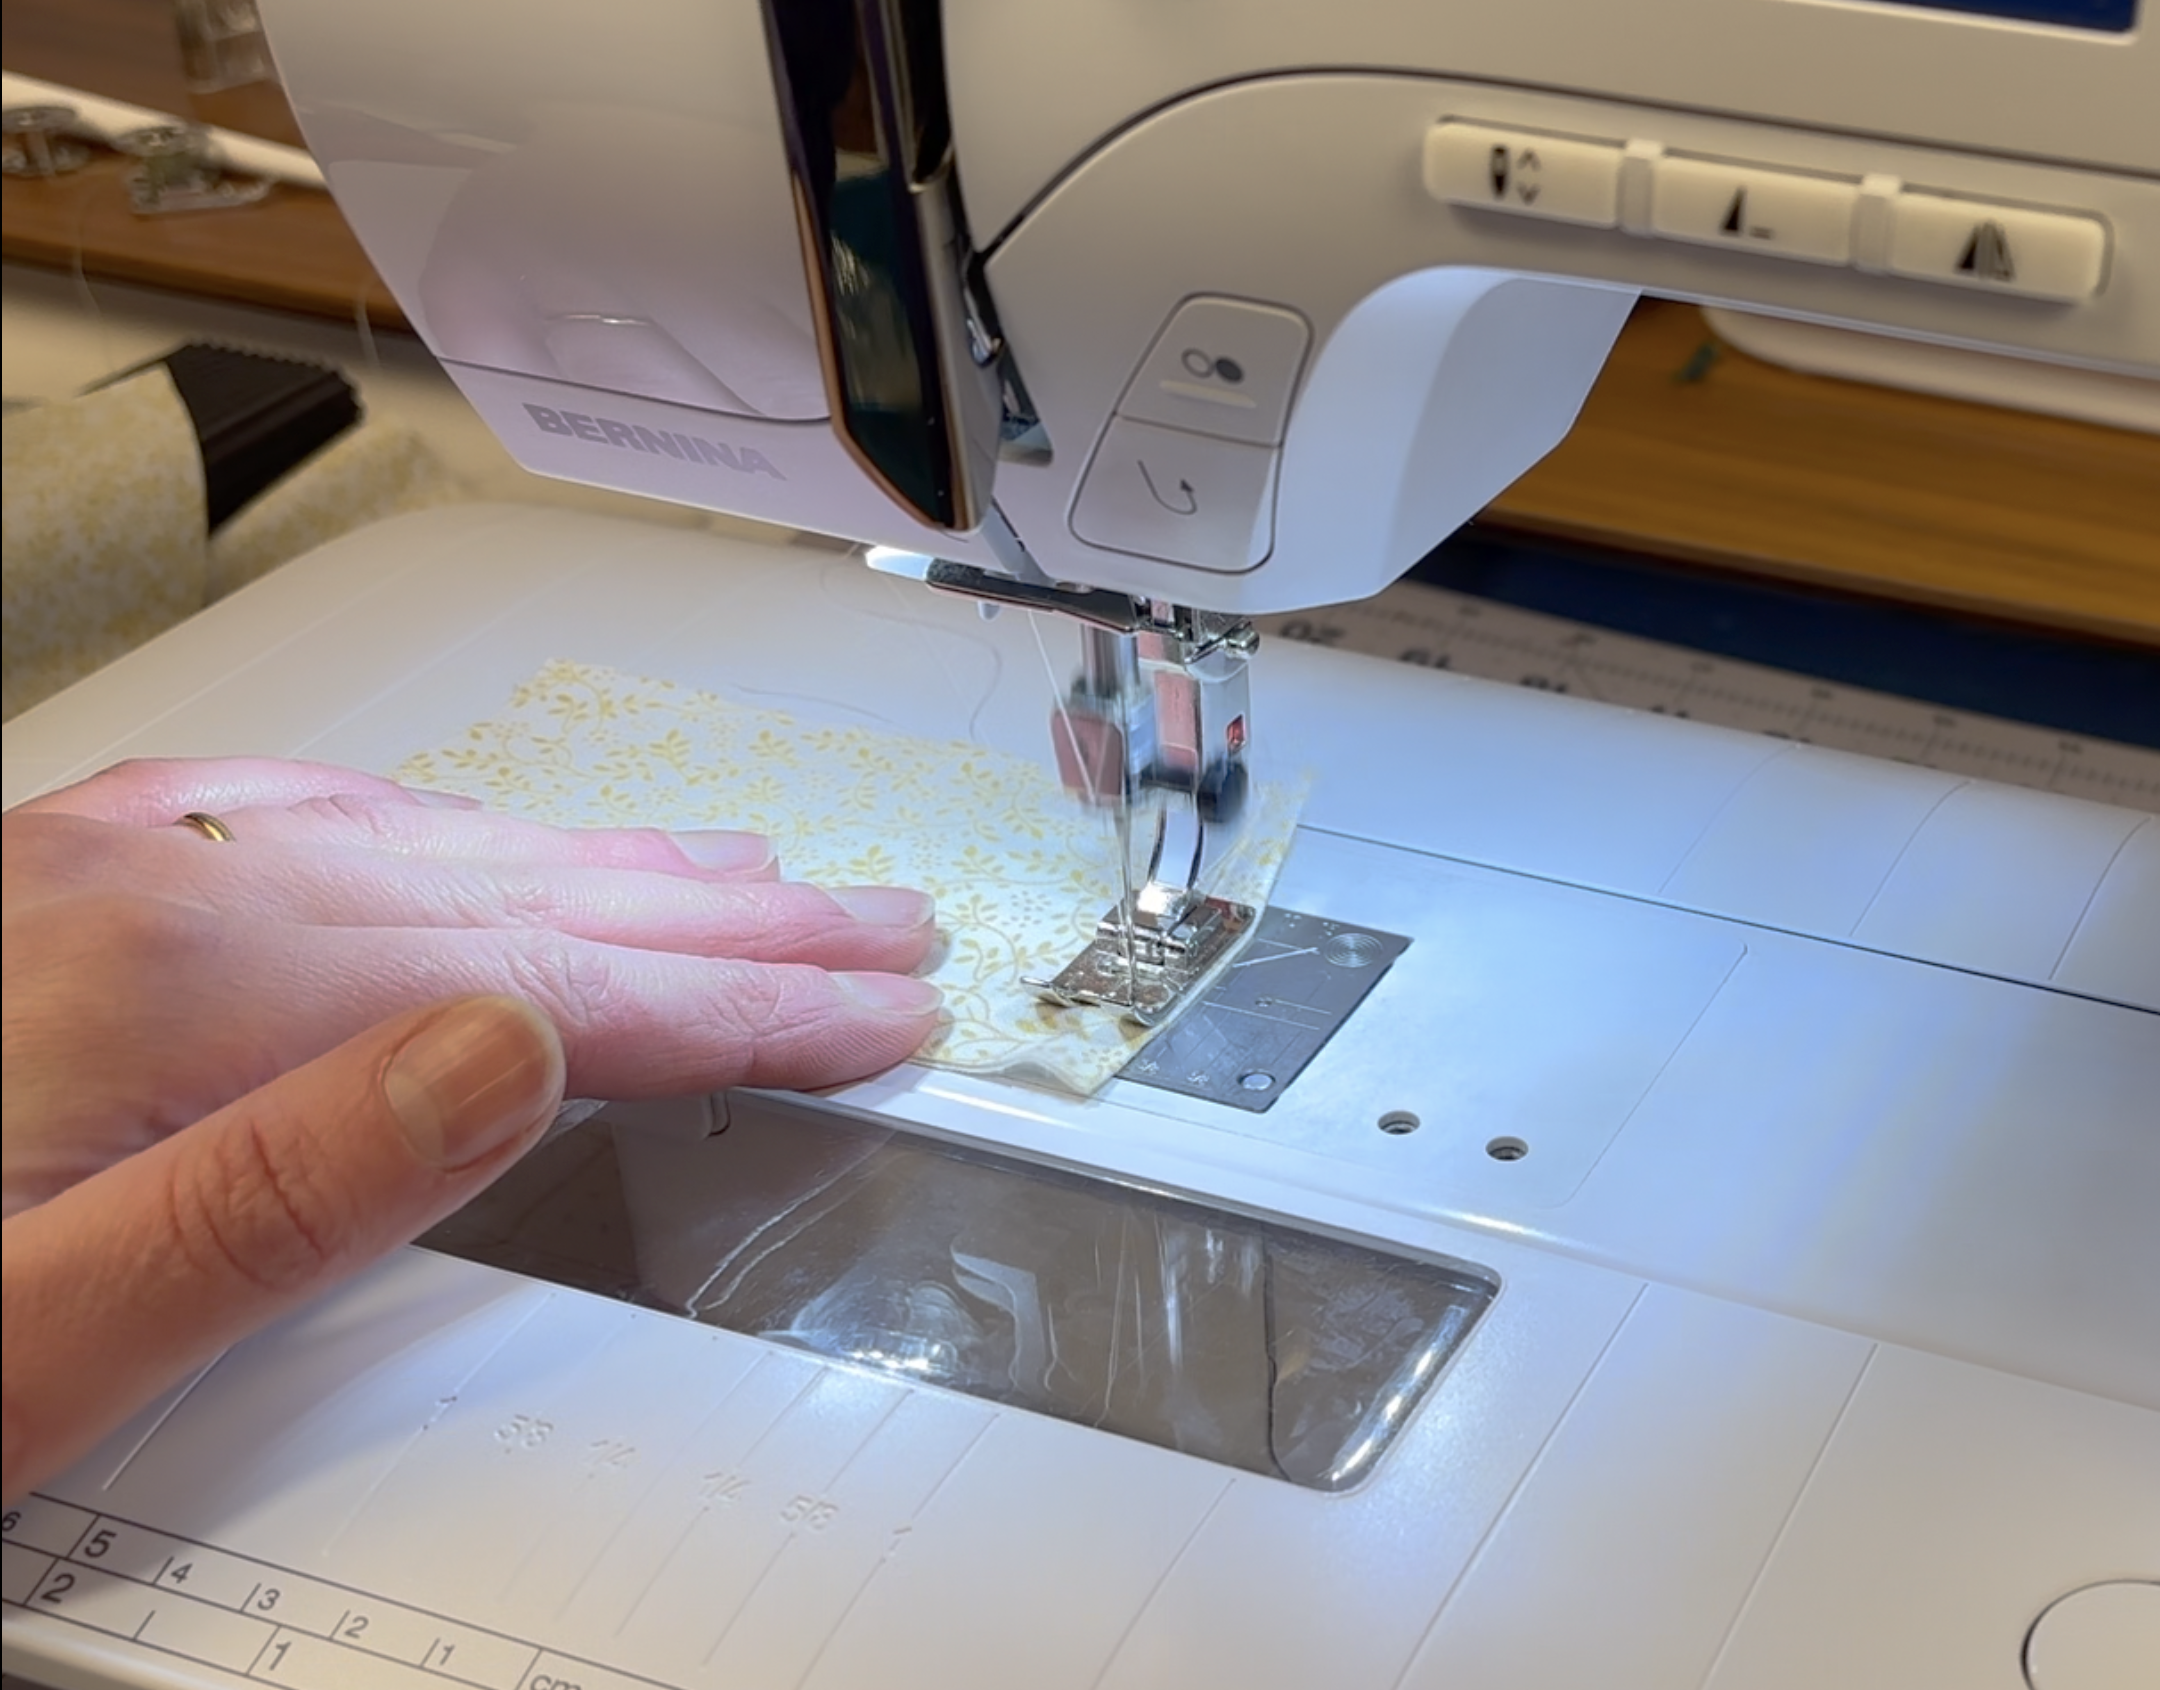
Sew across the folded edge using a longer stitch length.
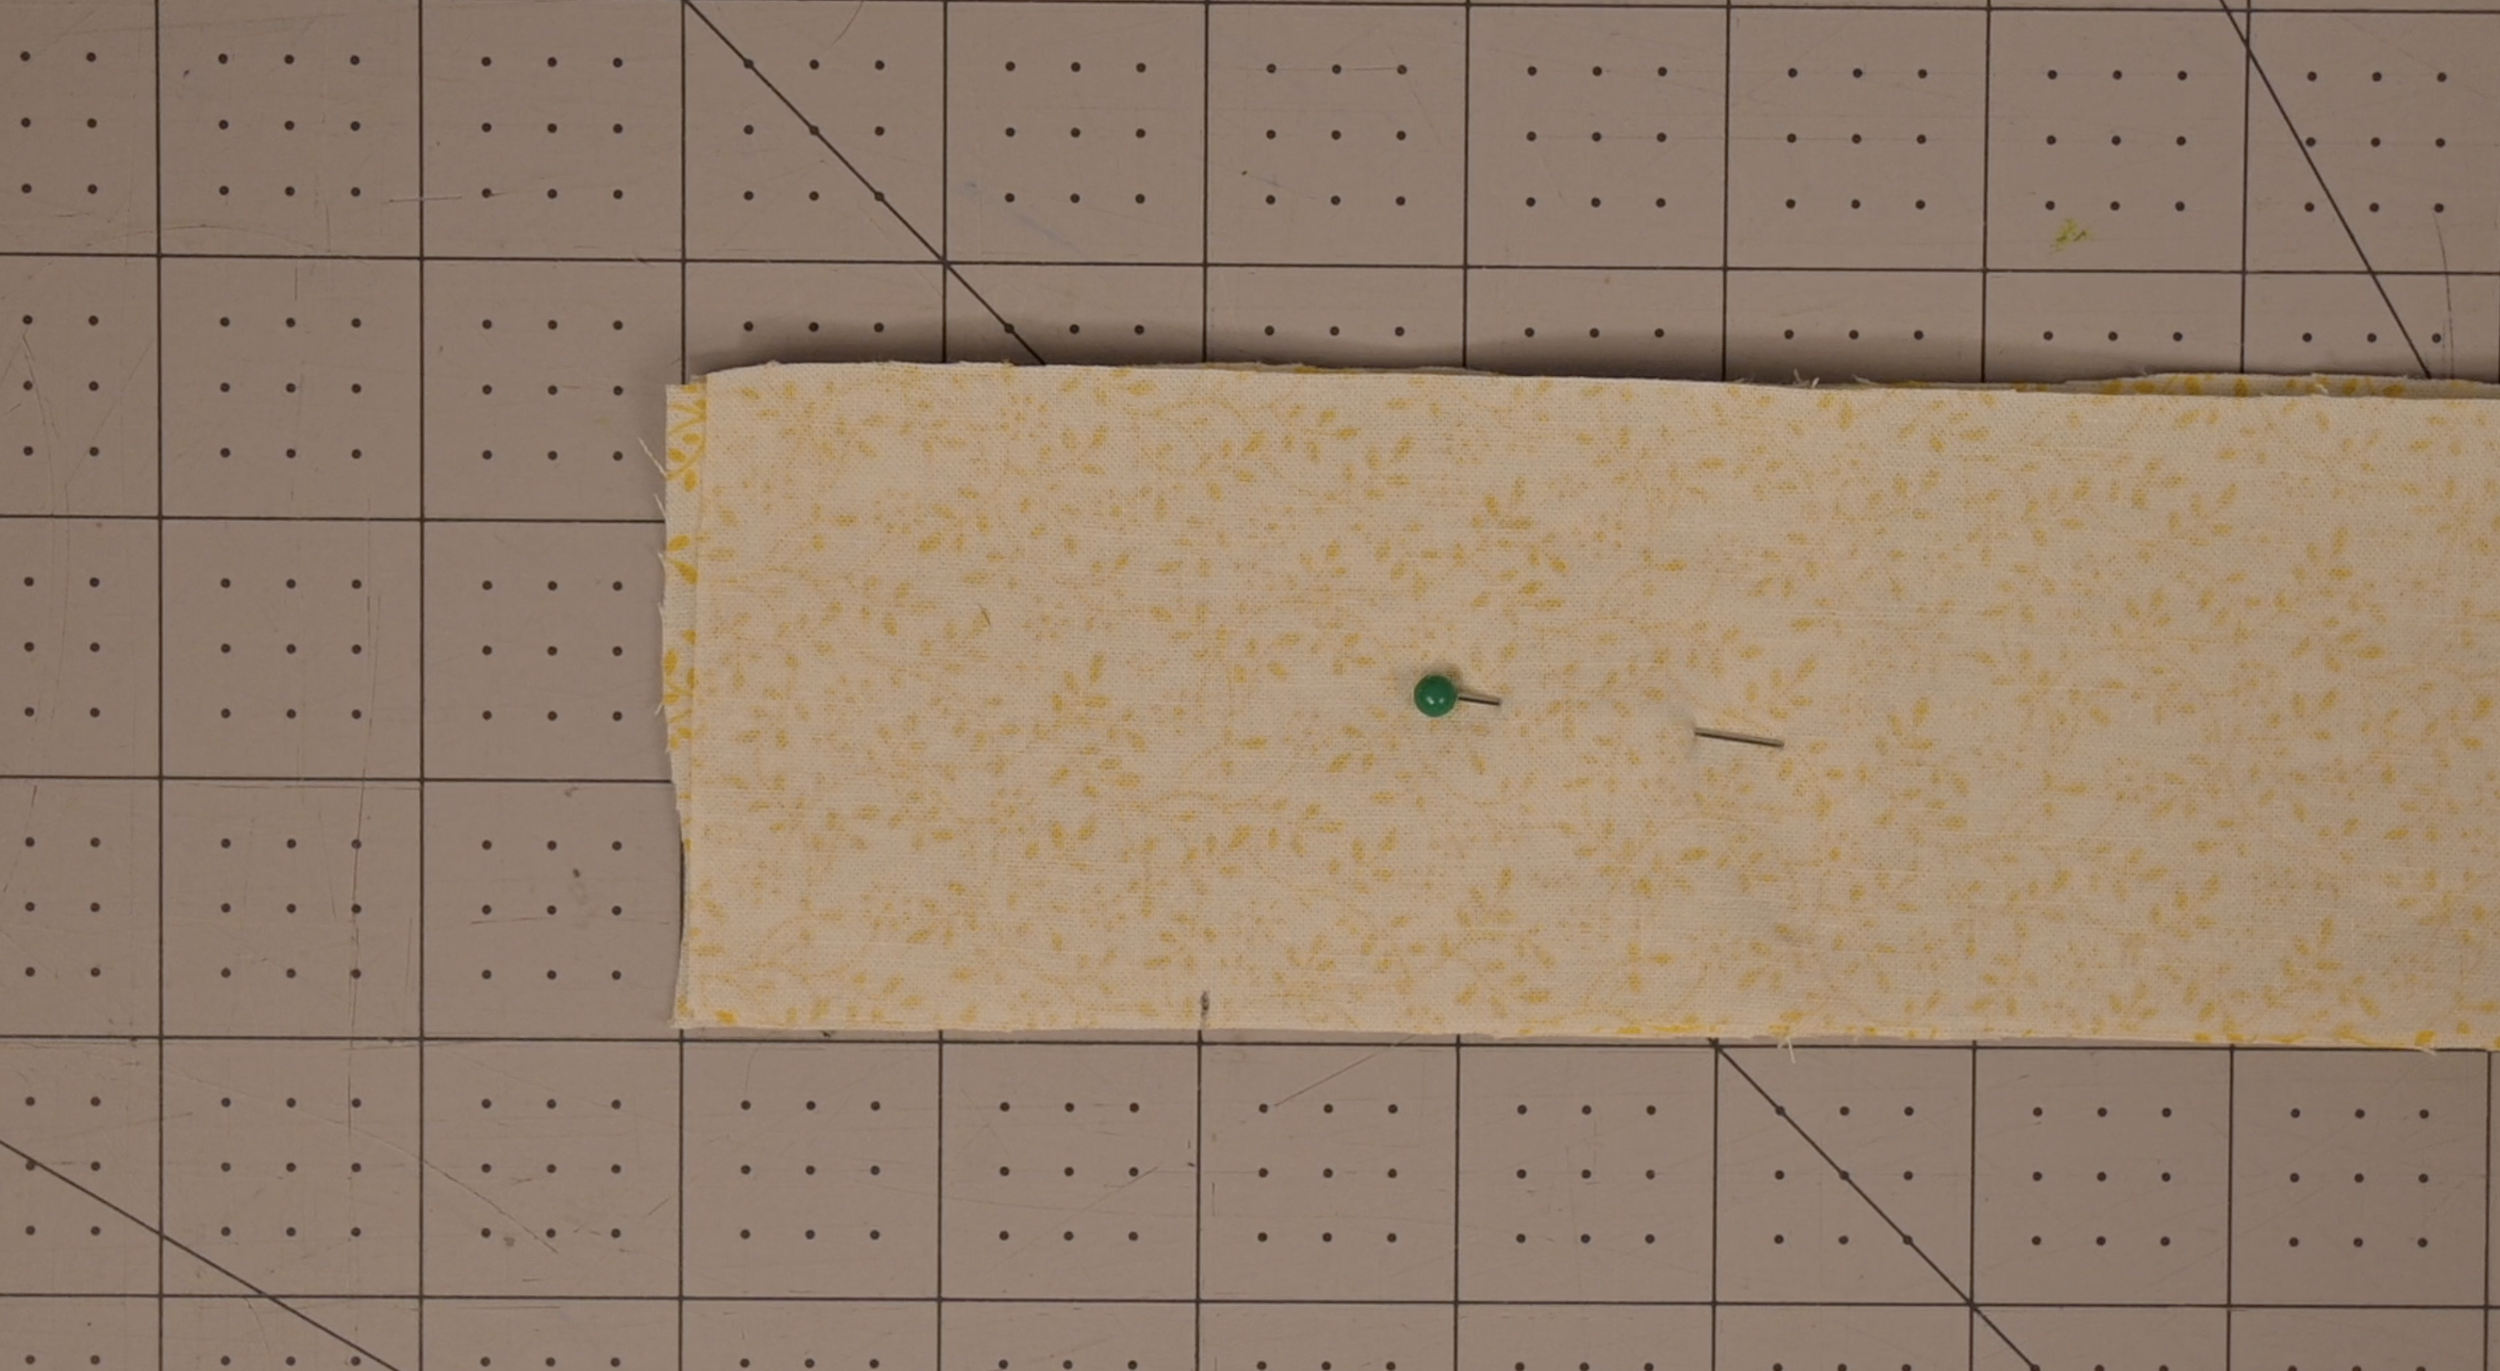
Step 3: Layering the Pieces
Lay one bow base strip flat, right side (pattern) facing up.
Place the pocket on top of one end, aligning the raw edges with the bottom and sides of the base.

Place the second bow base strip on top, right side facing down.

Pin or clip in place.
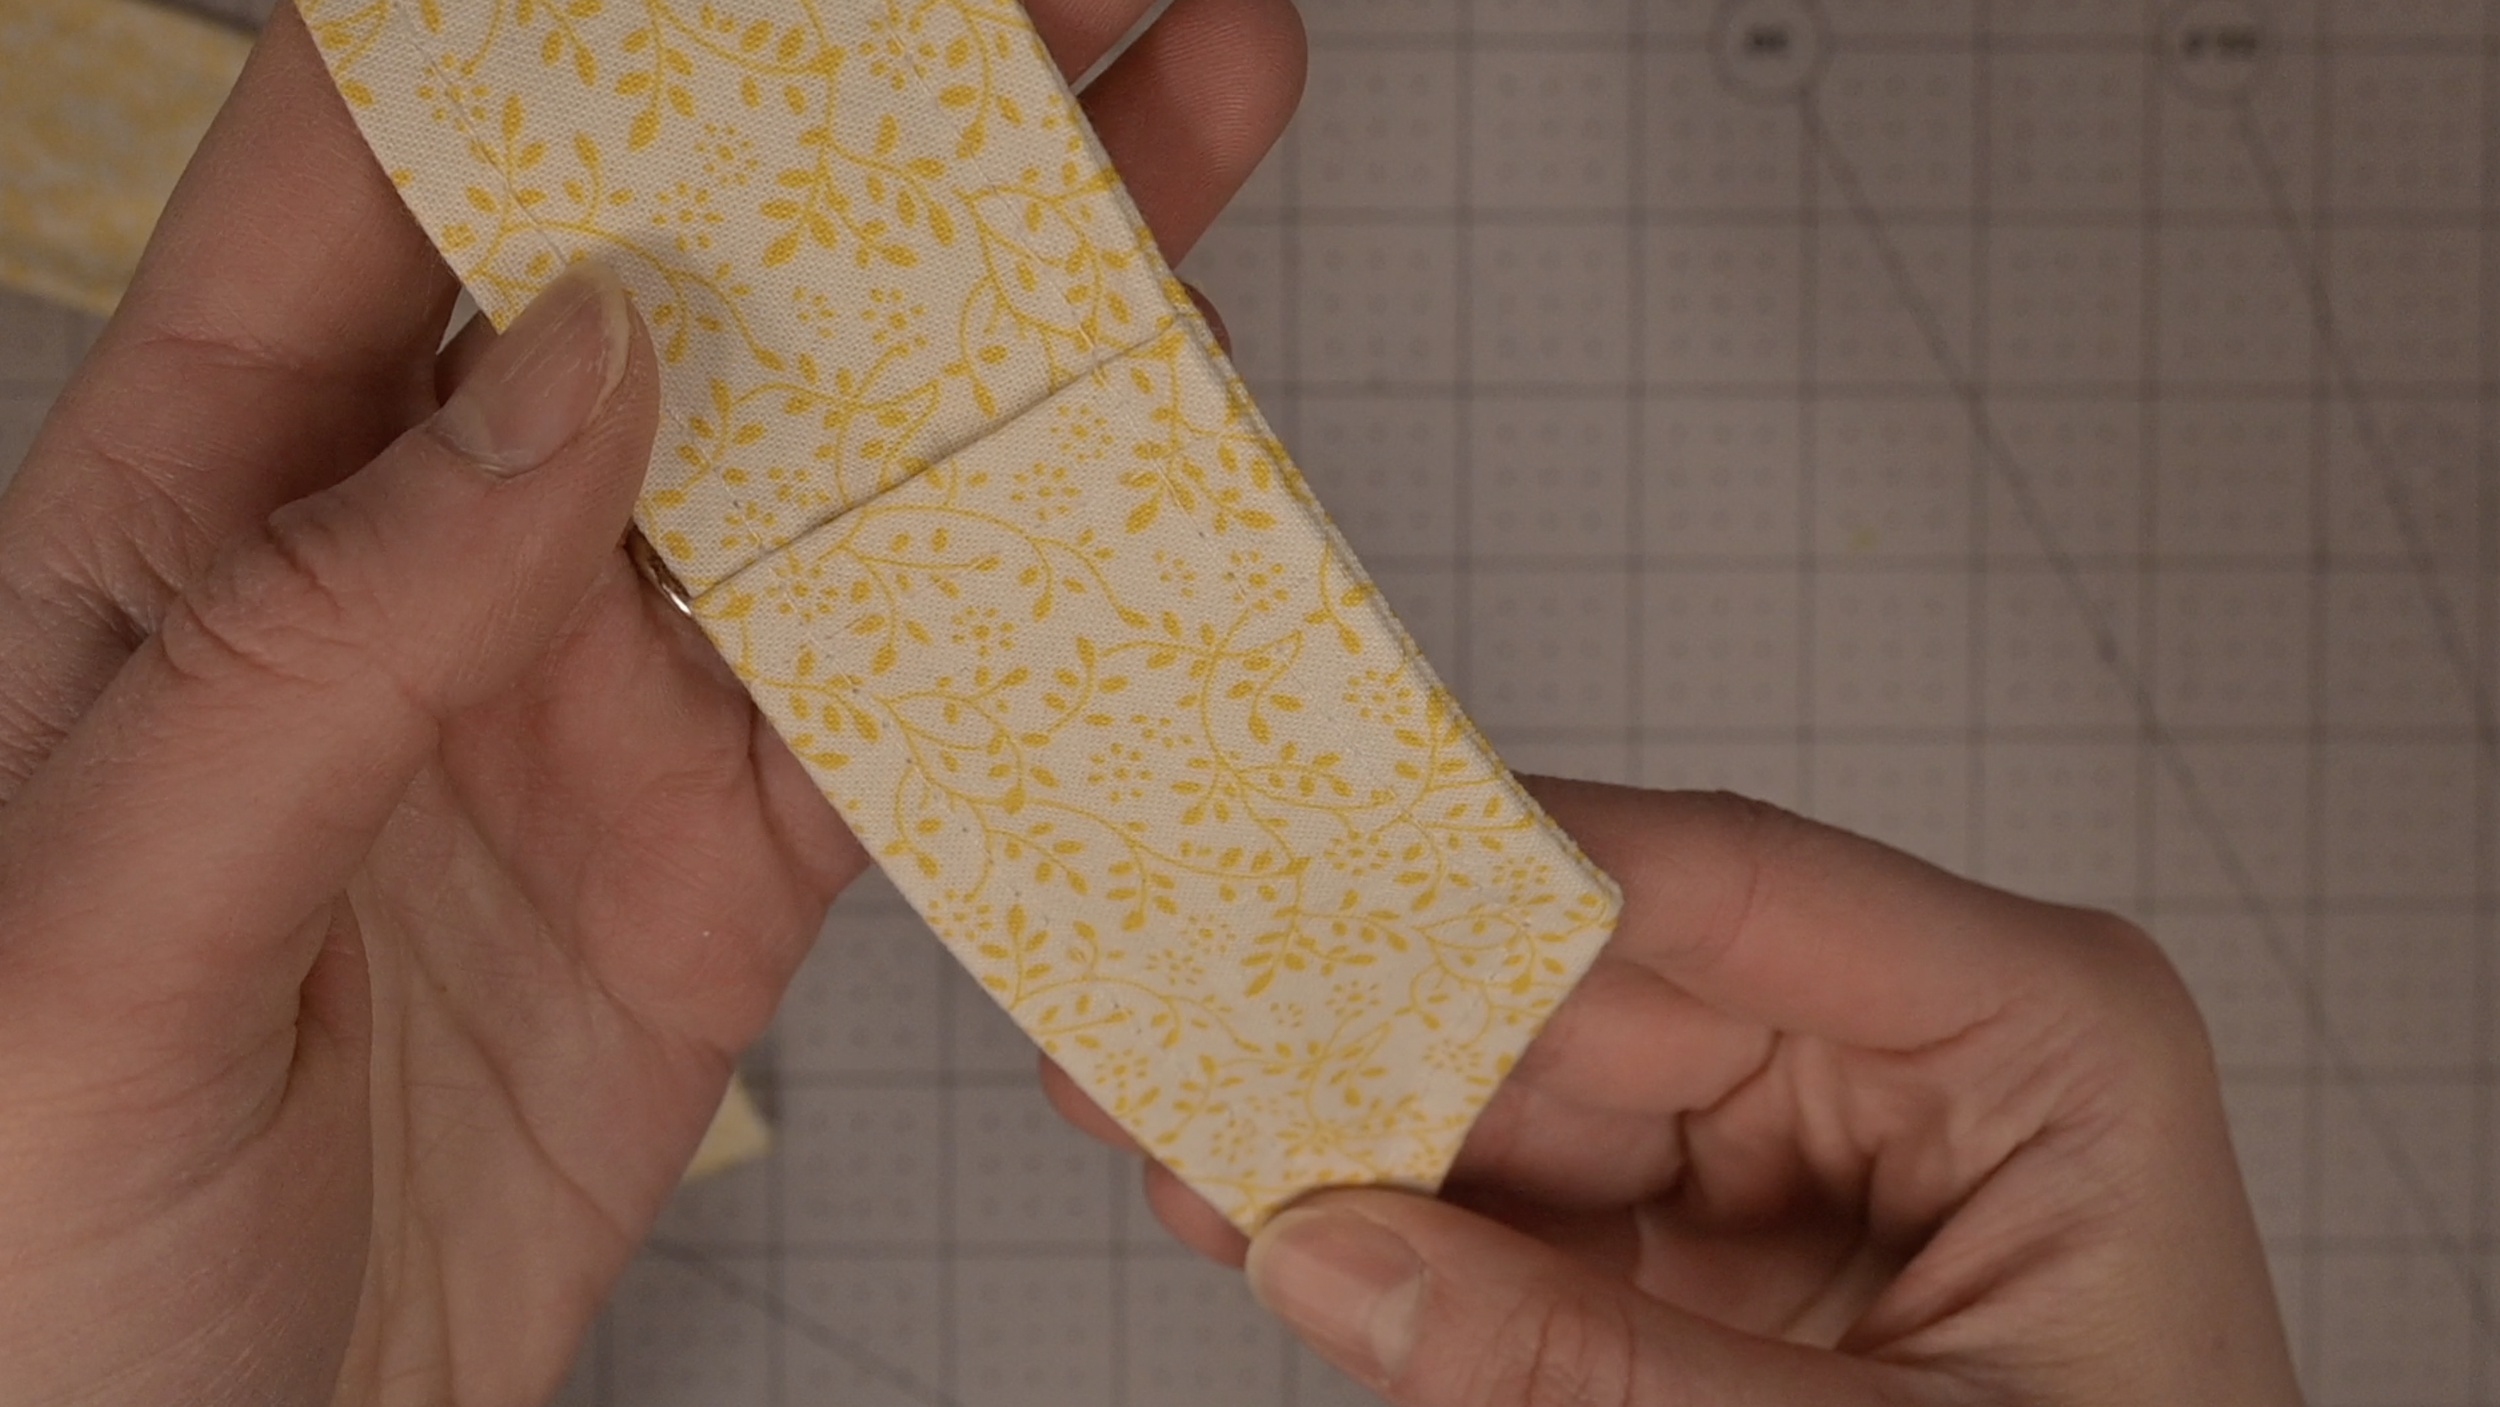
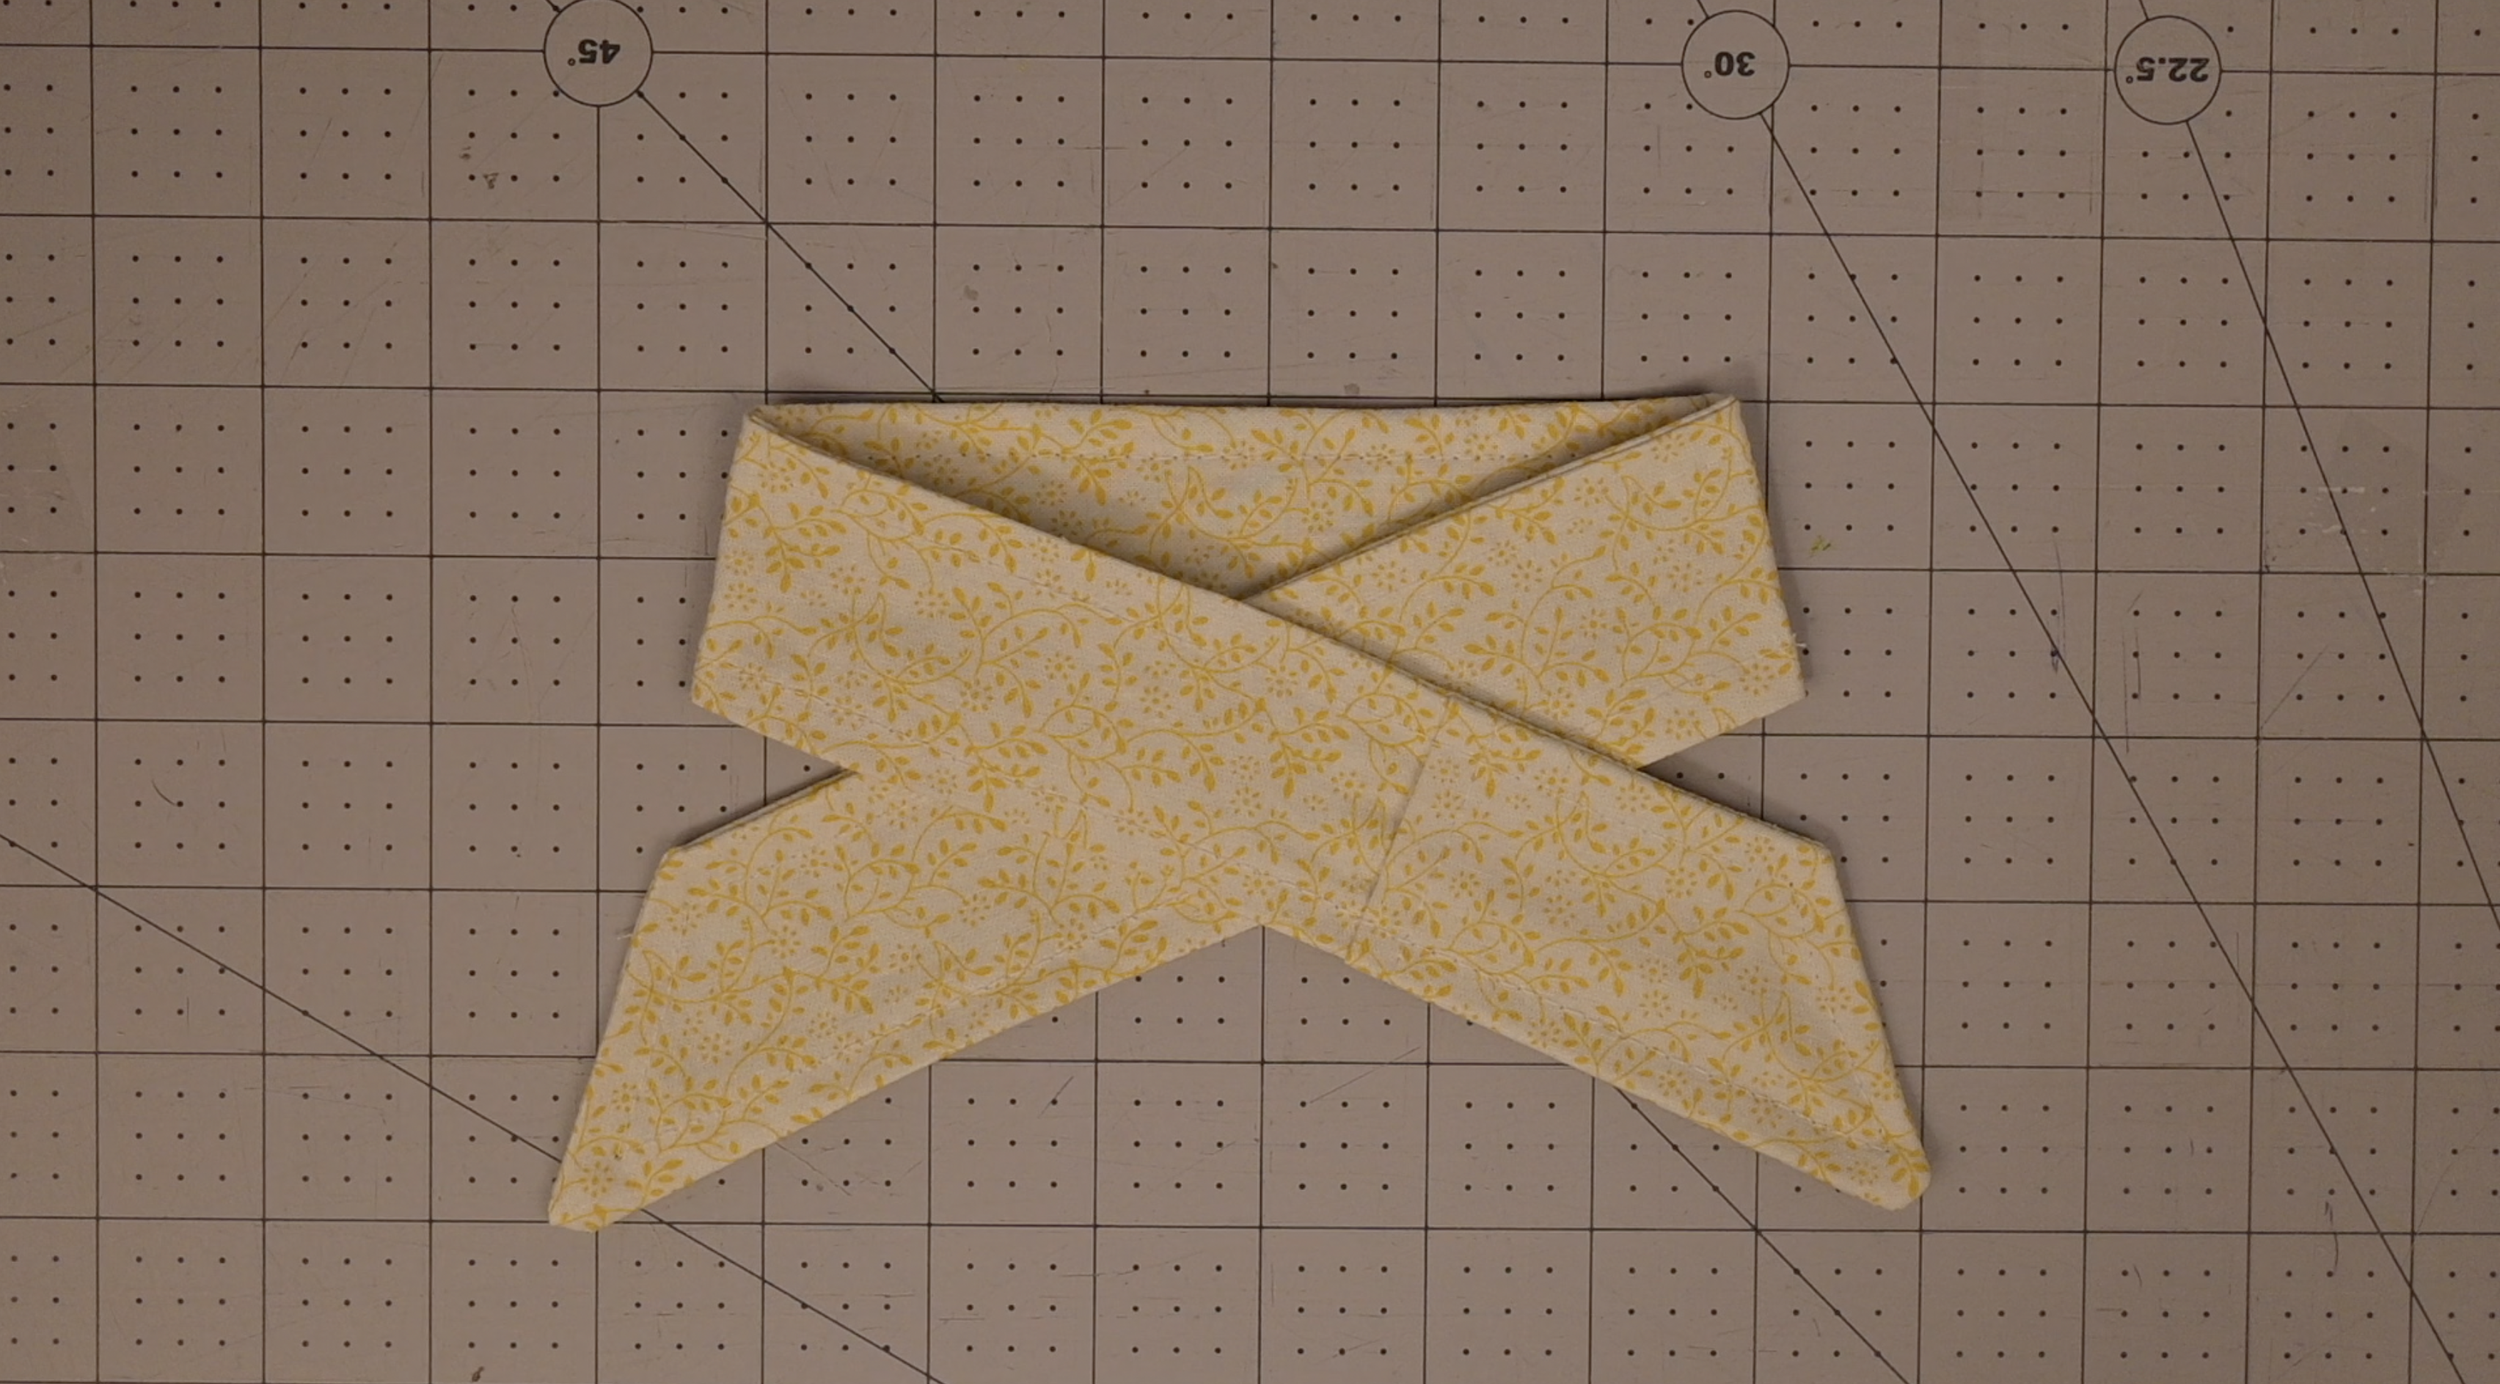
Step 4: The Bow Ends
On one short end, measure 2 inches up from the bottom corner along the long side and make a mark.
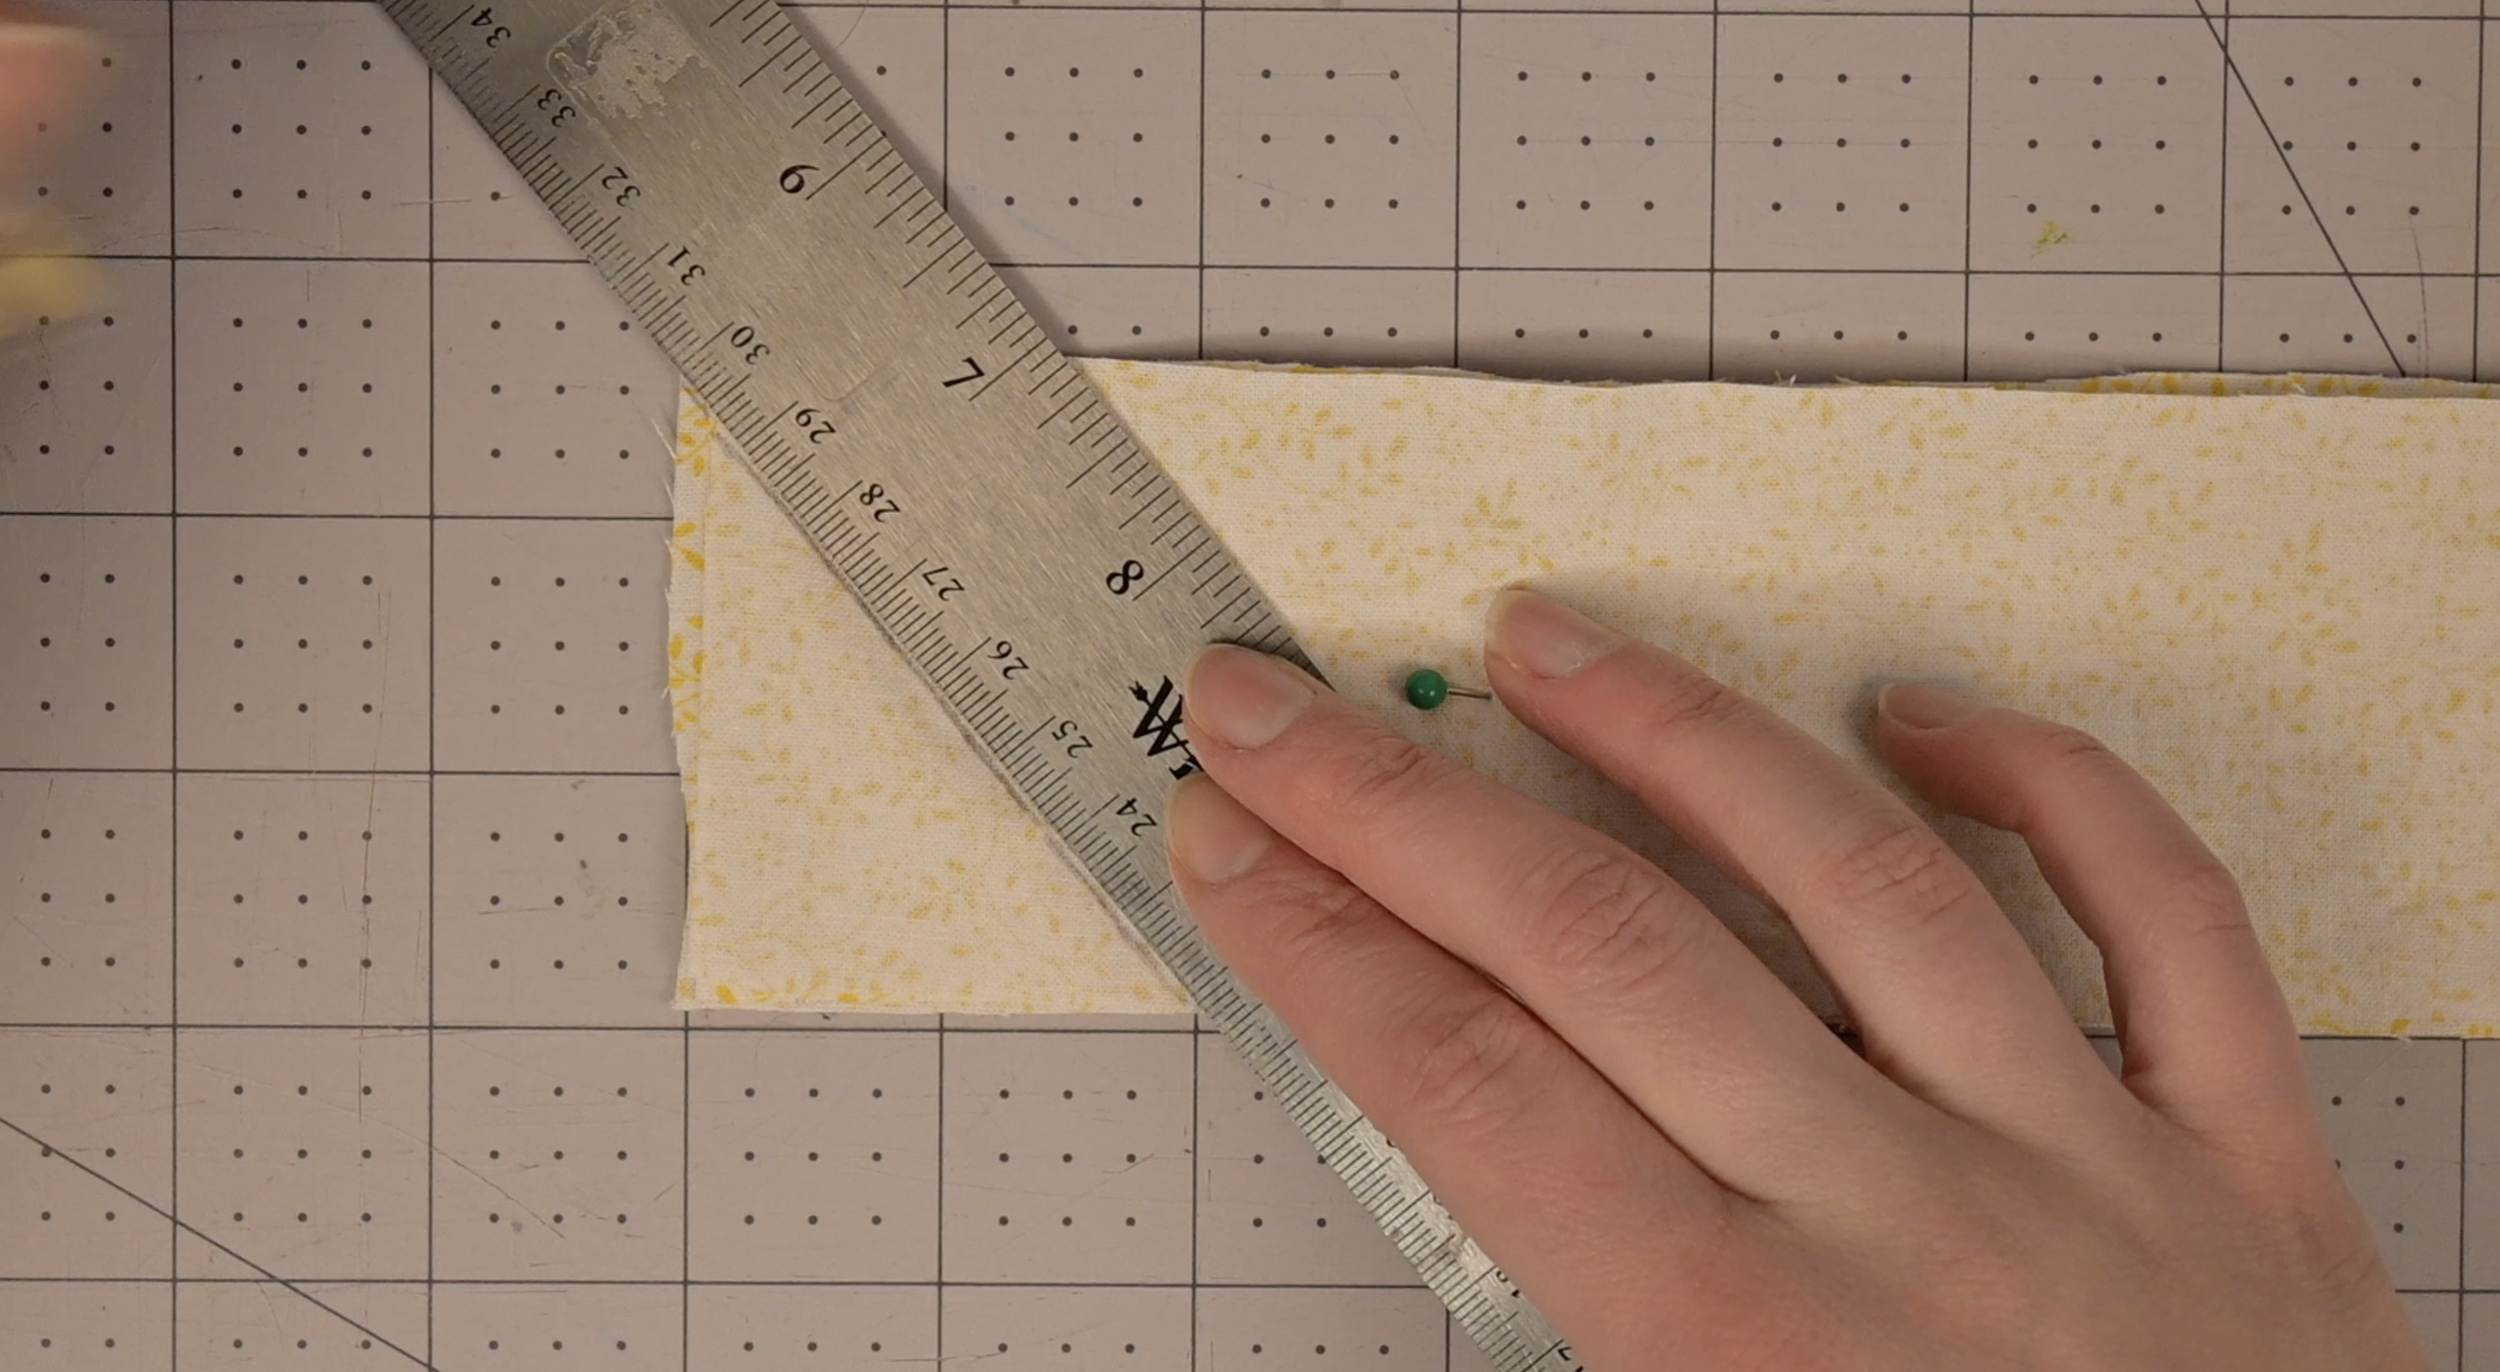
Draw a diagonal line from that mark to the opposite bottom corner.

Cut along this line.
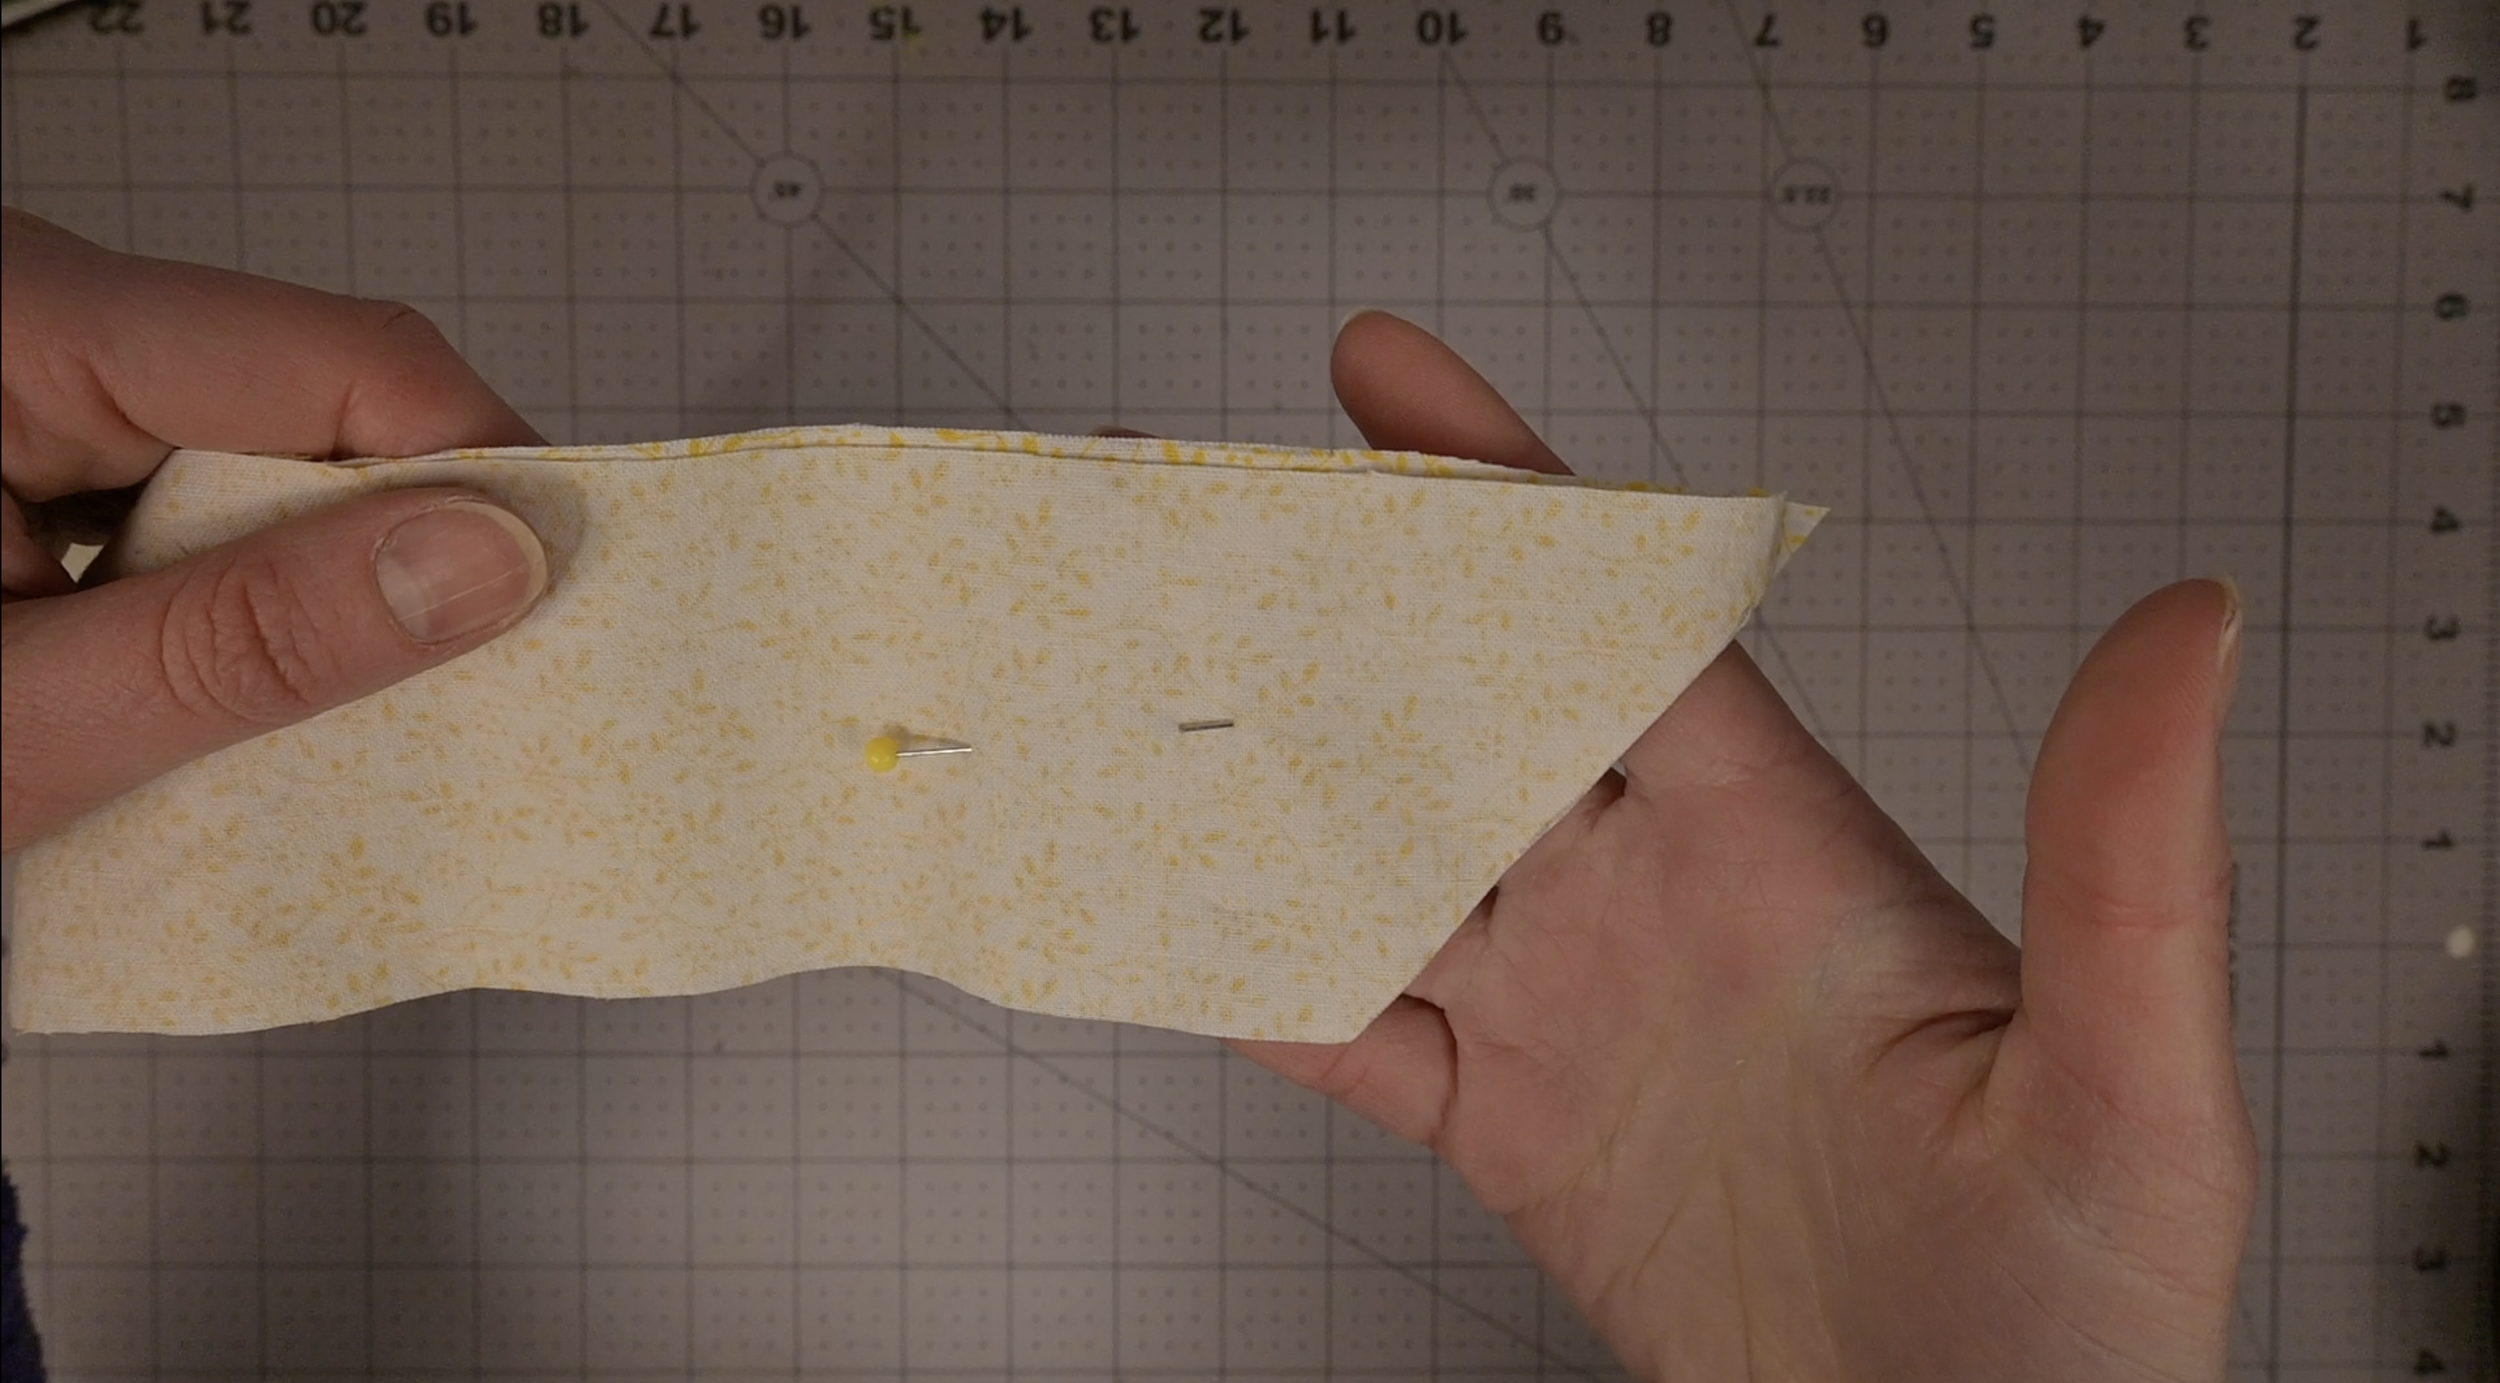
Repeat this on the other end of the strip.
Your long sides should now measure 24" on one side and 20" on the other.
.
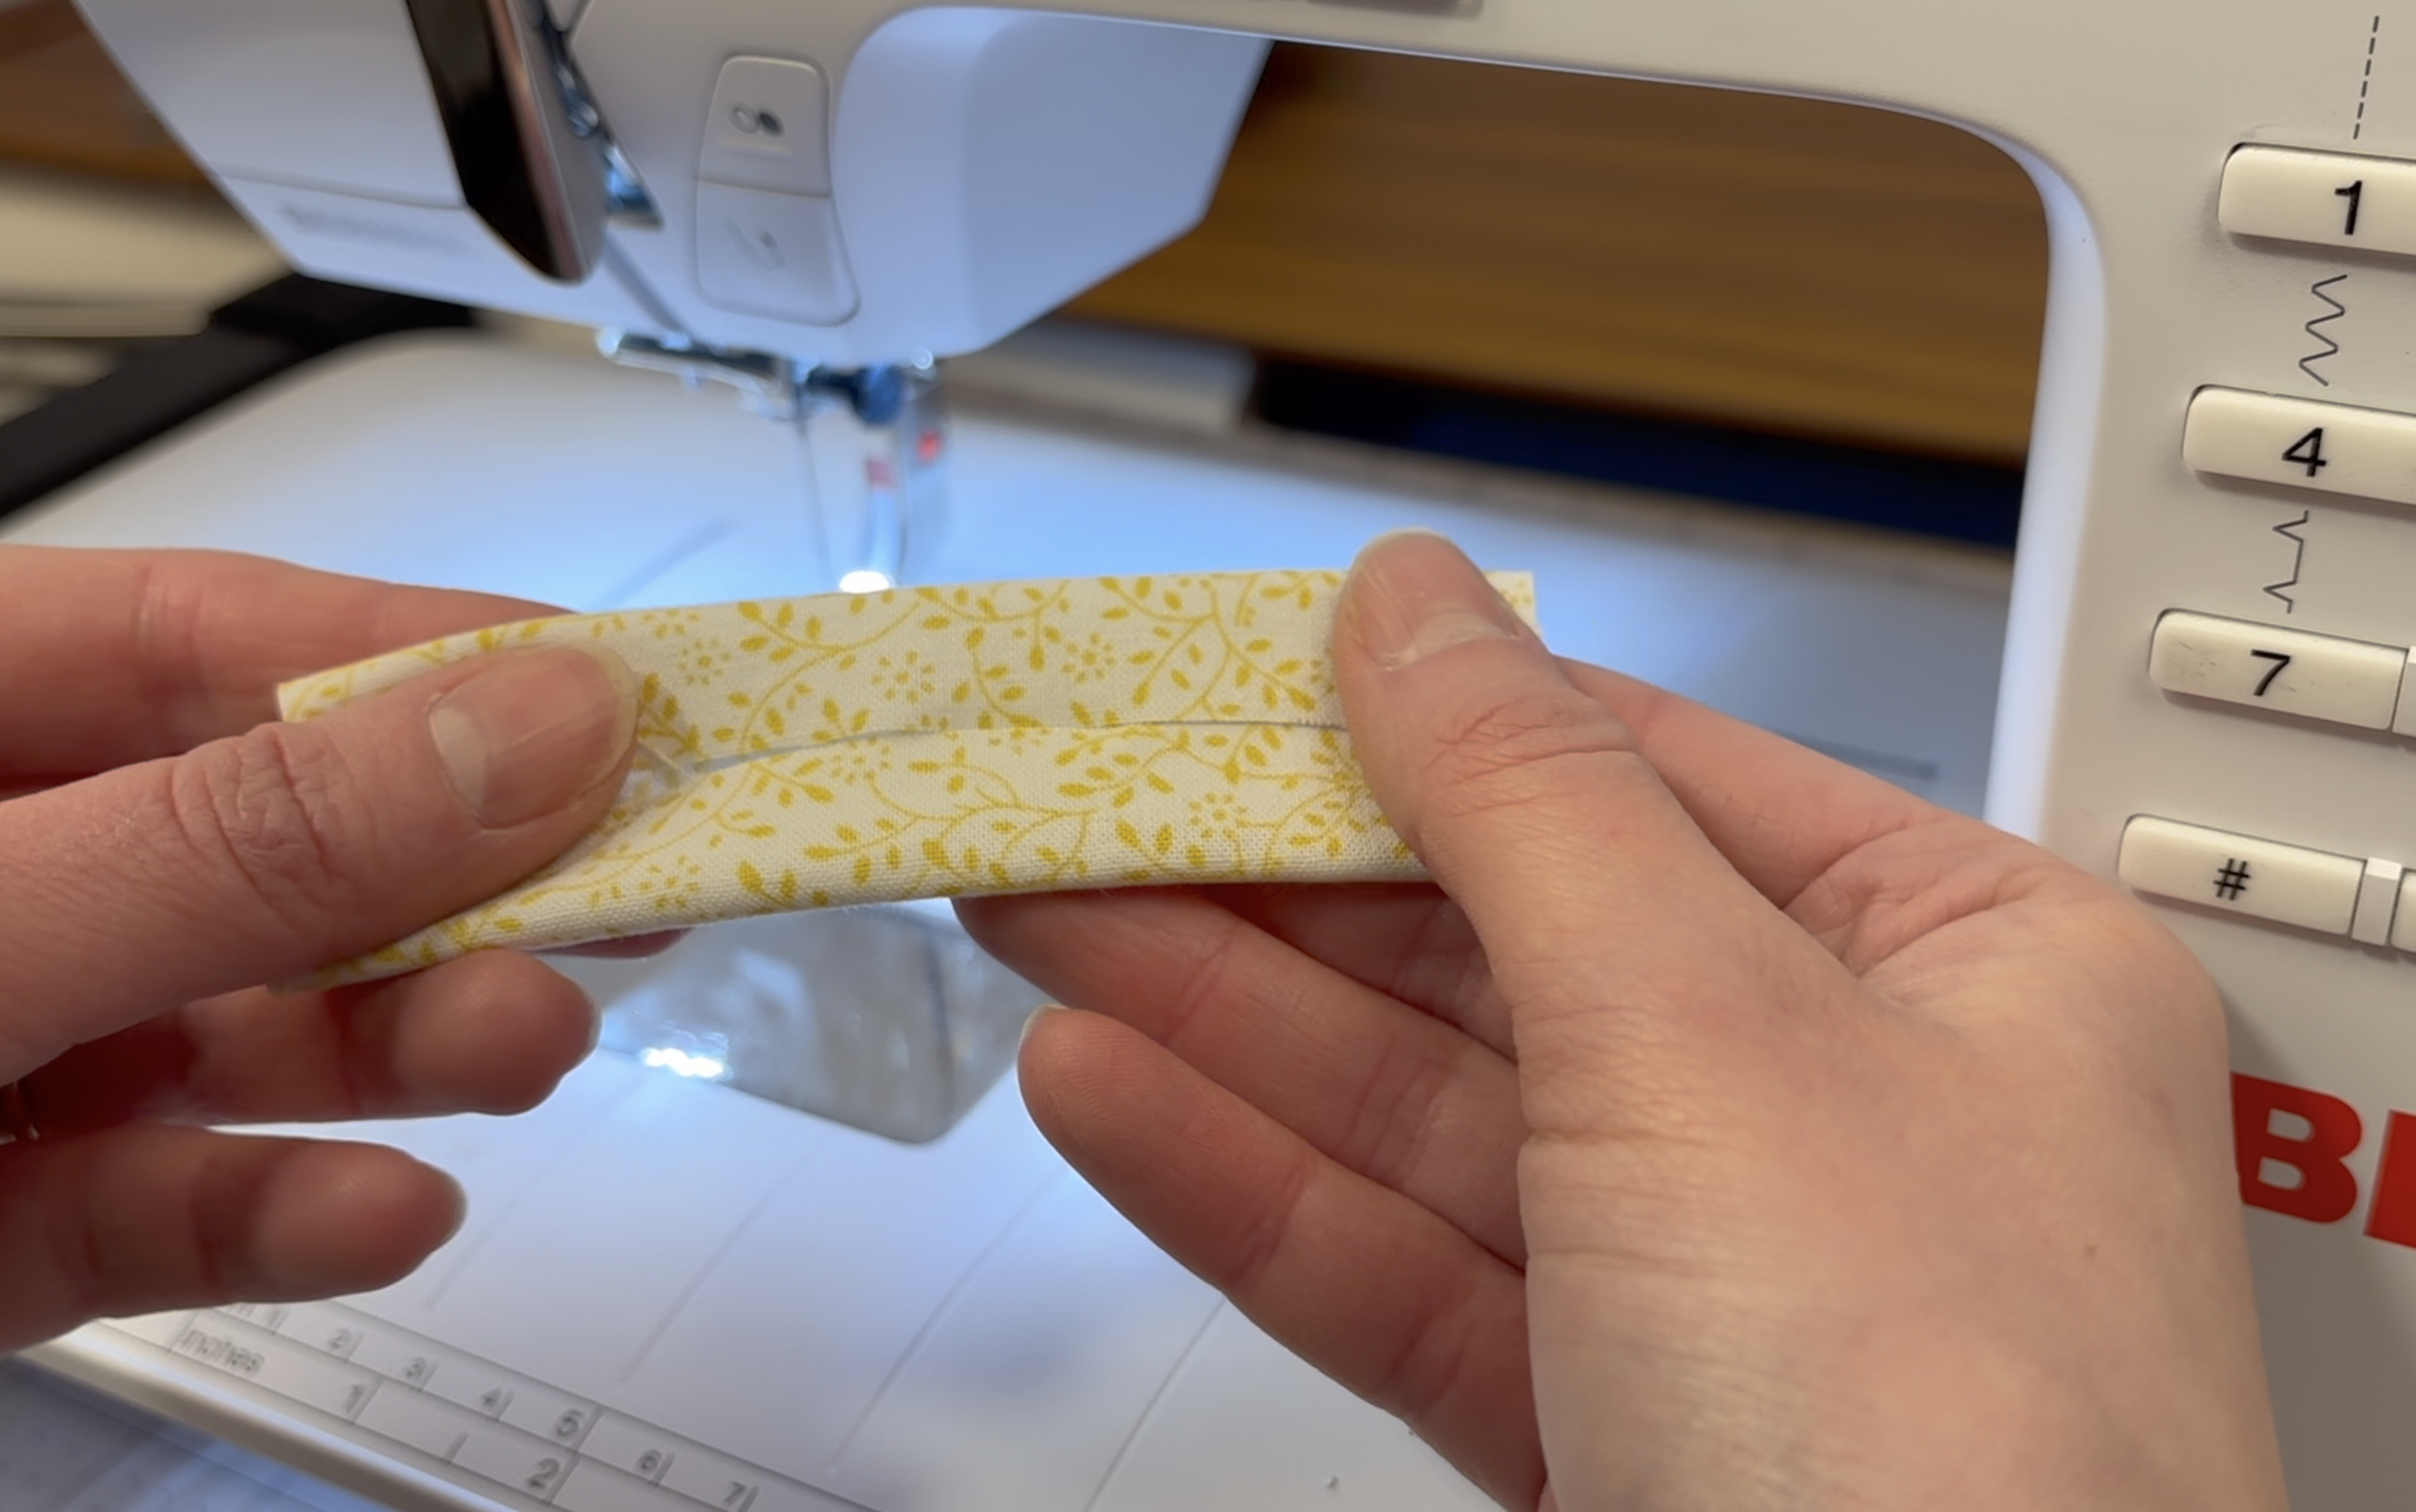
Step 5: Sew the Edges
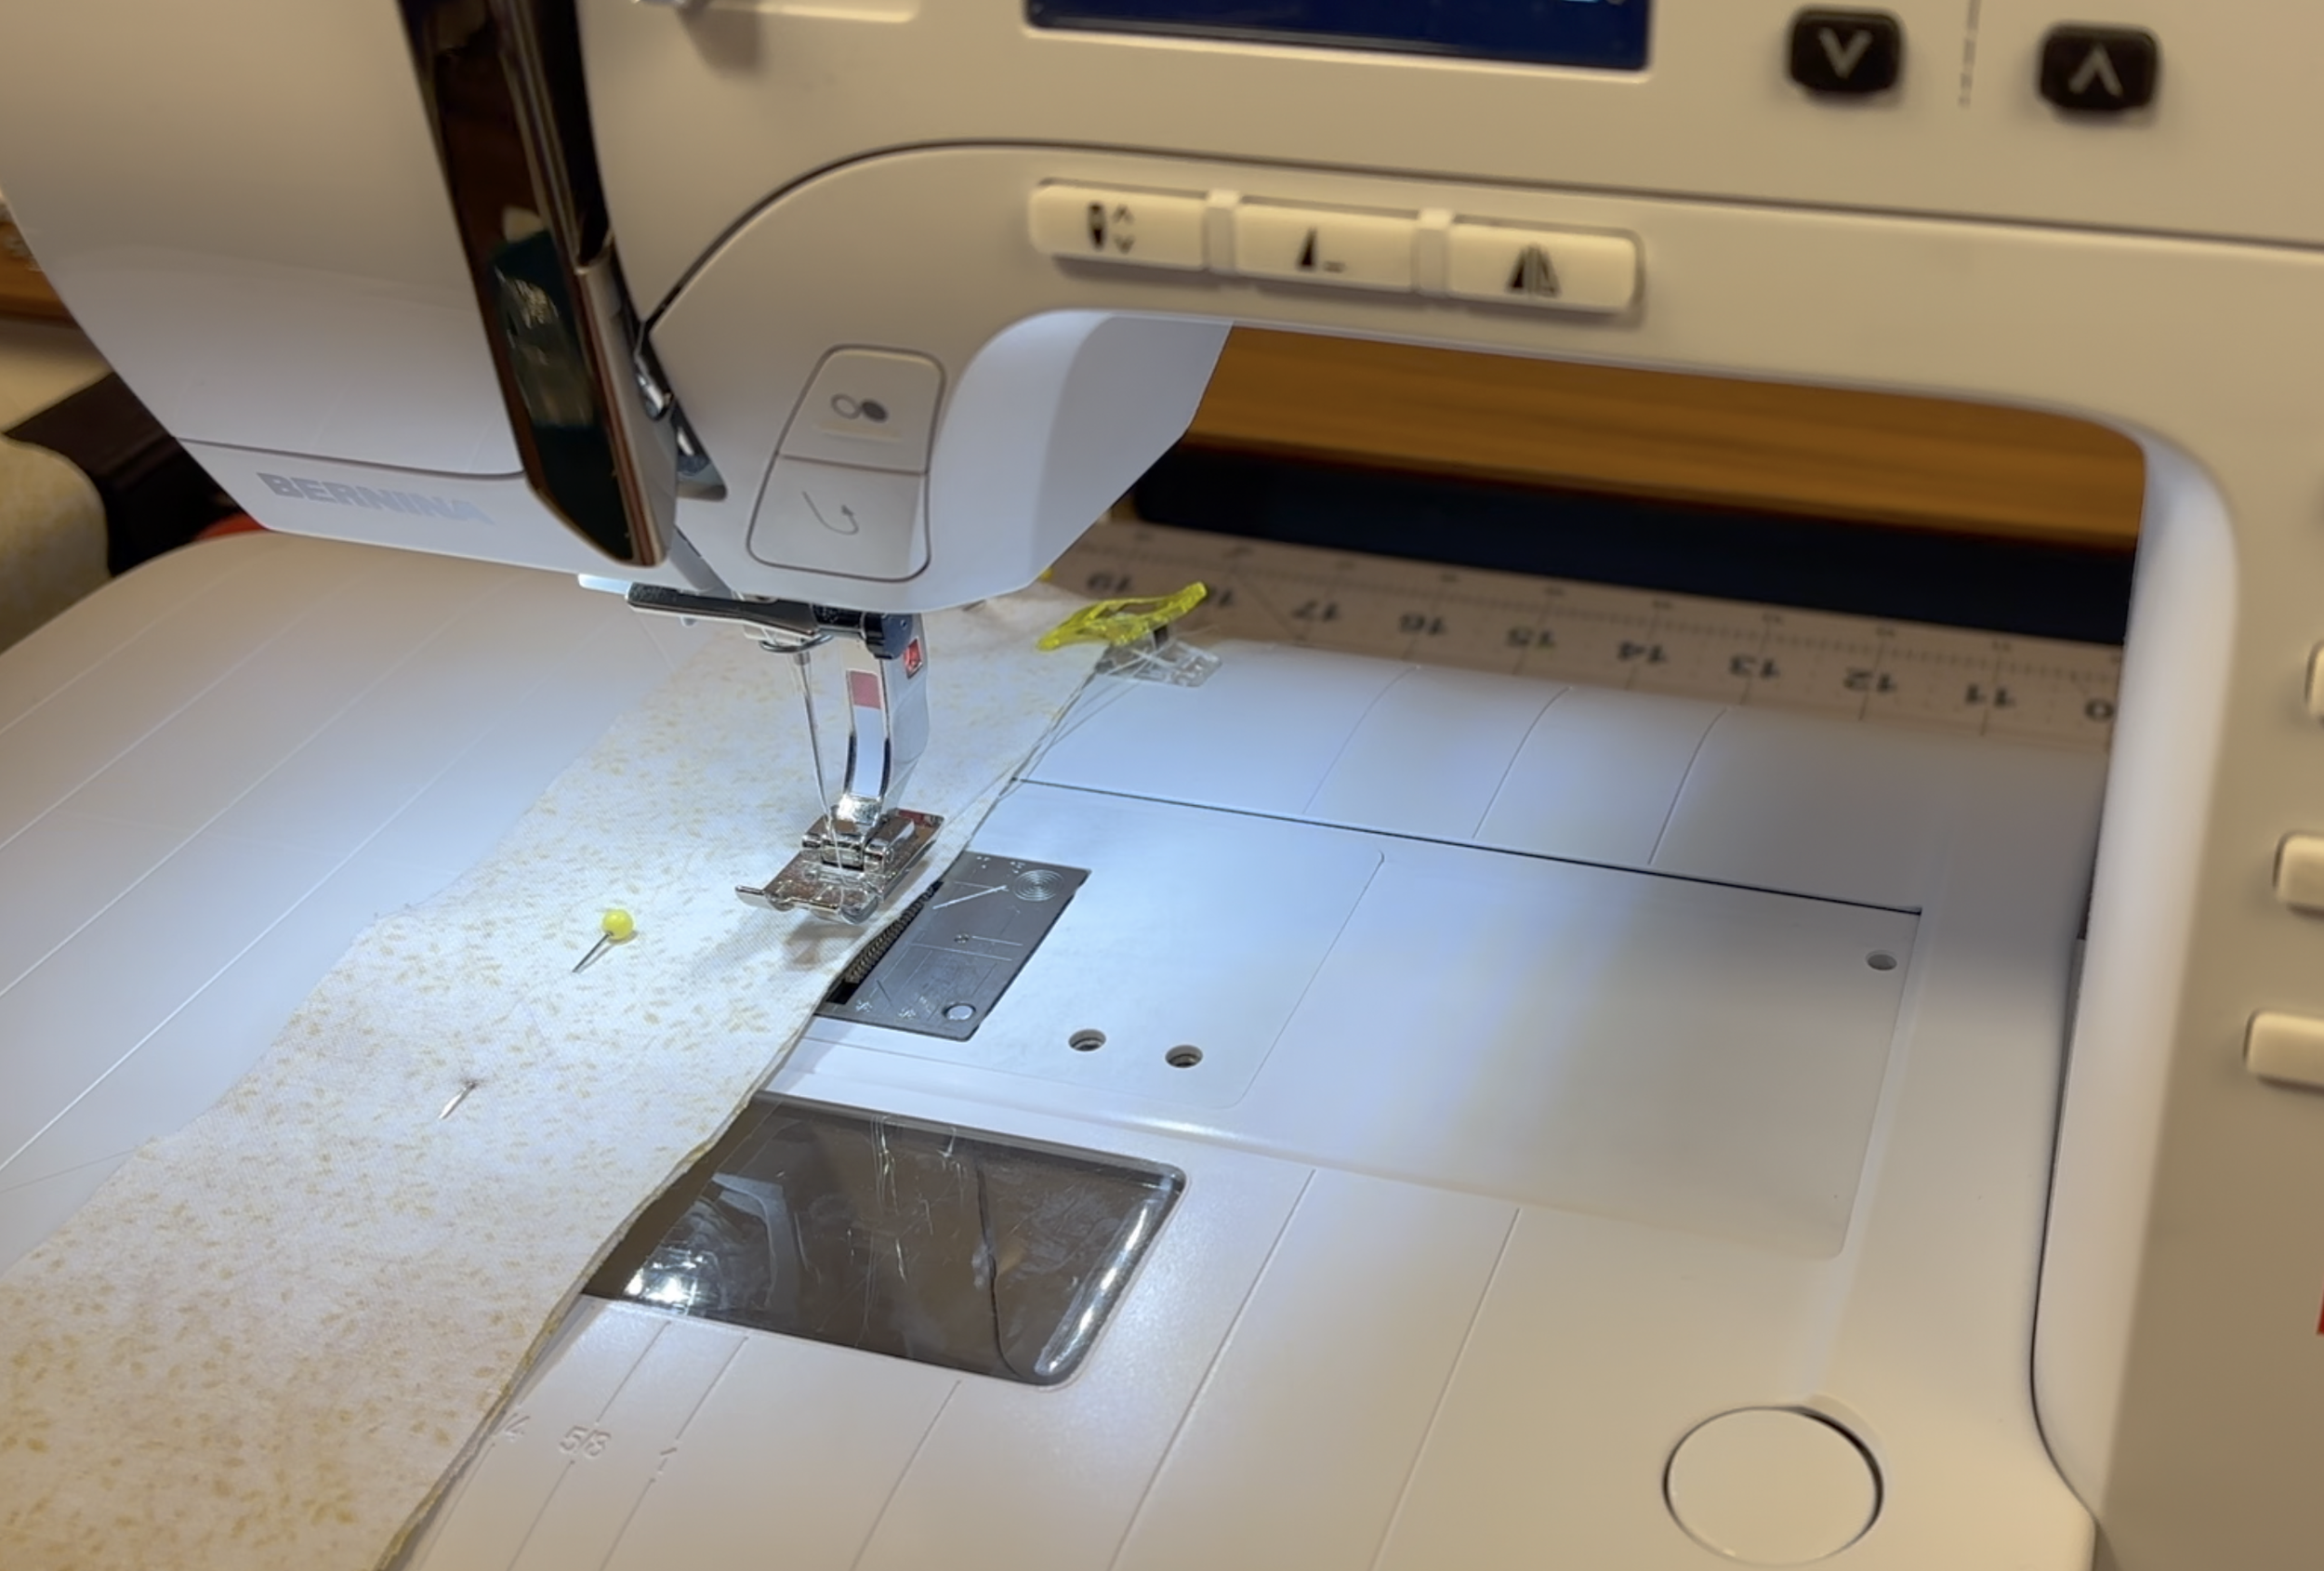
Sew around the entire edge of your layered fabric.
Leave a 3-inch opening in the middle of one long edge for turning.
Step 6: Right-Side Out
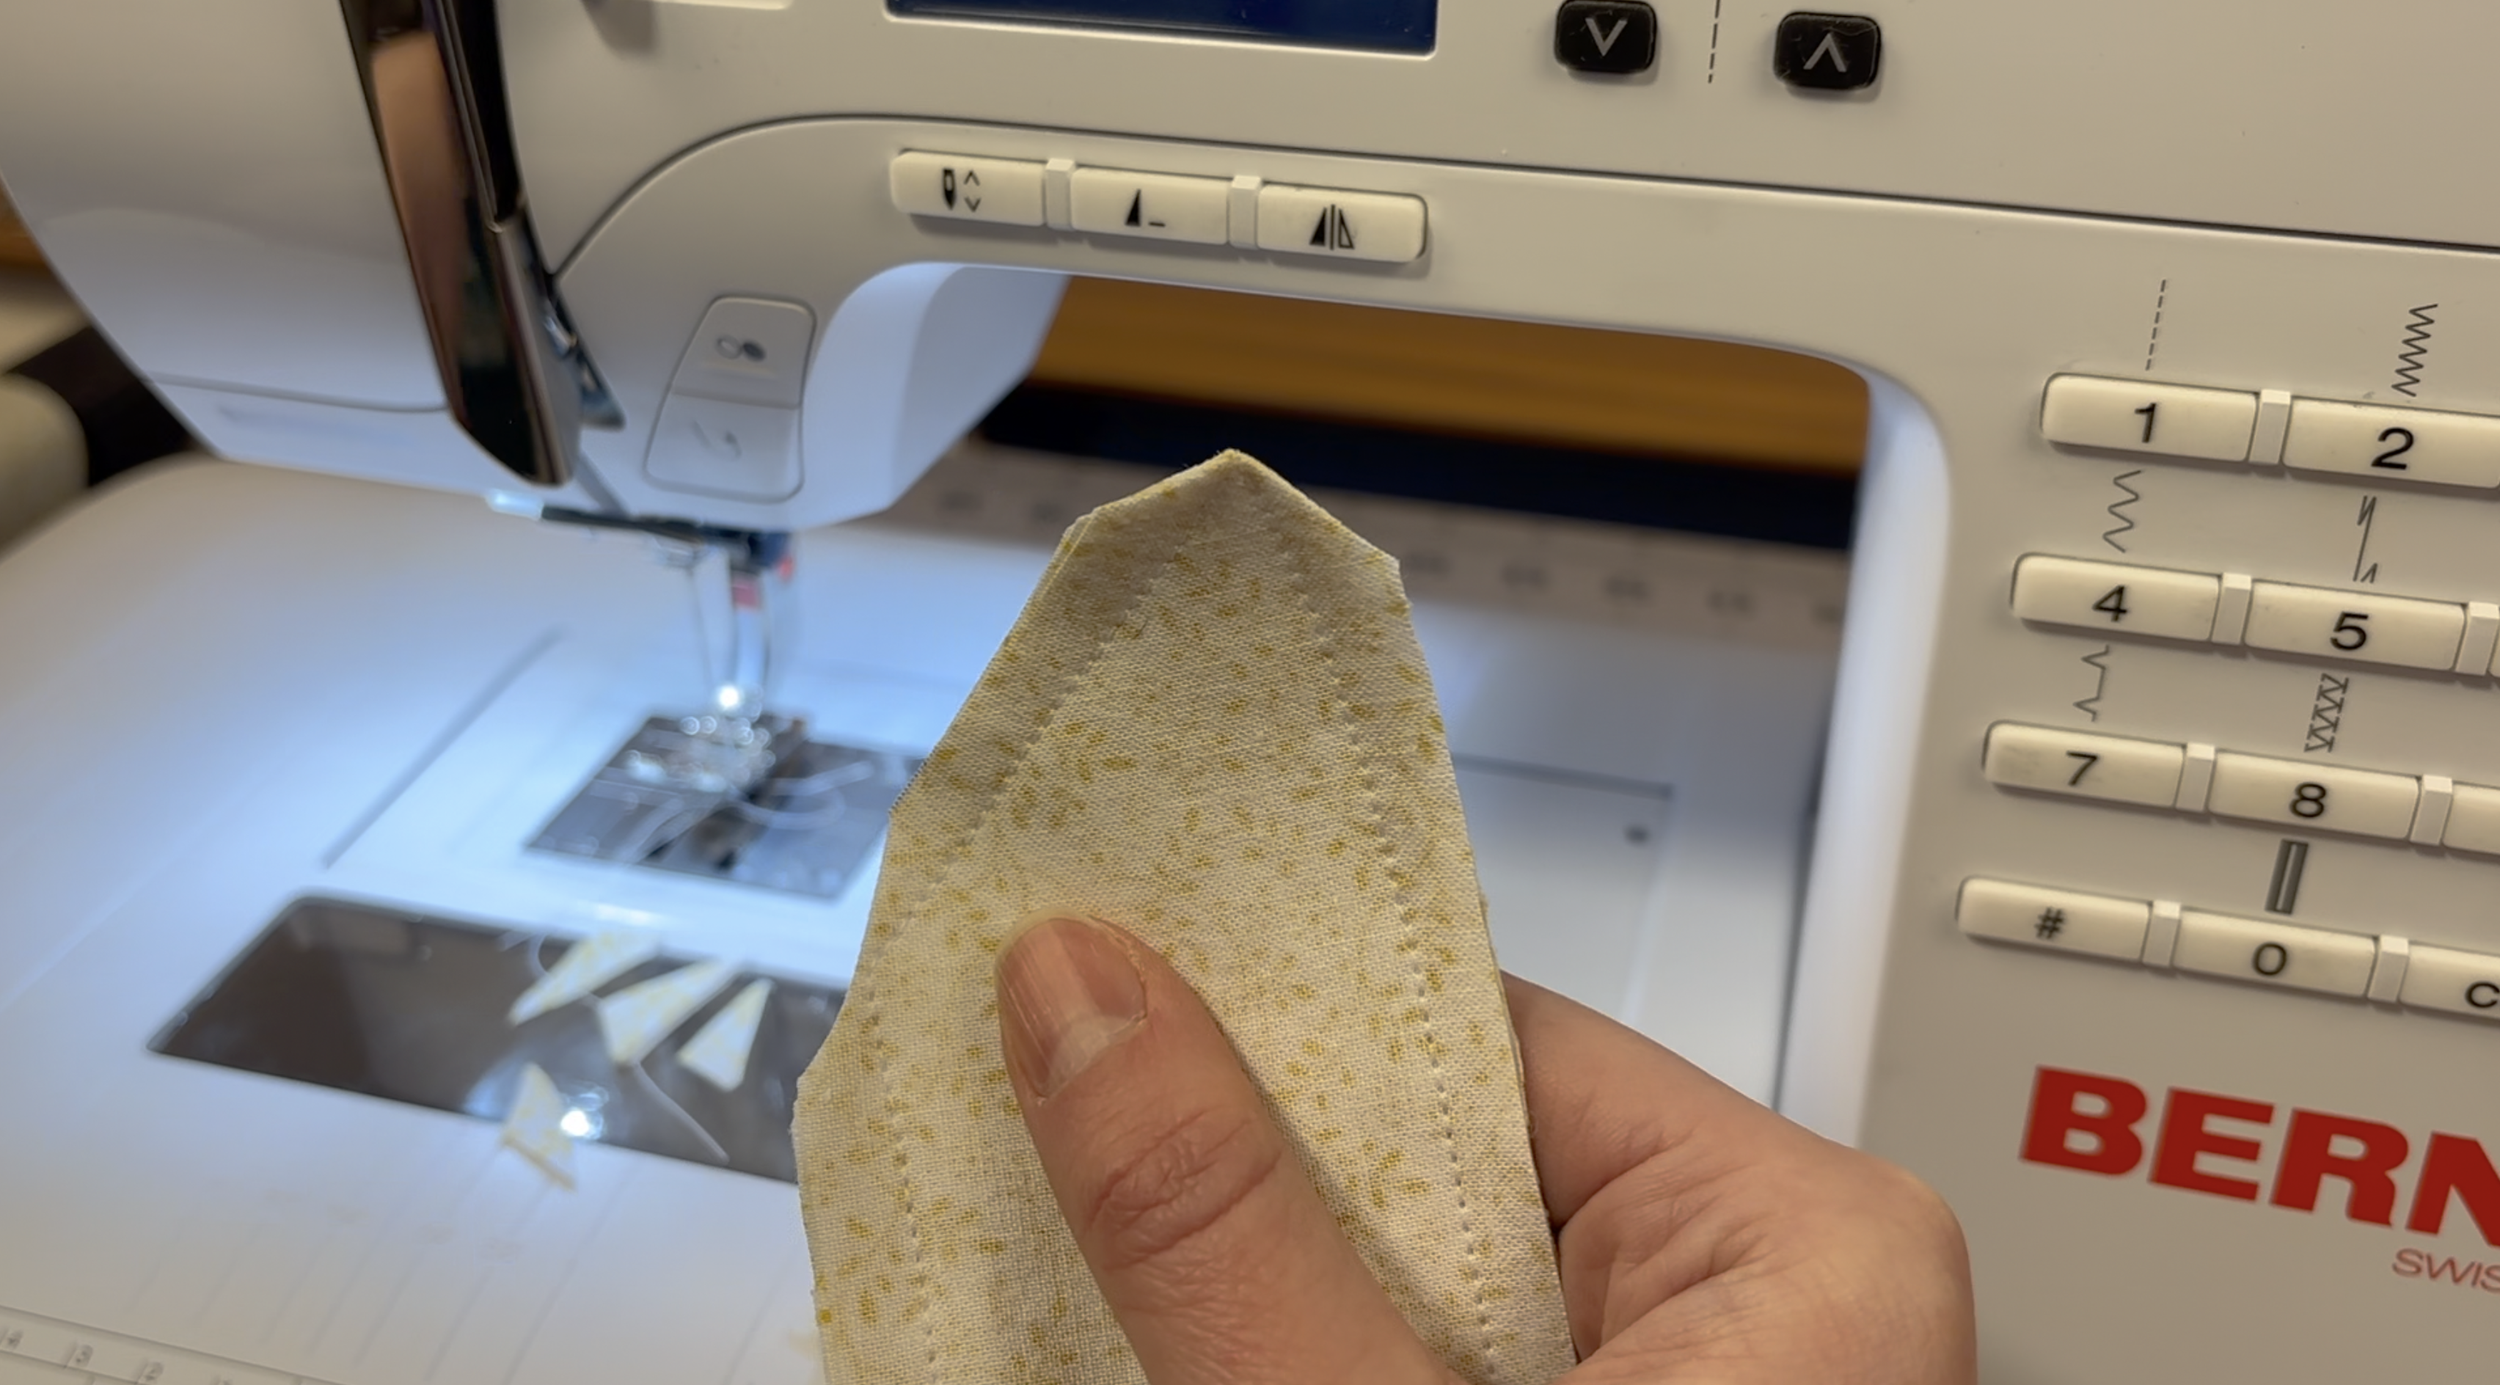
Clip the corners of the points .
Be careful not to cut the stitches.

Turn the fabric right-side out through the 3-inch opening.
Use a pencil or paintbrush to gently push the points out.
Step 7: Iron
Tuck the raw edges of the opening inward and iron the entire piece flat.
Step 8: Topstitch
Using a longer stitch length, sew a 1/4 inch hem around the entire edge of the fabric.
This closes the opening.
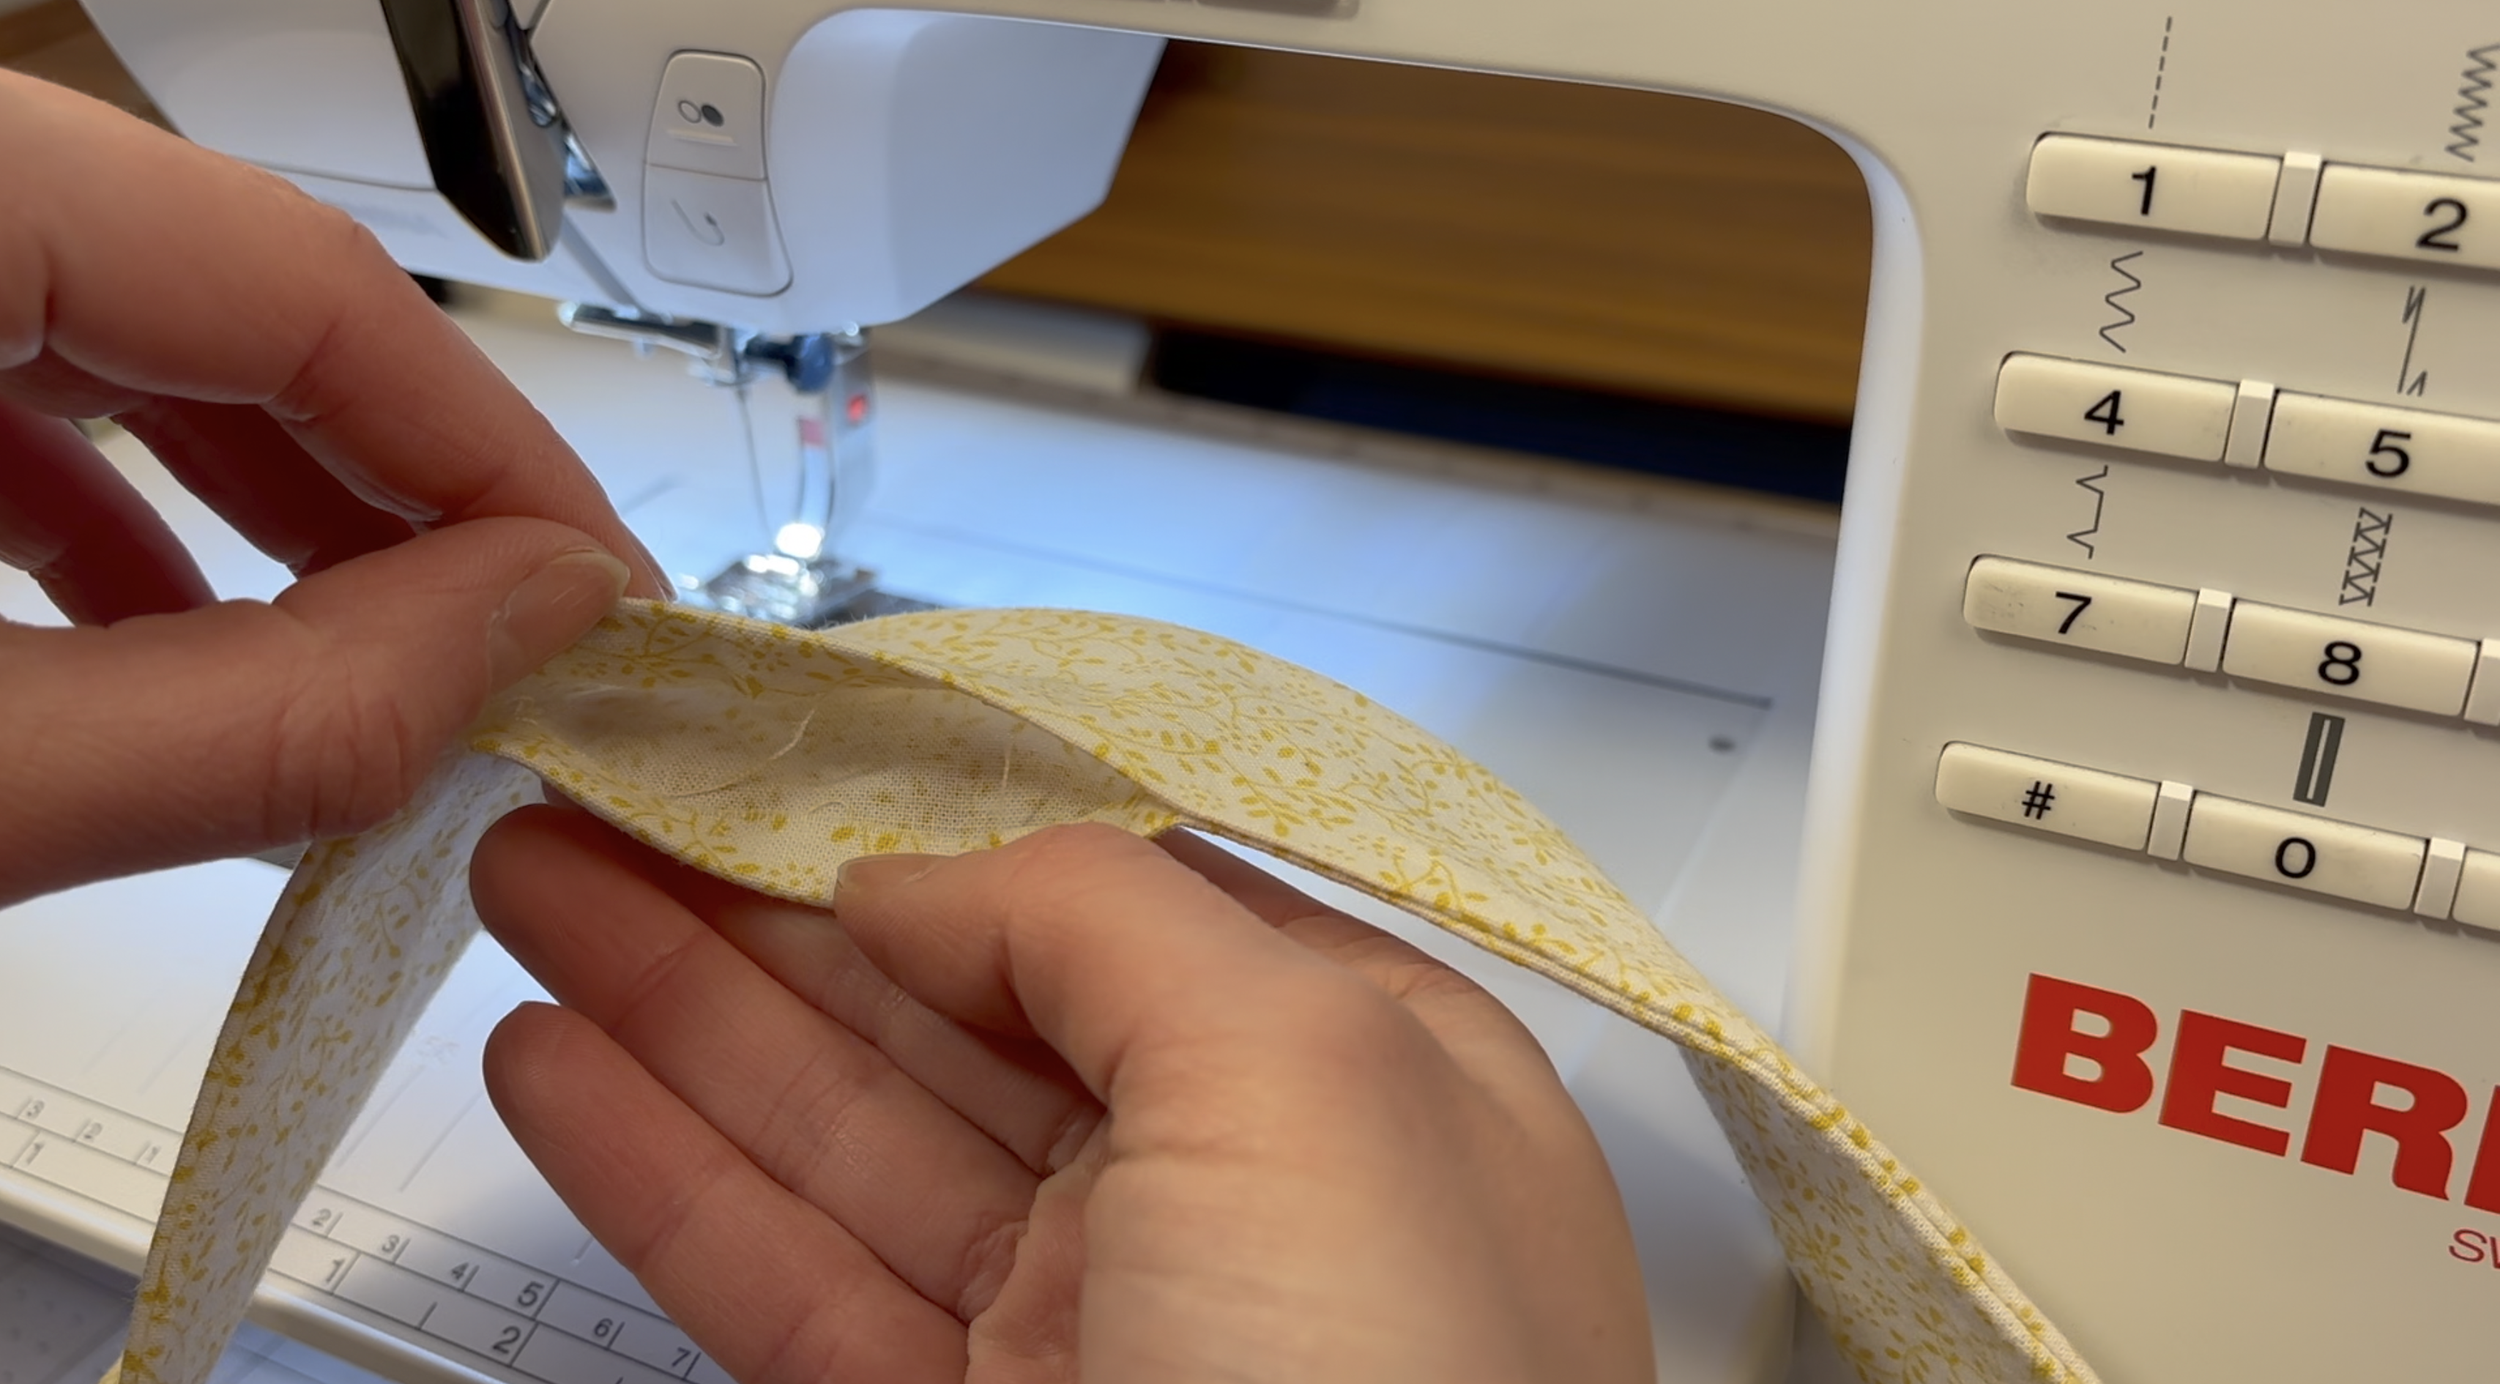
Step 9: The Bow Center

Take the 4" x 2" fabric piece.
Fold it in half lengthwise and iron a crease.
Open it and fold both long raw edges inward to meet that center crease.
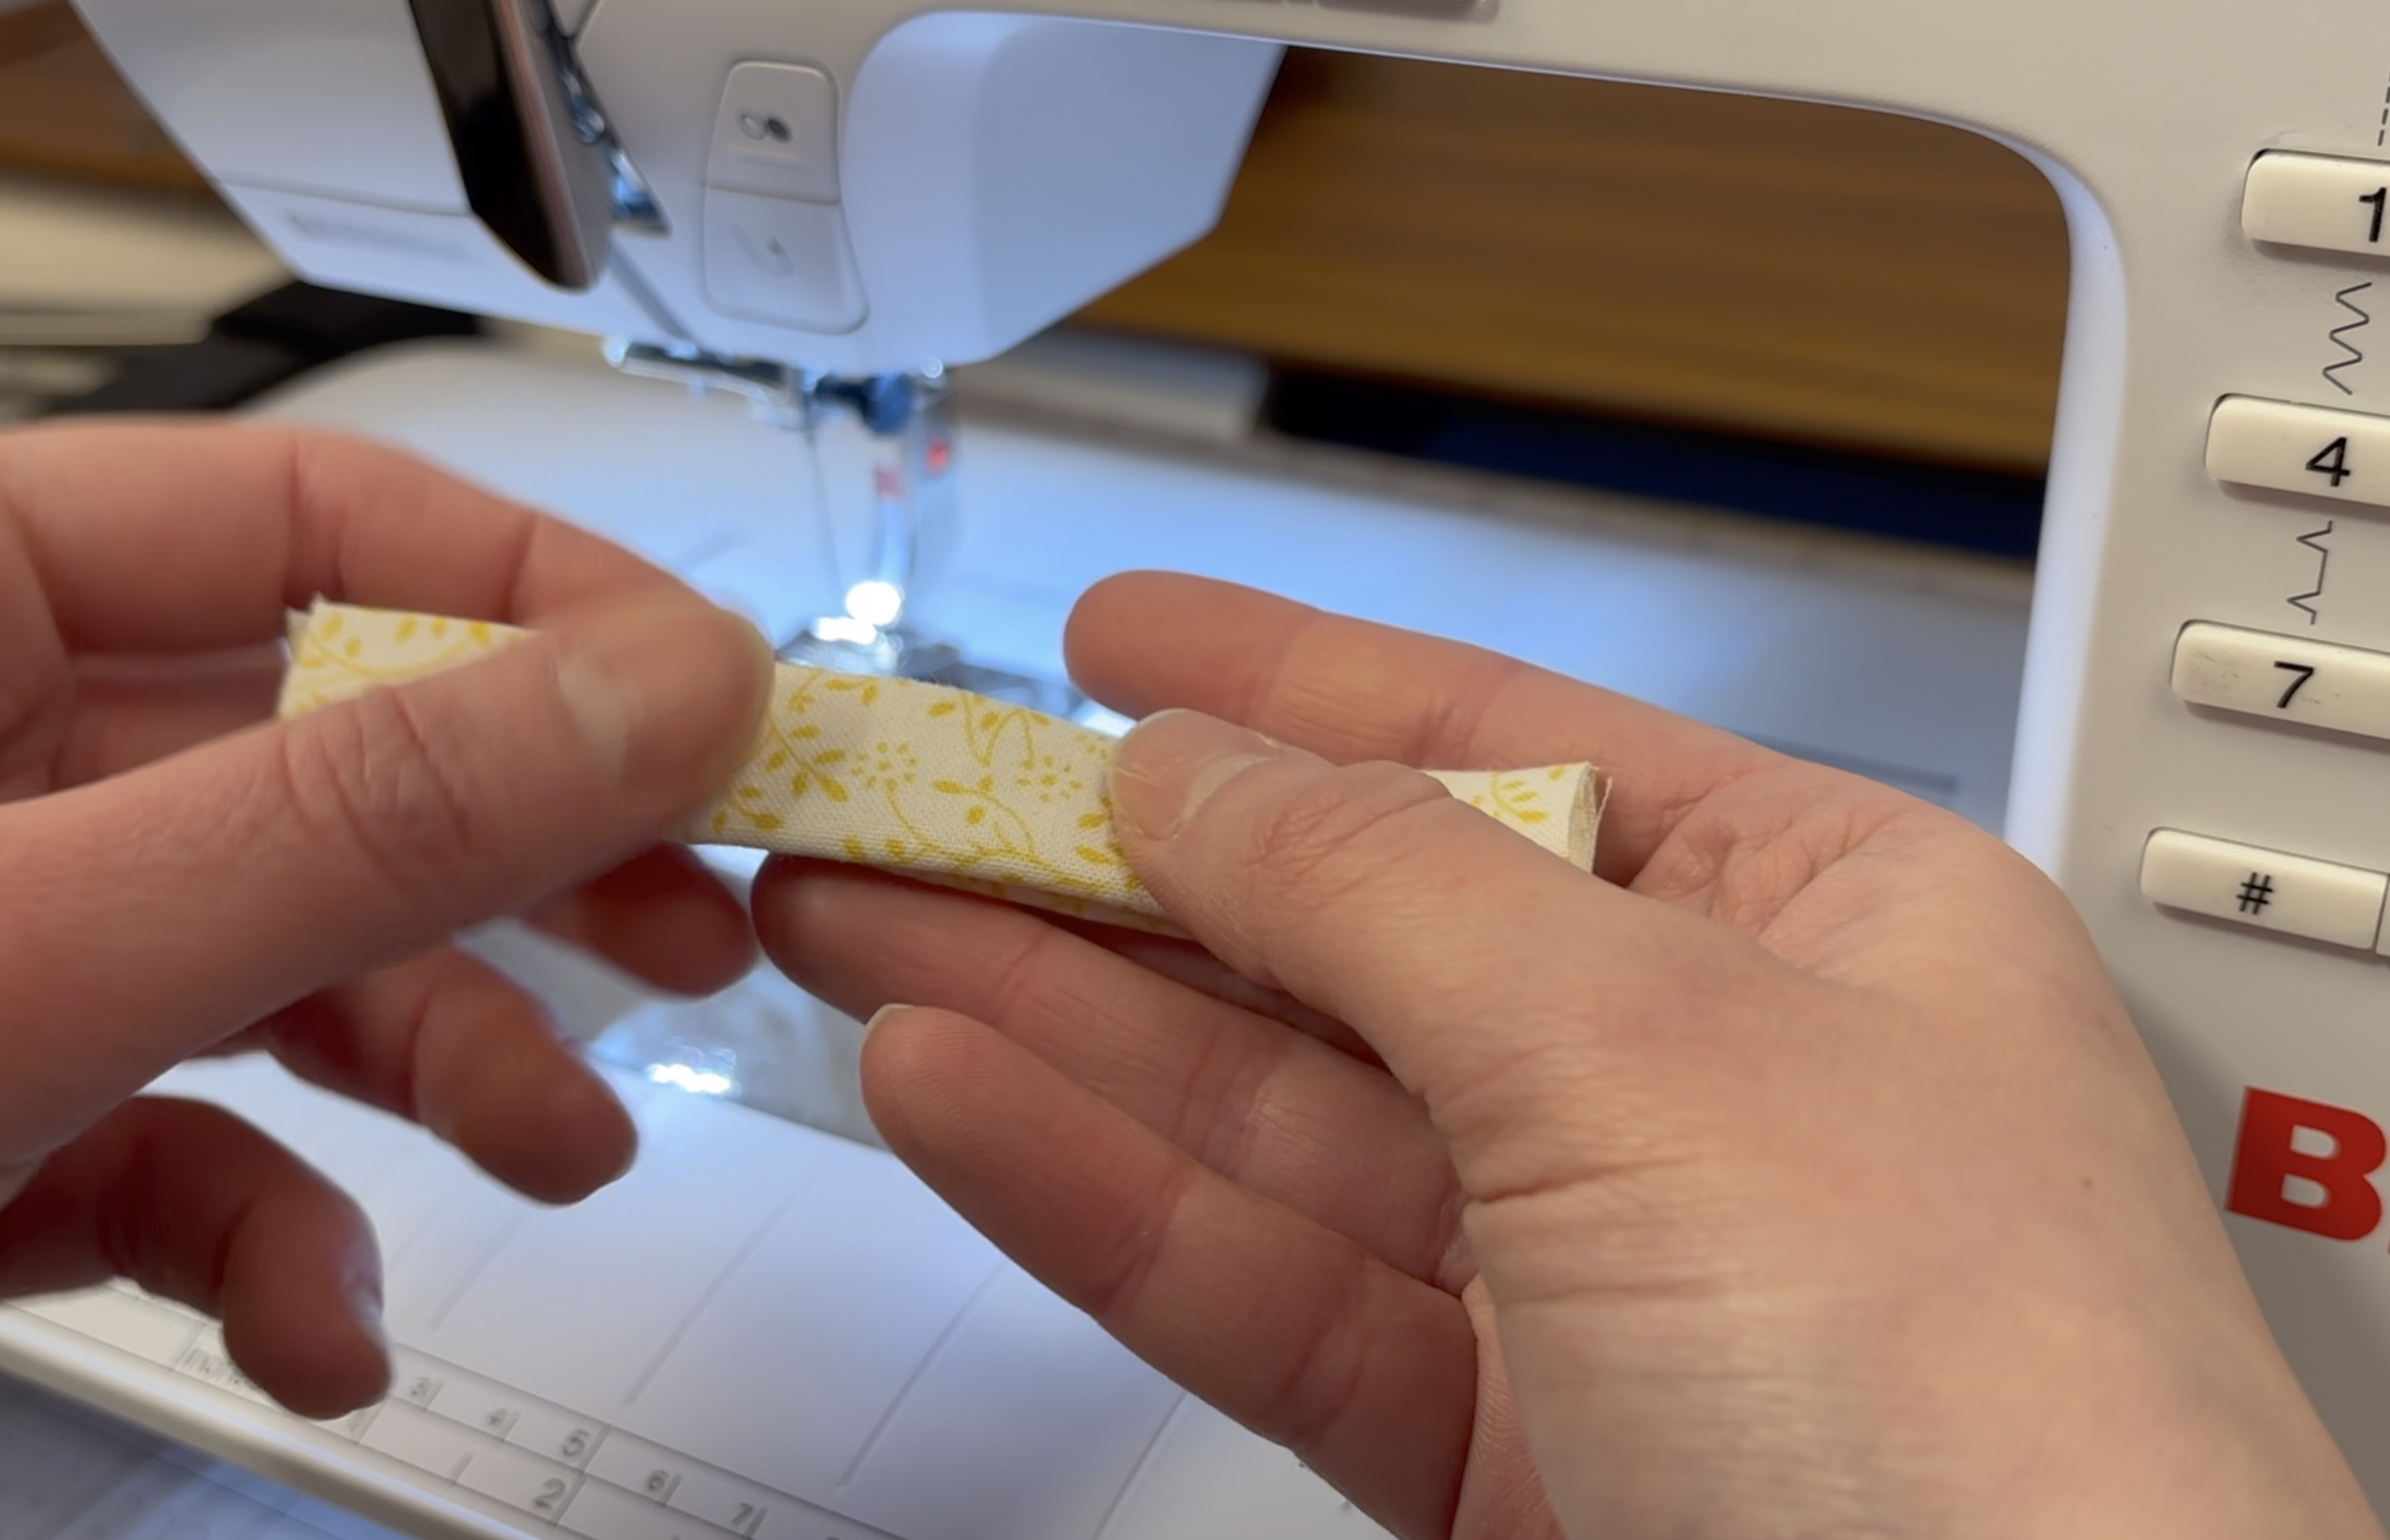
Fold in half again and iron flat.
You now have a finished strip measuring 4" x 0.5".
Step 10: Sew the Bow Center
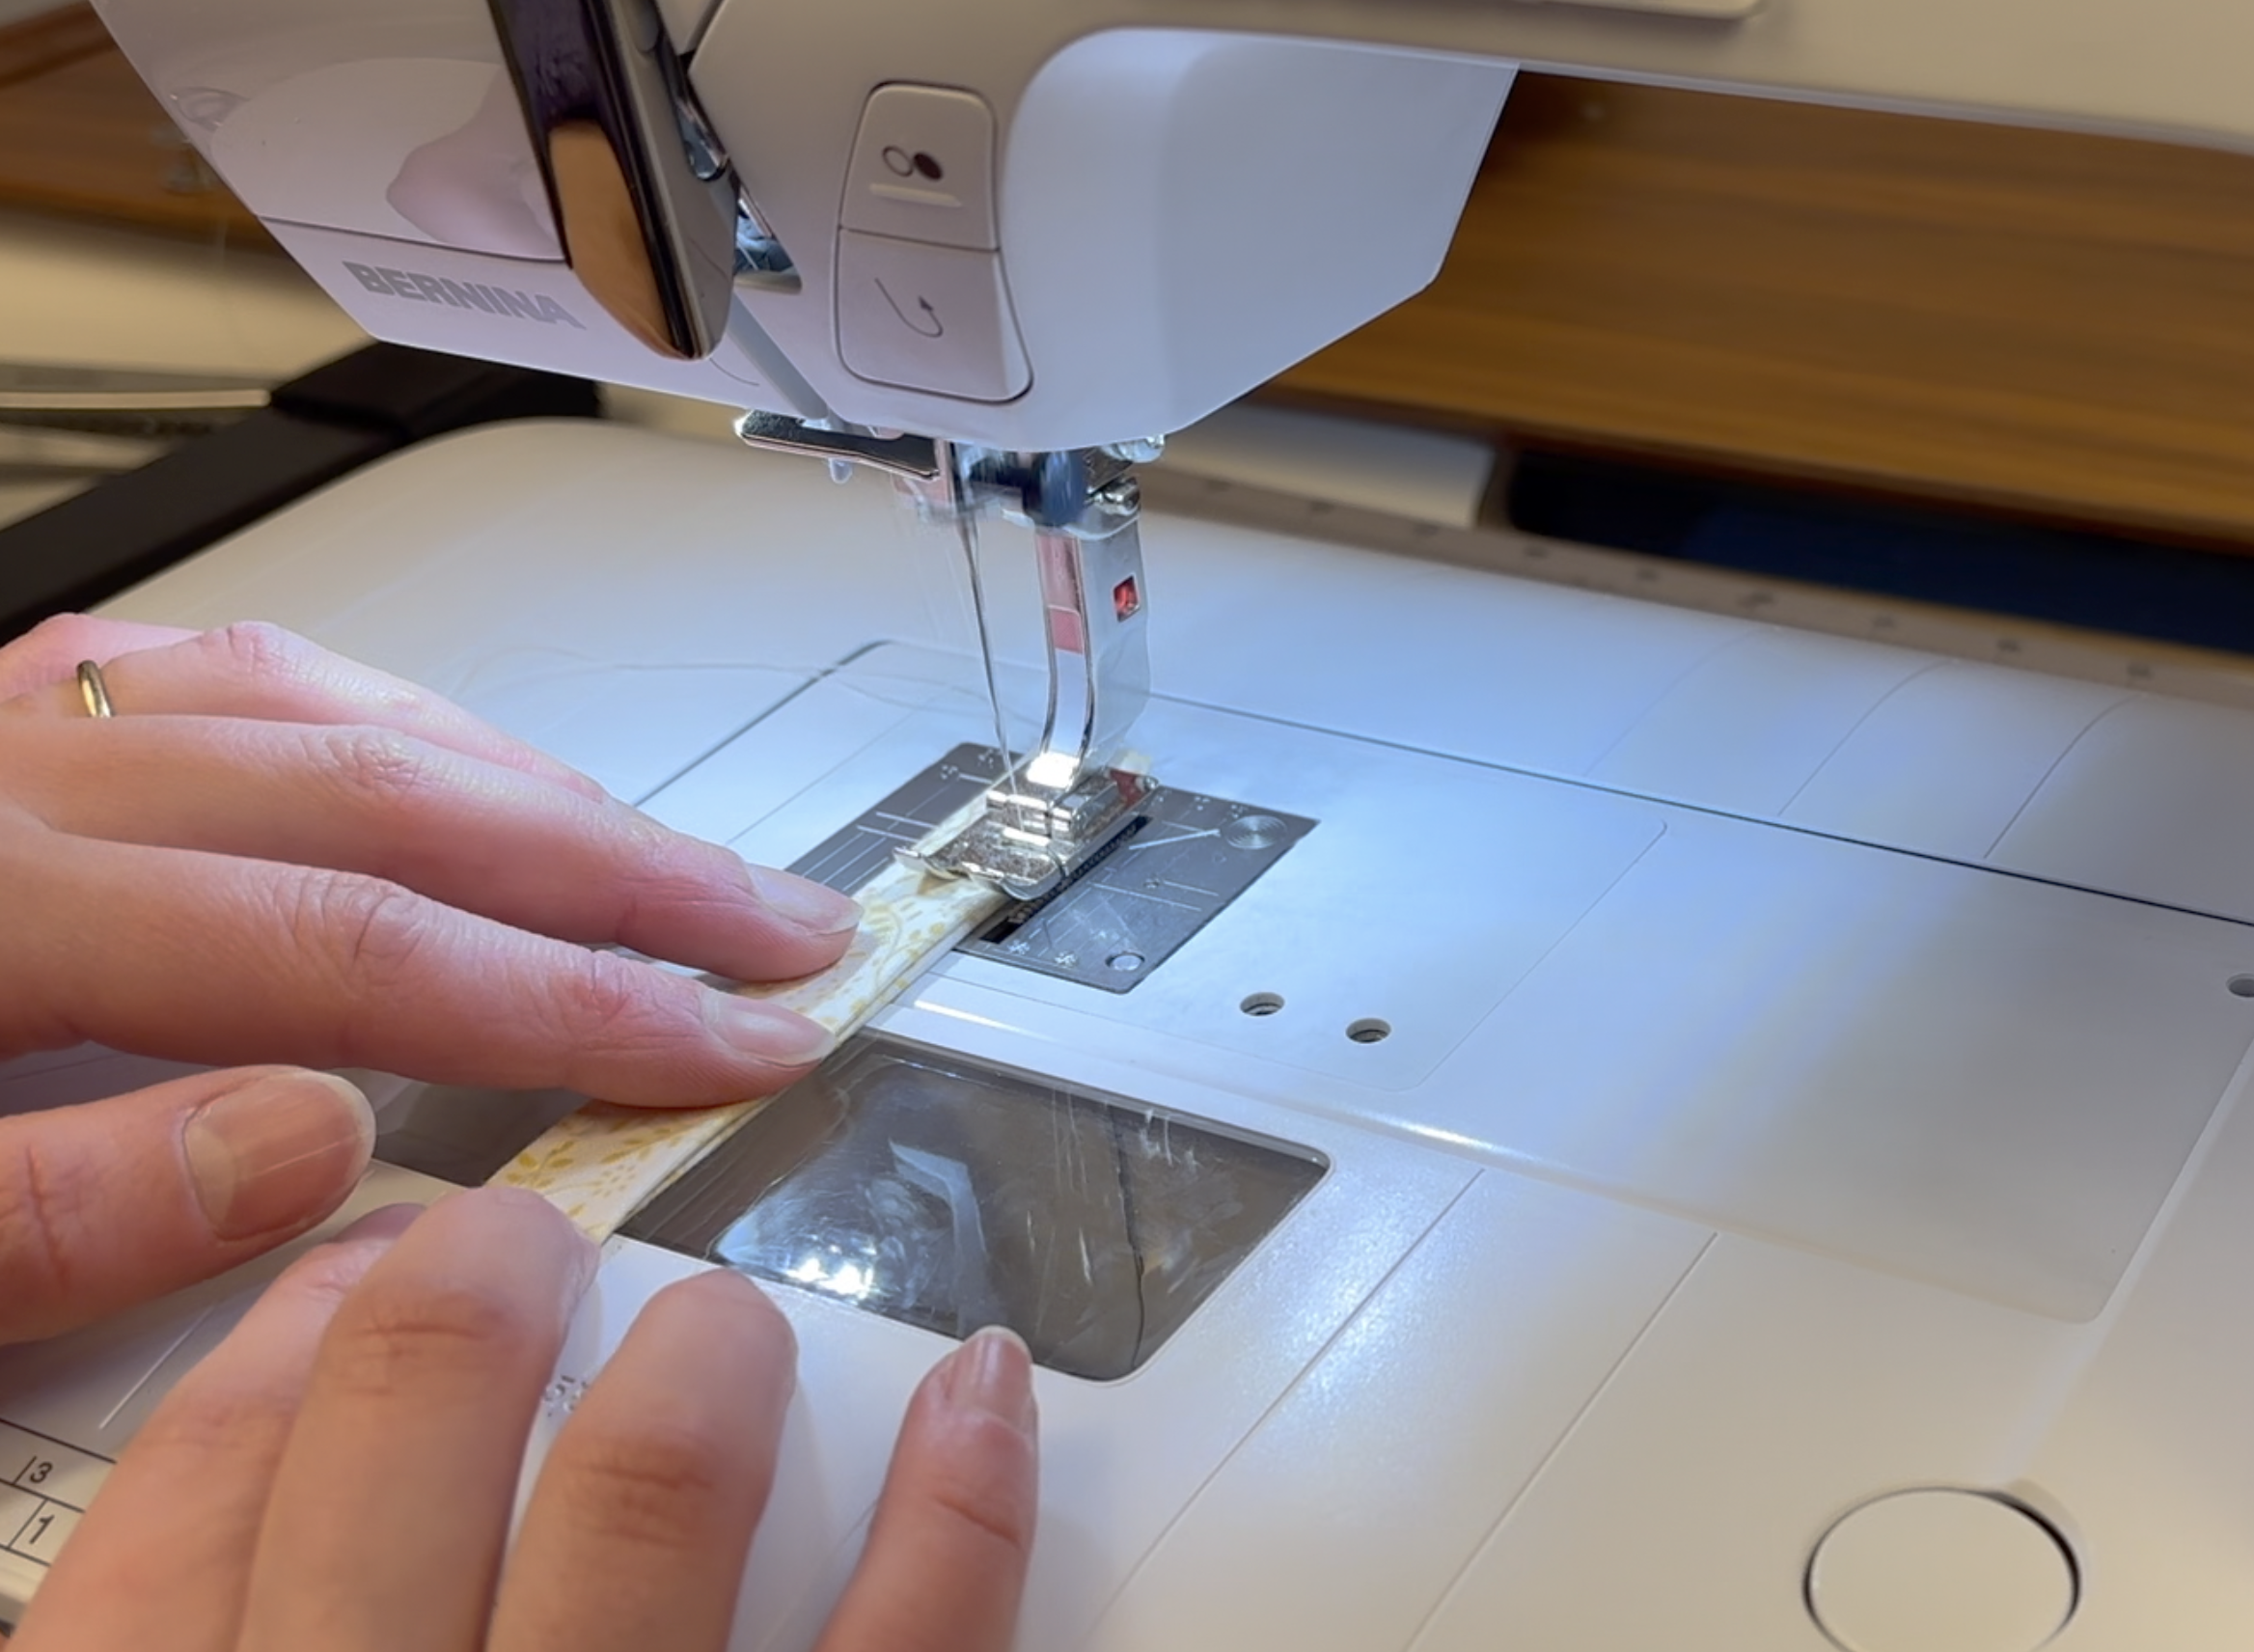
Using the longer stitch, sew both long sides of the bow center.
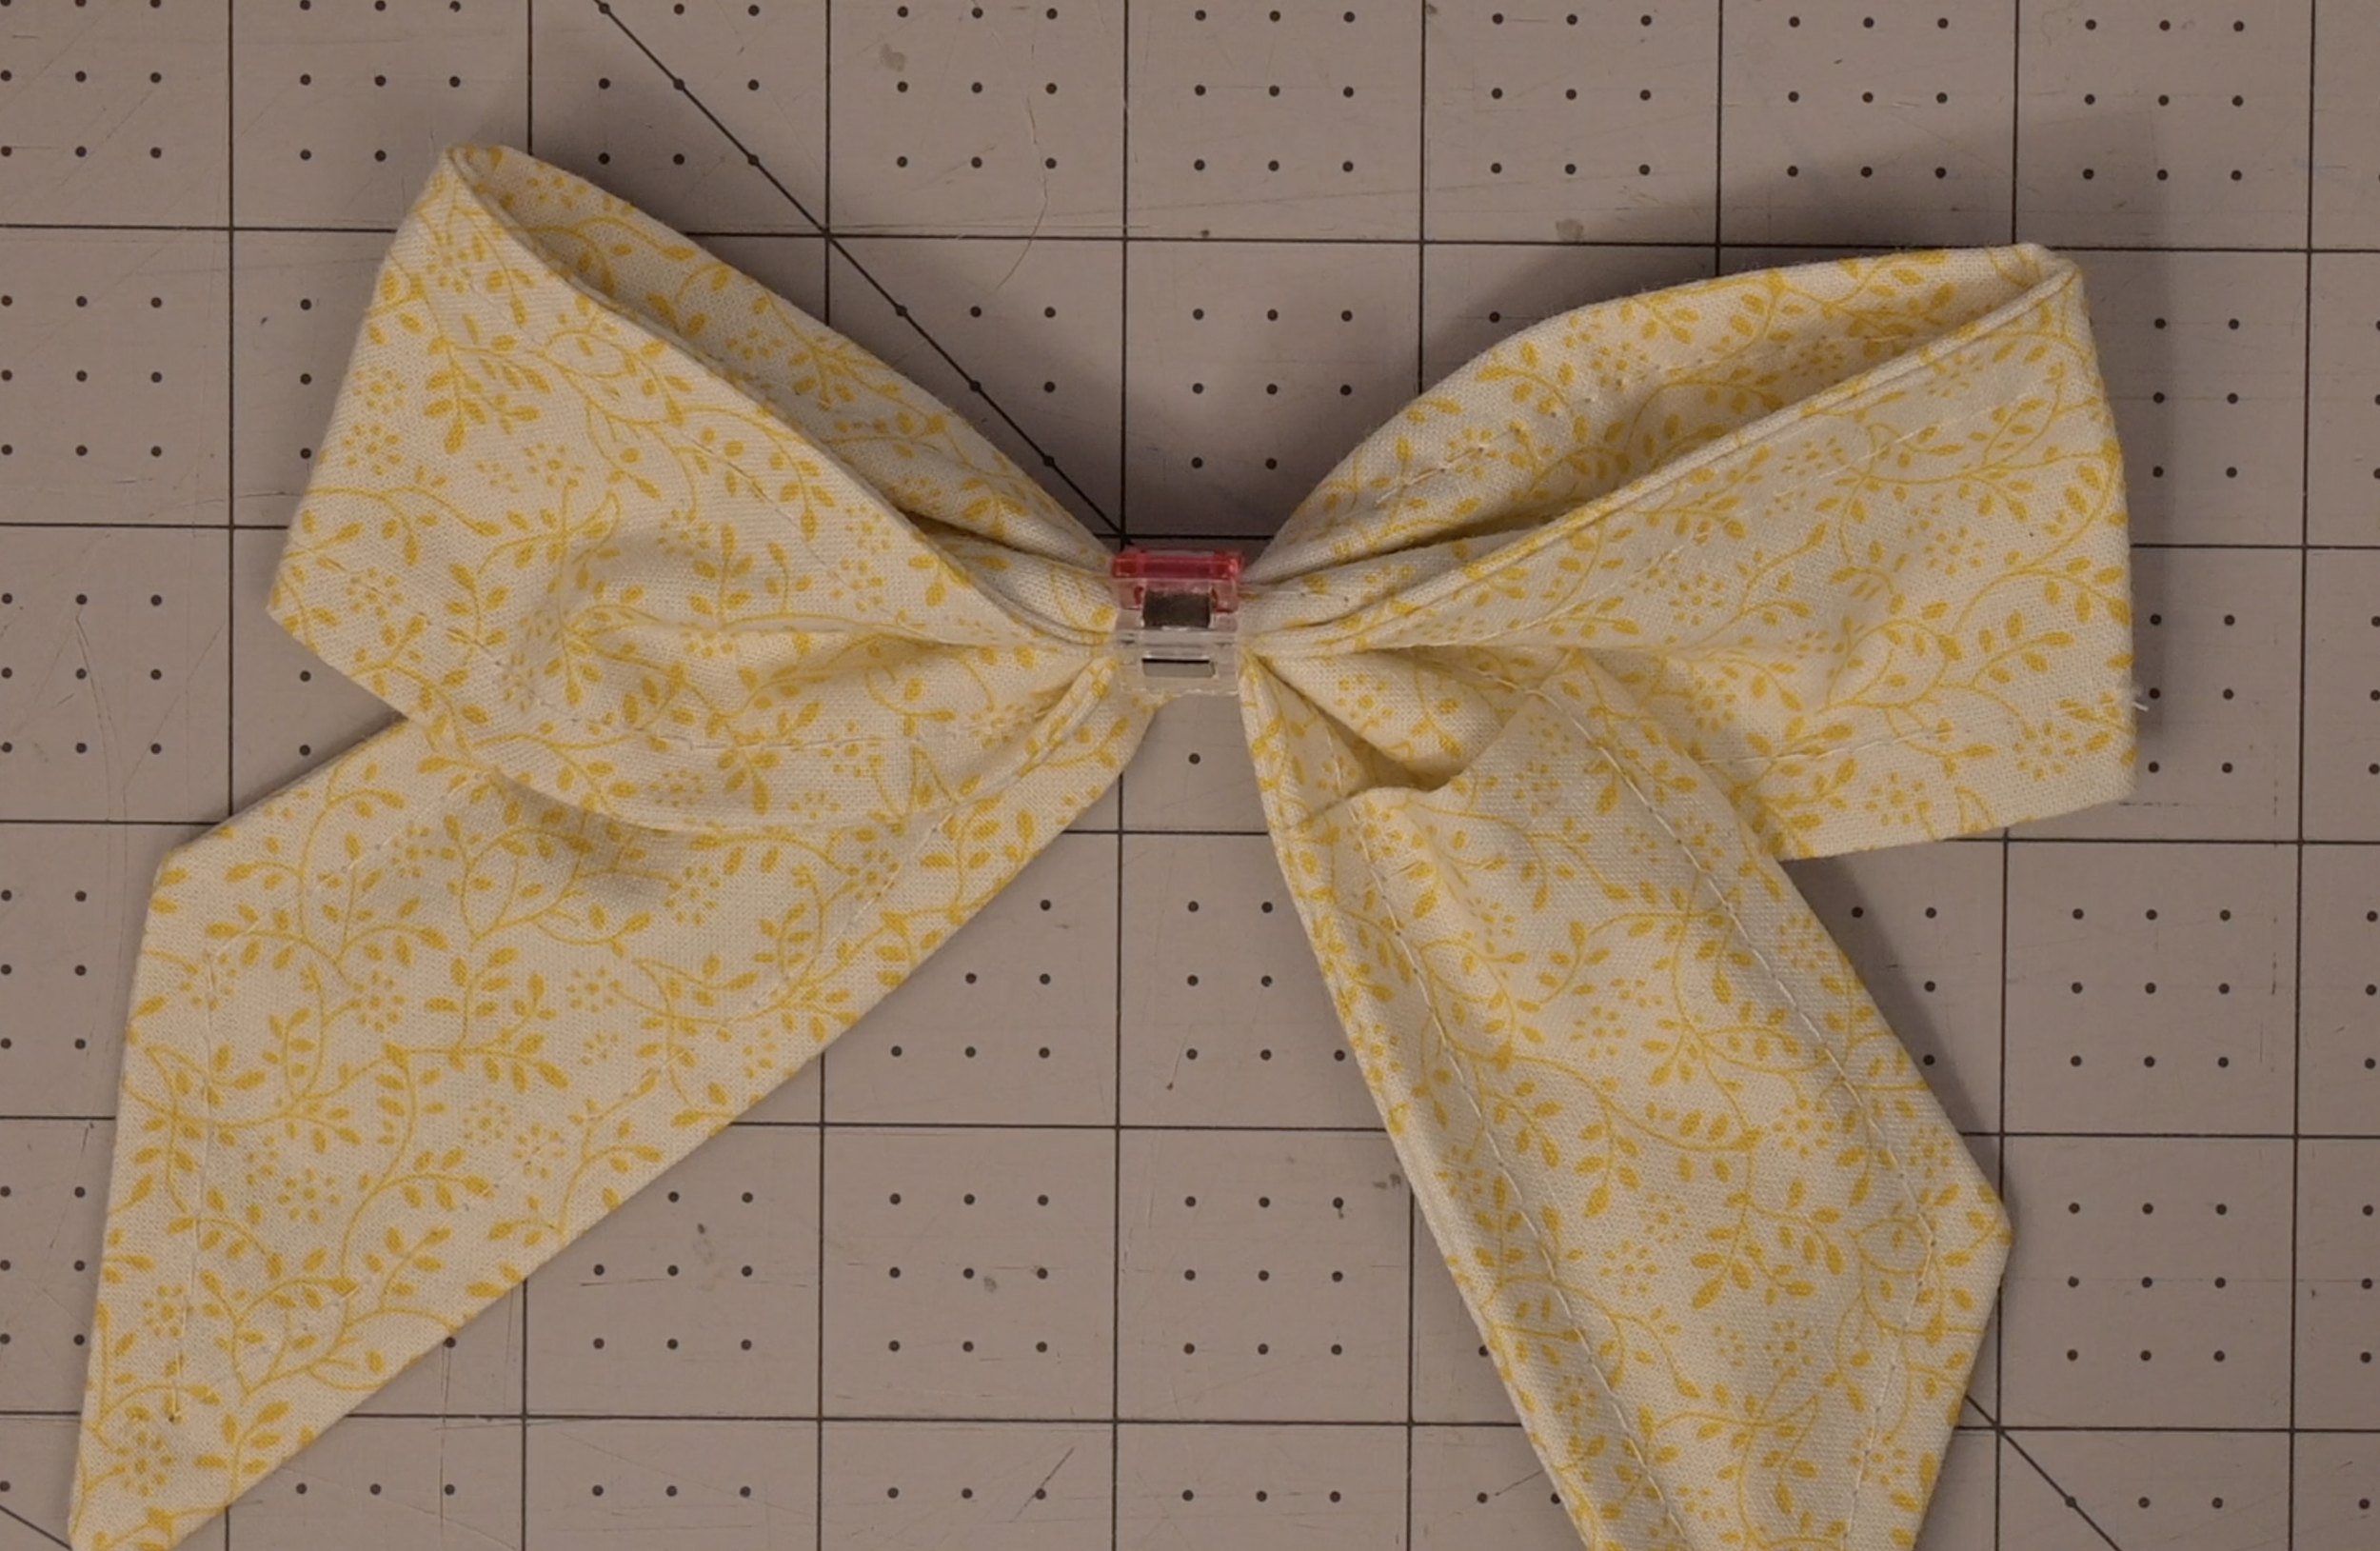
Step 11: Folding the Bow Base
Fold the long base piece in half to find the center.
Measure 3 inches to the left and 3 inches to the right of that center mark.
Fold the ends inward at a slight downward angle toward the center.
The top horizontal "loop" portion of the bow should measure 6 inches across.
The pocket should be facing towards you once folded.
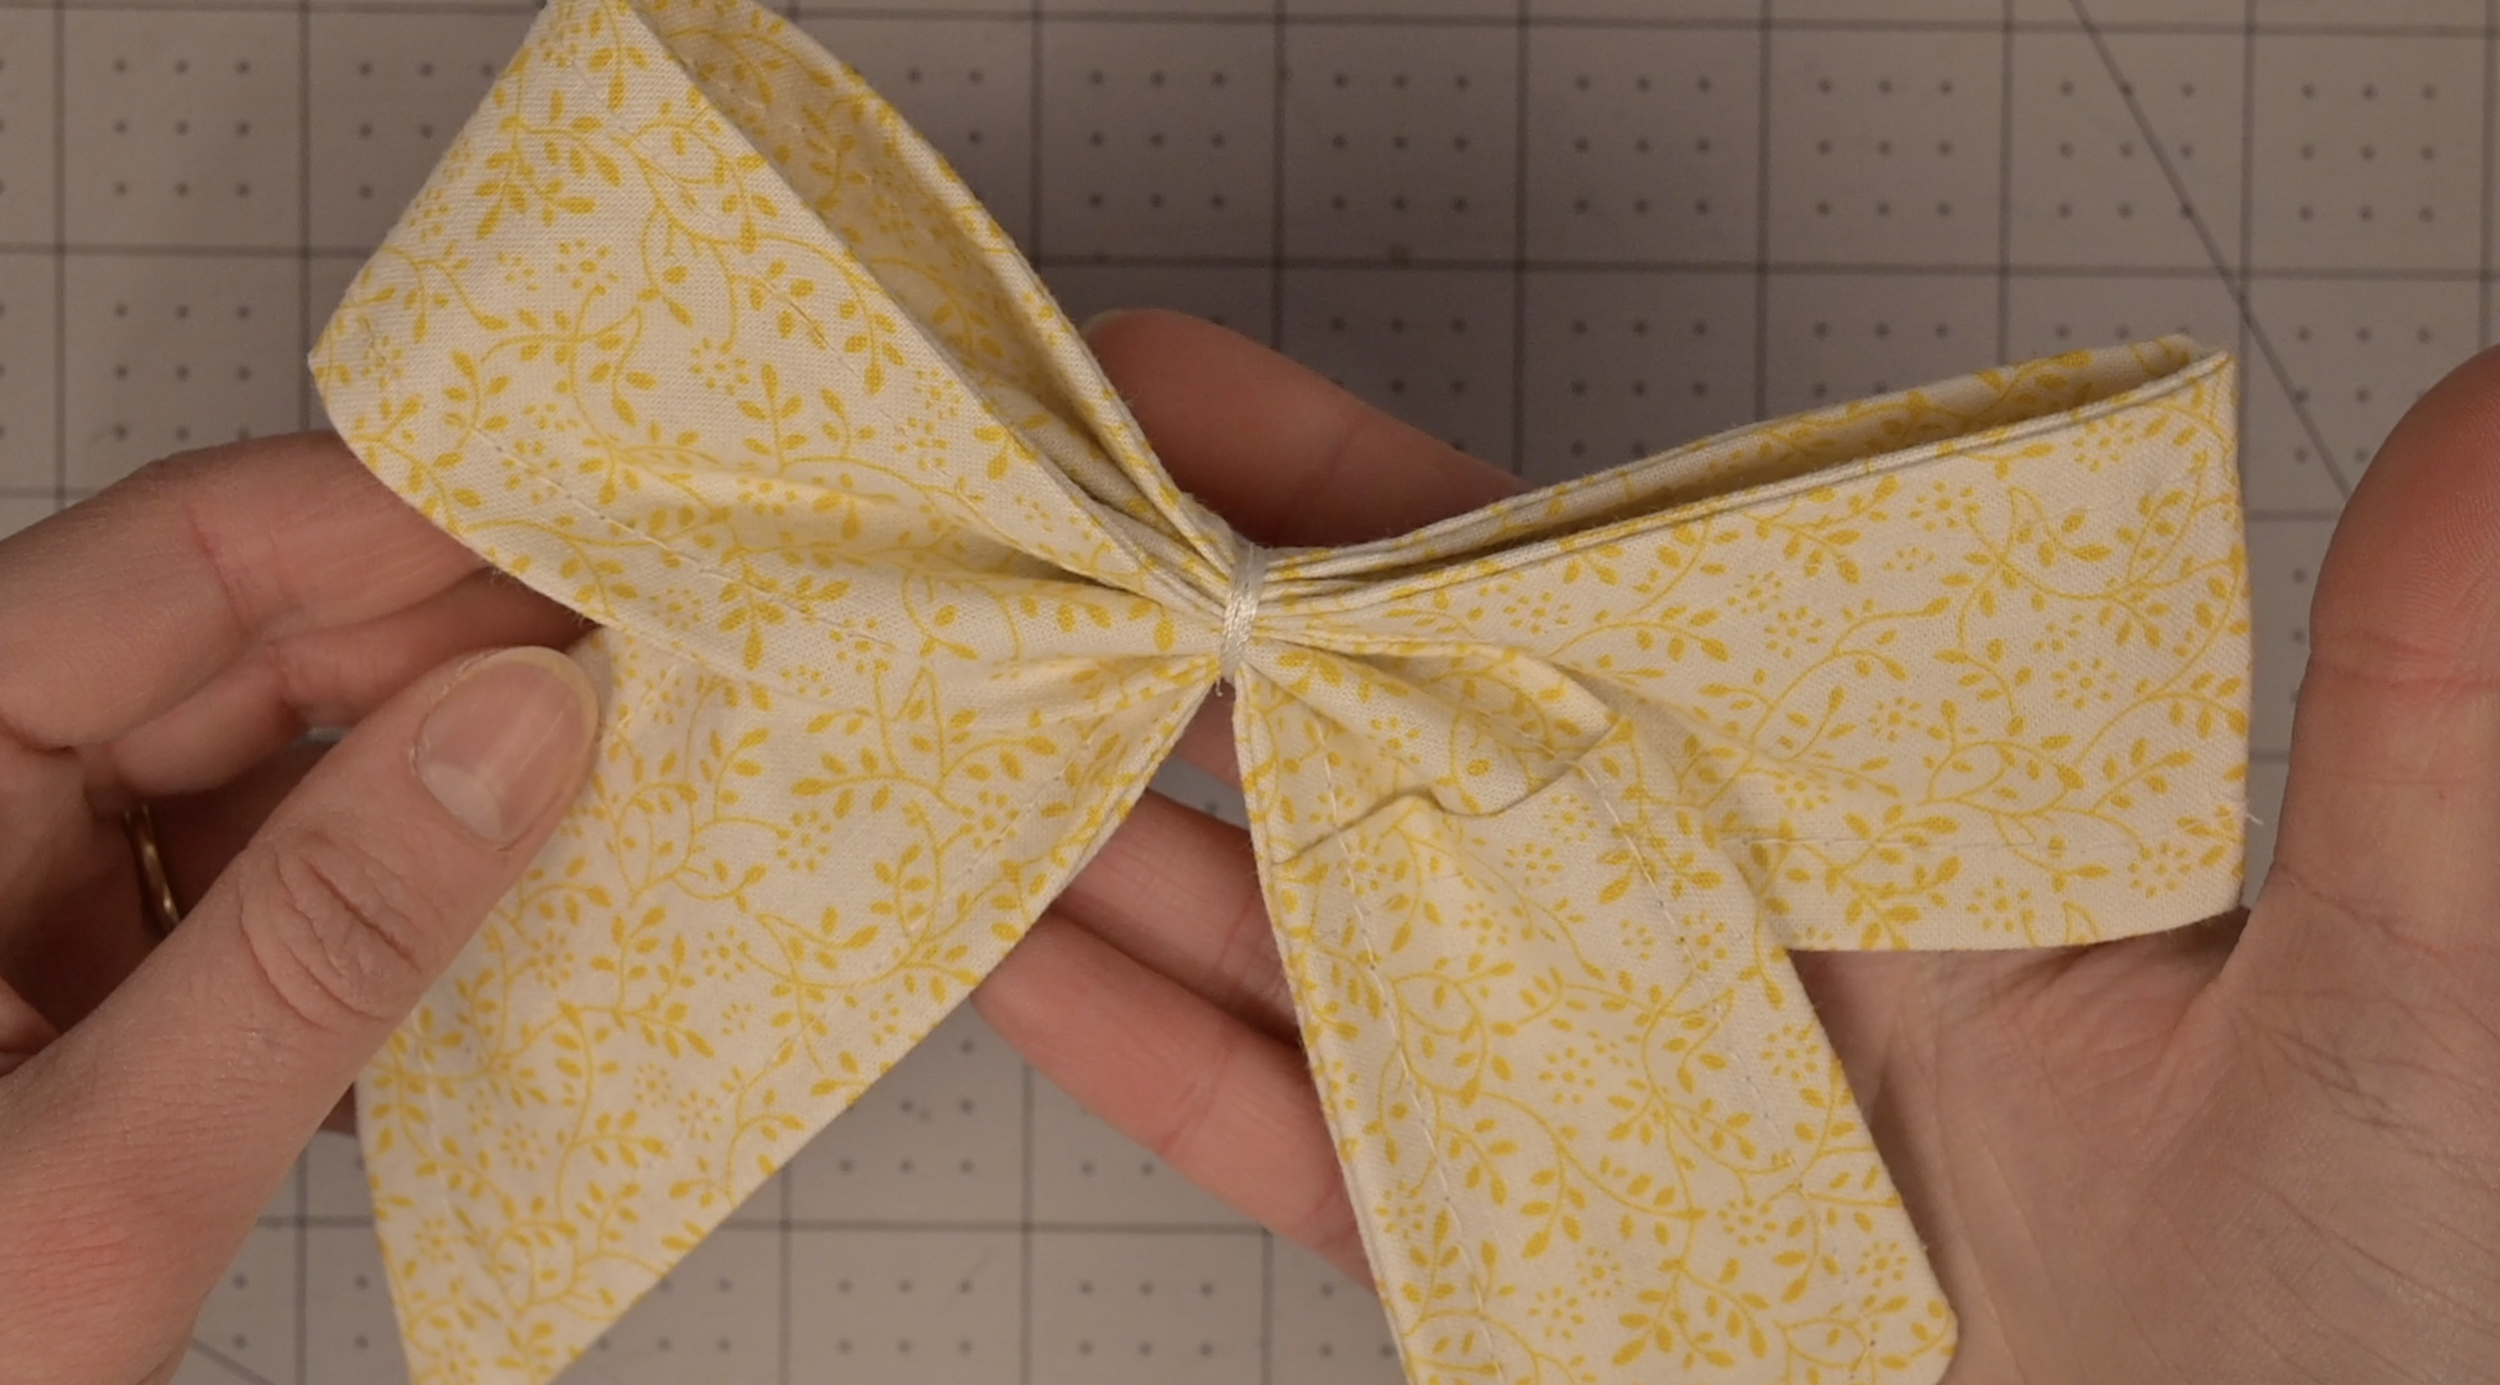
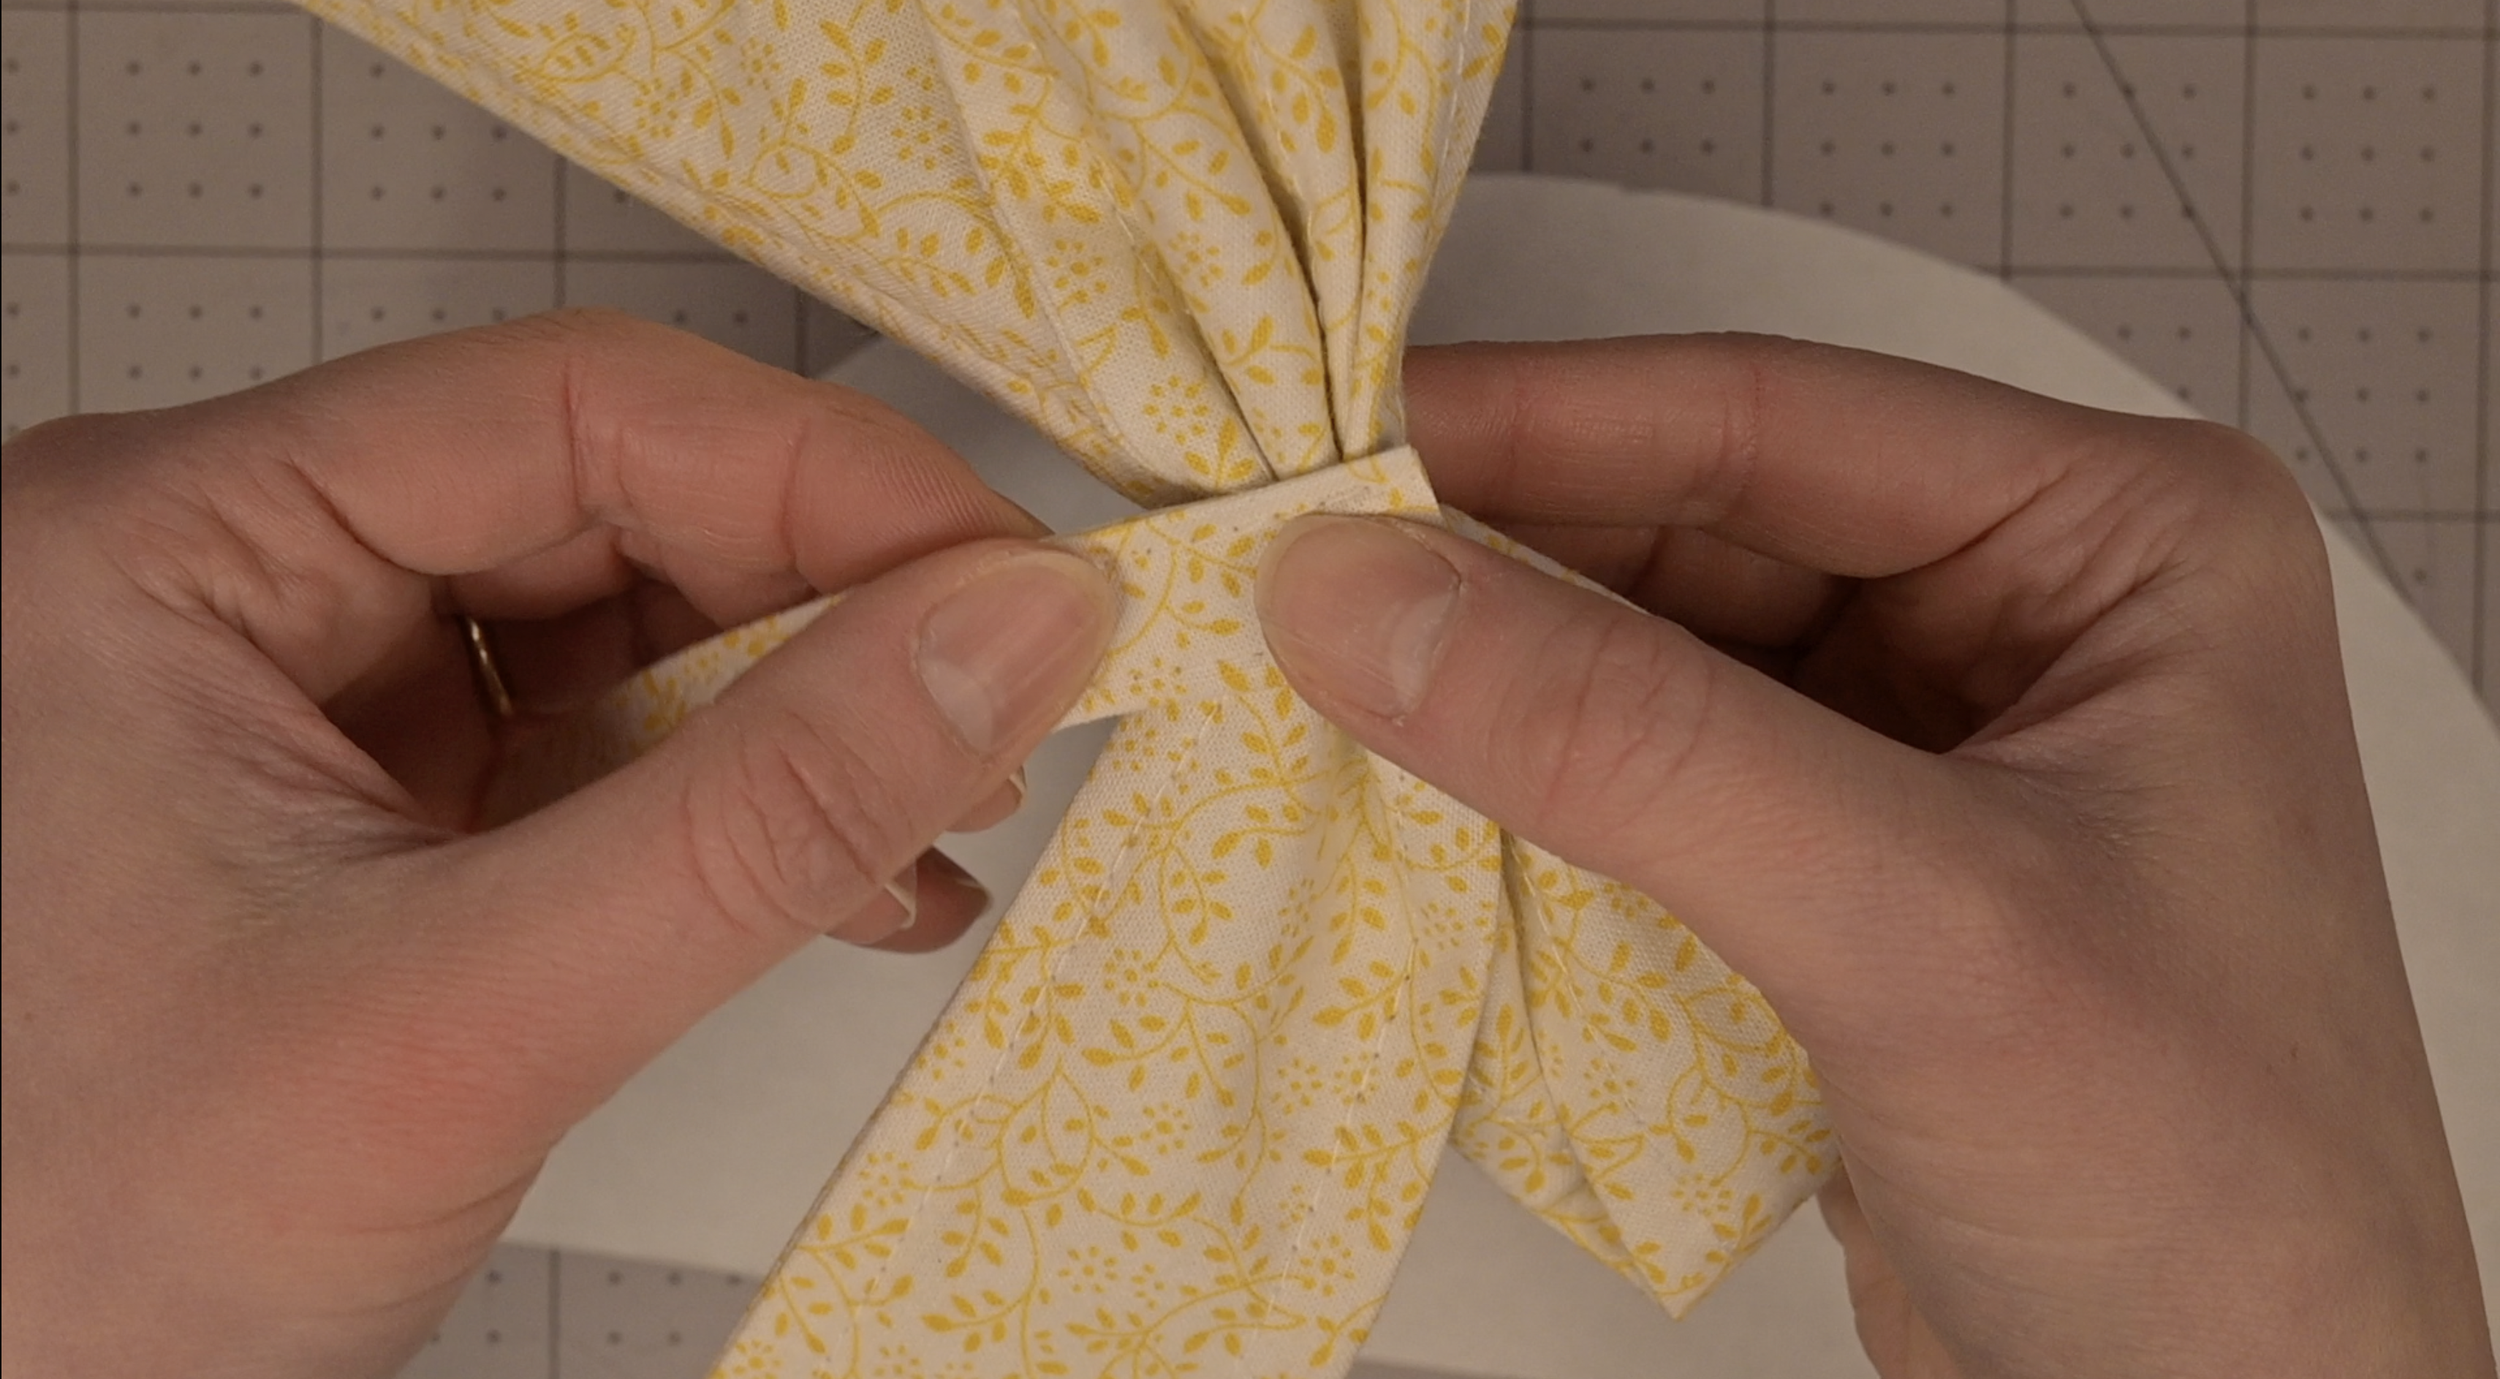
Step 12: Accordion the Center
Find the center of the bow.
Fold the fabric back and forth until you achieve your desired bow scrunch.
I folded the front and back piece four times.
Place a sewing clip in the center of the bow to hold it in place.
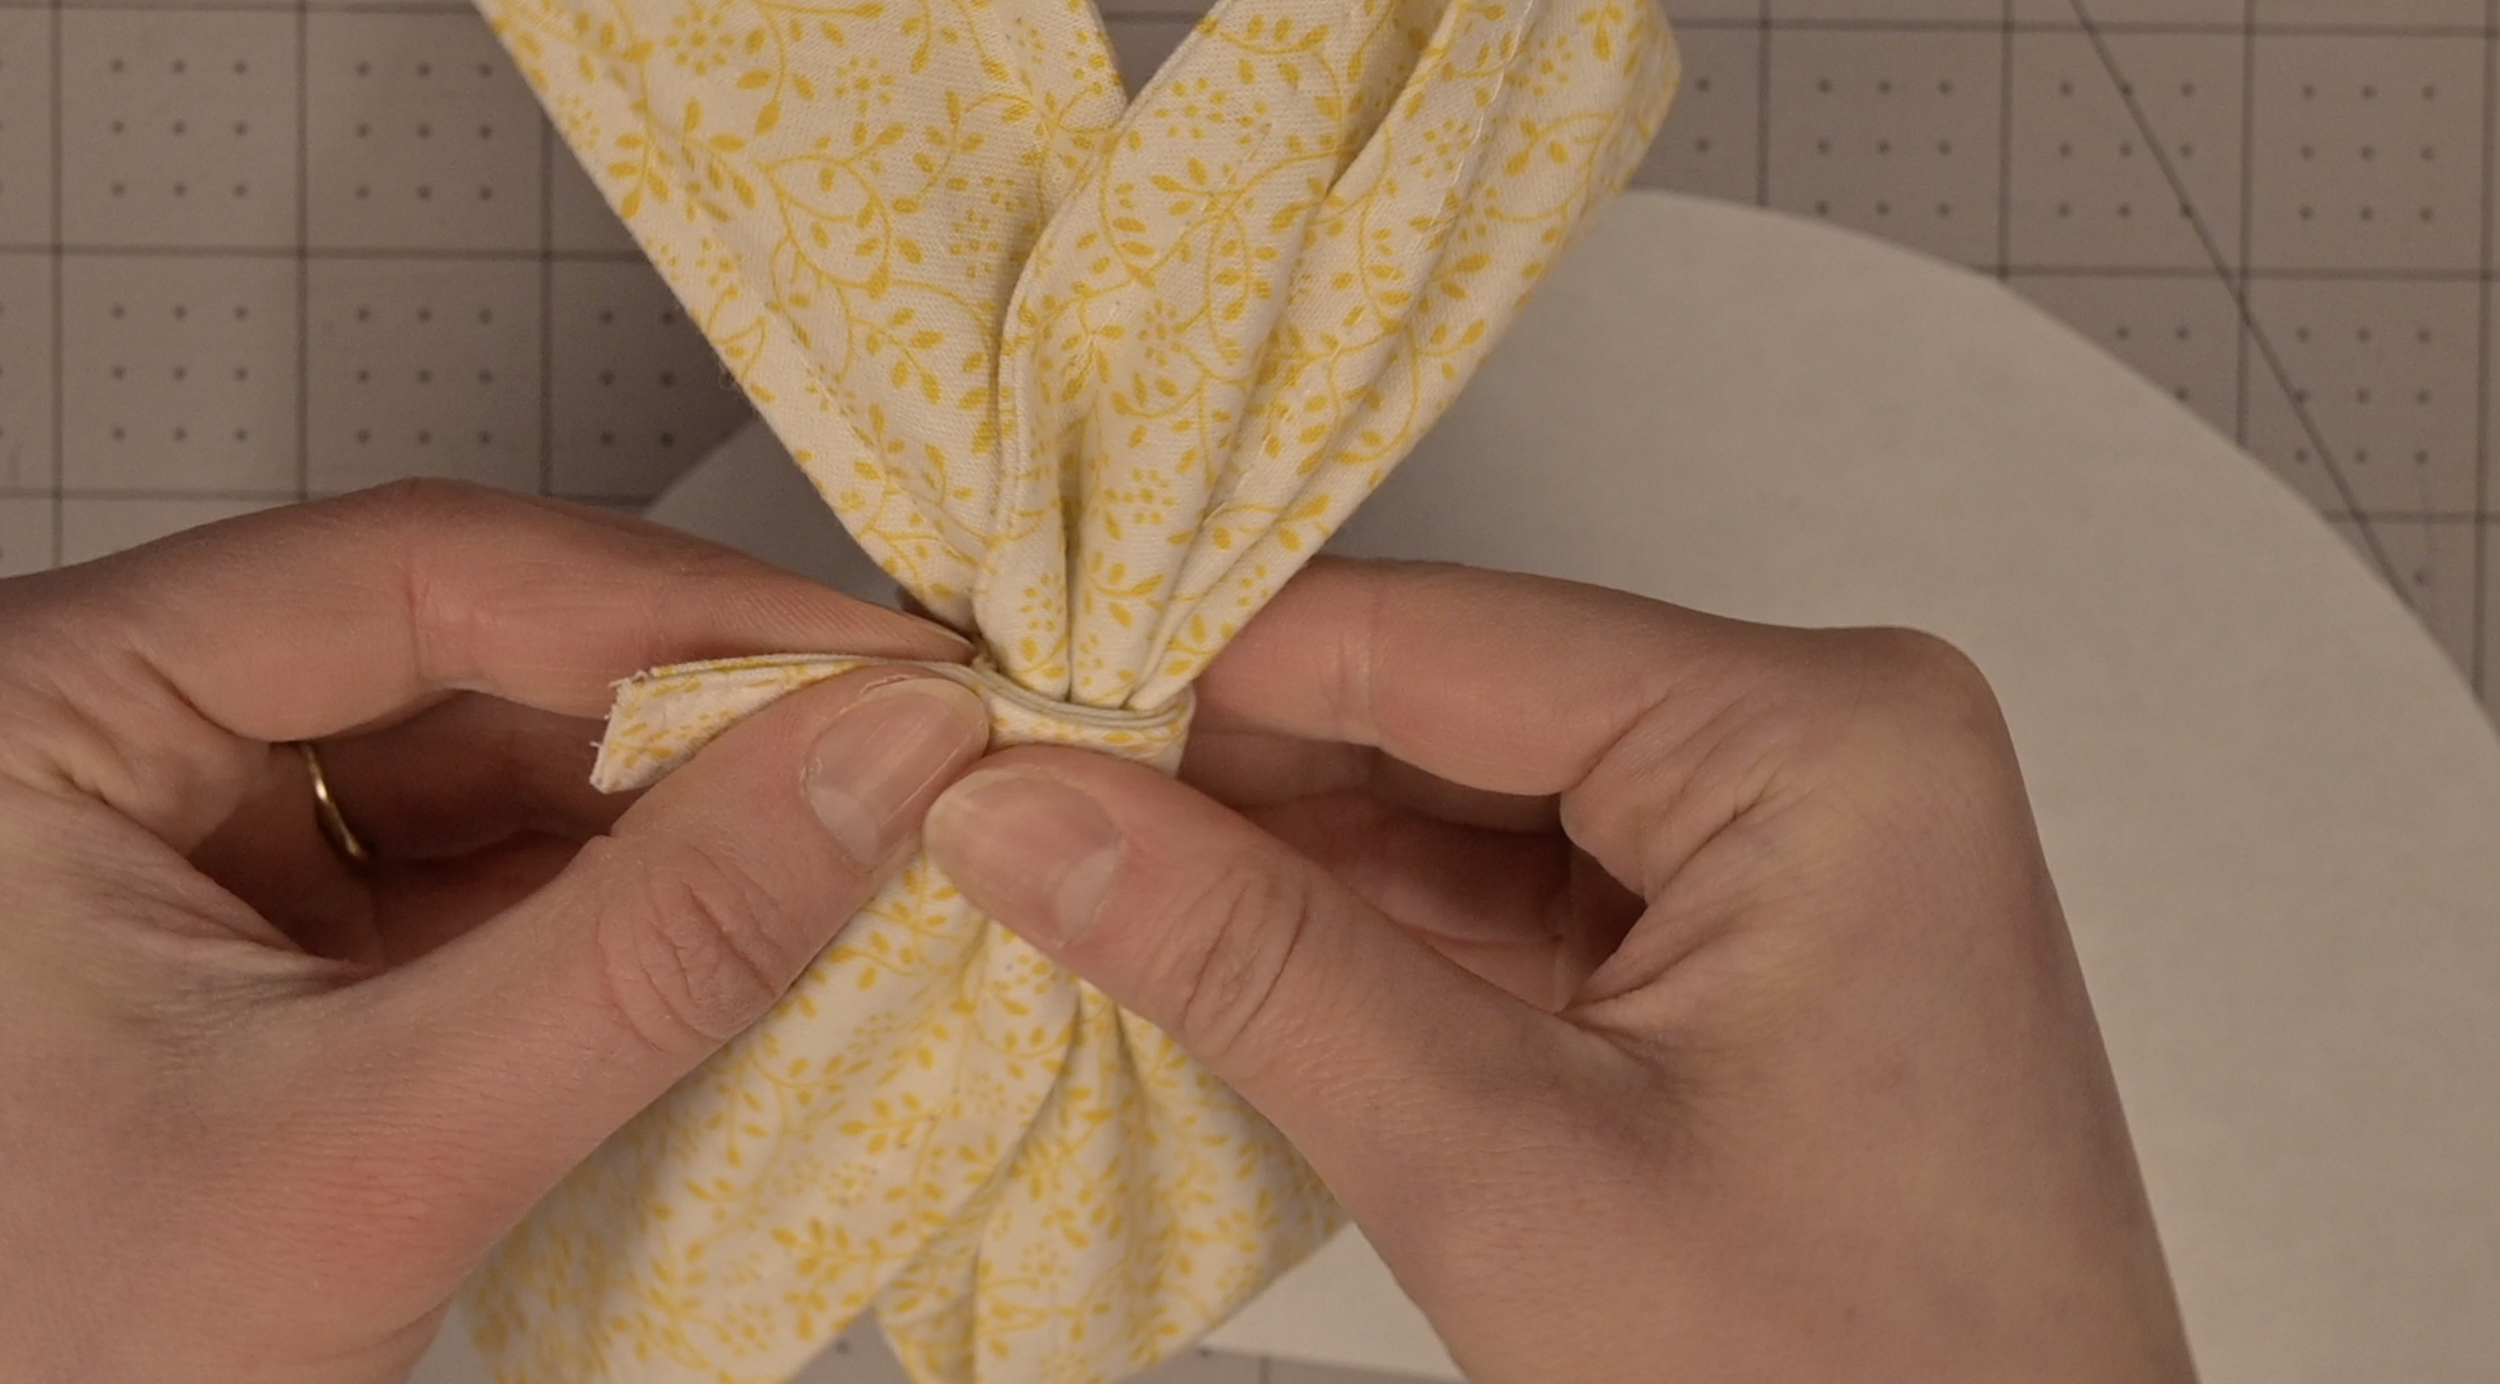
Step 13: Secure the Center
Taking your thread, tie a knot in the center of the bow.
Wrap the thread around the center 10-15 times.
Tie the thread in a loop knot until it feels secure.
Step 14: Adding the Bow Center
Glue one end of the center strip to the back of the bow. Wait until dry.
Loop the remaining strip over the front of the bow.
Depending on your type of clip, you may need to add the clip to the center fabric now.
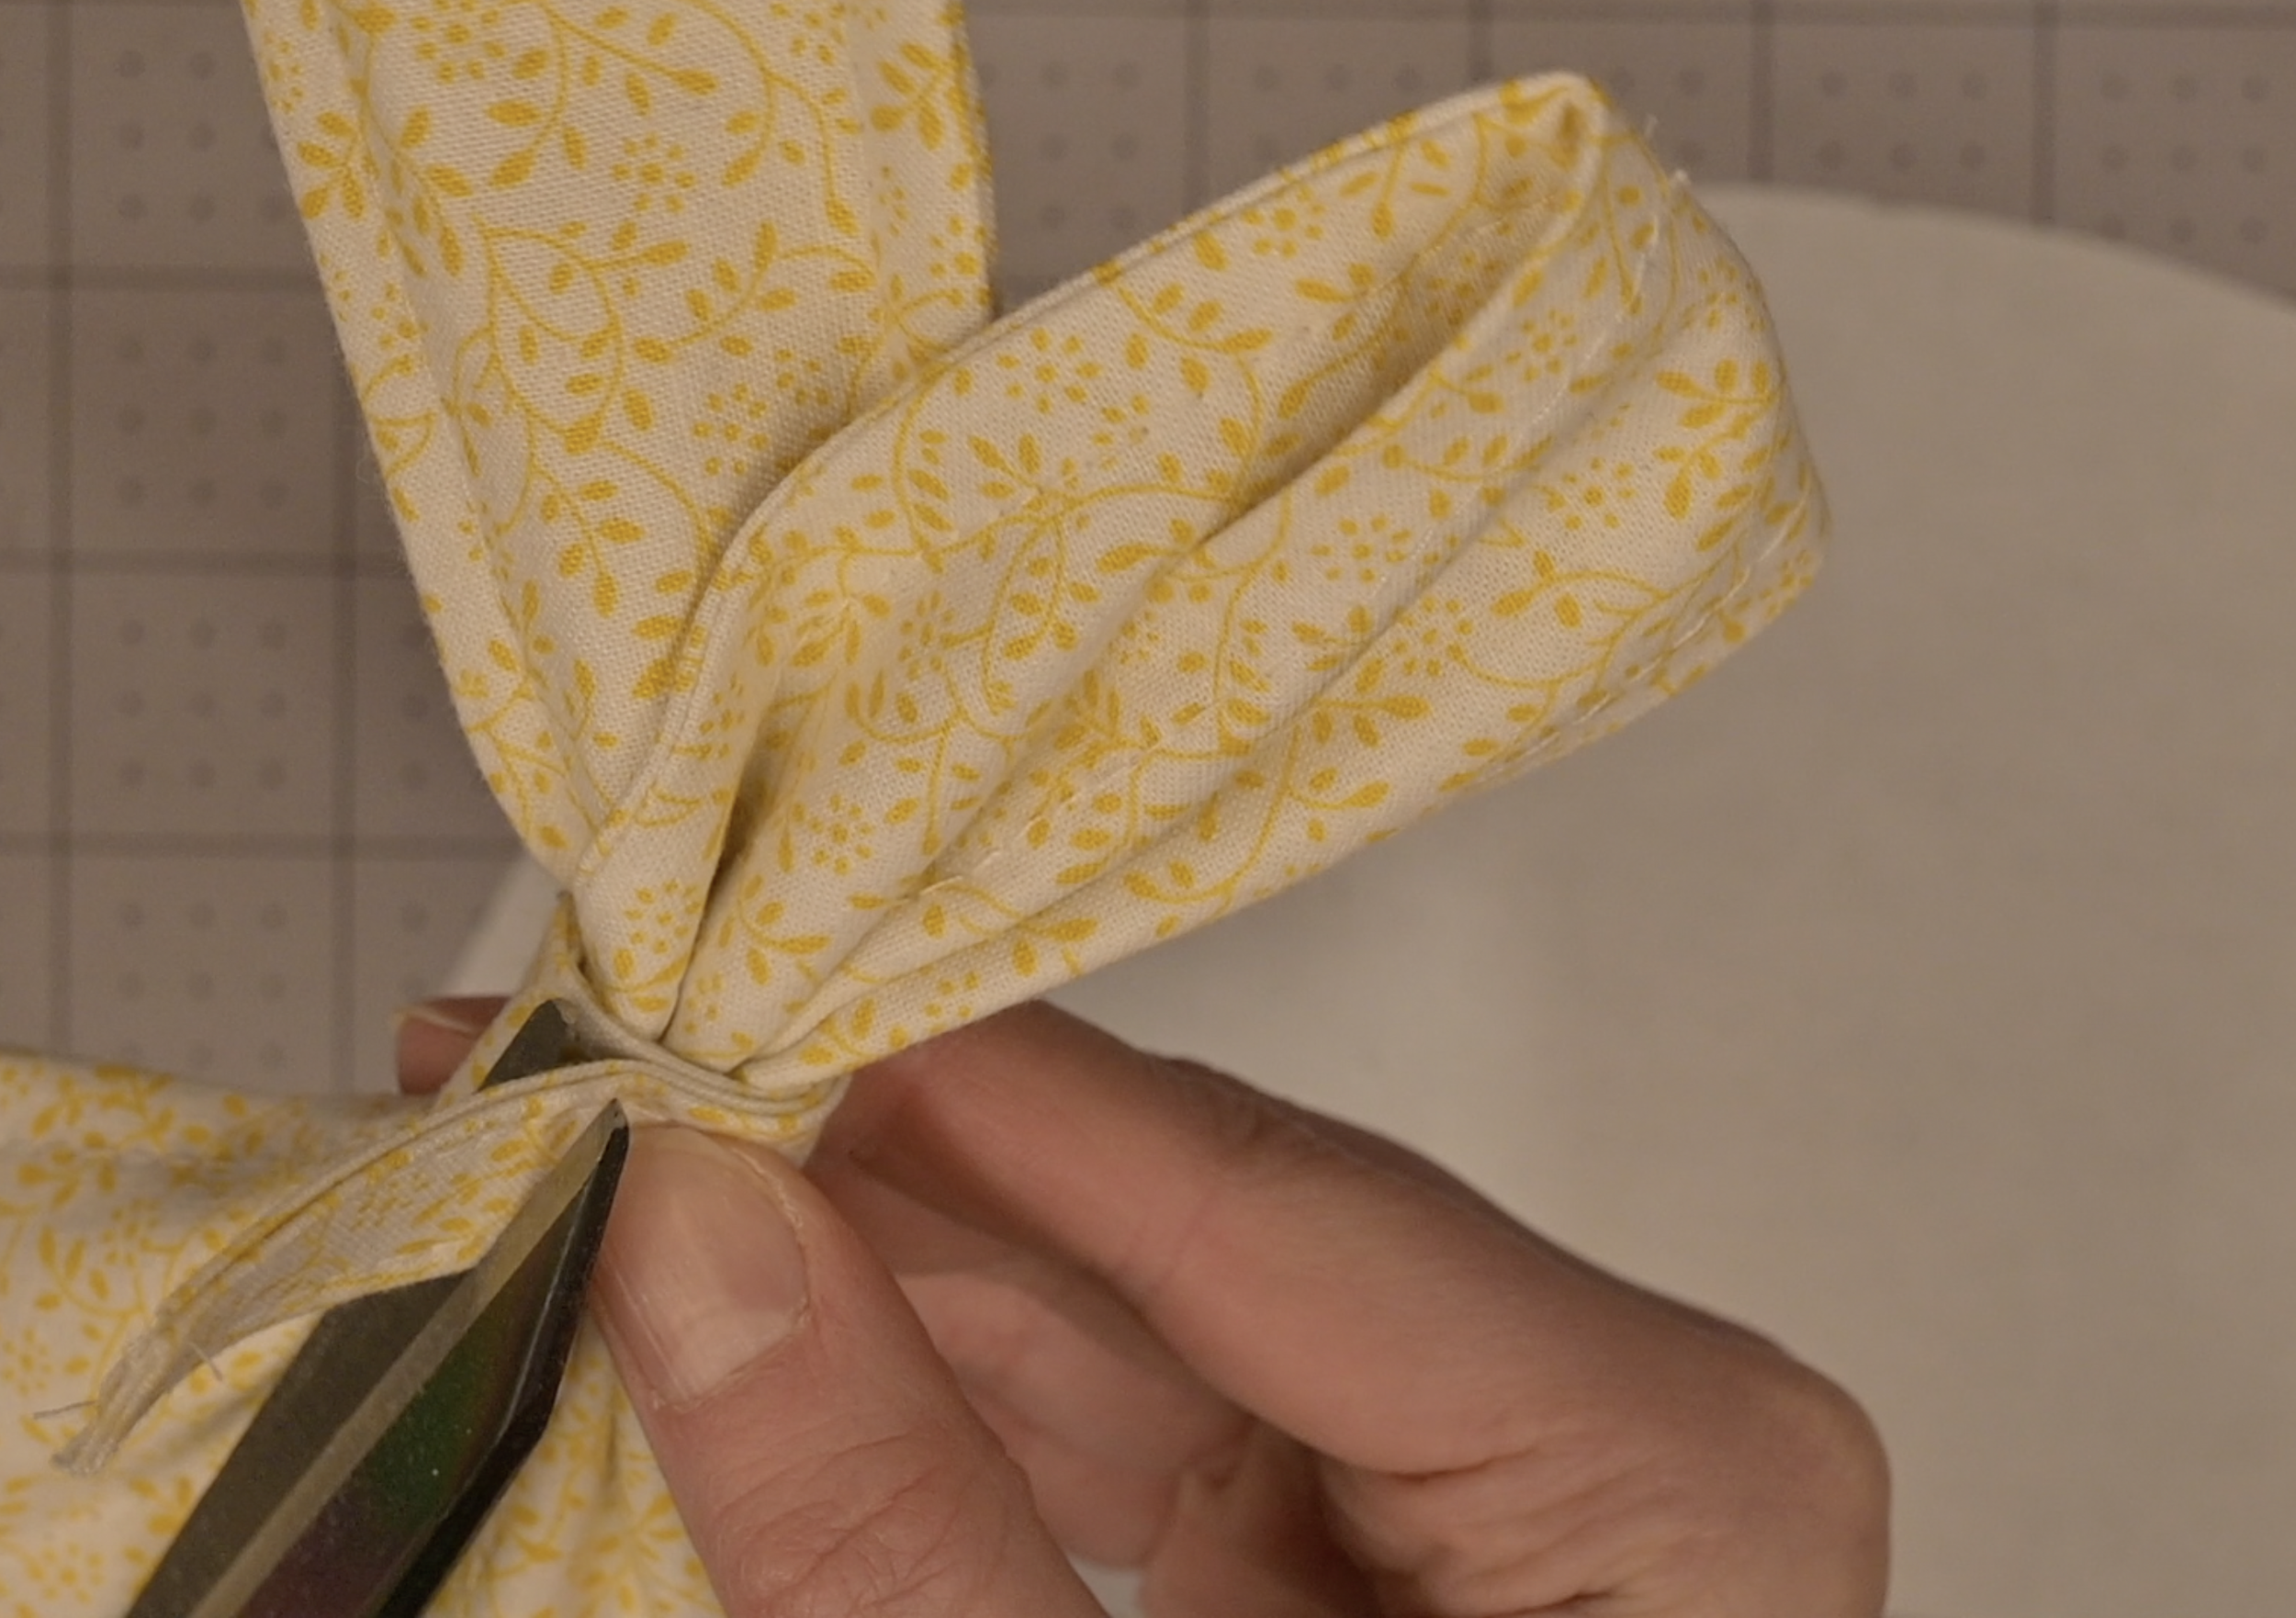
Glue the fabric strip in place and cut off the extra.
Step 15: Add your Clip and Lip Balm!
If you did not in the previous step, attach your clip to the bow center.
Add your lip balm to the pocket!
Inspiration Credit: https://www.tiktok.com/@__sammaannthaa/video/7569330055558483231