Create a Diagonal Diamond Paper Weave!
Let’s create a diagonal diamond paper weave! While I use this technique for projects like duct tape wallets, this tutorial will focus on the basics using construction paper. Skill level: Intermediate.
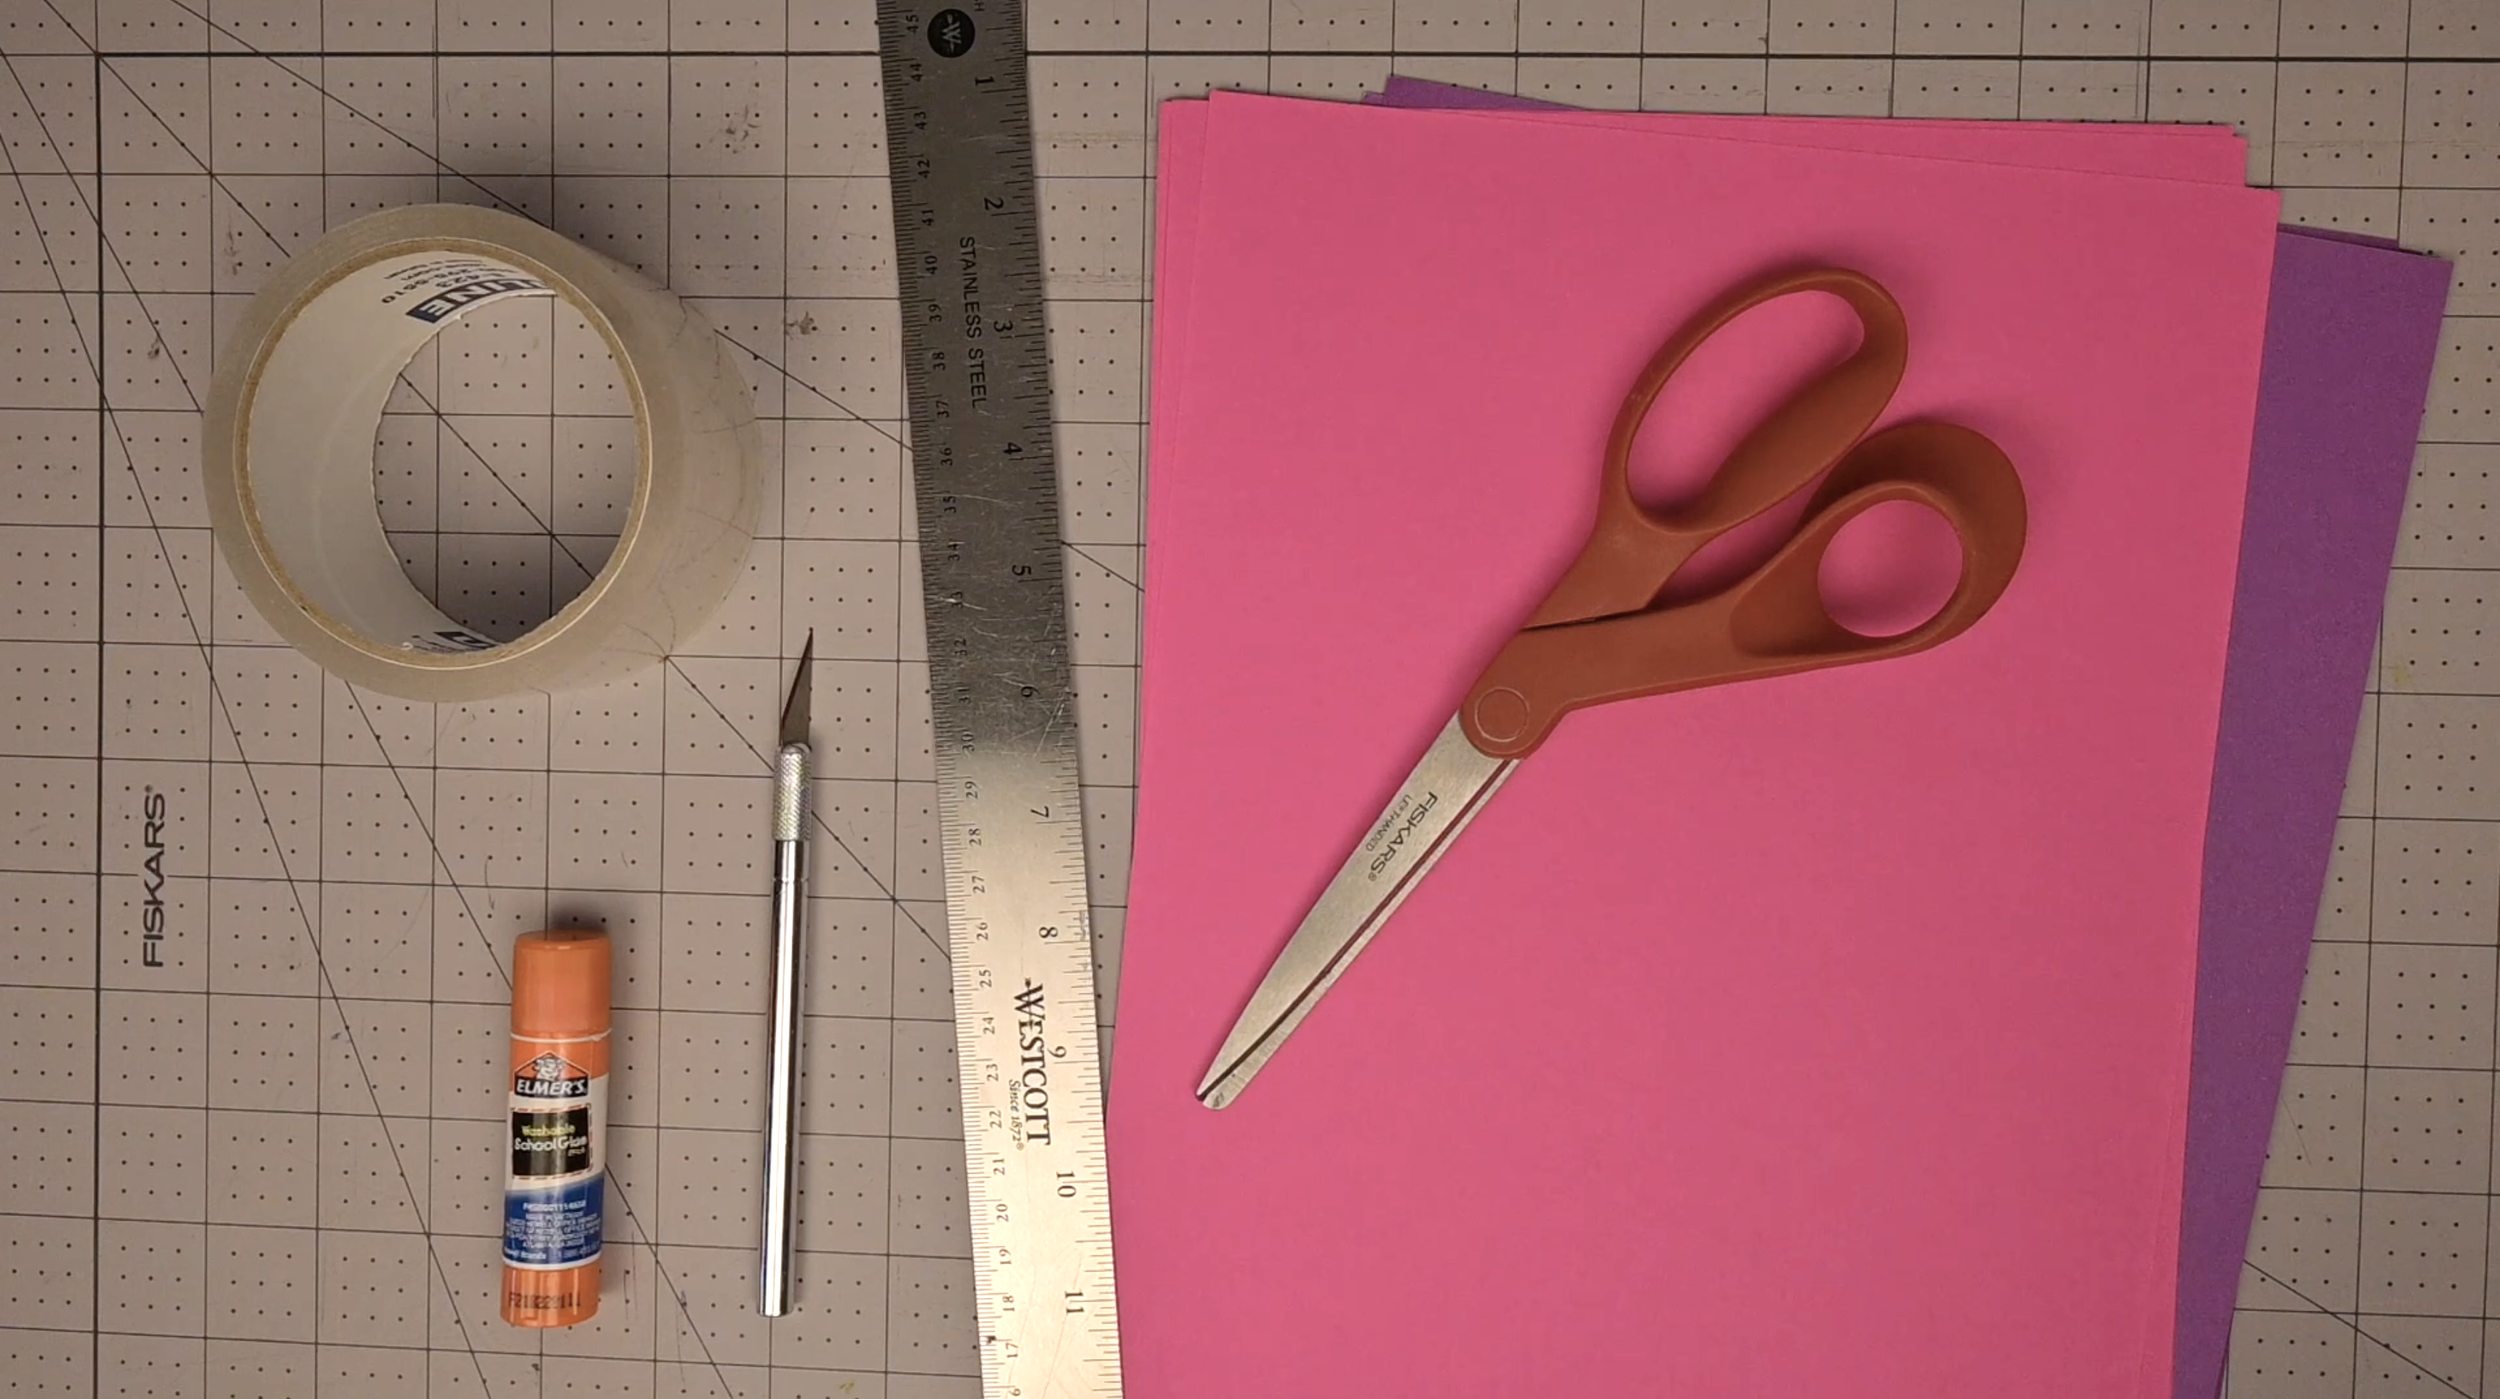
Supplies (As an Amazon Associate I earn from qualifying purchases):
2 pieces of construction paper in different colors (a standard 9x12 inch size works great)
Scissors or a craft knife (with a cutting mat if using a craft knife)
Glue stick or clear tape
Pencil (optional)
Step 1: Cut Your Weaving Strips
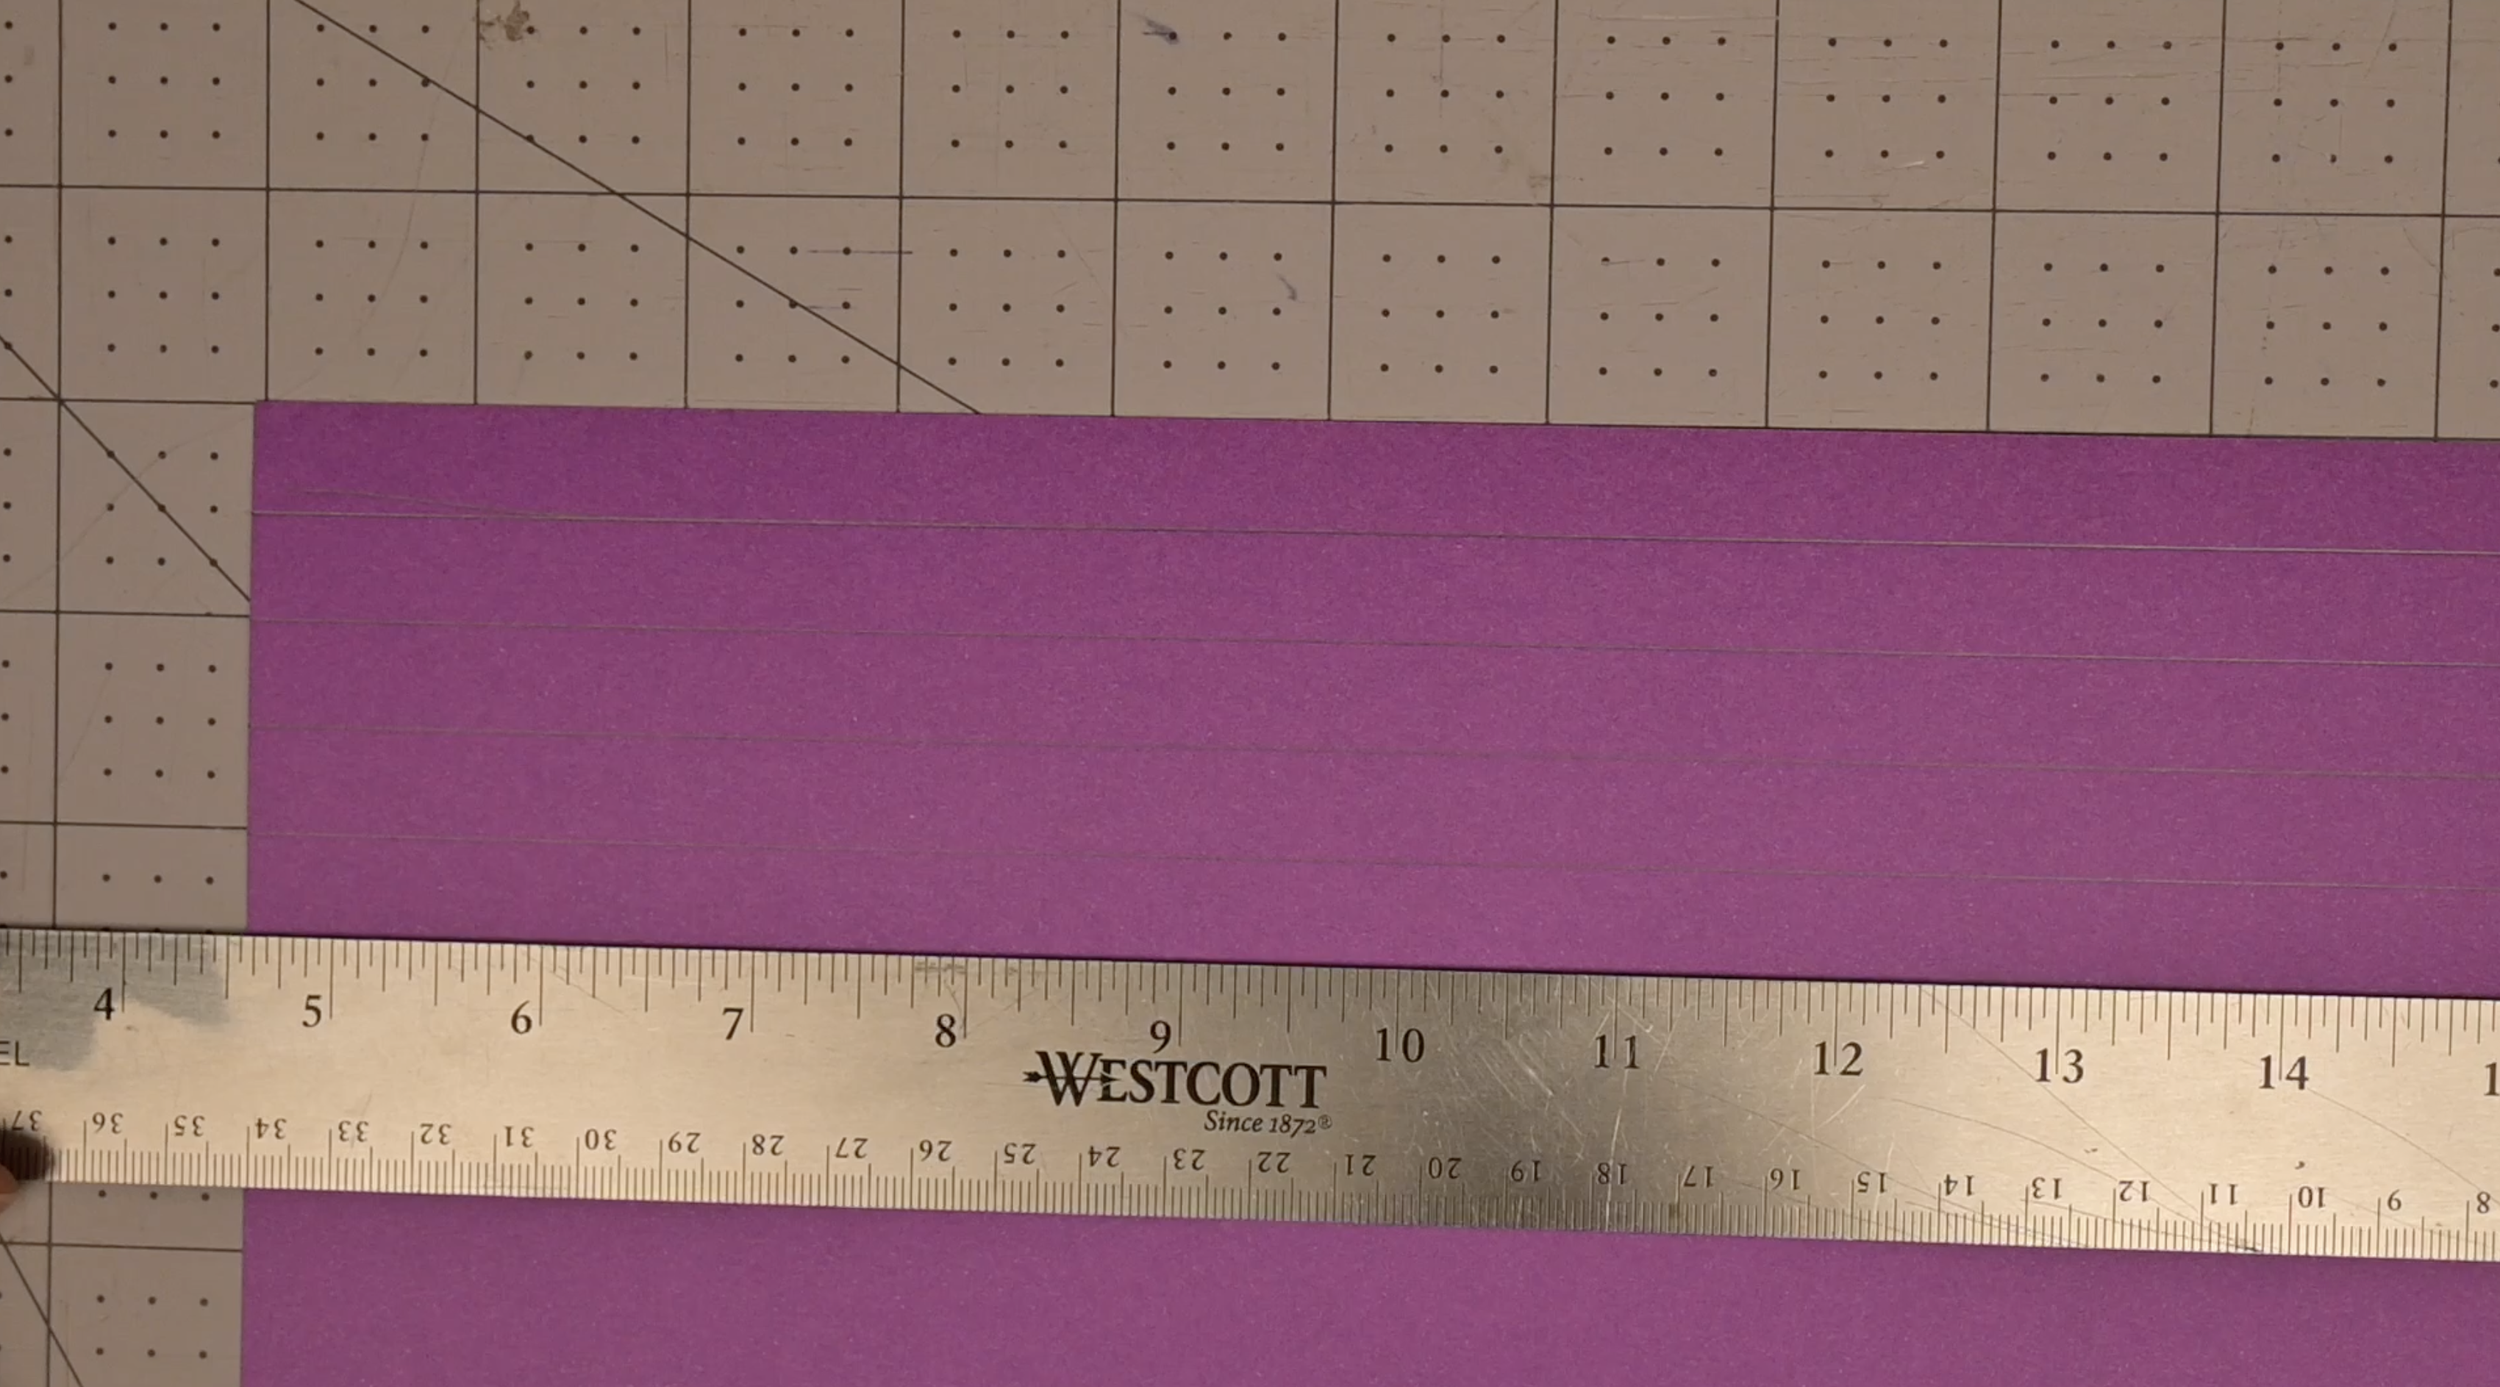
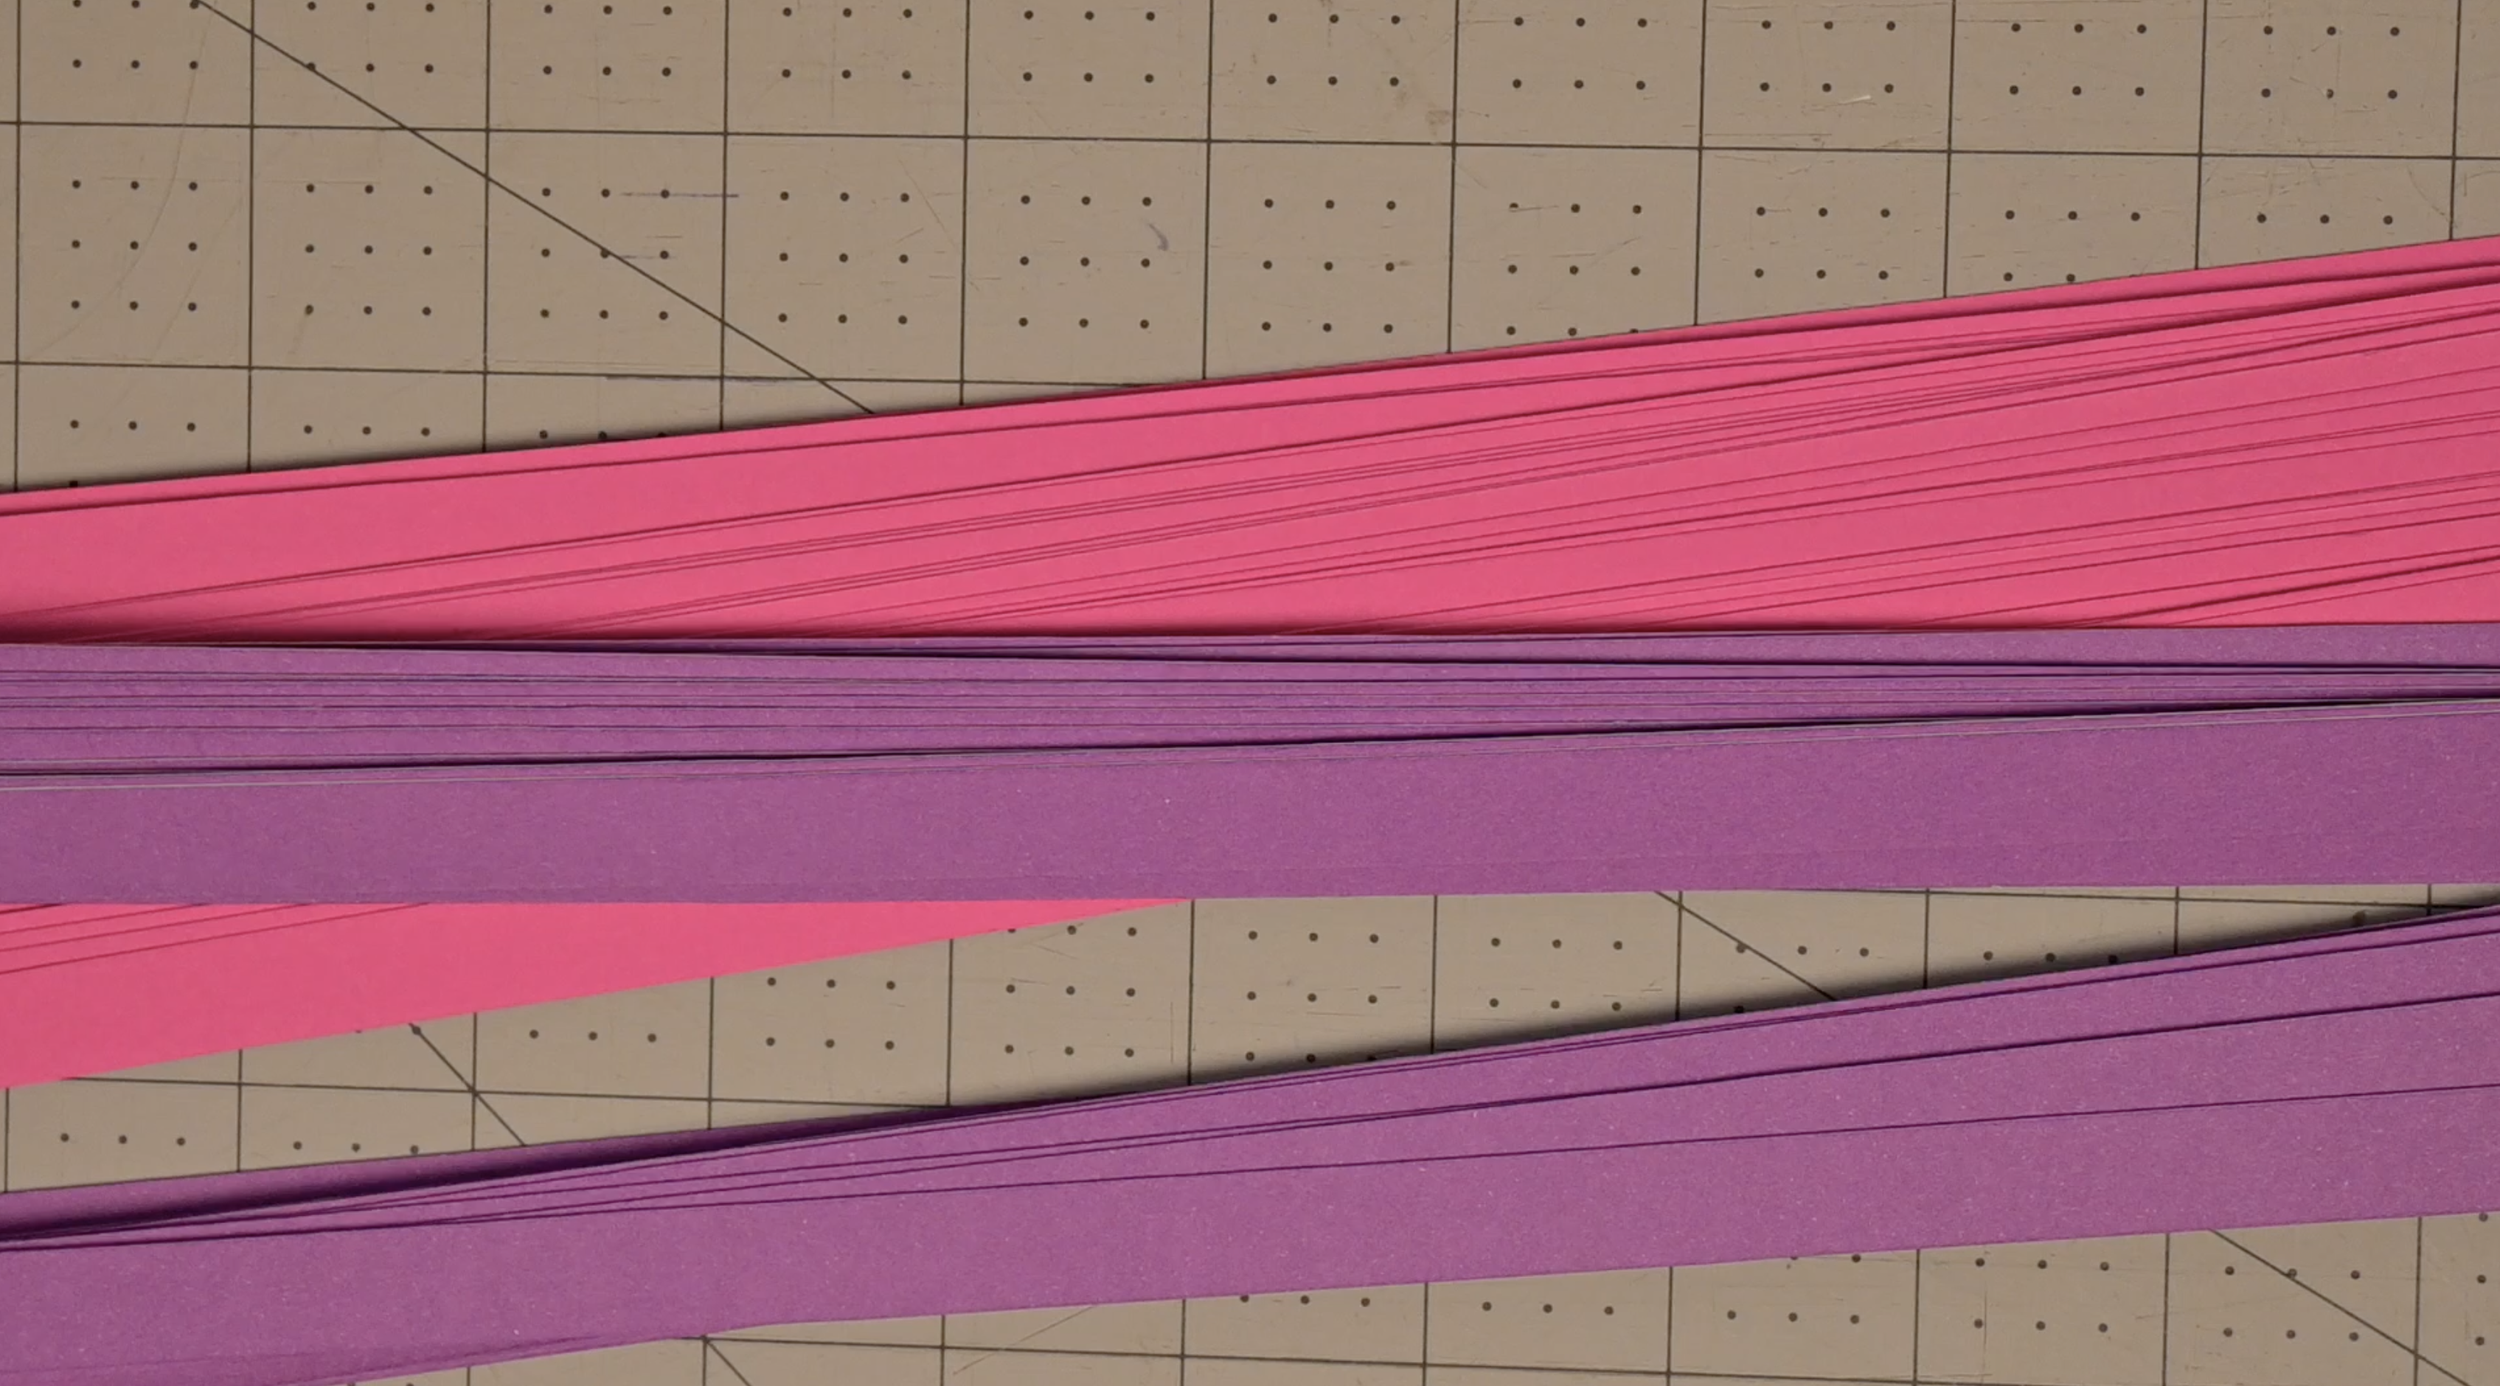
The key to a successful weave is having uniform strips. You'll cut all your strips to be the same length and width.
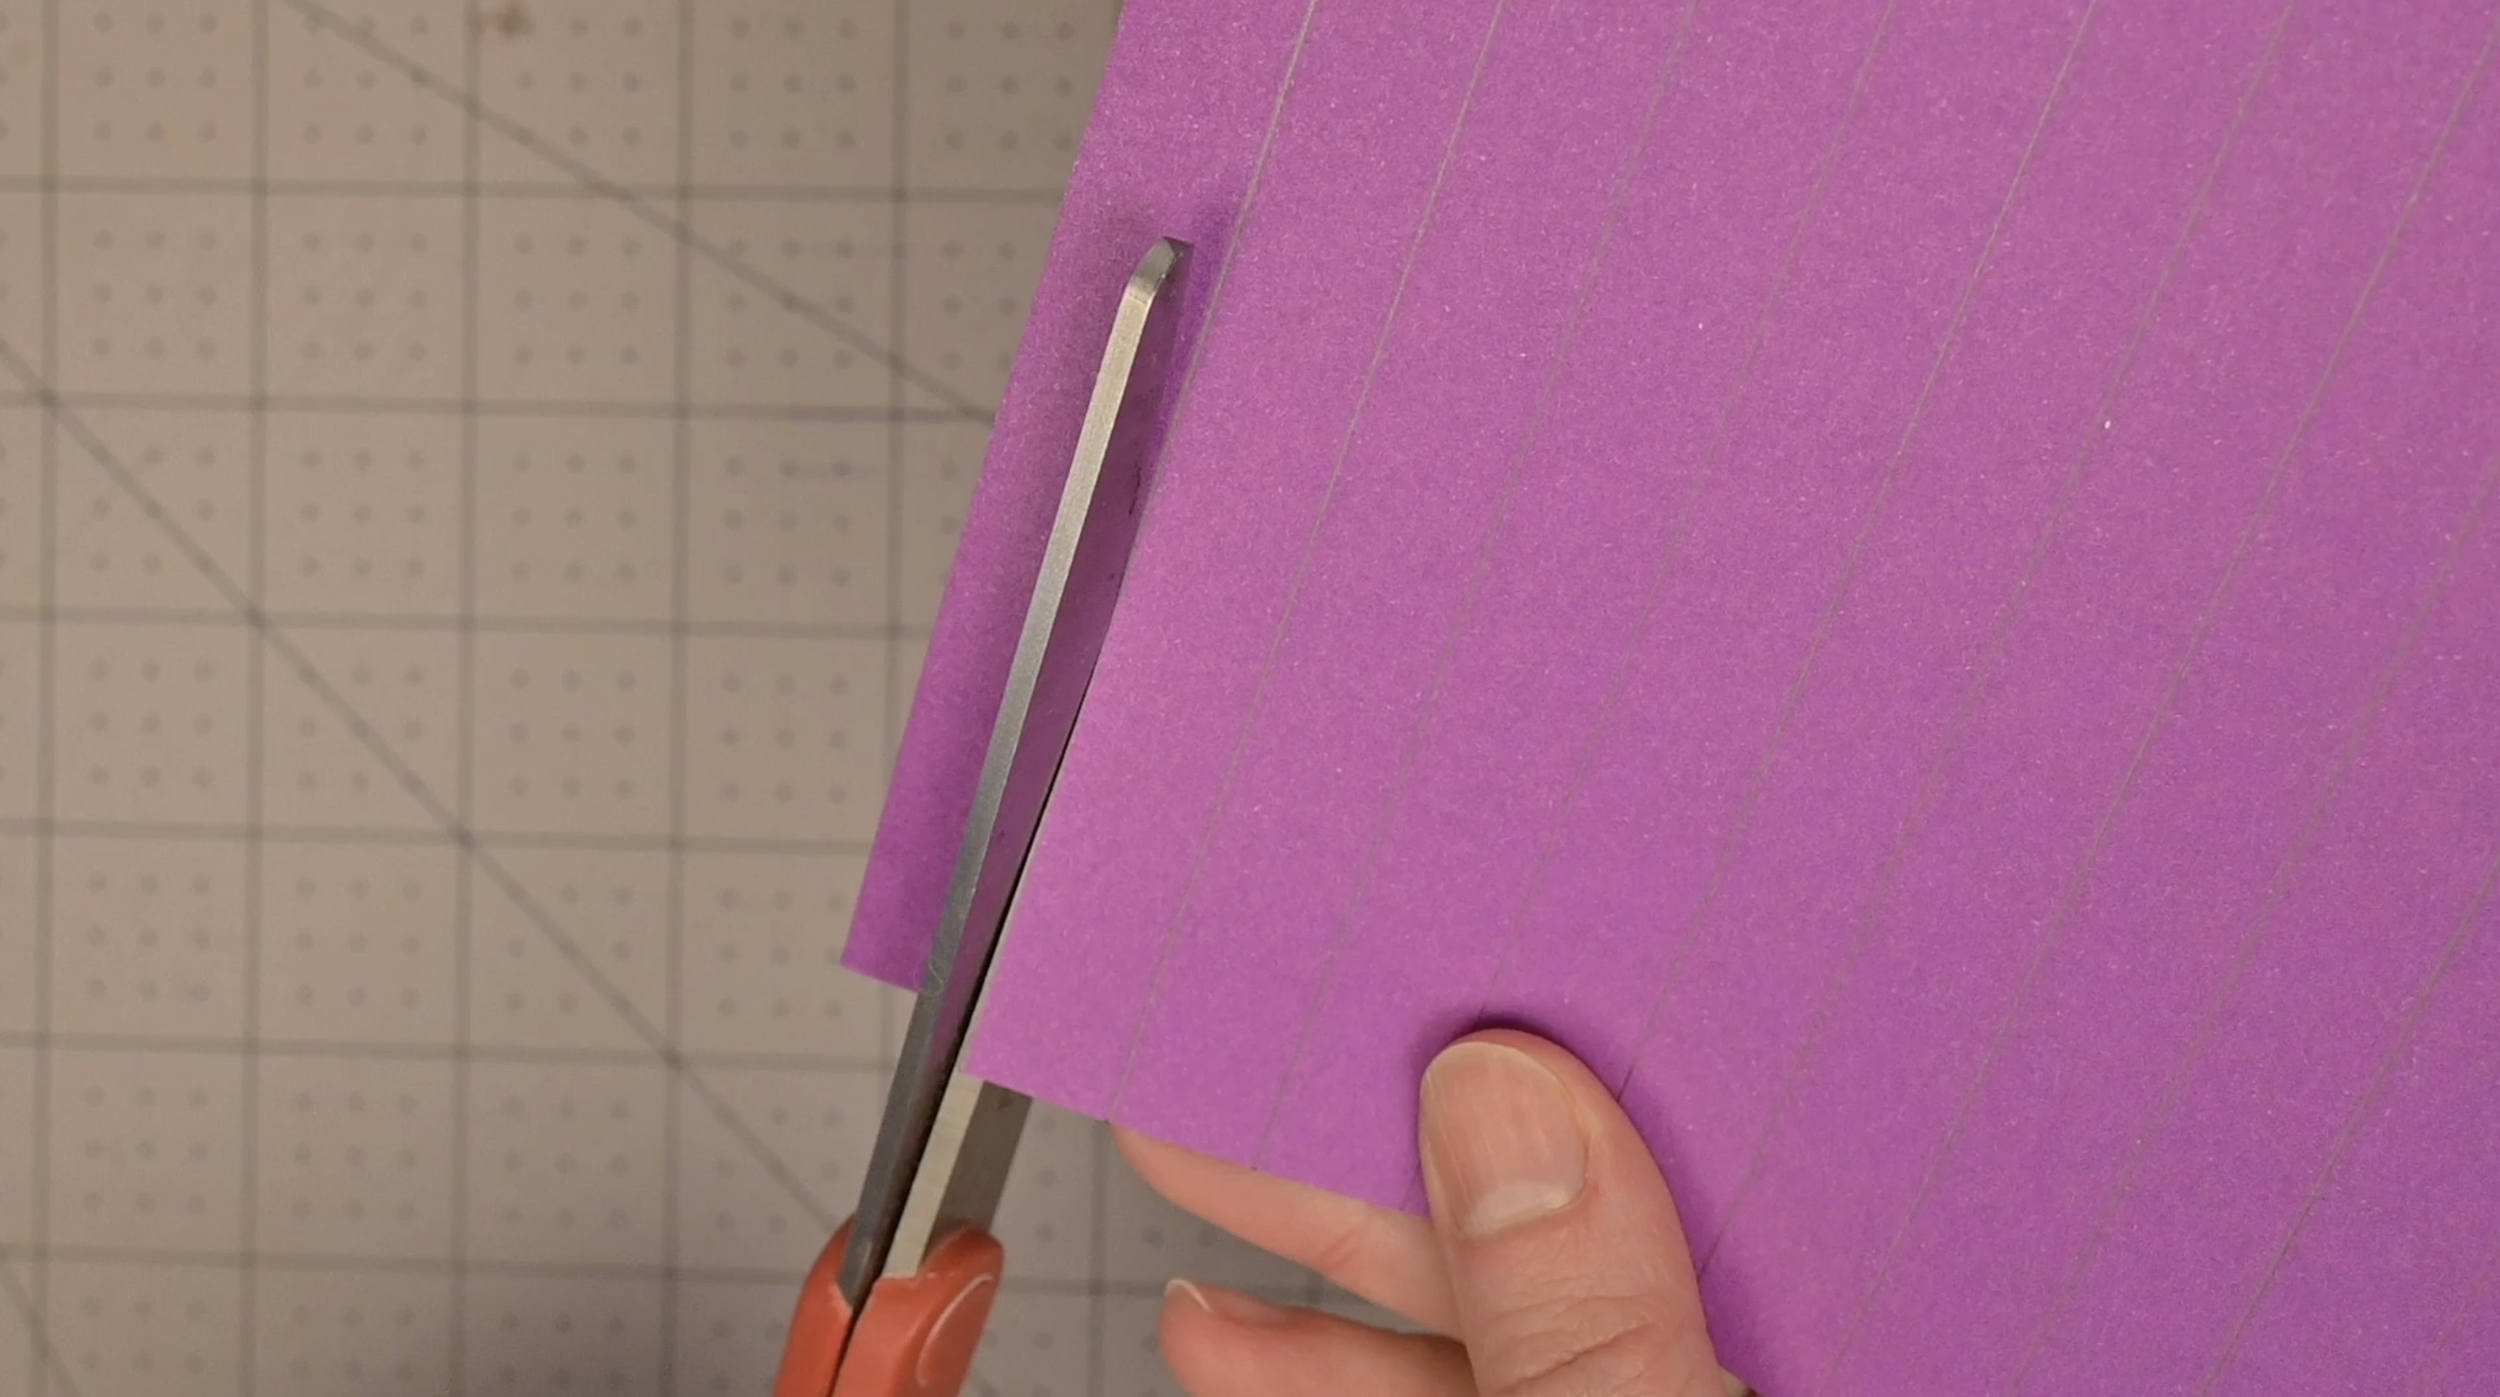
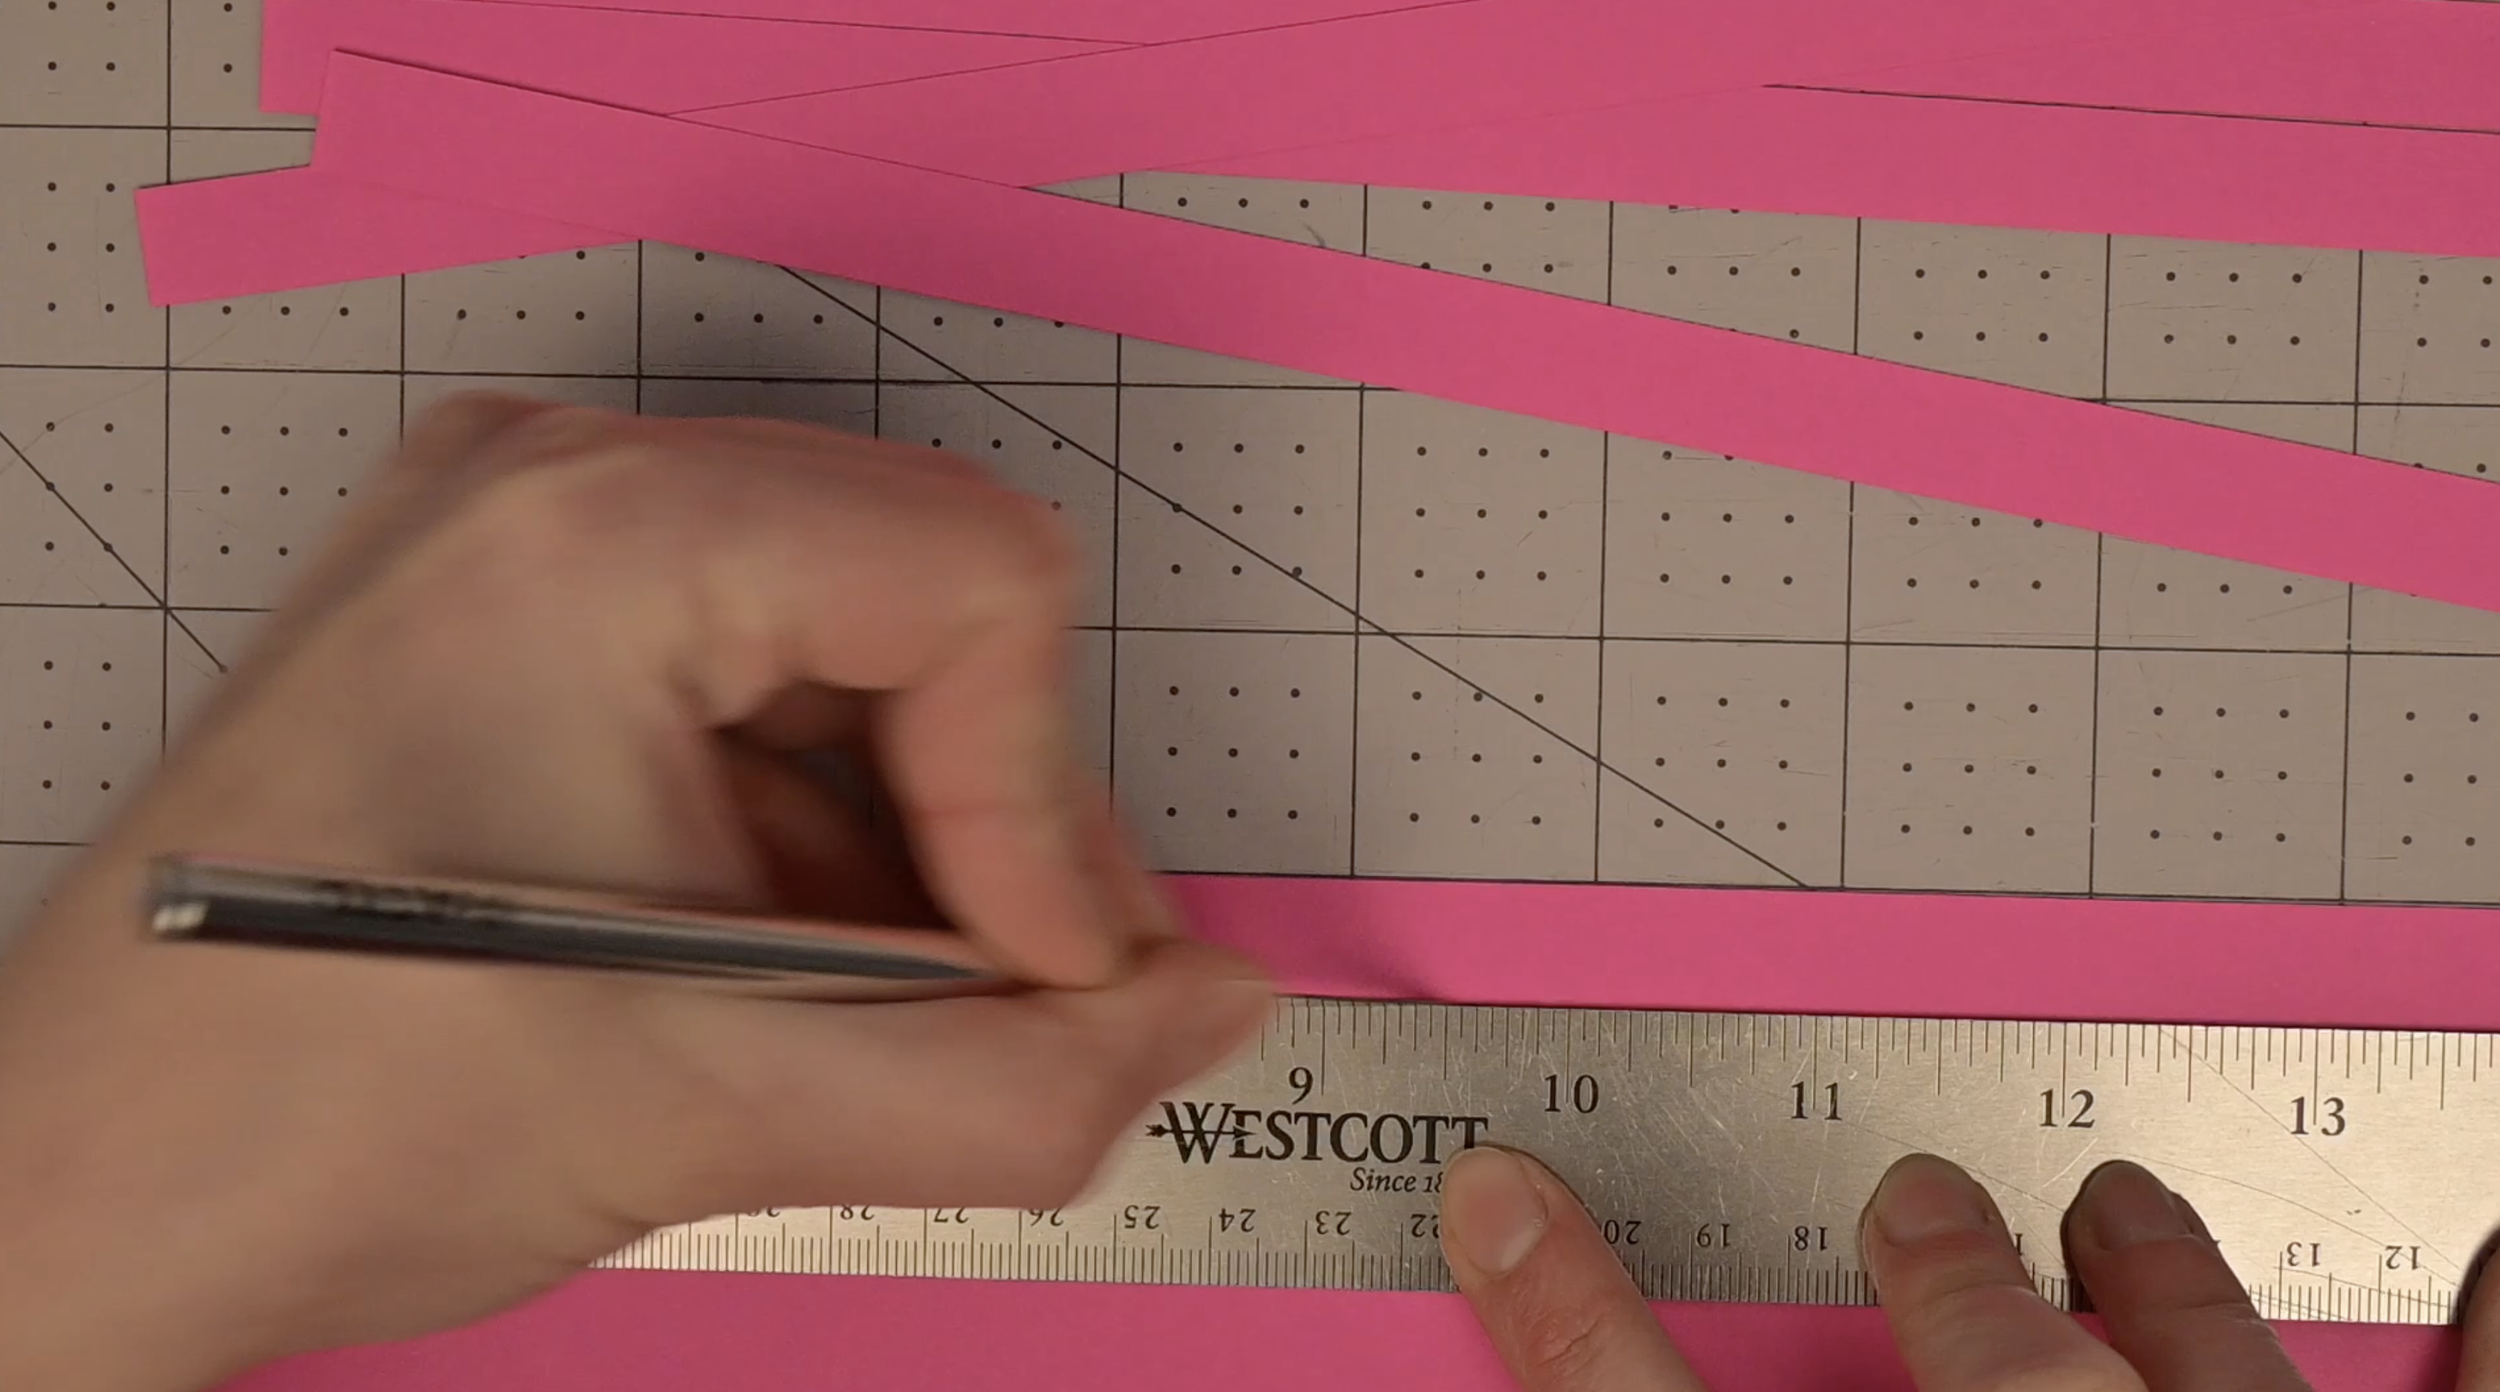
Make the strips: Take the 9x12 inch construction paper. Use your ruler and pencil to mark 1/2 inch sections along both of the long (12 inch) sides. Connect these marks with a line and then cut along the lines to create your weaving strips. Each strip will be 1/2 x 12 inches in size.
Each 9x12 piece of construction paper makes 18 strips.
Tip: If you're comfortable with using a craft knife, it can make this process faster and more precise! Just remember to always use a cutting mat and follow basic safety precautions.
New to craft knives? Check out my "Cut with Confidence: Essential Craft Knife Safety Tips" blog post for important safety information before you start!
Step 2: Connect the Strips
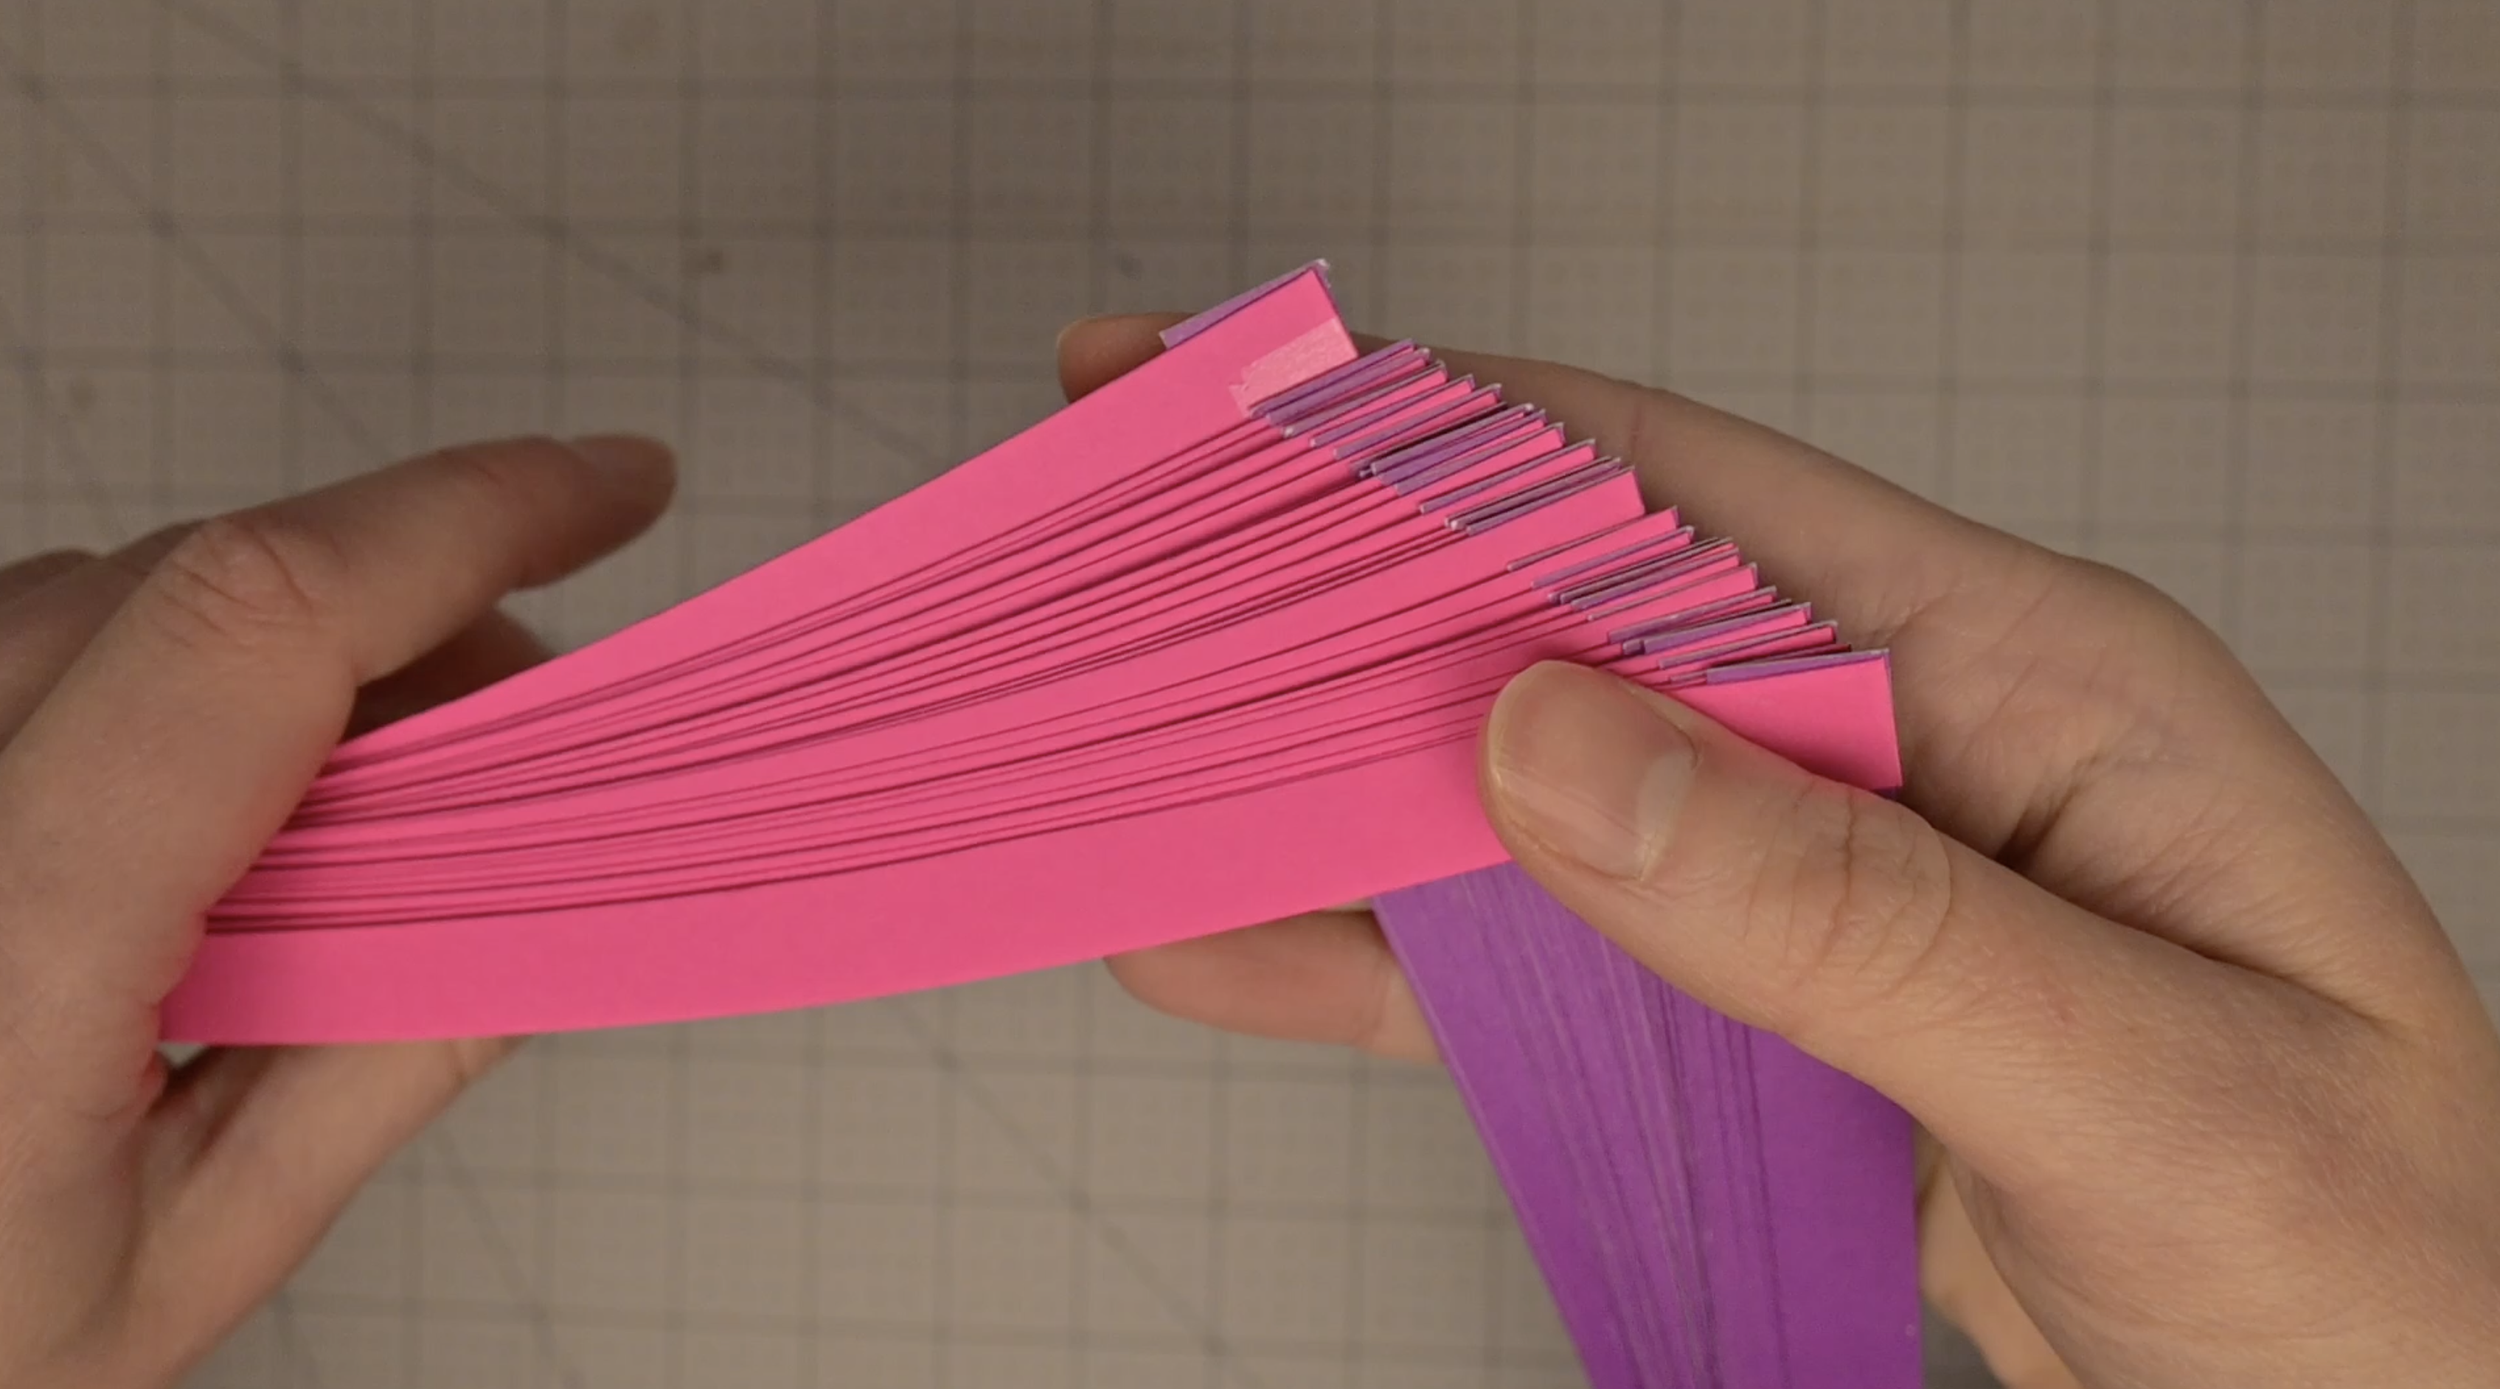
Instead of weaving the strips from the beginning, we'll connect them in pairs first. This forms the base of your weave.
Pick up one strip of each color.
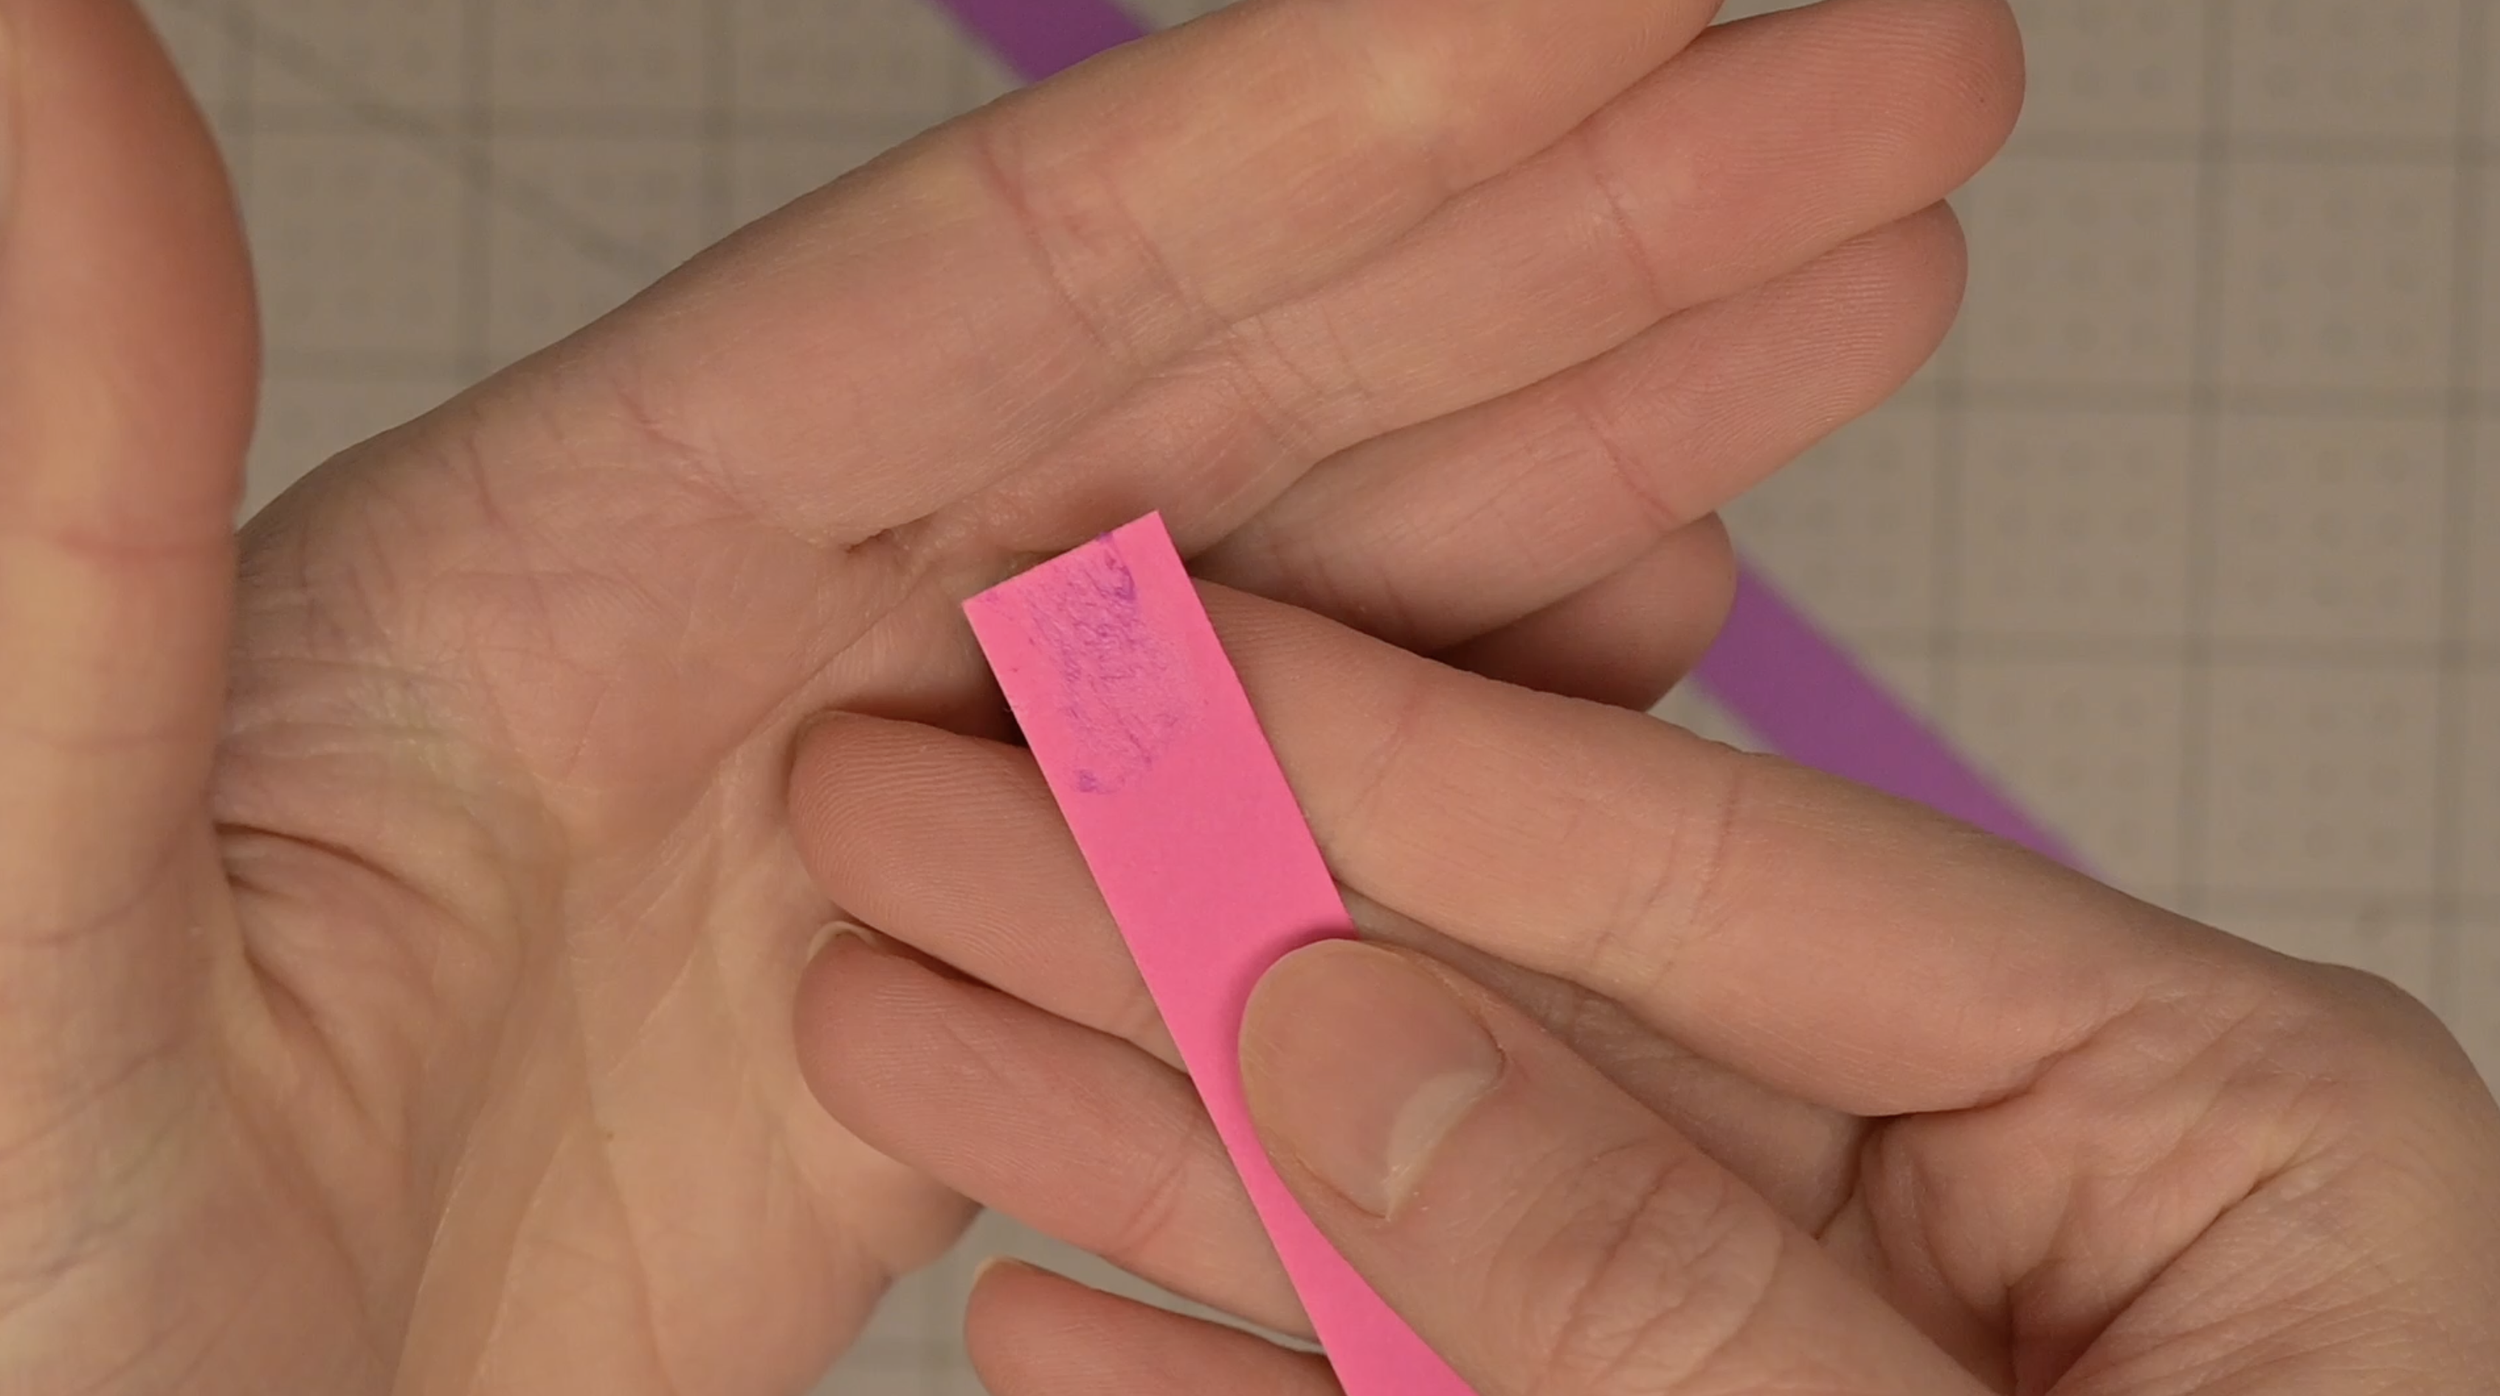
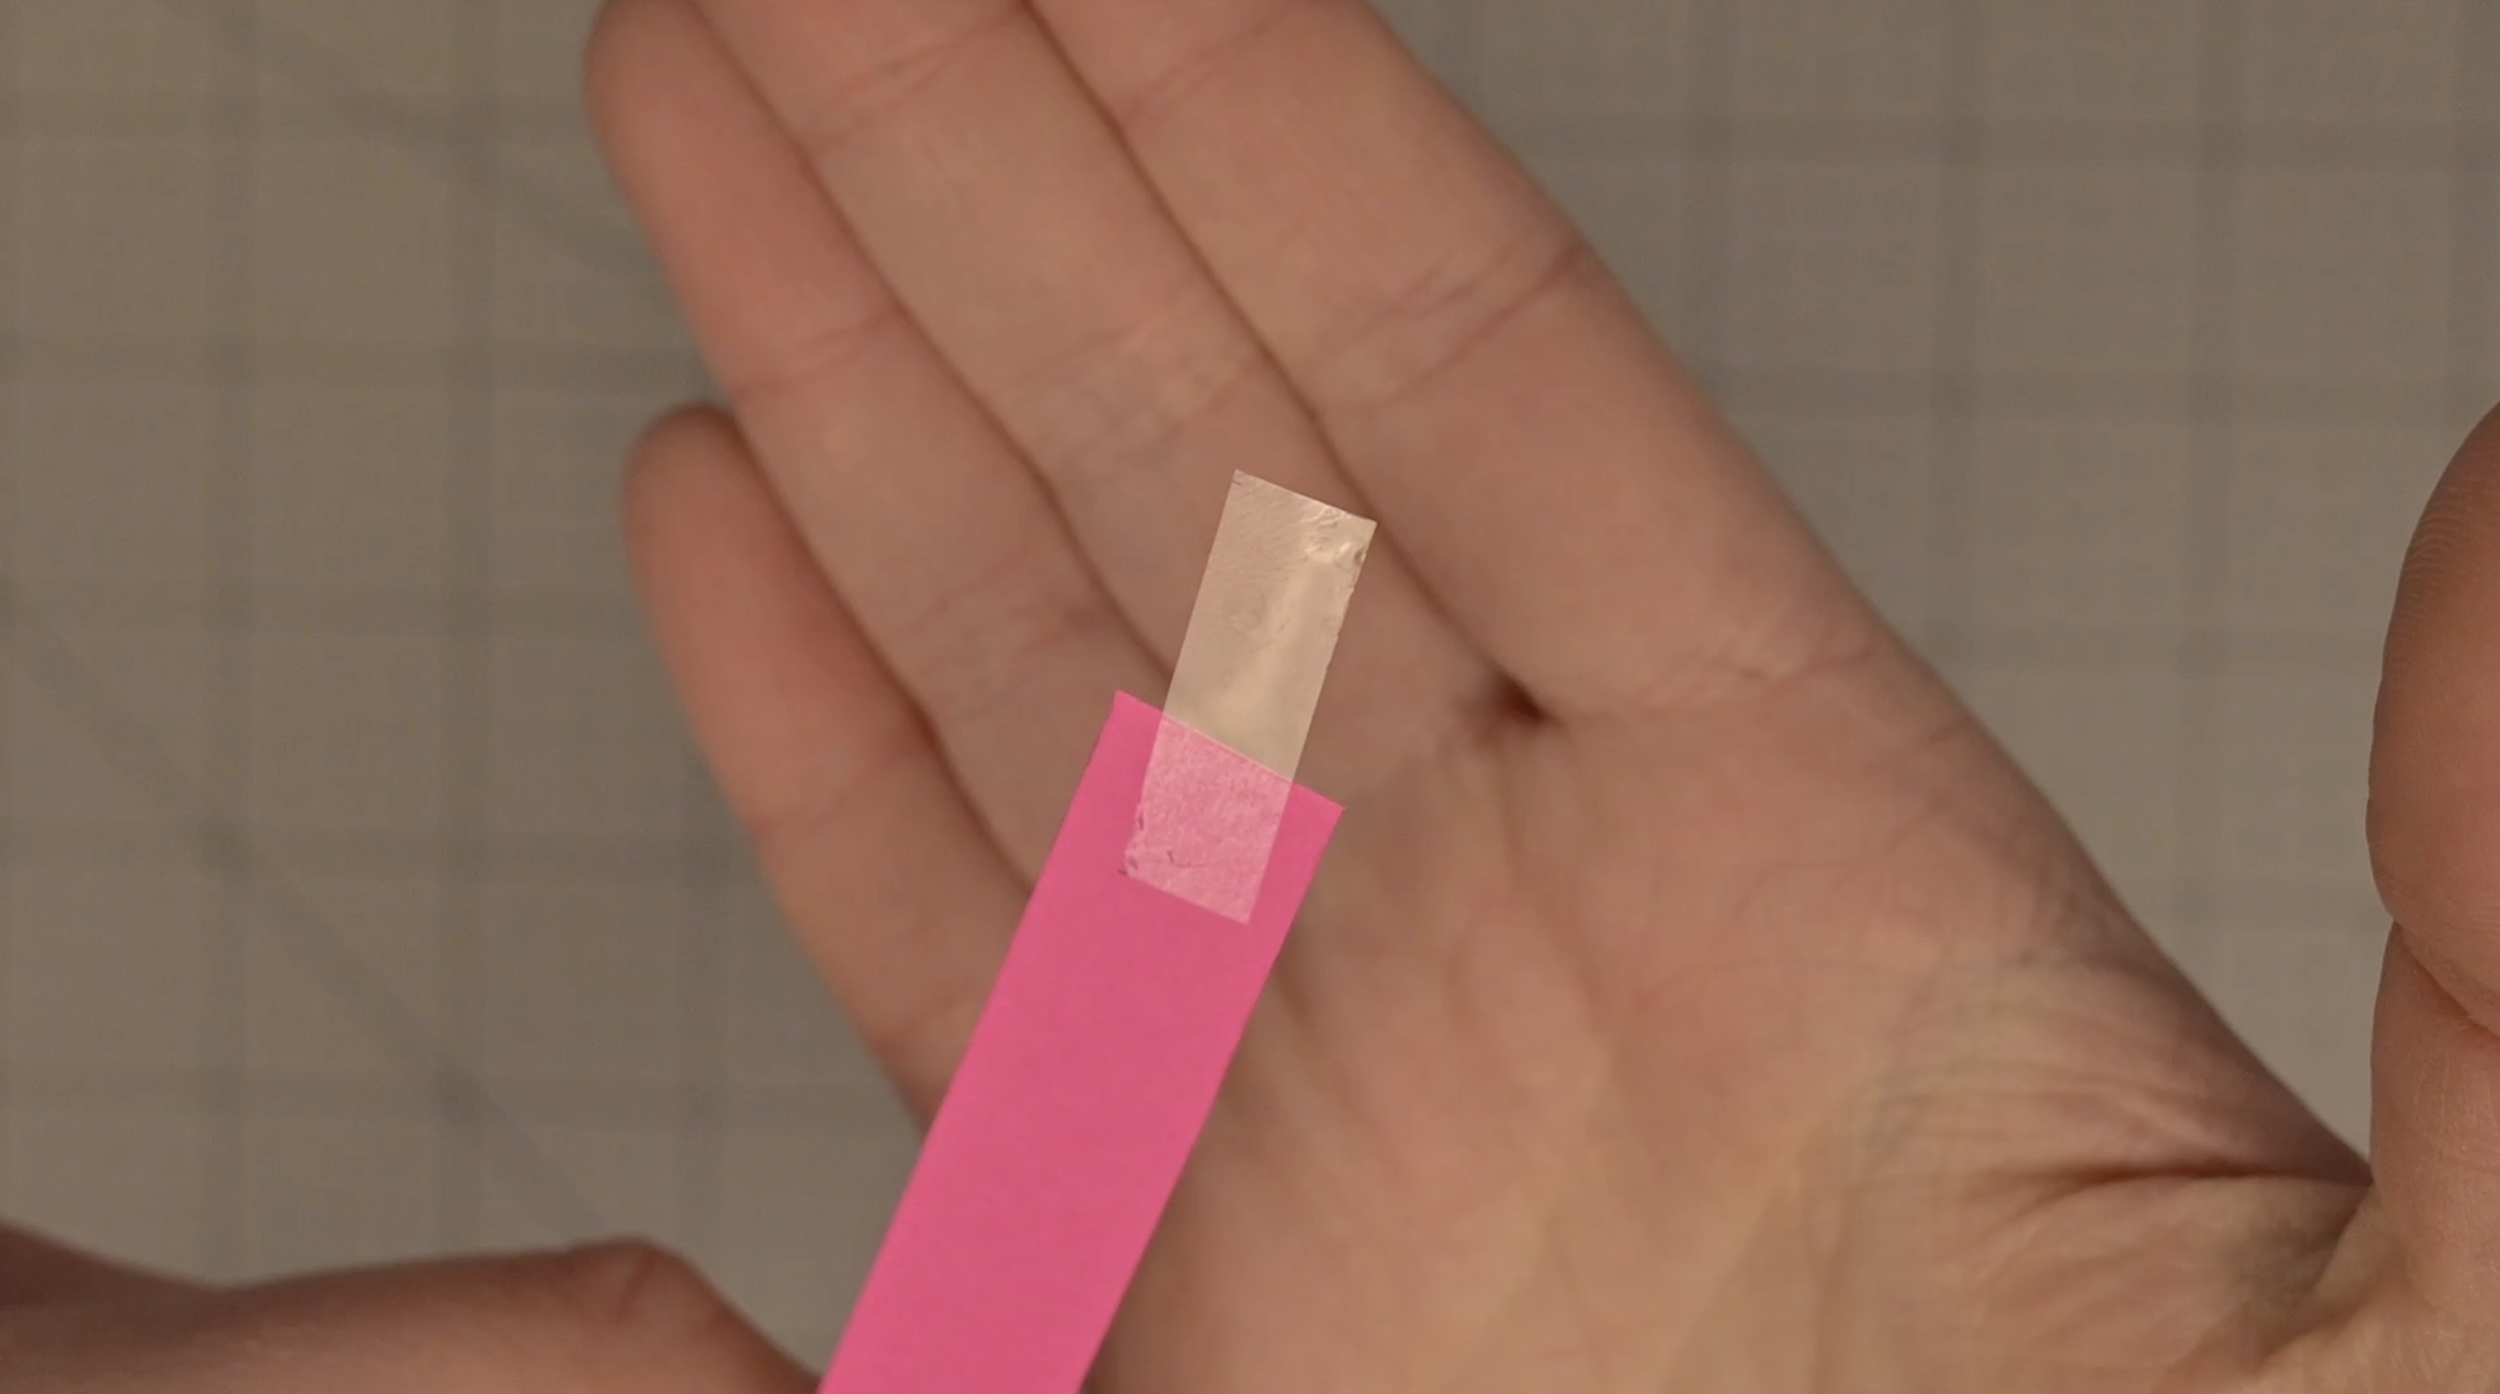
Apply a small dot of glue to the very end of one strip OR secure with a small piece of tape.
In my experience, using tape tends to work better than glue for this project.
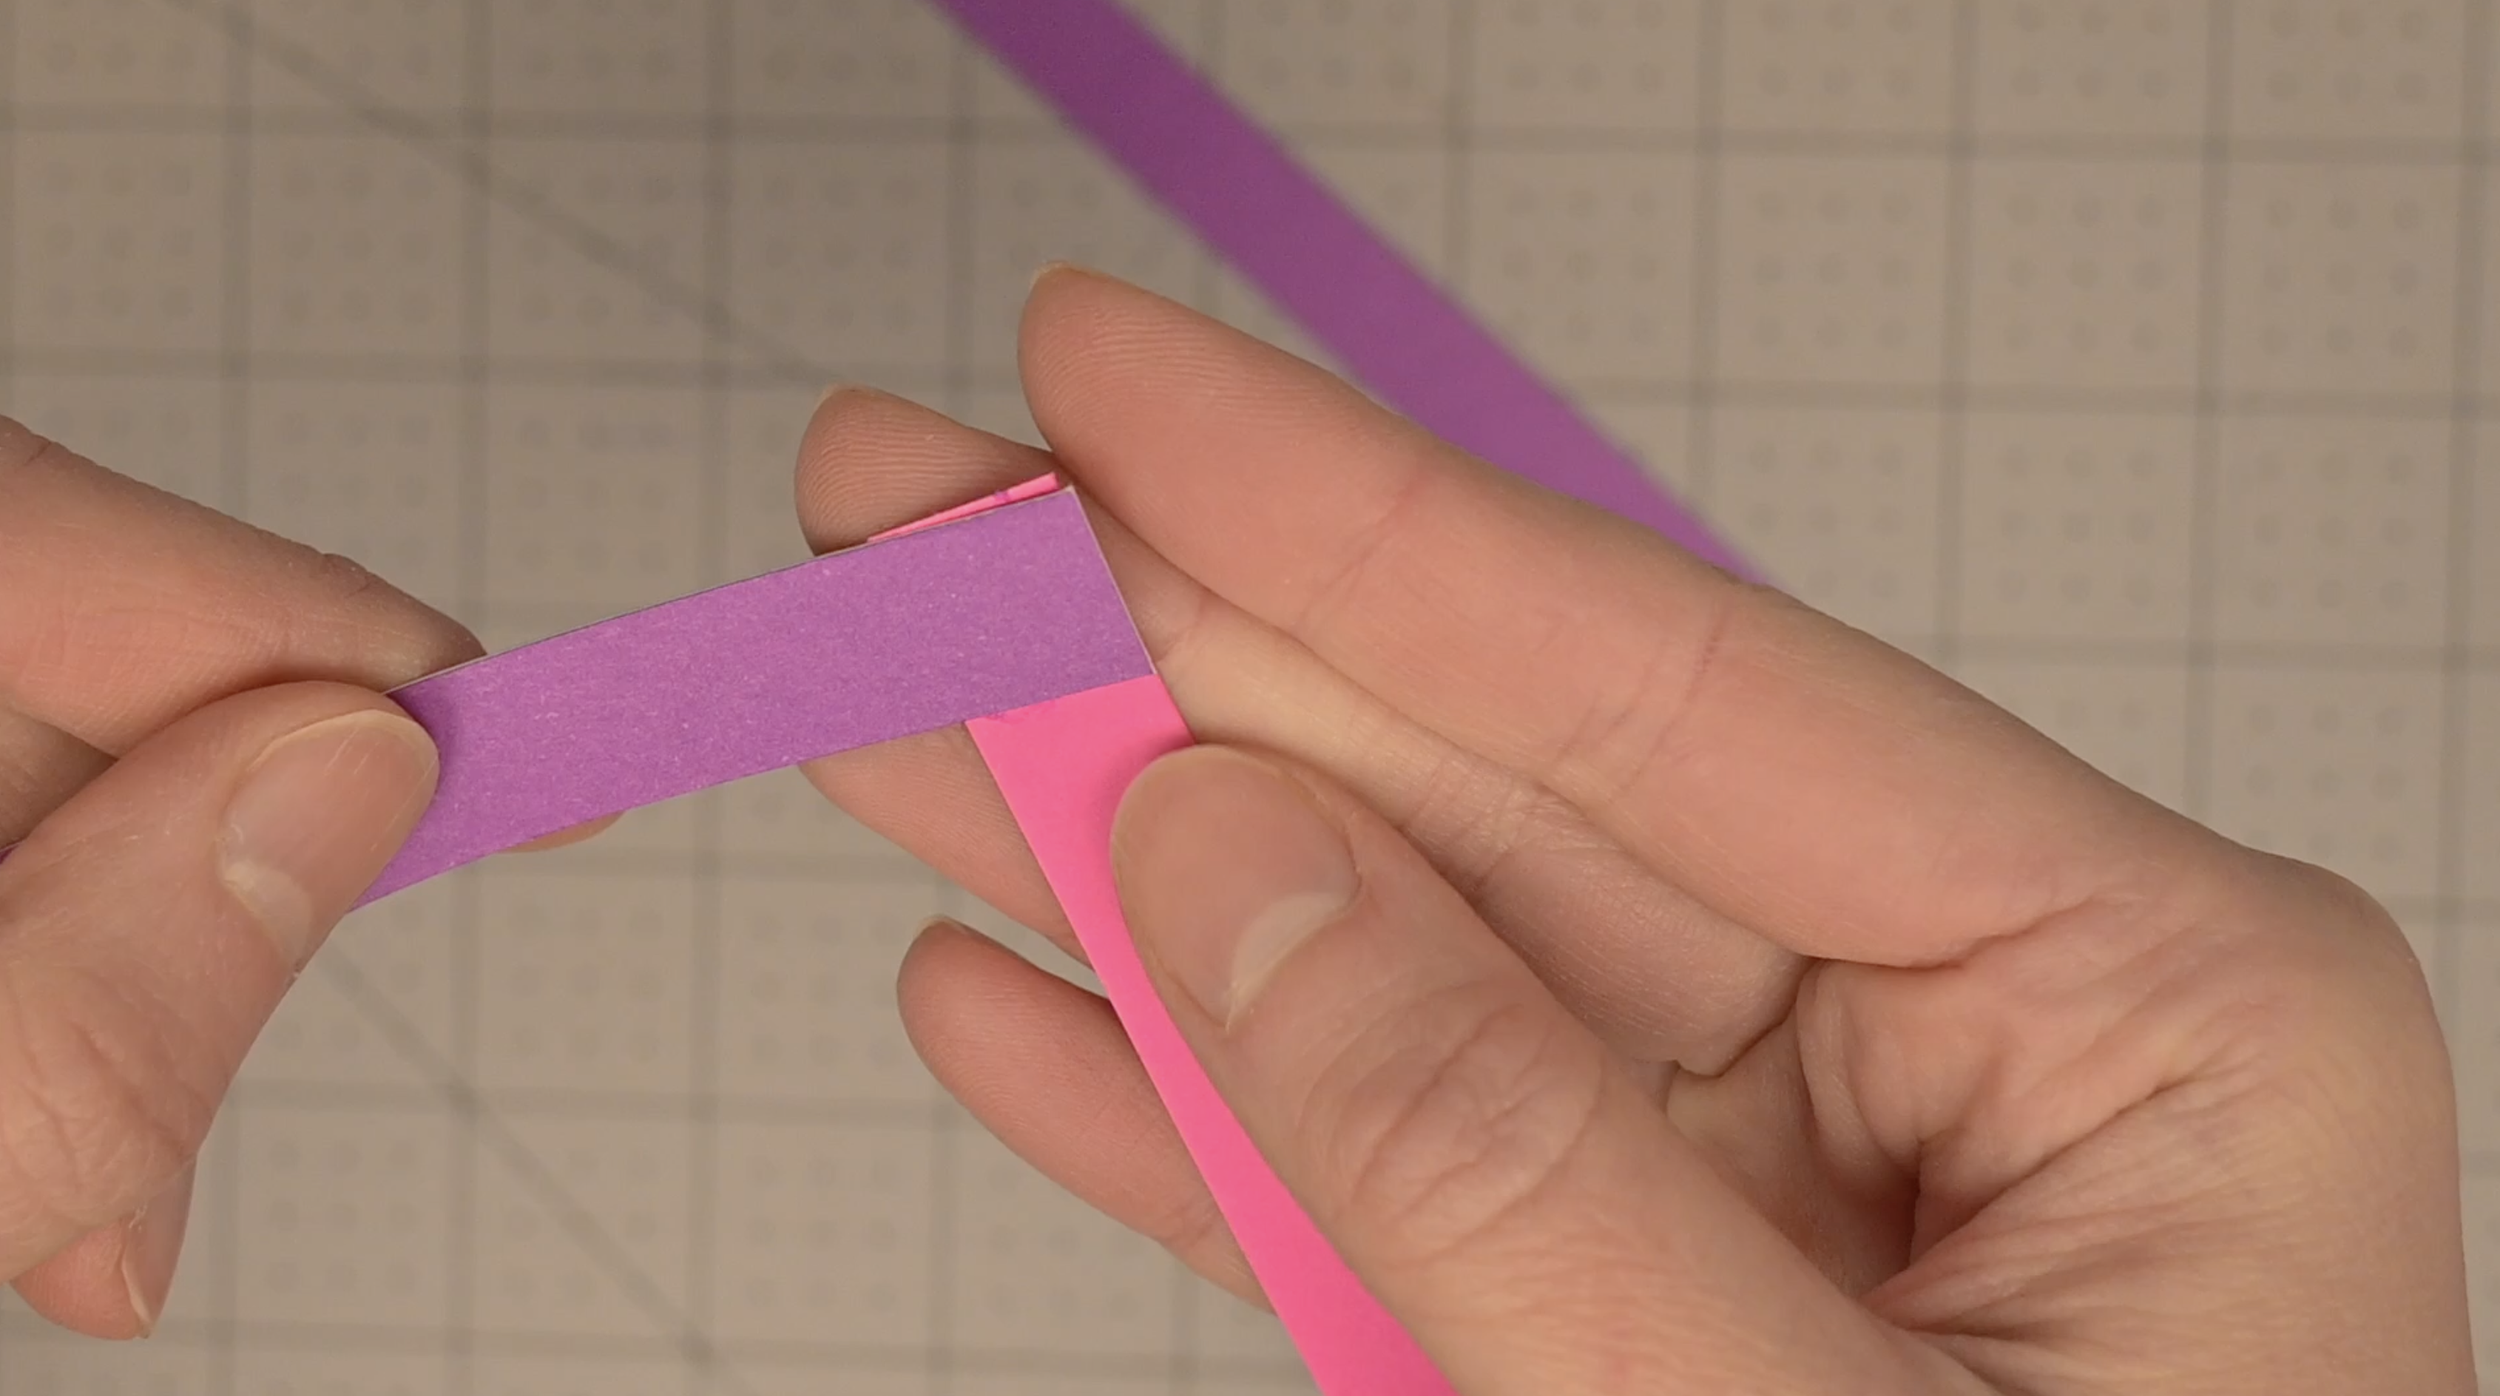
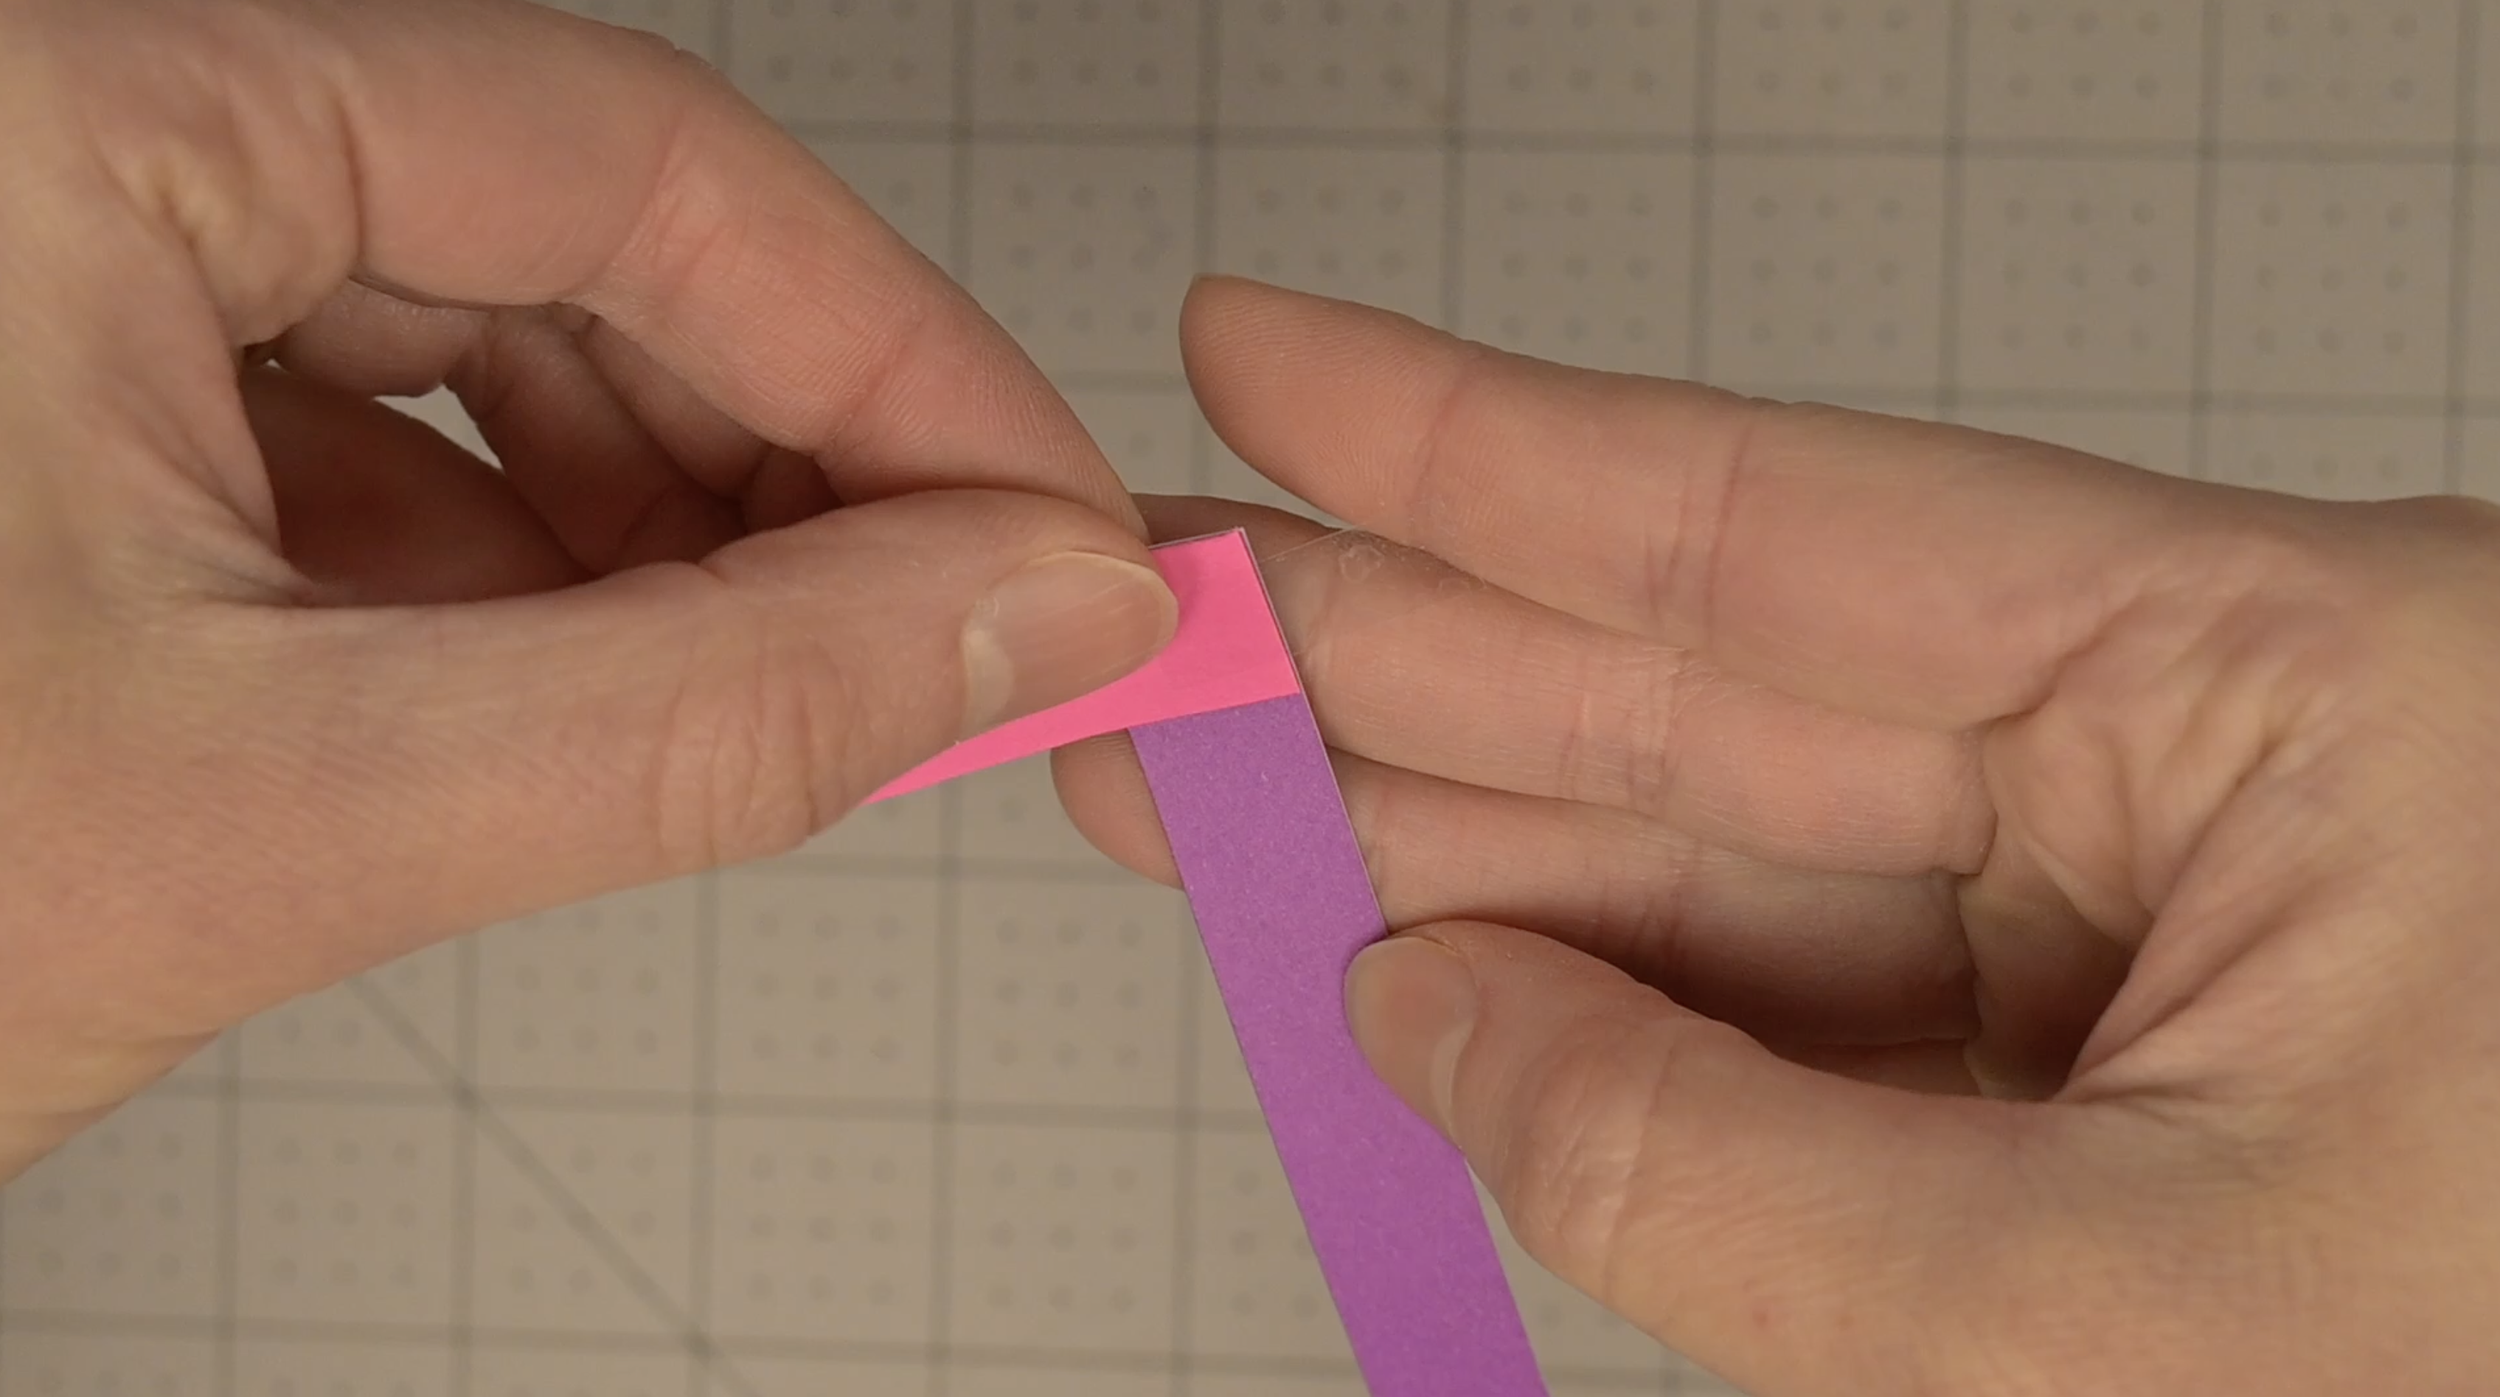
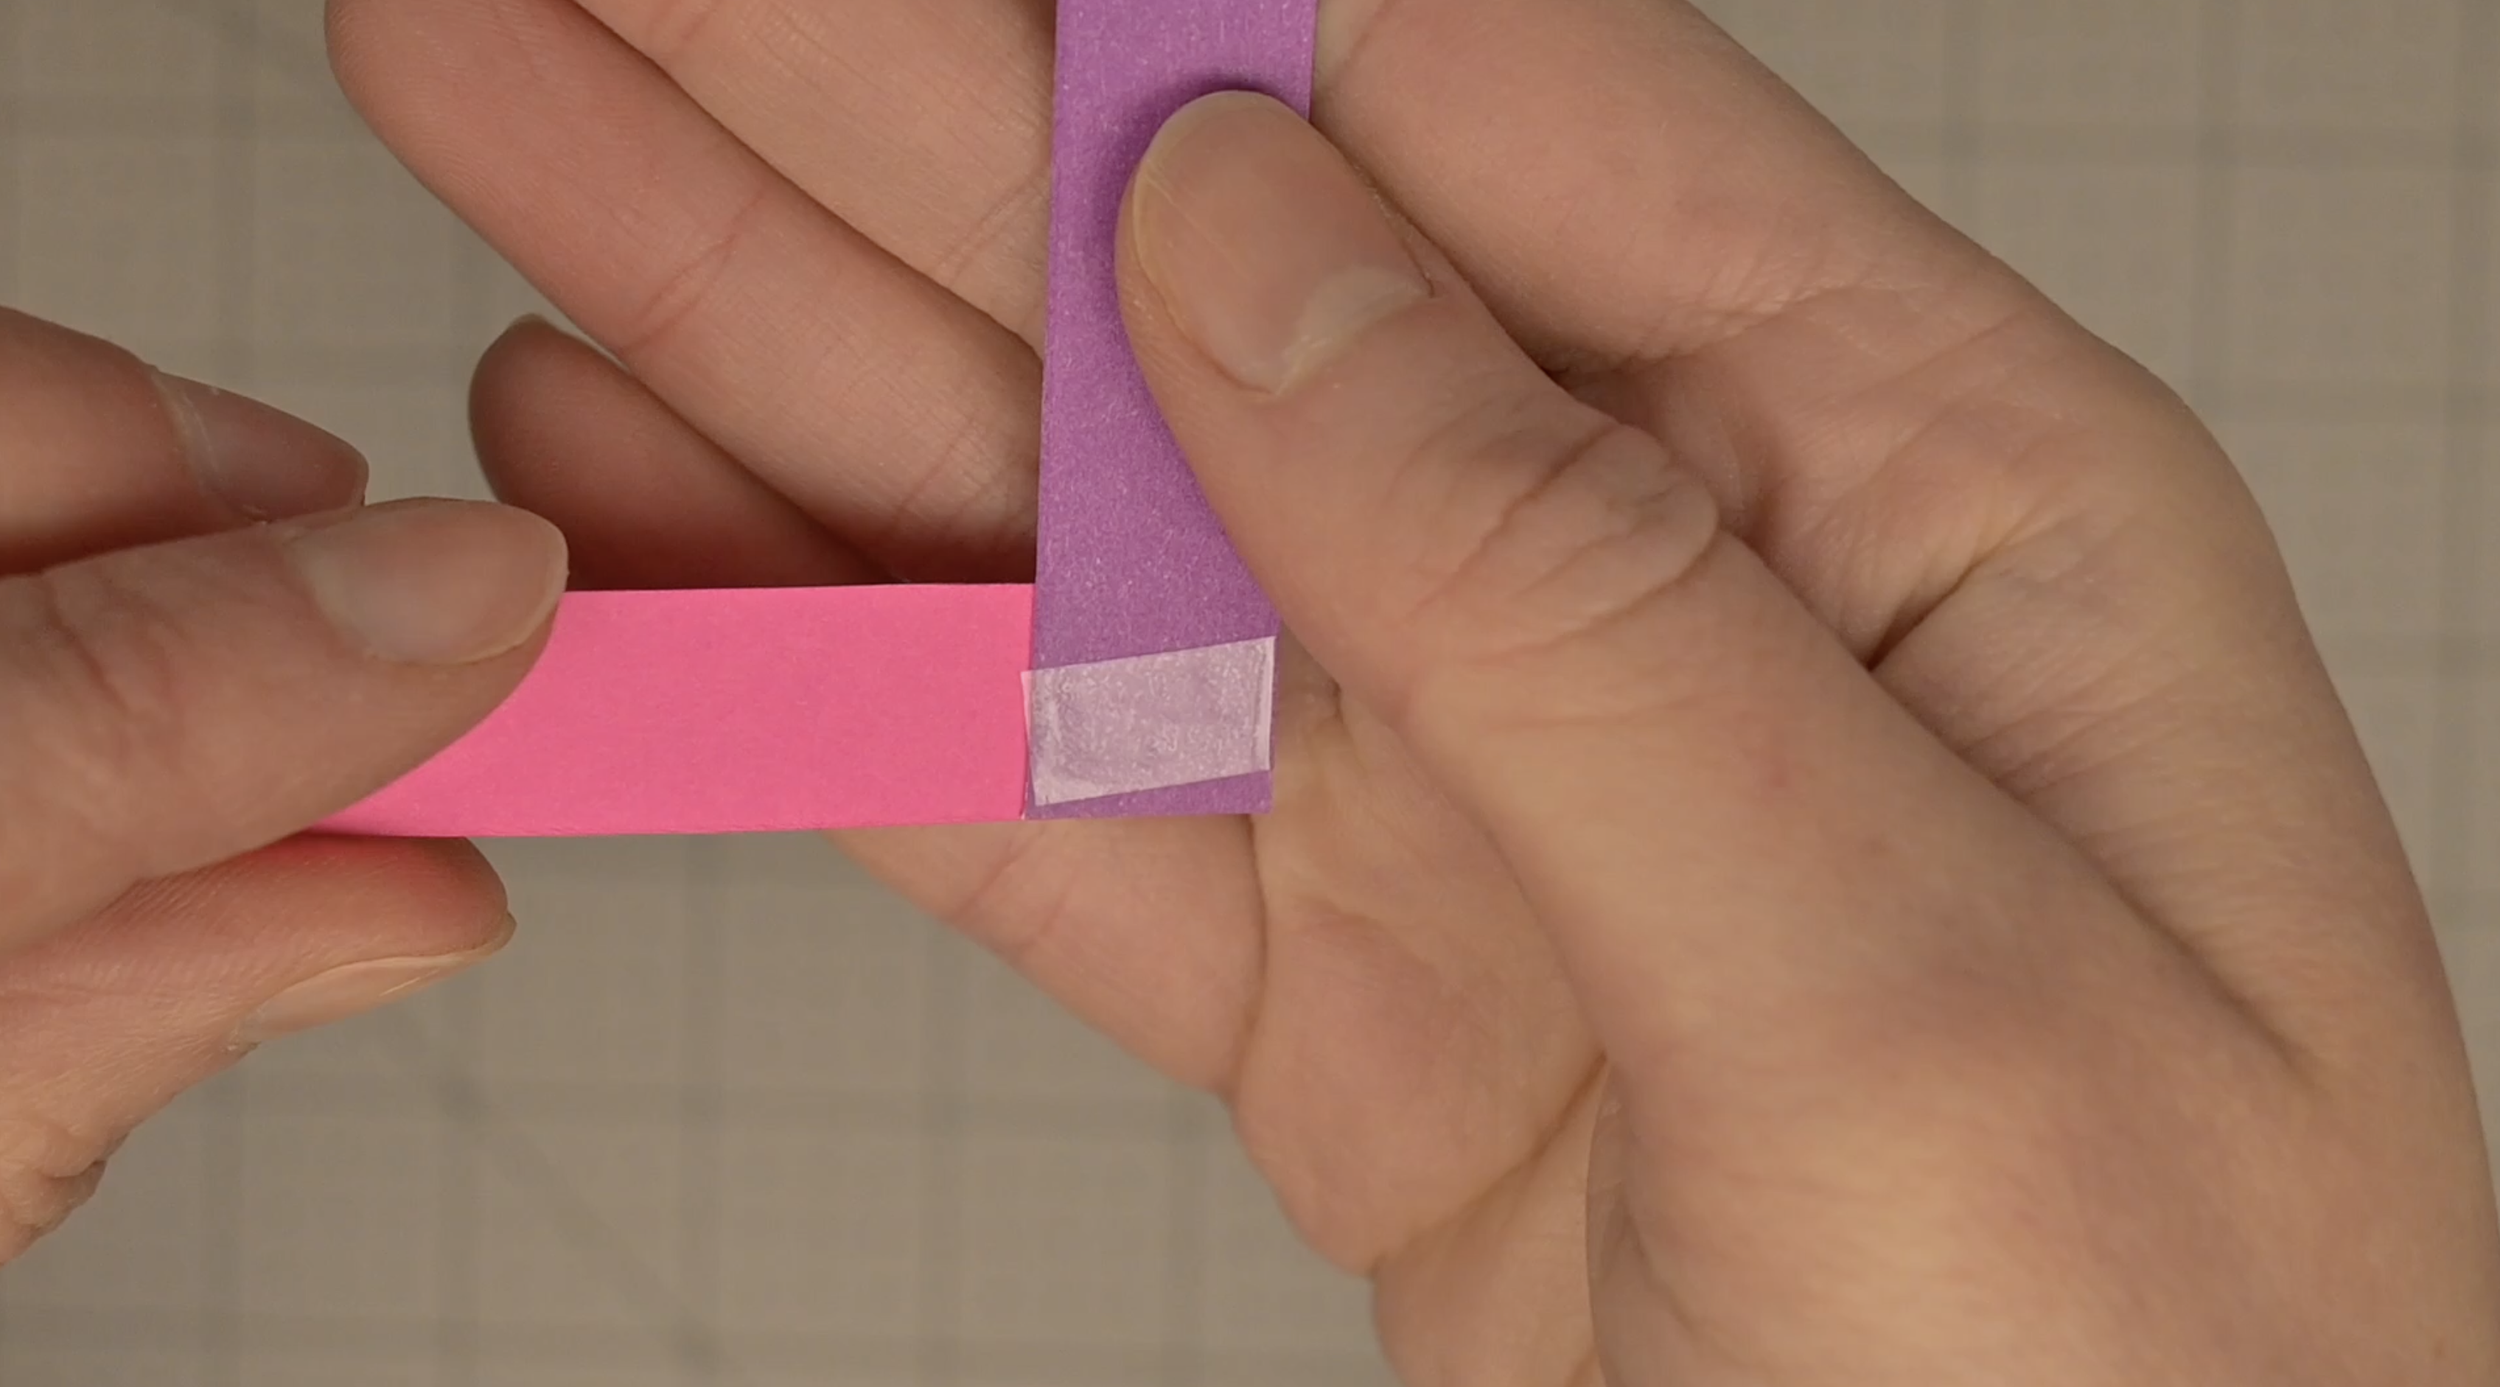
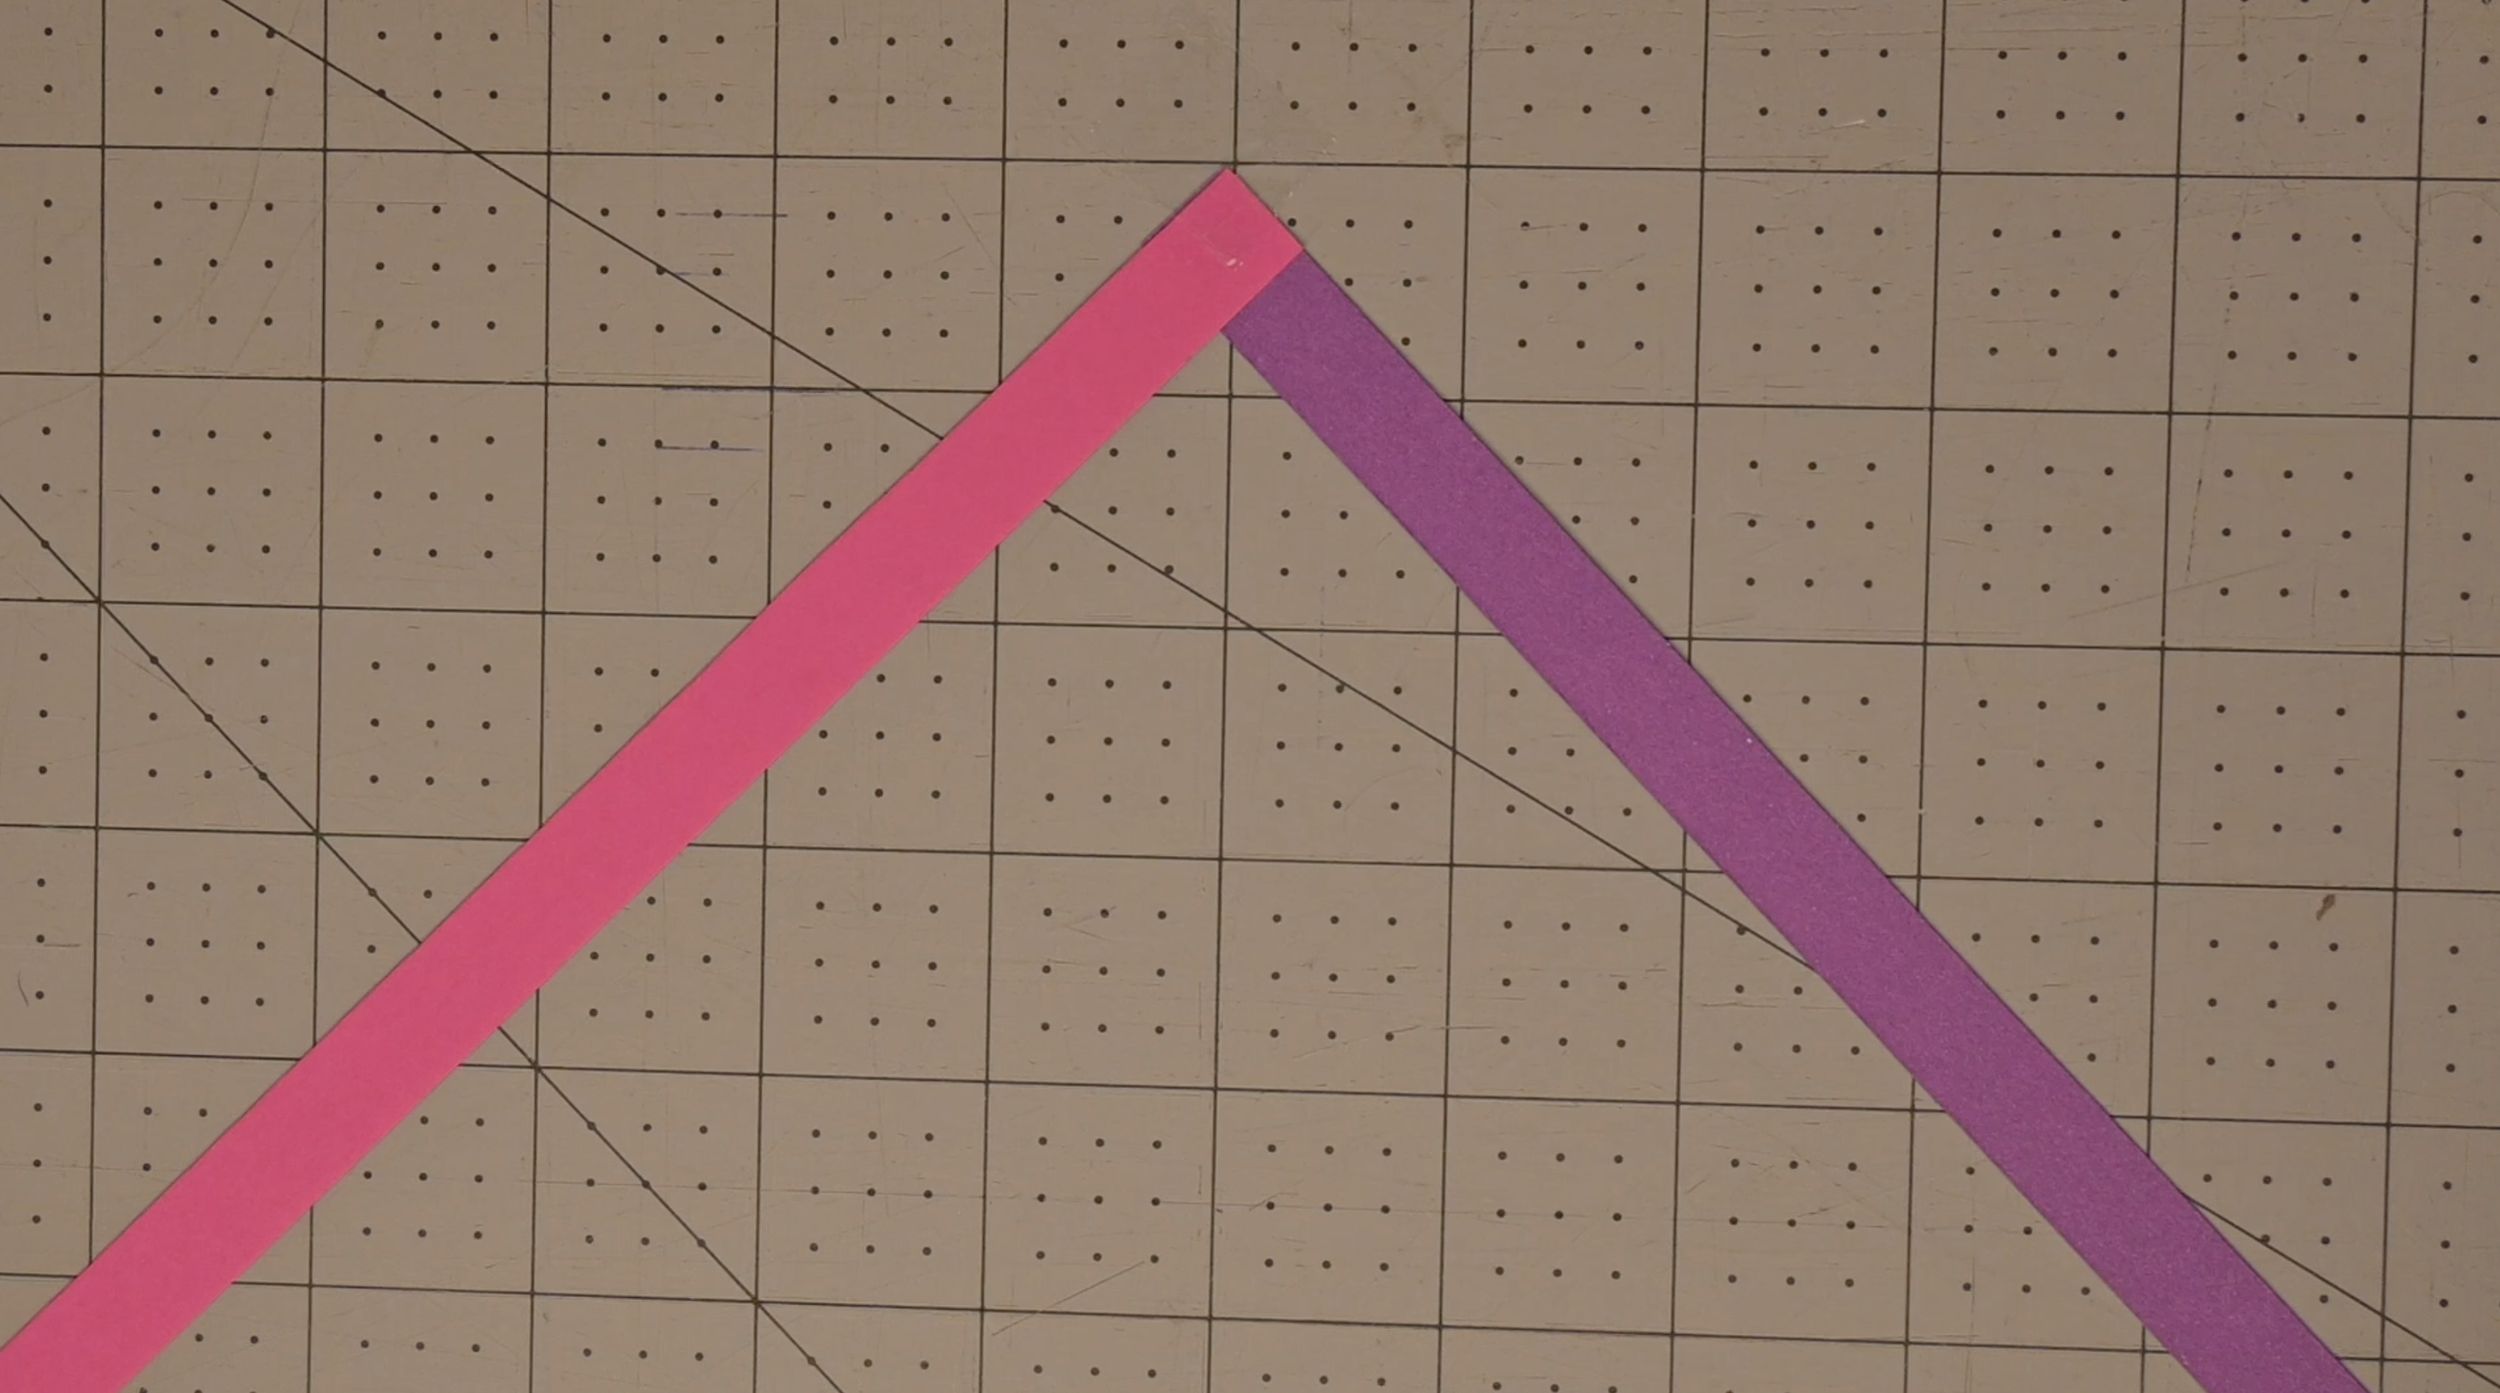
Place the end of the other strip on top, creating a 90-degree angle (a perfect L-shape).
Repeat this process for all your remaining weaving strips. If using glue, let it dry completely before moving on.
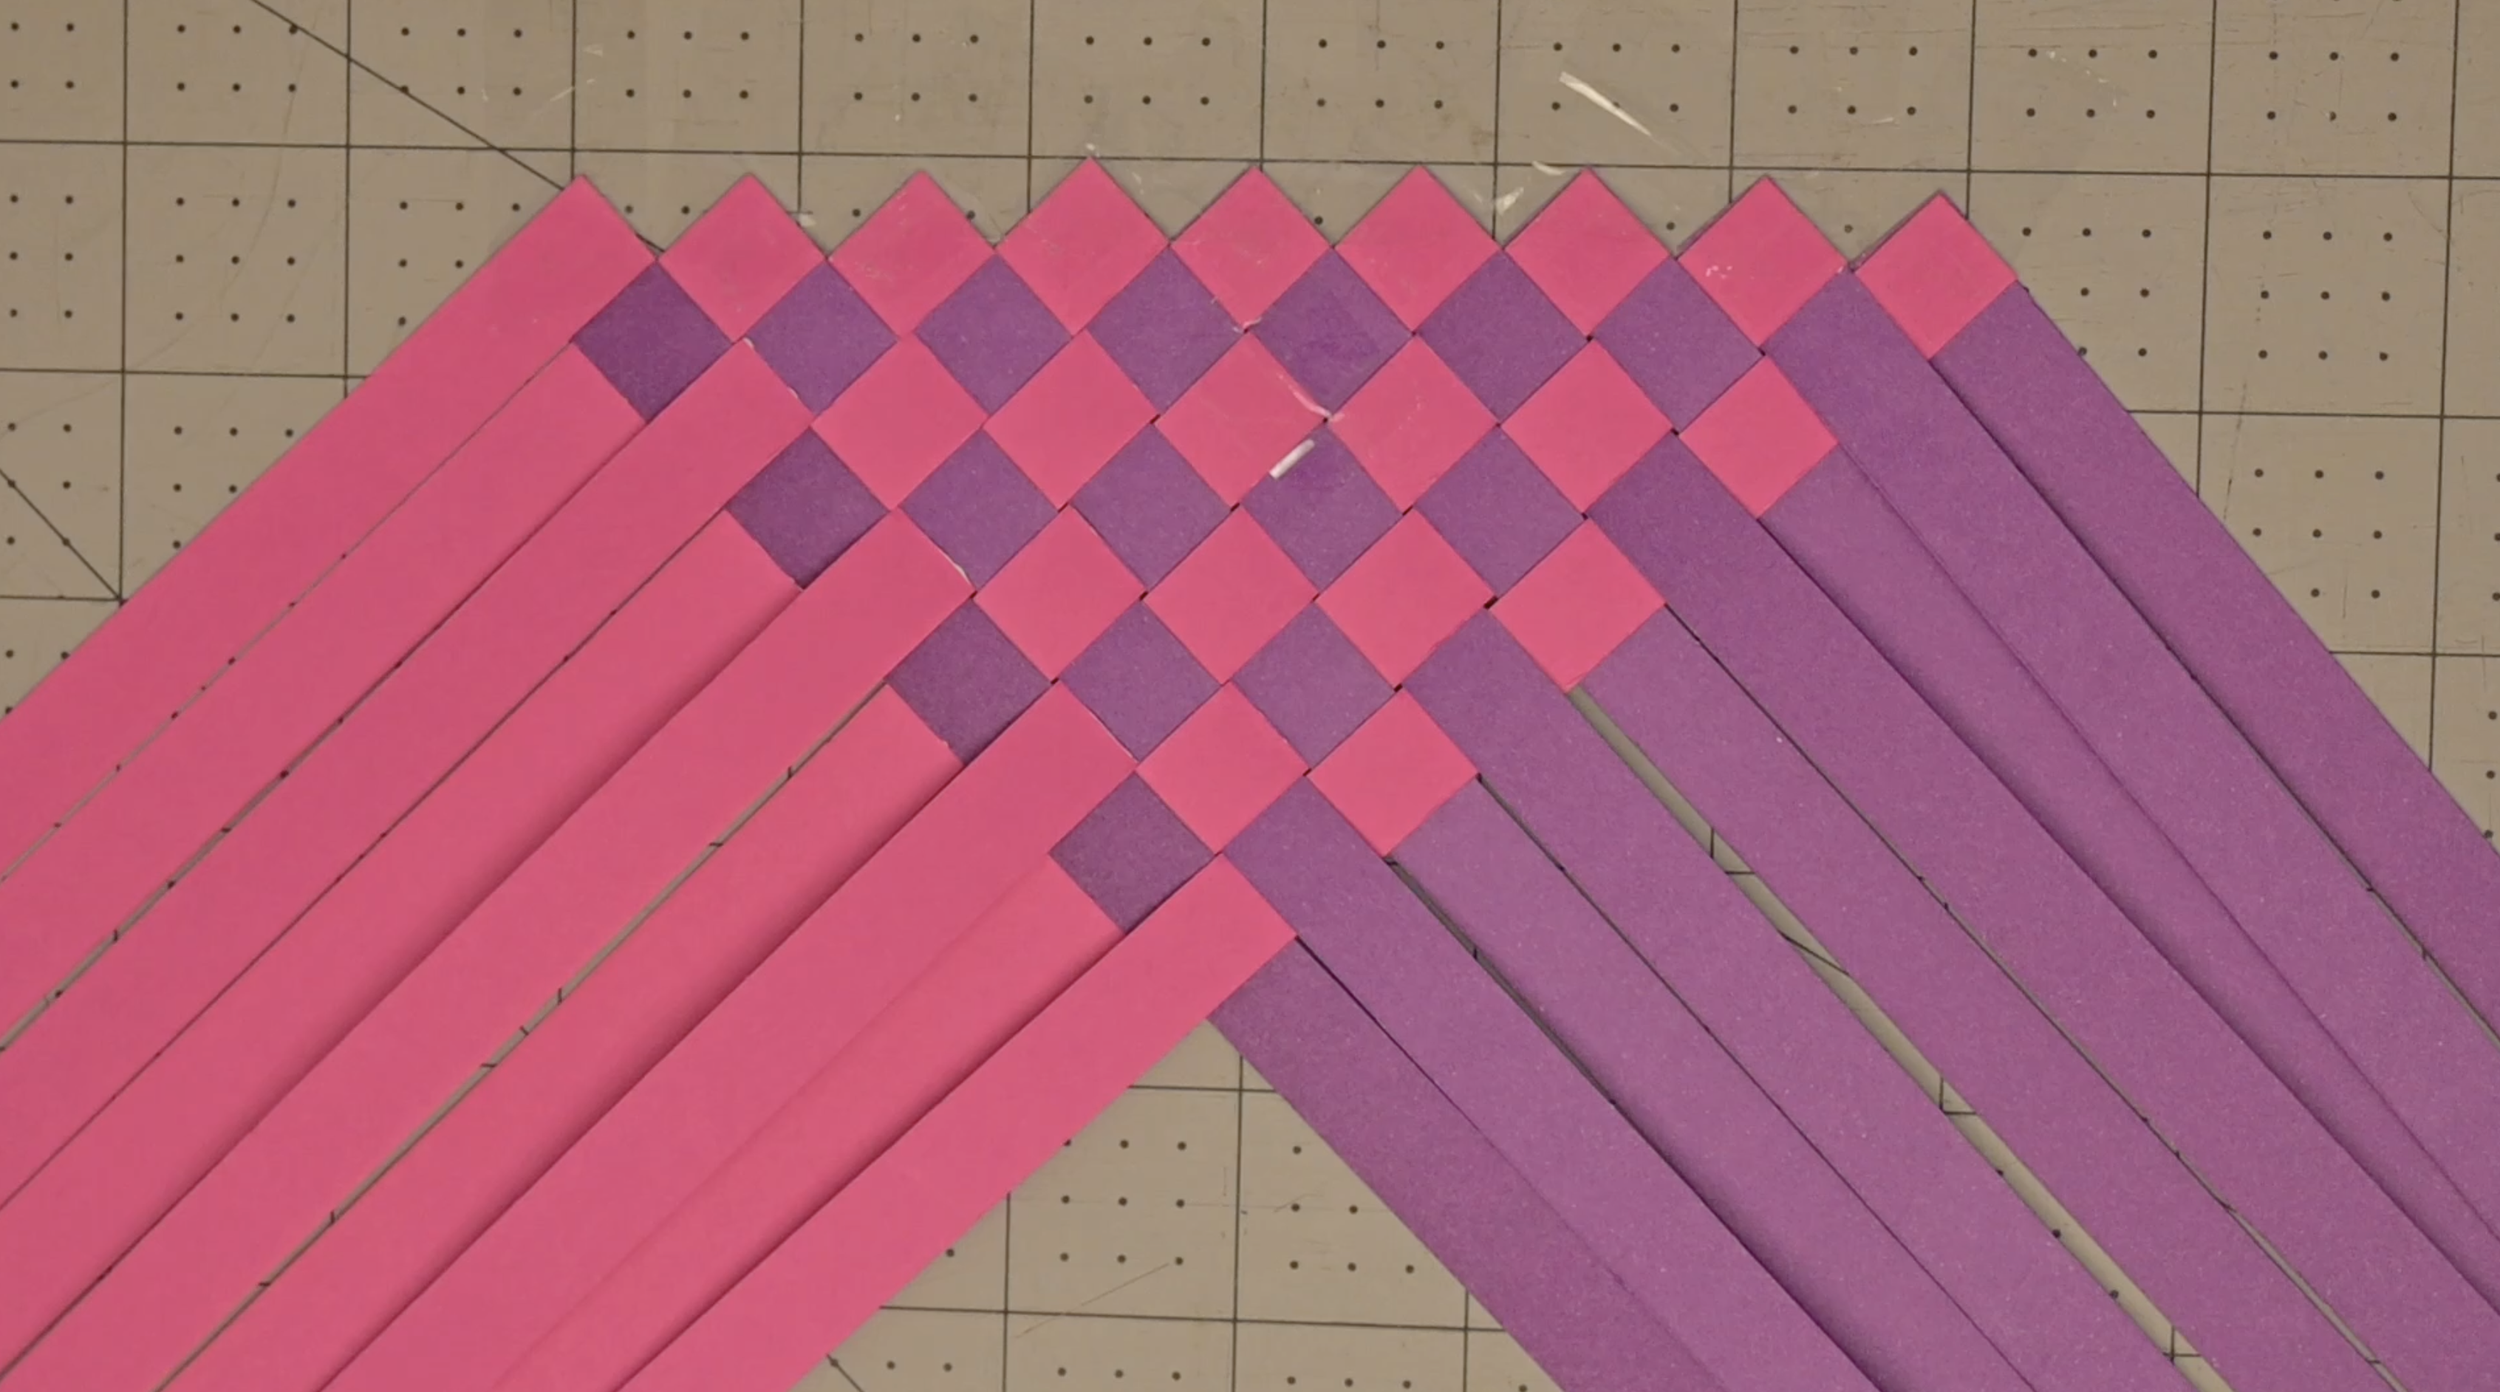
Step 3: Begin the Diagonal Weave
Now for the fun part! This is where the diamond pattern really starts to take shape. Unlike a traditional over-under weave that goes vertically and horizontally, we'll work on a diagonal.
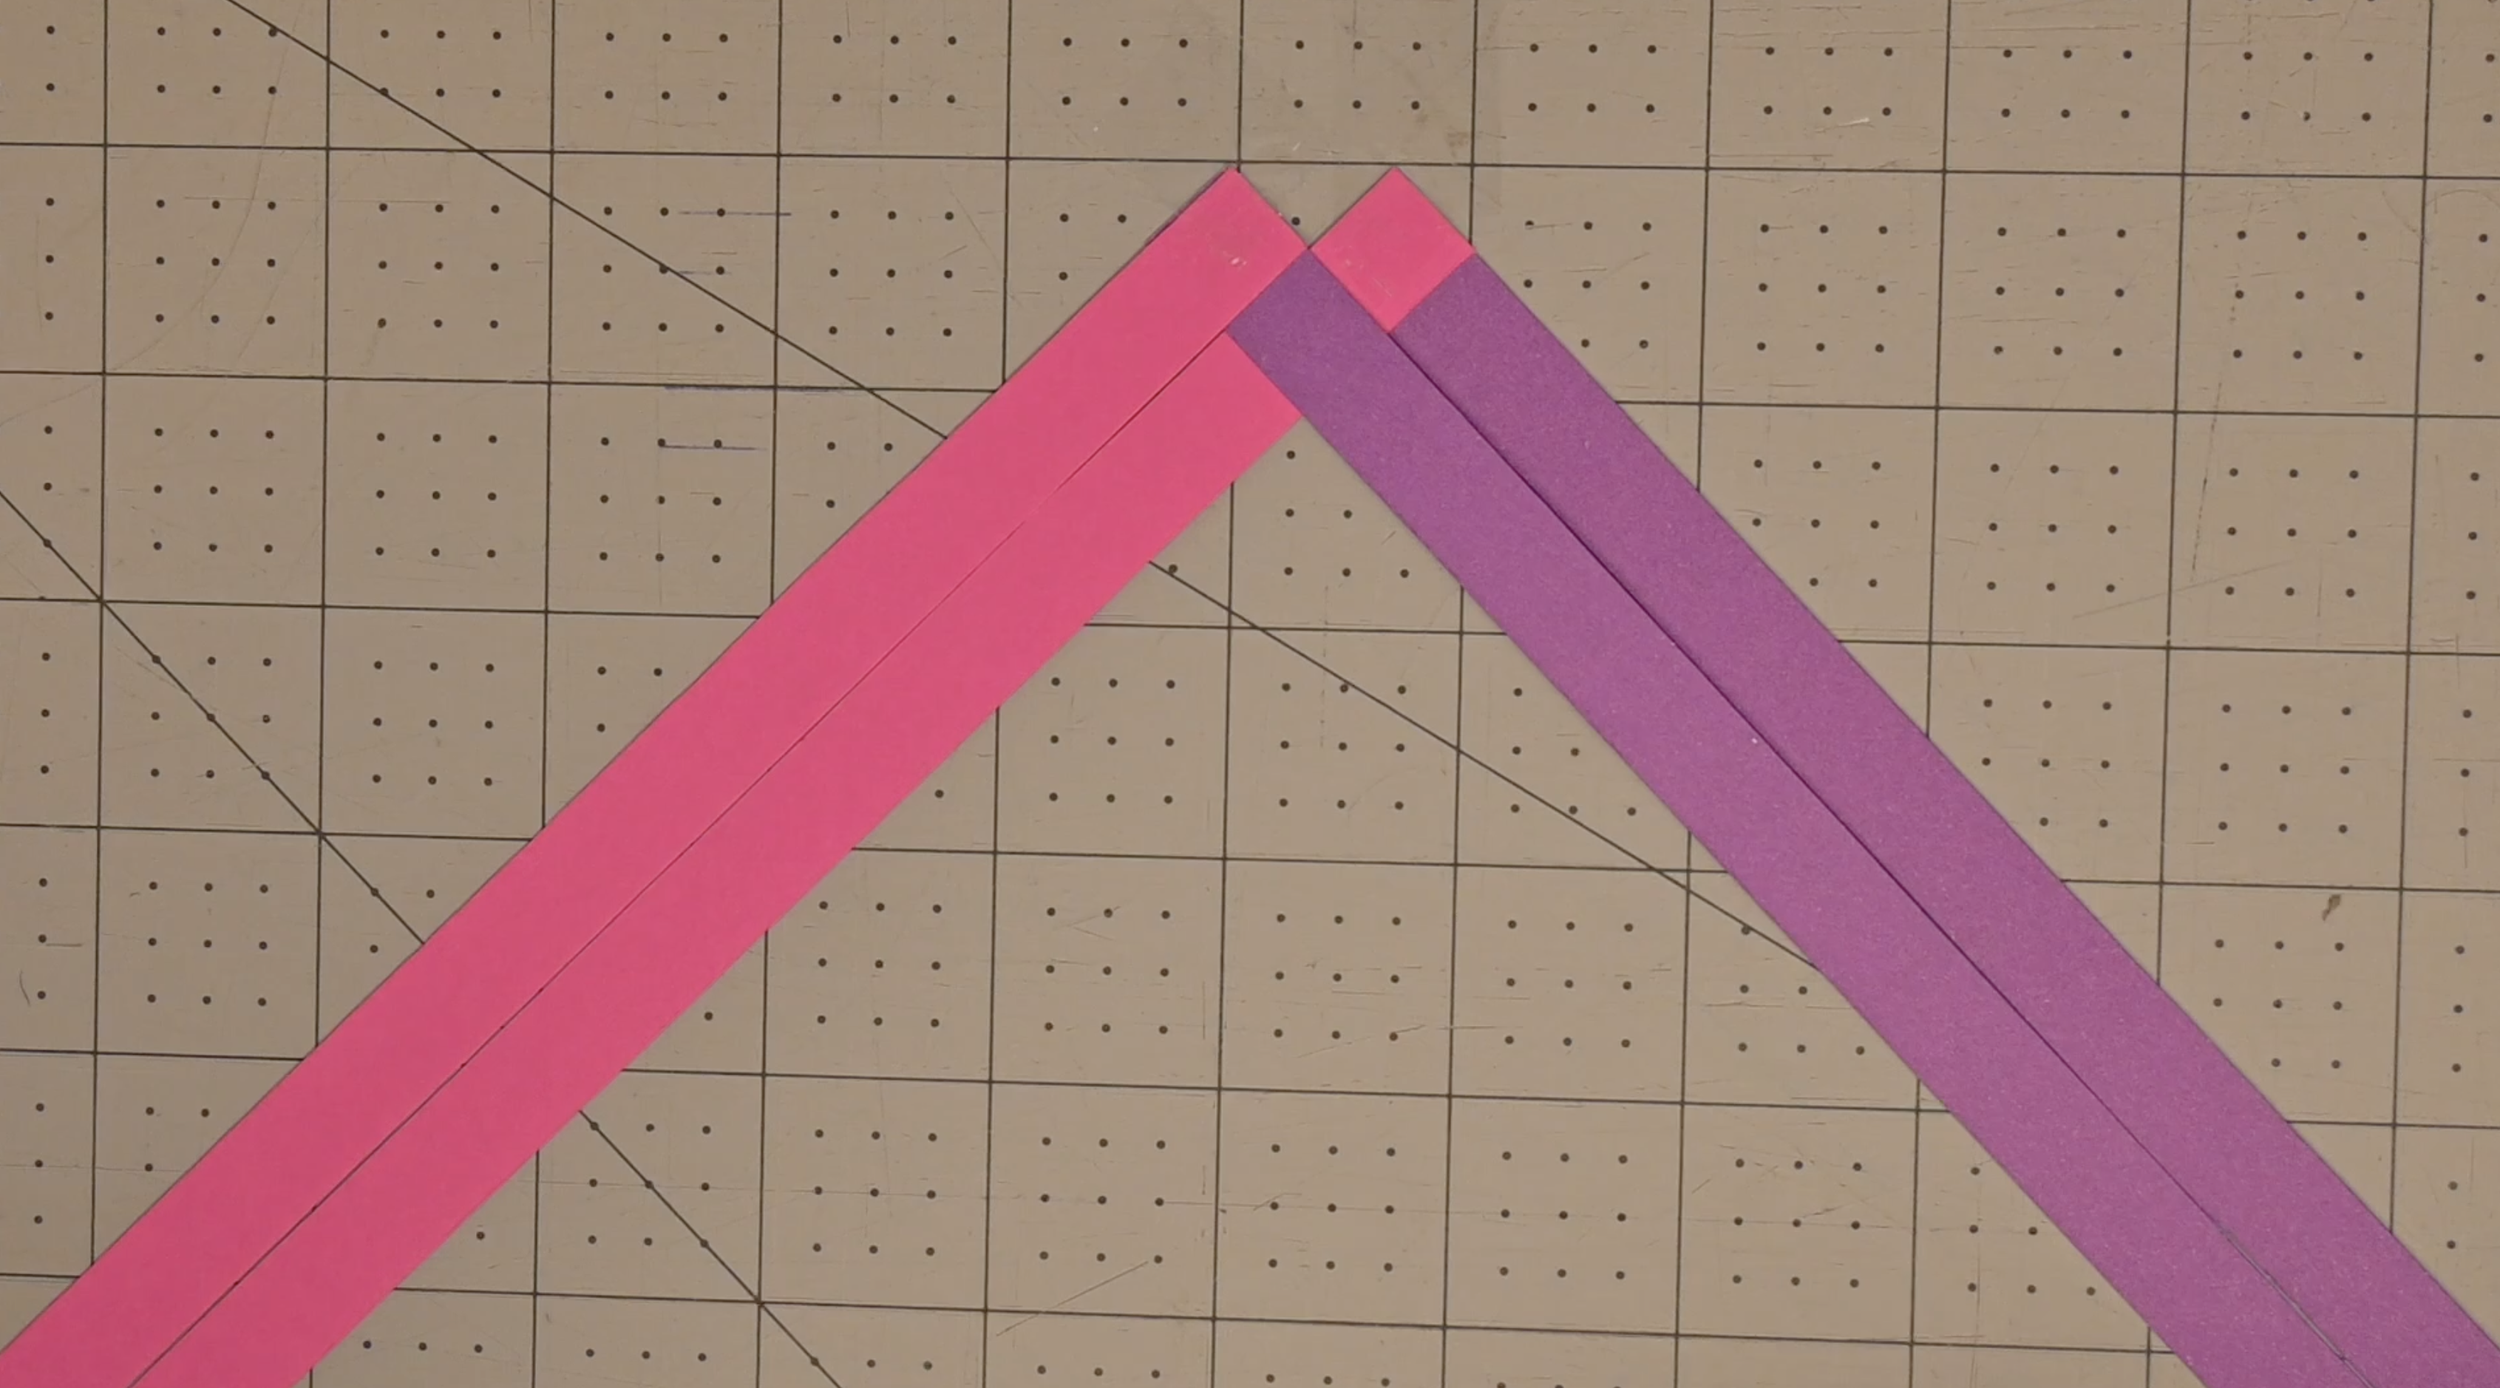
Tape the very end of a connected pair of strips to a flat surface, such as a table or a cutting mat. Make sure the long ends of both strips are facing toward you.
Take a second connected pair of strips and place it directly next to the first one. The ends of the strips should overlap slightly where they meet.
Now, take a third pair of strips. Place it next to the second, making sure its end overlaps with the end of the strip next to it.
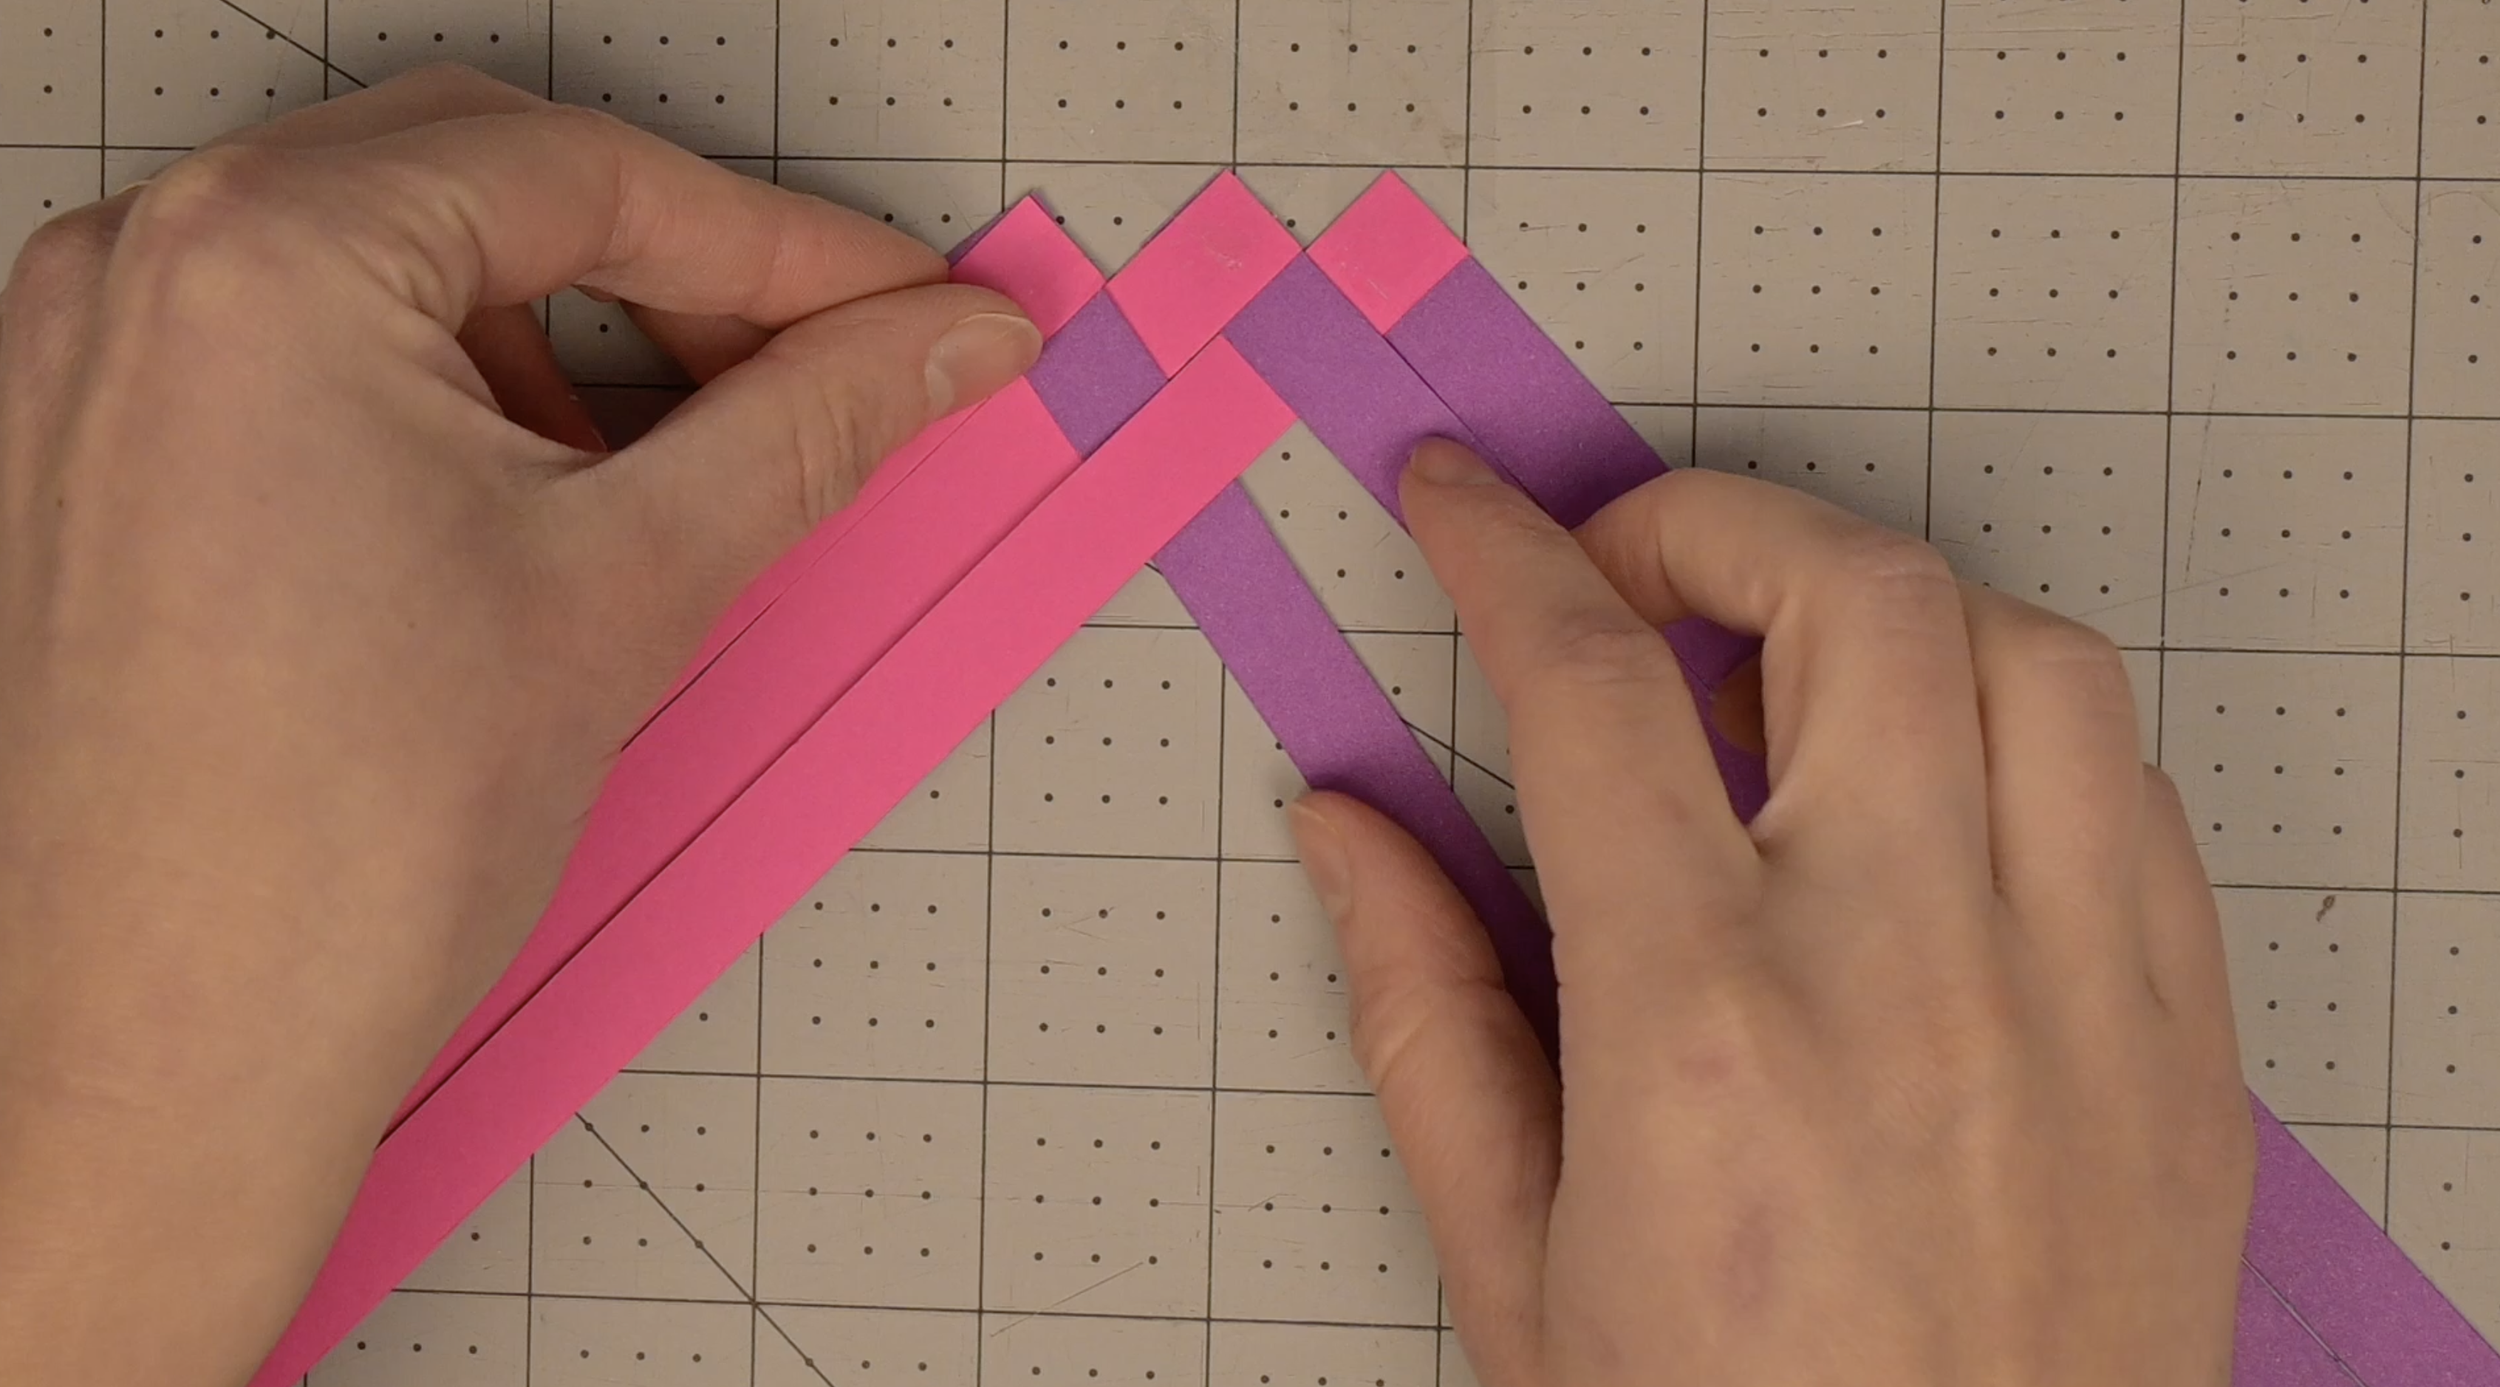
As you place the third strip, begin the weaving process by using the classic over-under technique with the strips that are already laid out.
Visualizing the weave: Your taped-down strips are a diagonal "grid." You'll be weaving the new strips diagonally through them, alternating between going over and under the existing paper.
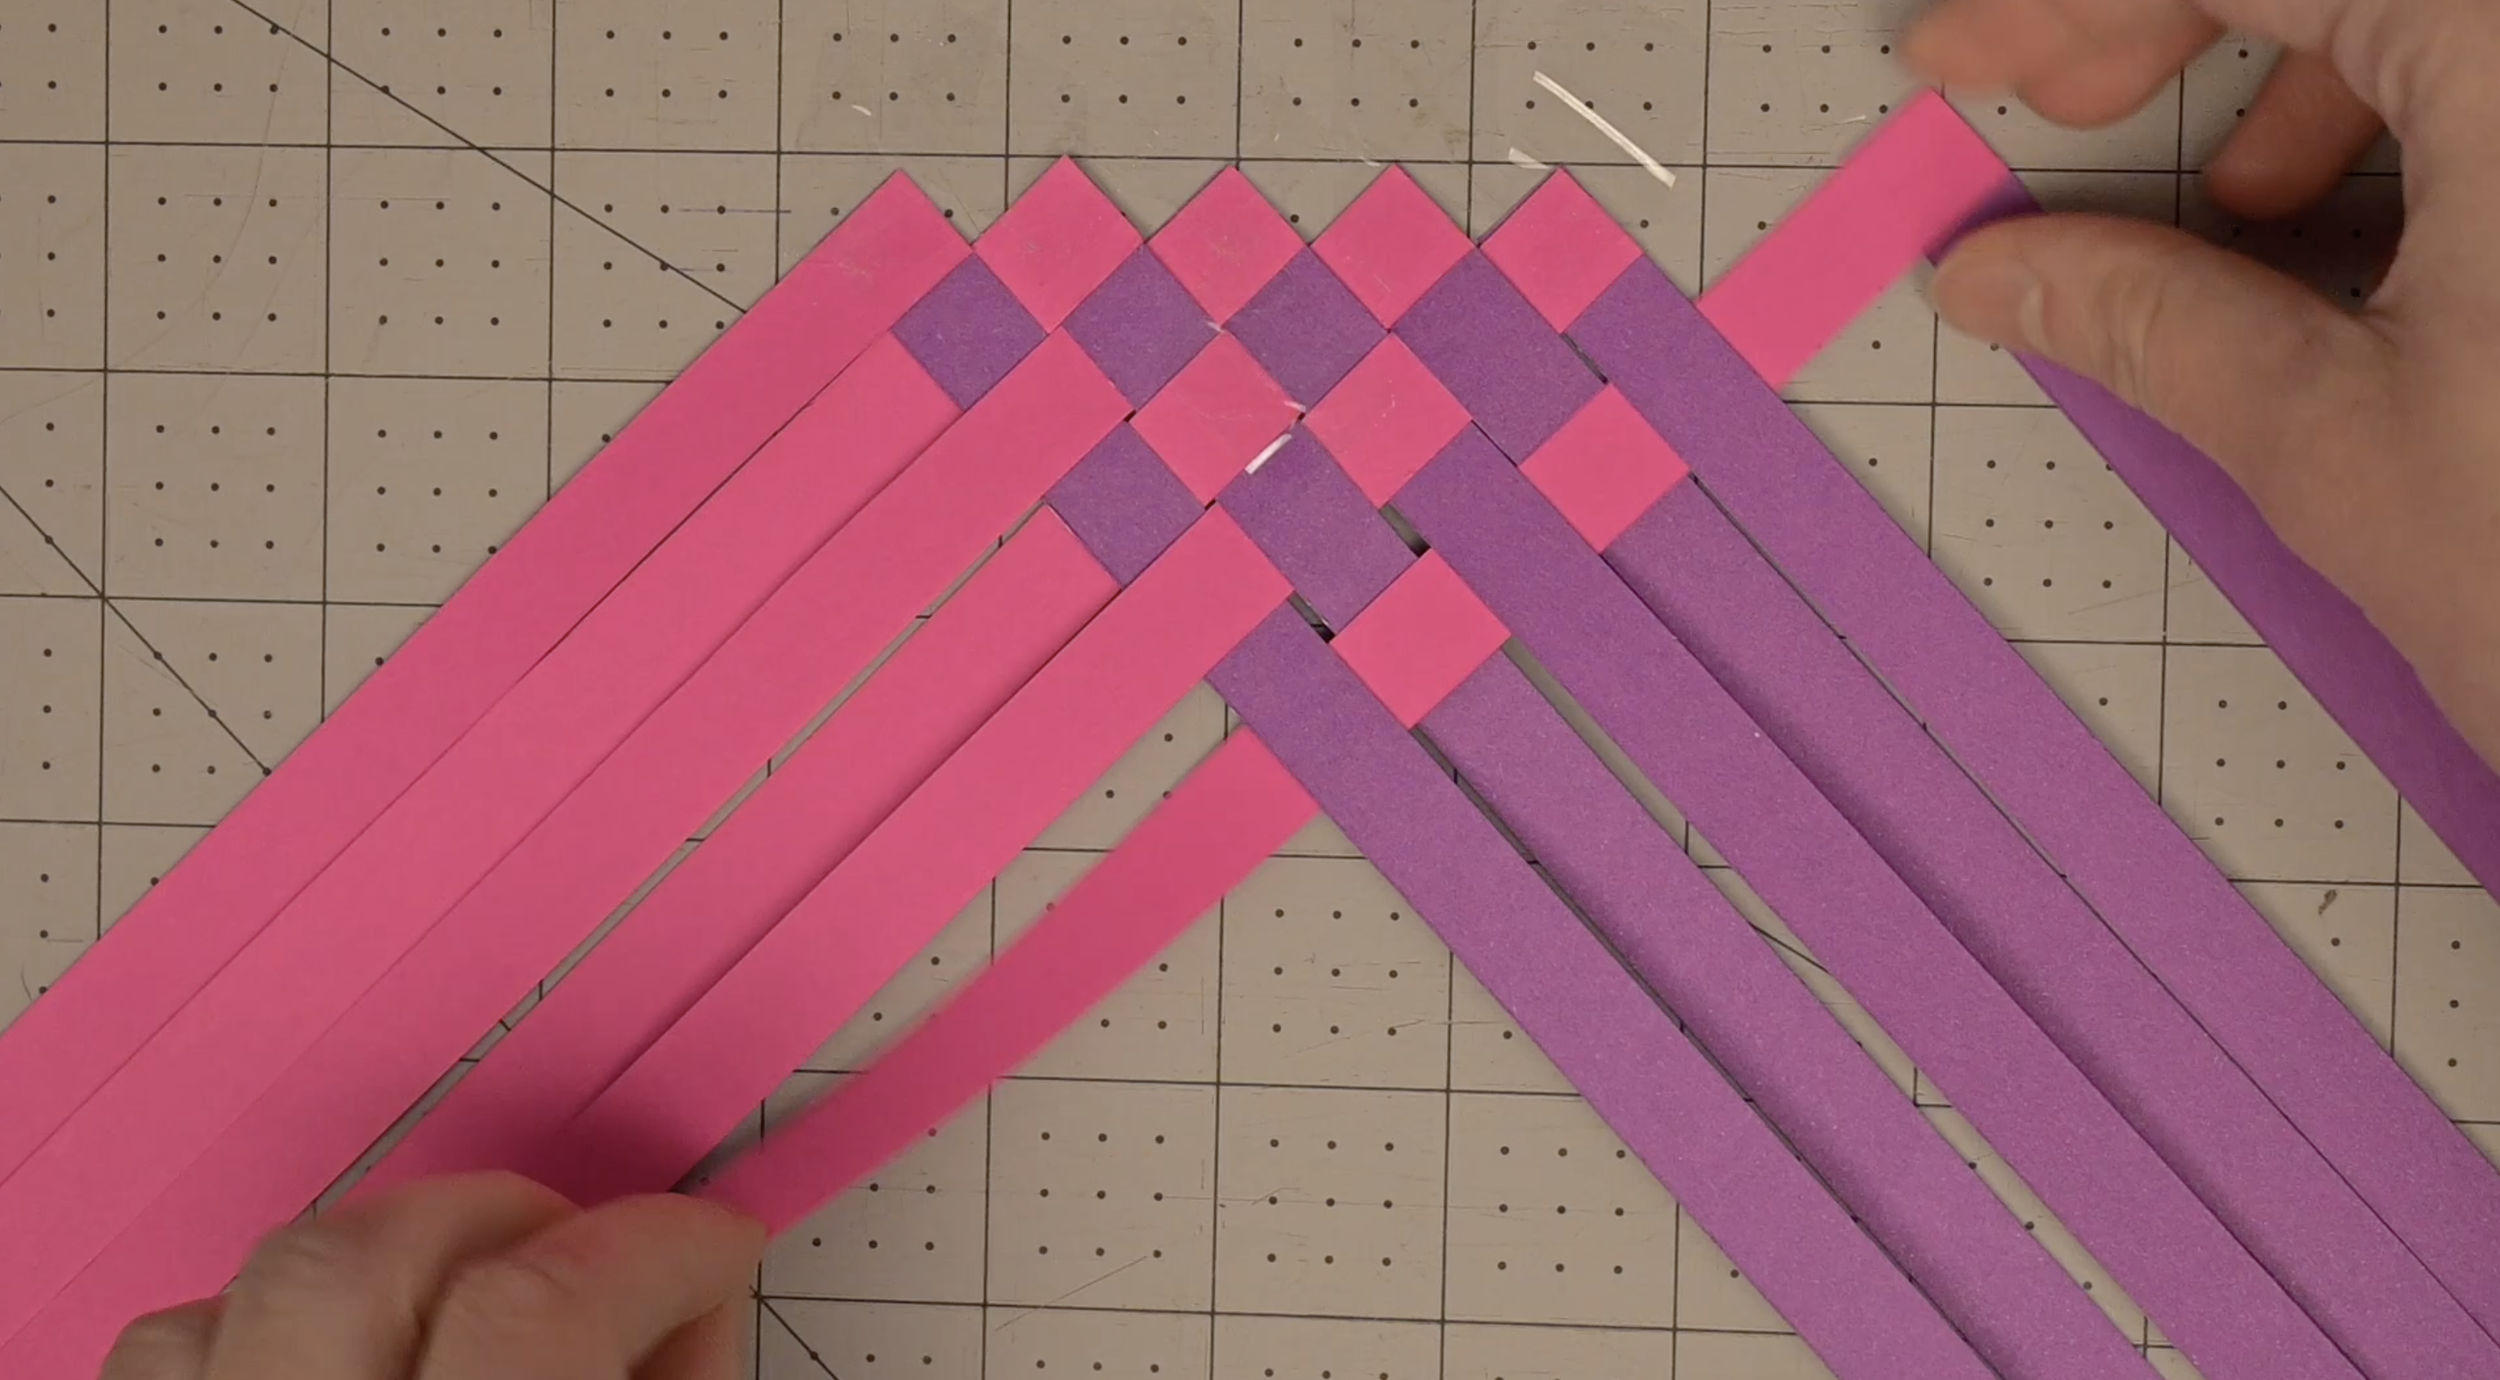
Continue these steps, adding and weaving new strips until your weave is your desired length.
After you have your desired length, you can use single strips to add height to your weave. As you do this, your weave will begin to take on a square or rectangle shape, instead of a triangle.


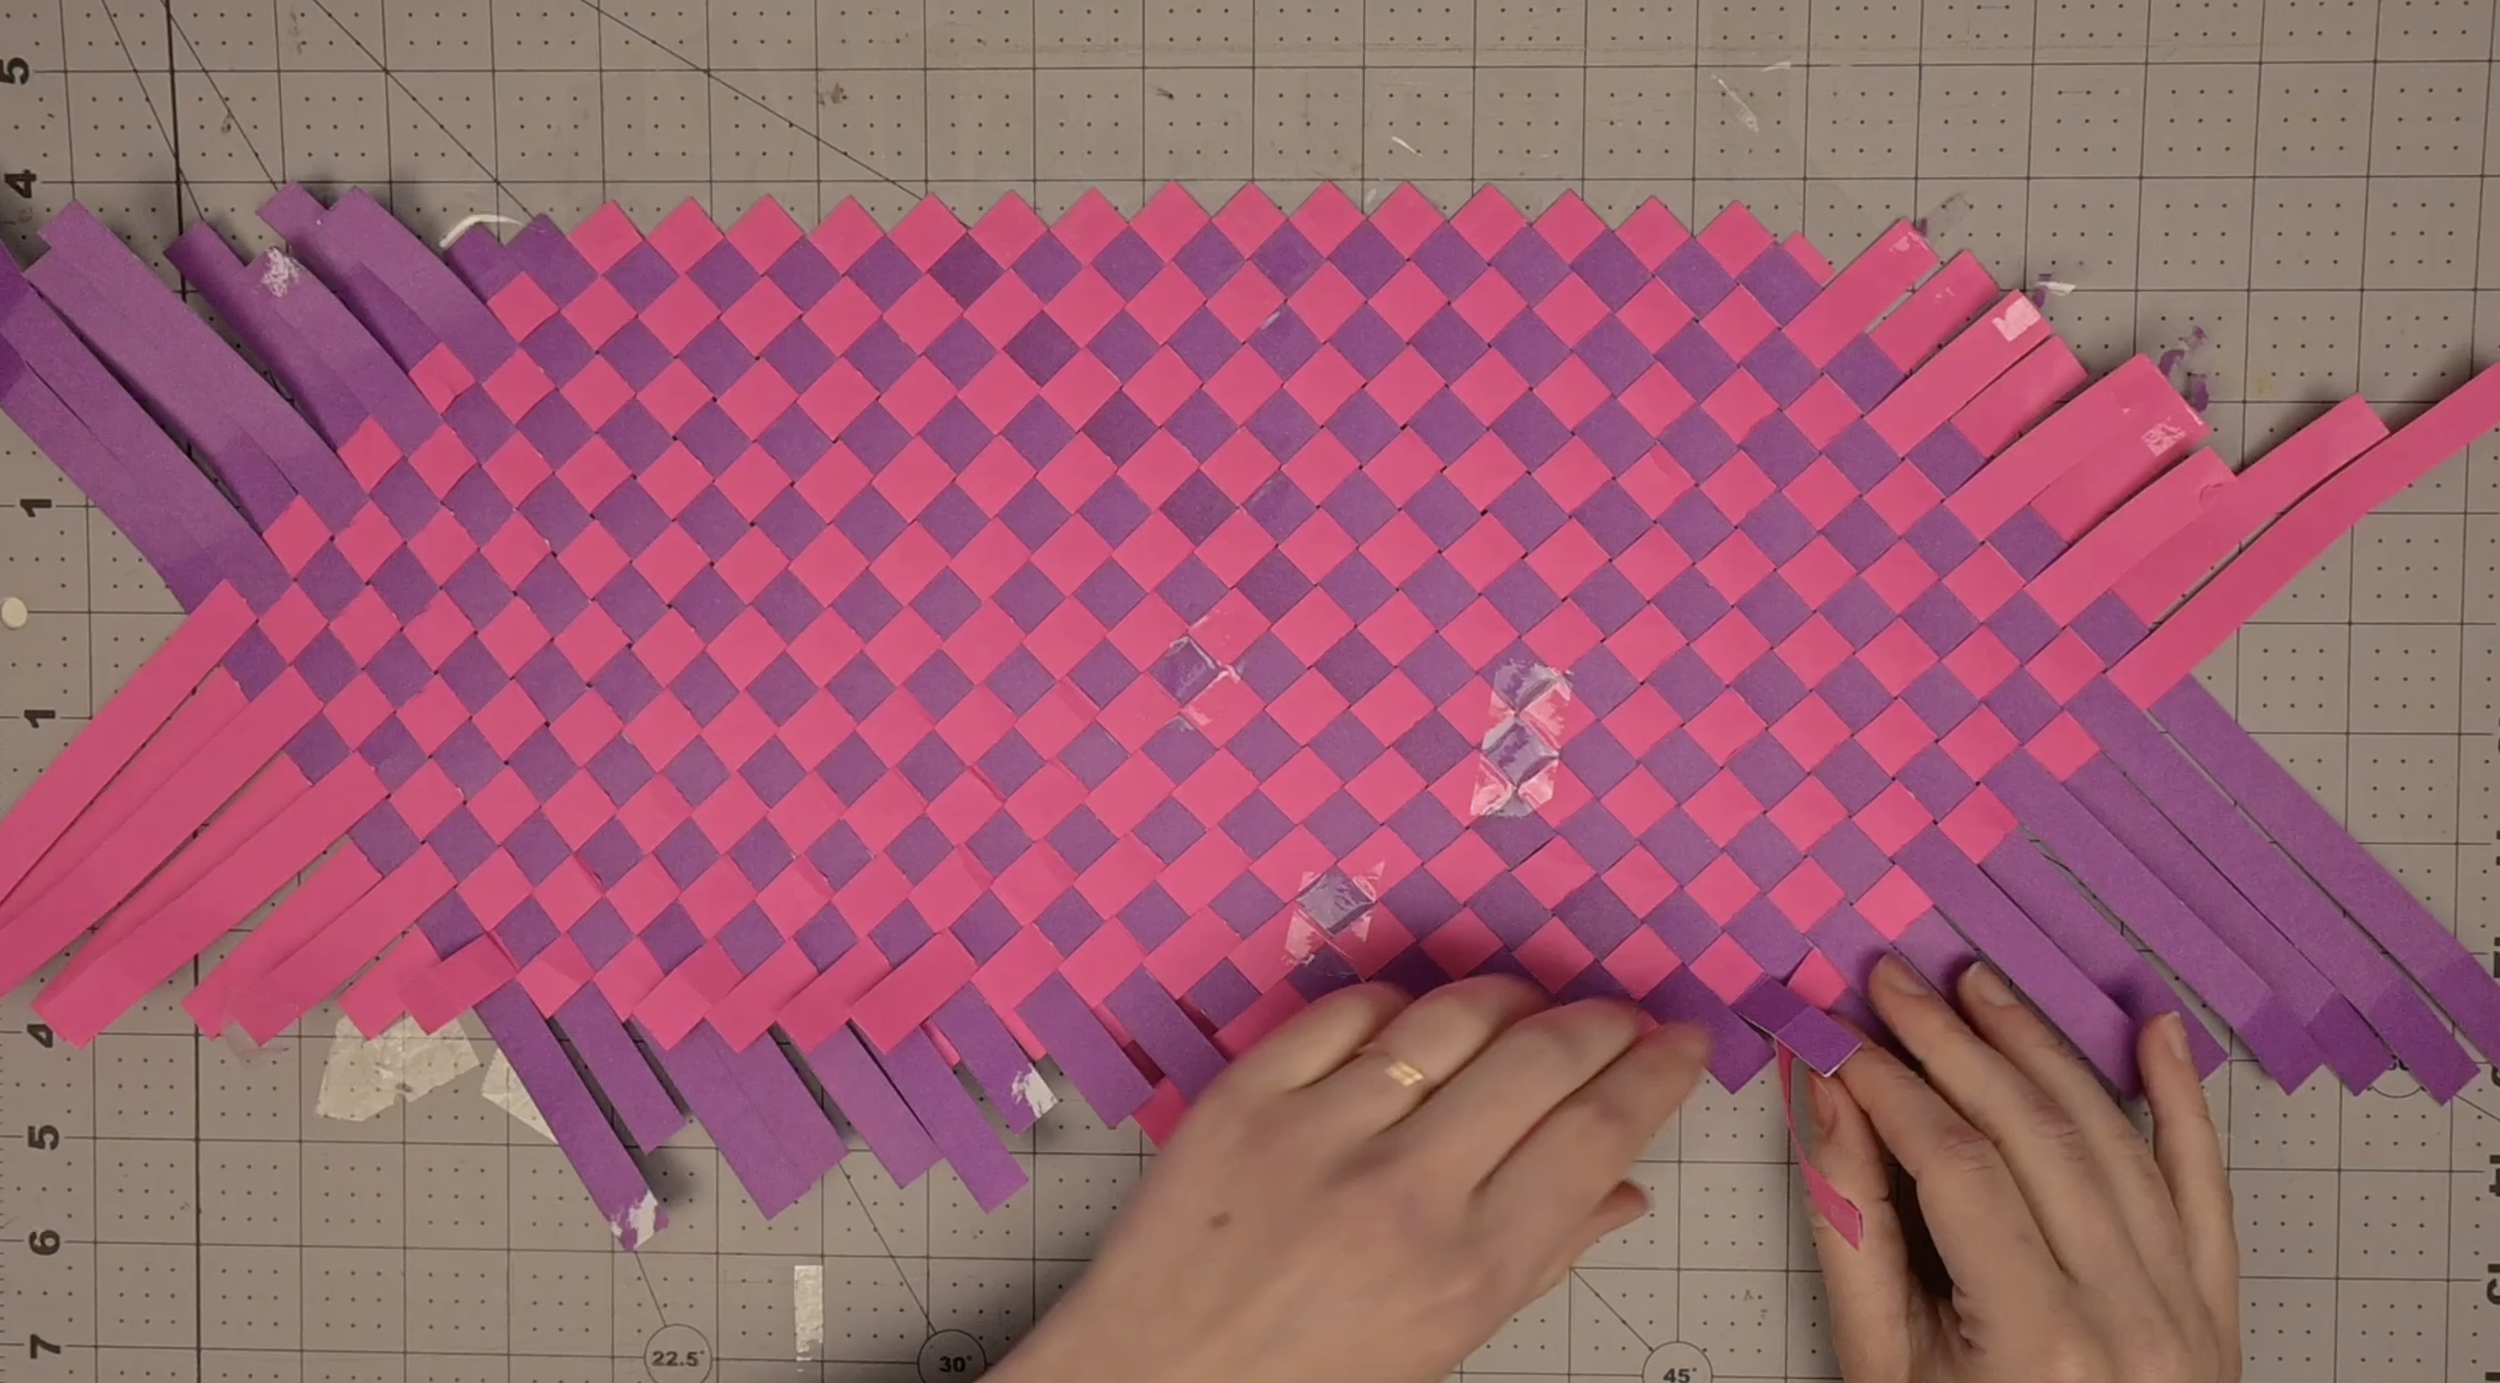
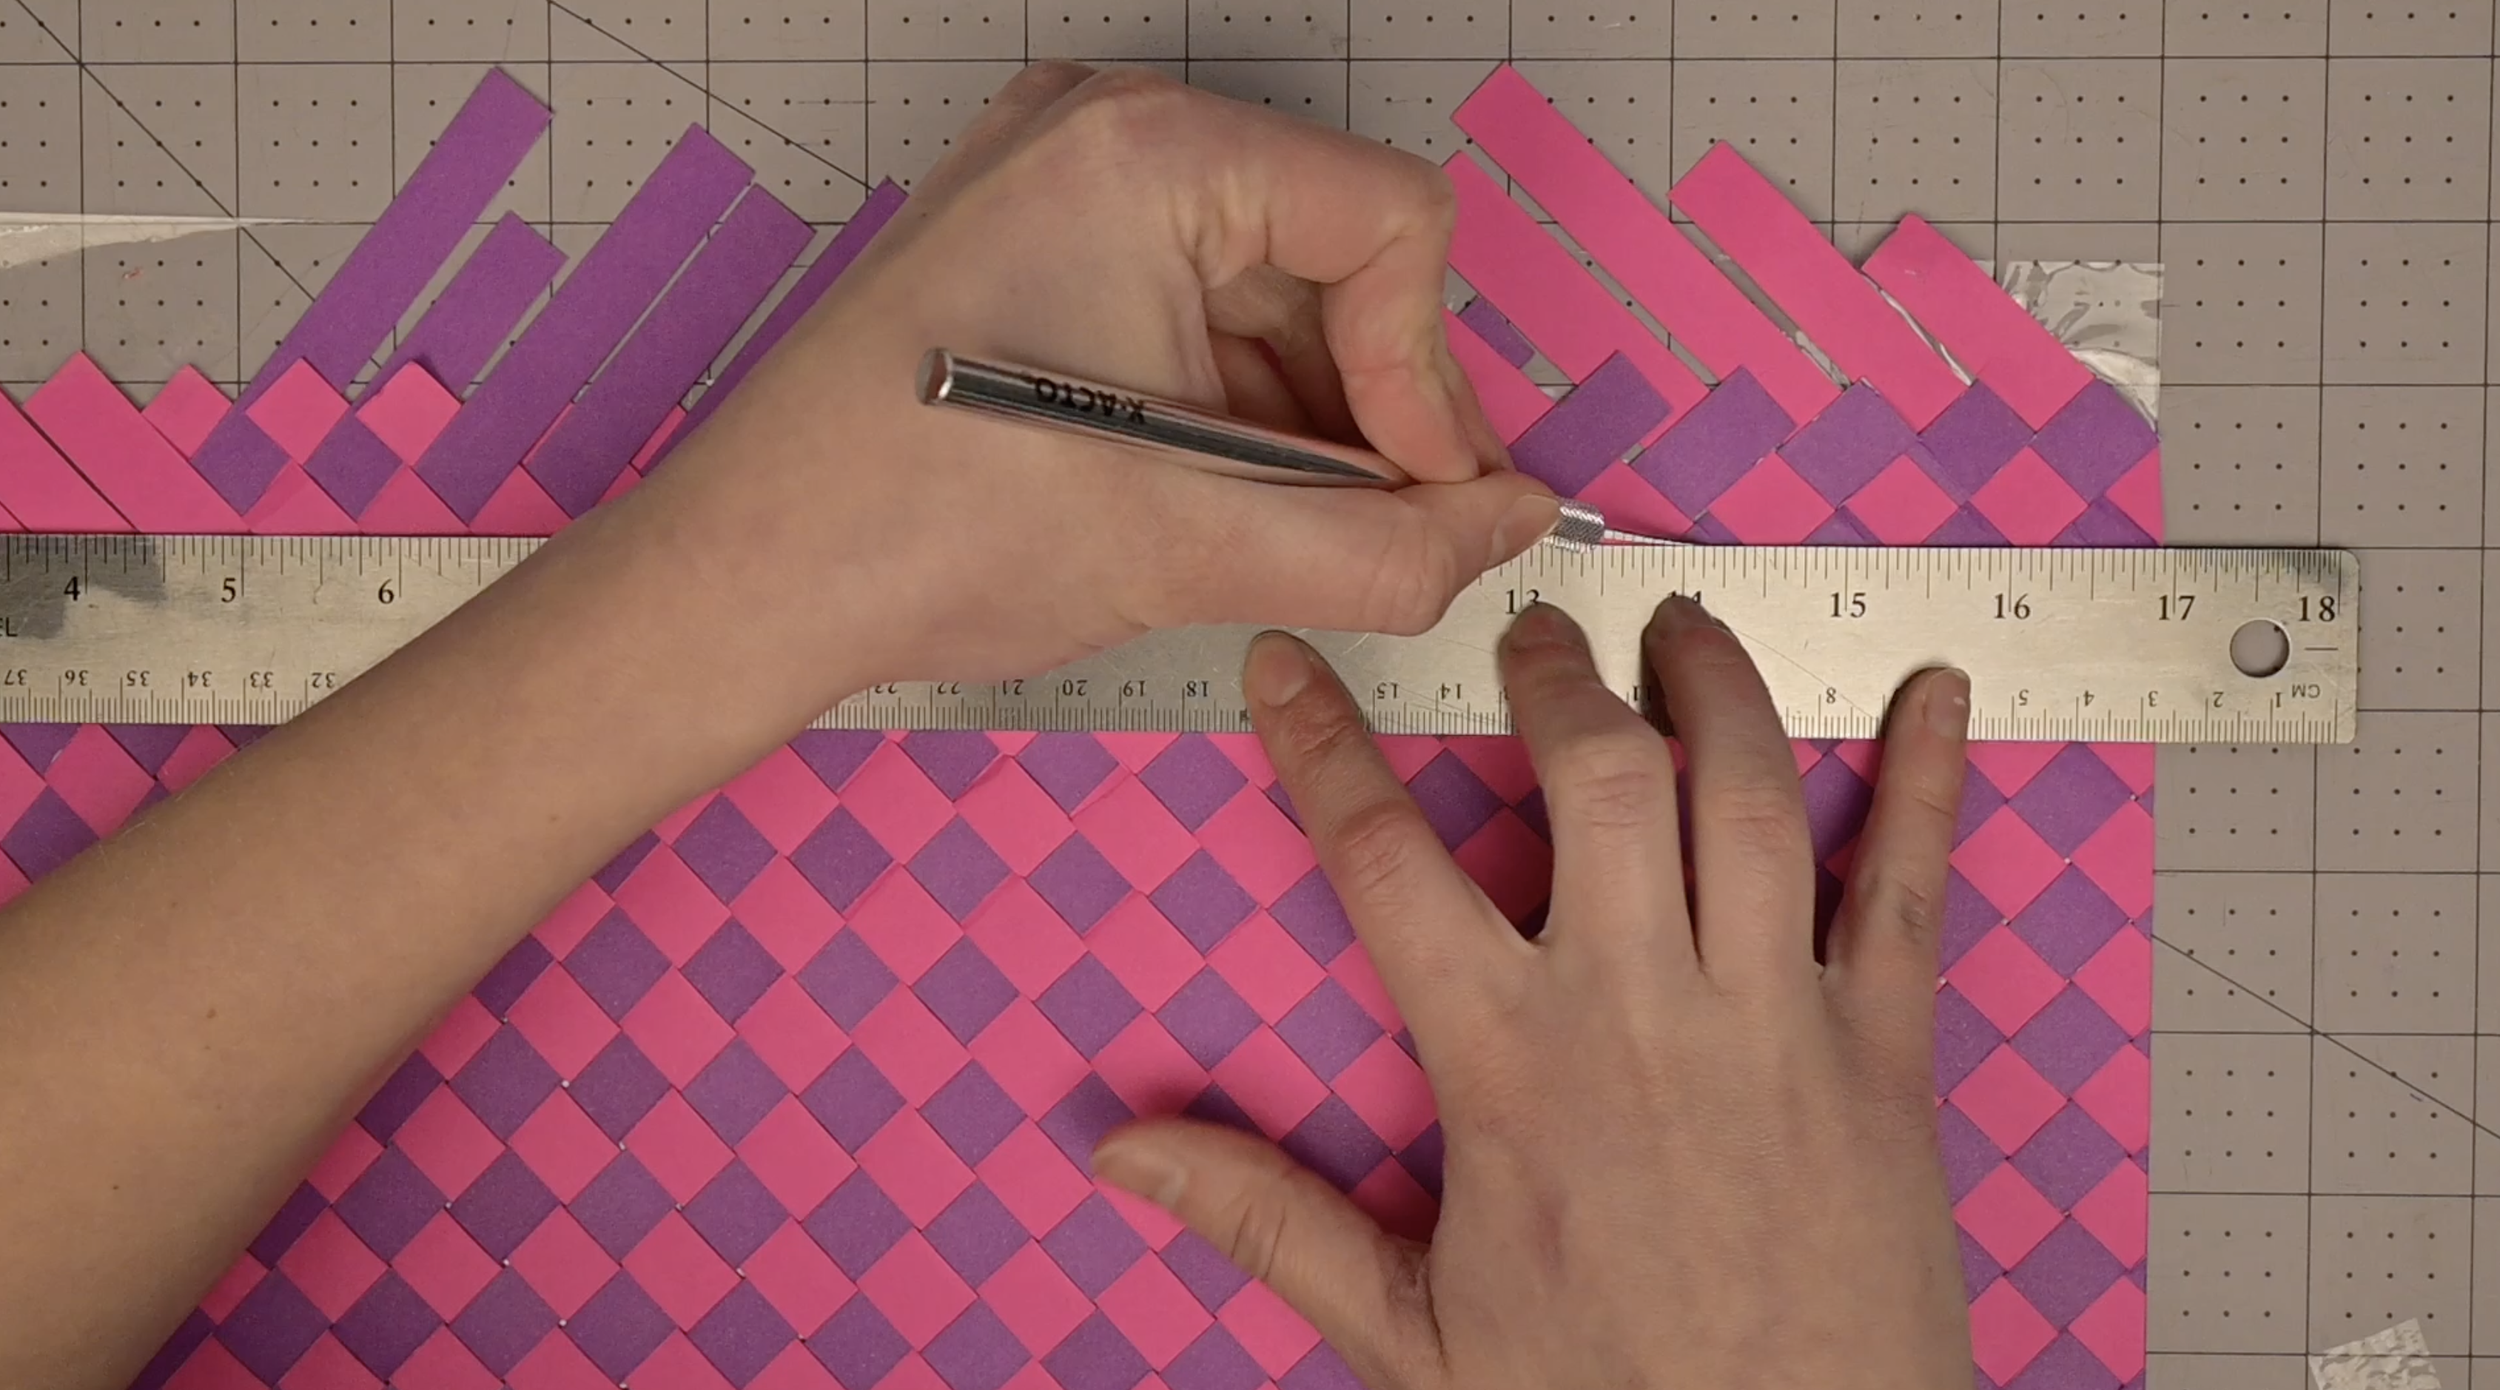
Step 4: Secure the Weave
To make sure your hard work doesn't fall apart, you need to secure the weave.
Cover the entire back with a layer of clear tape. This will hold all the strips securely in place.
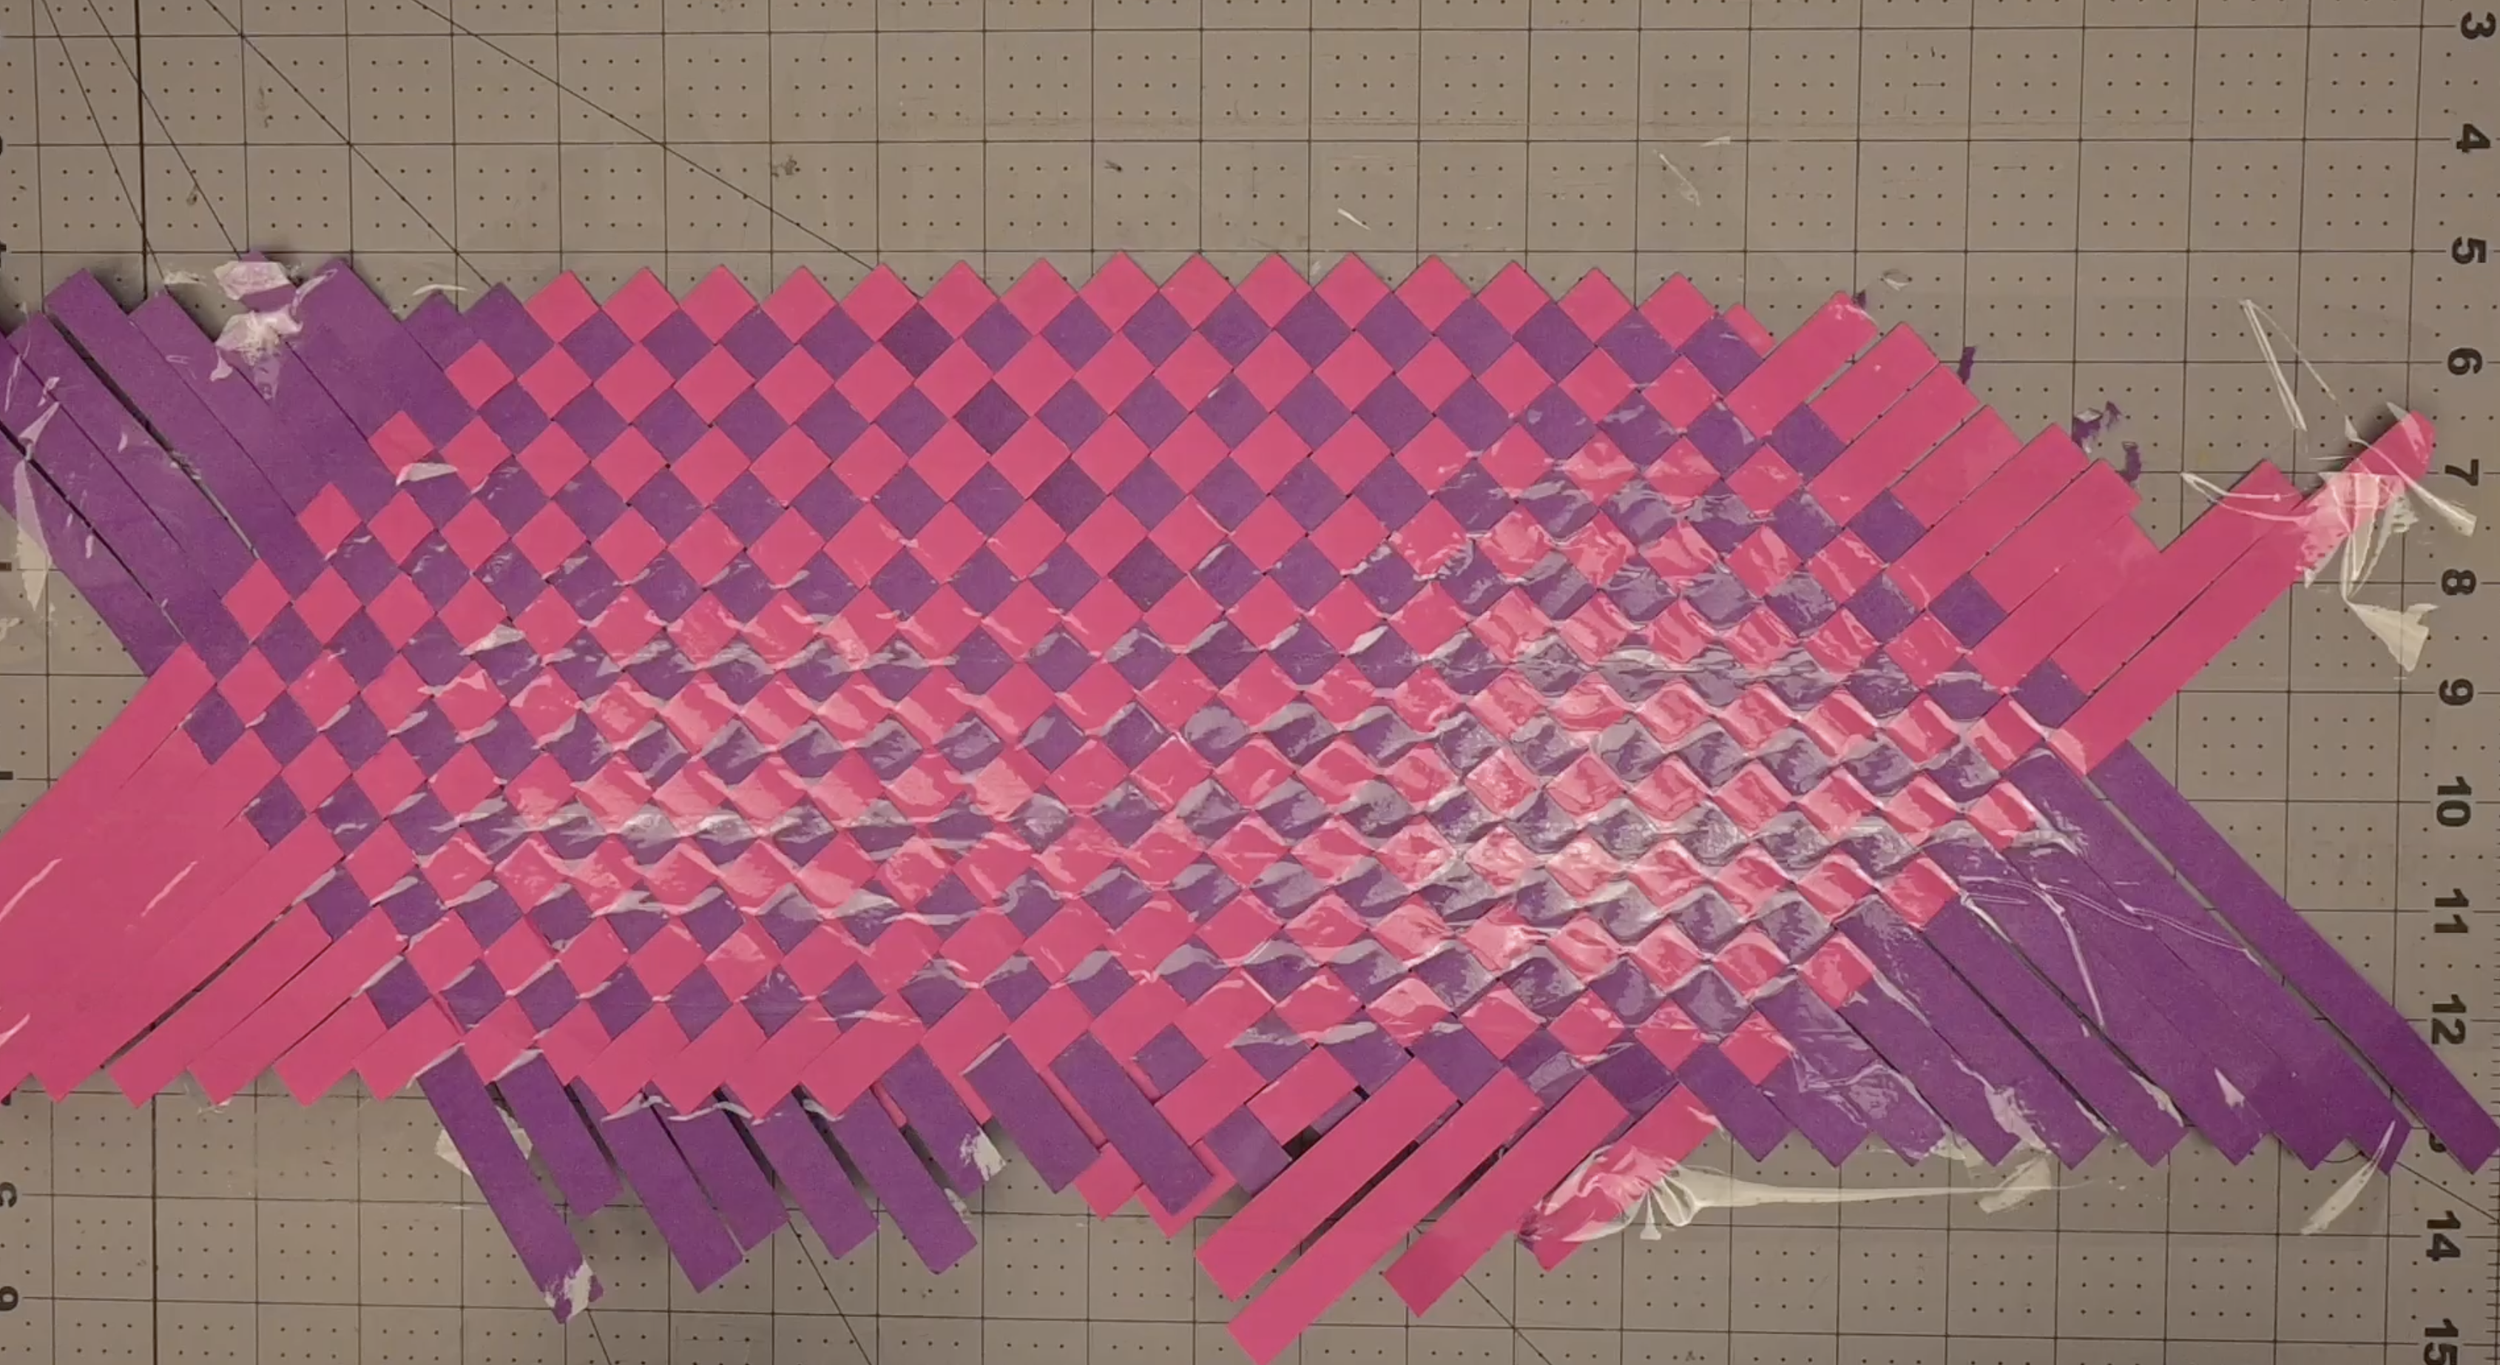
Step 5: Shape Your Weave
With the back taped, your weave is now stable enough to be cut into any shape you like!
Use scissors or a craft knife to trim the weave into a square, a circle, a heart, or any other shape you may need!